| Skip Navigation Links | |
| Exit Print View | |

|
Sun Blade Storage Module M2 Product Documentation |
About This Documentation (PDF and HTML)
Overview of the Sun Blade Storage Module M2
Installing the Storage Module Into the Chassis
Assigning and Managing Storage
Overview of the Sun Blade Storage Module M2 Product Notes
Supported Firmware, Hardware and Software
Solaris Operating System Issues
Performing Maintenance and Hot Plug Actions
Importing Existing Virtual Drives to a Replacement REM
Replacing a REM on a SPARC System
Storage Module Sensors and Indicators
Introduction to the Sun Blade Storage Module M2
Maintaining the Sun Blade Storage Module M2
When replacing a host REM on an x86 system, you will need to take the following actions depending on whether or not your storage module contains the host boot disk.
Note - These steps assume you have saved configuration file from the REM that was replaced in order to retrieve virtual drive configurations. It is also assumed you have installed the new REM.
The following outlines the steps necessary when replacing a host REM that uses a disk on the storage module for OS boot.
Note - In depth instructions for performing the steps listed here are described in the appropriate Sun Storage 6Gb SAS REM HBA Installation Guide.
Boot the host.
Enter the HBA BIOS configuration utility using one of the following methods:
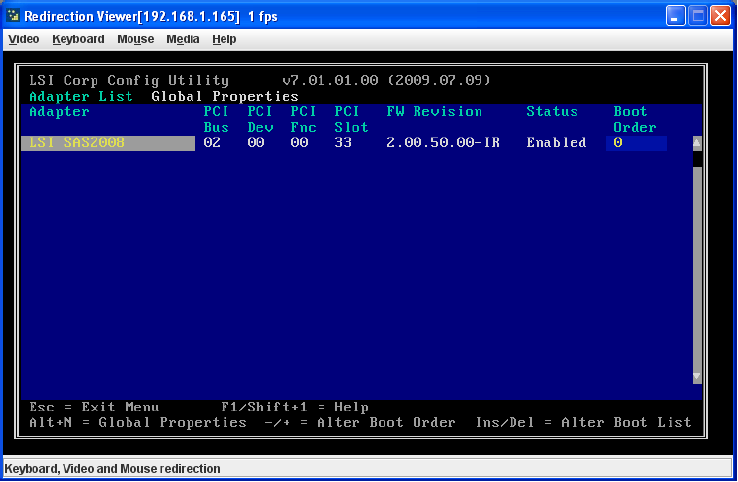
The Fusion-MPT SAS controllers (such as the Sun Storage RAID Expansion Module 6Gb/s SAS HBA) press Ctrl+C when prompted during boot. Described in Step 3.
The MegaRAID SAS controllers (such as the Sun Storage RAID Expansion Module 6Gb/s SAS RAID HBA) press Ctrl+H when prompted during boot. Described in Step 4.
If you are replacing a Fusion-MPT SAS-2 REM, do the following to activate the existing logical drives:
In the Adapter List screen, use the arrow keys to select a SAS adapter and press Enter.

Select RAID Properties, and press Enter
Select View Existing Volume.
Pressing Alt+N will switch to another volume on this adapter.
Select Manage Volume.
From the Manage Volume screen, select Activate Volume.
Press Y to activate the volume that contains the boot disk.
The volume becomes active.
Press Esc to go back to the Adapter List.
If an adapter is currently configured as the boot device, the Boot Order column on the screen lists the number 0.
You can change the boot order by using the +/- keys.
Save and exit the utility.
You next need to reapply other saved configurations for the array using the MegaRAID Storage Manager software. Proceed to Step 5.
If you replacing a MegaRAID SAS-2 REM, do the following to import the existing virtual drive configuration:
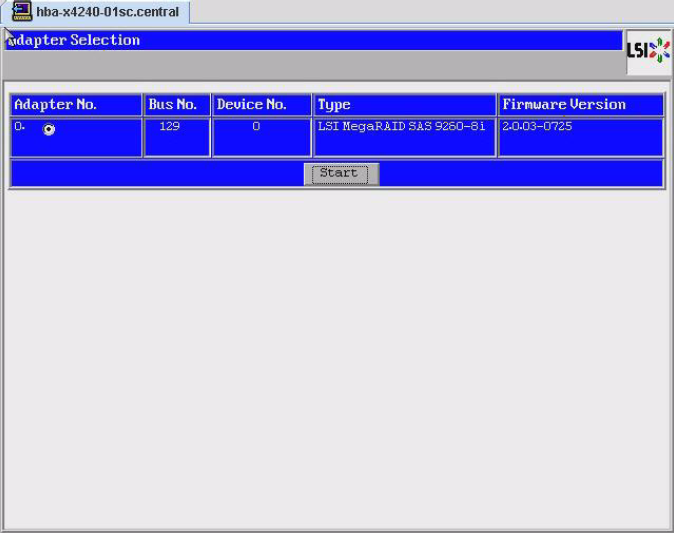
If the host has multiple HBAs, select the replacement REM In the Adapter List screen and click Start.

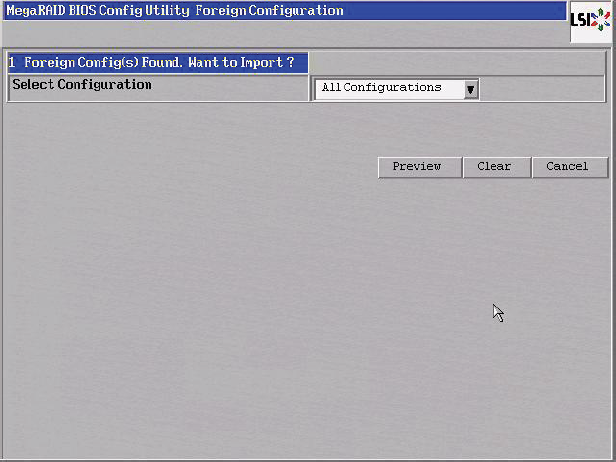
The WebBIOS utility should detect a foreign configuration and display the import screen.
In this case, the foreign configuration are the existing virtual drives configured through the old REM.

Click the Preview button.
The right panel shows the virtual drive properties of the foreign configuration. The left panel shows the drives that comprise the foreign configuration.
 | Caution - Clicking the Clear option at this screen will erase all data on the disks. |
Click Import to use the foreign configuration and re-establish the existing virtual drive(s) on this controller.
Note - If the virtual drive configurations you are importing have a security lock, refer to the importing instructions in the “Selecting Full Disk Encryption Security Options” section of the LSI MegaRAID SAS Software User's Guide.
Save and exit the utility.
You next need to reapply other saved configurations for the array using the MegaRAID Storage Manager software run from the host OS.
From the host OS, run the MegaRAID Storage Manager software.
Select the controller icon in the left panel of the MegaRAID Storage Manager window for the new REM.
On the menu bar, select Operations->Configuration->Add Configuration from file.
As prompted, open the saved configuration file and apply the configurations.