To Create One or More Data Types for an Application
-
Define the action for the application using the procedure in the previous section, "To Create an Action for an Application".
-
Click the Advanced button in the Create Action window to expand the window.
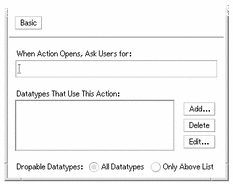
Figure 11-3 Advanced features in the main Create Action window
-
If you want the application icon to prompt for a file argument when the icon is double-clicked, type the text of the prompt into the ``When Action Opens, Ask Users for'' text field.
Use these guidelines for this text field:
-
You must use this field if the application's command line has a required file argument.
-
You must leave this field blank if the command line does not include a file argument.
-
If the file argument in the application's command line is optional, you have a choice. If you supply the prompt text, the action icon will prompt for the file when double-clicked. If you do not supply the prompt text, the action will be executed with a null string as the file argument.
-
-
Specify the types of files that the action will accept as arguments:
-
If the action can accept any data type, select All Data Types.
-
-
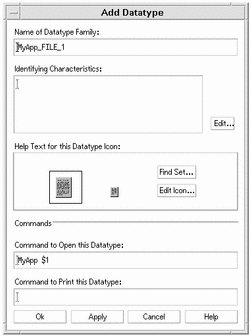
Click Add beside the Datatypes That Use This Action list box to display the Add Data Type dialog box.
Figure 11-4 Create Action's Add Datatype dialog box
-
Optional: If you don't want to use the default data type name, type a new name for the data type into the Name of Datatype Family text field.
The name cannot include spaces. The data type name is not visible to application users; it is used in the actions/data types database to identify the data type definition.
-
Click the Edit button beside the Identifying Characteristics box to display the Identifying Characteristics dialog box.
Figure 11-5 Create Action's Identifying Characteristics dialog box
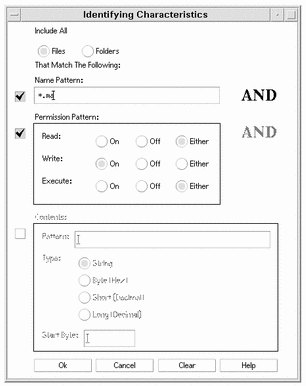
Characteristics of a data type are the criteria used to differentiate the data type from others. You can choose one or more of the following criteria:
Files or Folder--the data type applies only to files or only to folders
Name Pattern--data typing based on the file name
Permission Pattern--read, write, execute permissions
Contents--contents of a specified portion of the file
-
Select whether the data type represents a file or folder.
Figure 11-6 Specifying a file or directory characteristic for a data type.

-
If the data typing depends on the name, select the Name Pattern check box and fill in the text field.
Figure 11-7 Specifying the file name characteristic for a data type

You can use * and ? as wildcards:
*--matches any sequence of characters
?--matches any single character
-
If the data typing depends on the permissions, select the Permission Pattern check box and select the permissions for the data type.
Figure 11-8 Specifying the permission characteristics for a data type
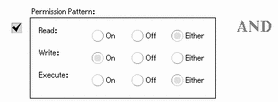
On--the file must have the specified permission
Off--the file must lack the specified permission
Either--the specified permission does not matter
-
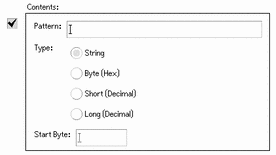
If the data typing depends on the contents, select the Contents check box and supply the requested information--Pattern to search for and Type of contents. Optionally, you can supply the byte location where the search should start.
Figure 11-9 Specifying the contents characteristics for a data type
Note -Use of content-based data typing may affect the performance of the system.
-
Click OK to close the Identifying Characteristics dialog box.
The characteristics will be displayed in the Identifying Characteristics field using this coding:
d--a directory
r--the file has read permission
w--the file has write permission
x--the file has execute permission
!--logical operator NOT
&--logical operator AND
-
Type the help text for the data files into the Help Text text field.
-
Use the Datatype Icons controls to specify the icon for the data files. Initially, the default icon is shown.
-
To choose a different, existing icon, click Find Set to display the Find Set dialog box. See "Using the Find Set Dialog Box To Specify an Icon".
-
To create new icons, click Edit Icon to run the Icon Editor.
-
-
Verify the command in the Command to Open this Datatype text field. This is the command that will be executed when the user double-clicks a data file.
-
Optional: If the application supplies a print command for printing data files from the command line, type the command into the Command to Print this Datatype text field, using the syntax $n for a file argument.
-
Do one of the following to save the data type definition:
-
Click OK to save the data type and close the Add Datatype dialog box.
-
Click Apply to save the data type without closing the Add Datatype dialog box. This let you immediately proceed to define another data type for the action.
-
- © 2010, Oracle Corporation and/or its affiliates
