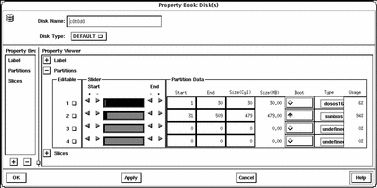
How to Modify fdisk Partitions
-
Select the disk that you want to modify in the Disk Manager main browser.
-
Open the Property Book for the selected disk.
For more information see "Disk Manager Property Book".
The Property Book window appears.
-
Open the Partitions chapter.
For more information see "Disk Manager Property Book".
Size the Property Book window so that the entire partition layout is visible.
-
Click the select box in the Editable column that corresponds to the fdisk partition you want to edit.
-
Modify the size of an fdisk partition(s) by clicking on the arrows in the Slider portion of the window, or click the appropriate Start or End field in the Partition Data portion of the window, type in a value, and press Return.
For reference information, see online help.
Note -For x86 platforms, fdisk Solaris partitions must start at cylinder 1 or higher and they may not overlap.
-
If desired, select the button in the Boot column to make the fdisk partition active (the one whose operating system will be used at system start-up).
-
Choose the type of the fdisk partition.
Choose the appropriate type using the menus in the Type column.
-
Click OK.
Example -- Modifying fdisk Partitions

- © 2010, Oracle Corporation and/or its affiliates
