Creating Siebel EAI OTDs
Before Creating the OTD
Installing seebeyond.sif for Siebel 7.5.x
If you are using Siebel 7.5.x, before you create an OTD using the OTD Wizard, you must install the seebeyond.sif file into your Siebel Tools system. This file is installed in the Netbeans IDE’s user directory during the Netbeans IDE installation.
 To Install the seebeyond.sif File
-
Use the Siebel Tools utility to import the seebeyond.sif file into your Siebel Server
This file is installed with the Netbeans IDE. If you installed the Netbeans IDE in the c:\JavaCAPS\edesigner directory, then the file is located in
c:\JavaCAPS\edesigner\usrdir\modules\ext\siebeleaiadapter
-
After importing the file, use the Siebel Tools utility to compile your SRF file.
-
Stop the Gateway Server and the Siebel Server.
-
Replace the file on the Siebel Server with the one you created in step 2.
-
Restart the Gateway Server and the Siebel Server.
Installing SiebelMessage XSD Generation Process.xml for Siebel 7.7 and 7.8.x
If you are using Siebel 7.7 or 7.8.x, before you can create an OTD using the OTD Wizard, you must install the SiebelMessage XSD Generation Process.xml file.
 To Install the SiebelMessage XSD Generation
Process.xml File
-
Open the Siebel Tools utility.
-
In the Object Explorer, click the Workflow Process.
-
Right-click the item in the Object list, and then click Import Workflow Process.
-
Browse to the directory that contains SiebelMessage XSD Generation Process.xml.
This file is installed with the Netbeans IDE. If you installed the Netbeans IDE in the c:\JavaCAPS\edesigner directory, then the file is located in
c:\JavaCAPS\edesigner\usrdir\modules\ext\siebeleaiadapter
-
Click Open to begin importing the Workflow template.
-
Select your project.
-
Stop the Gateway Server and the Siebel Server.
-
Use the Siebel Tools utility to compile your SRF file.
-
Copy the SRF file to the objects folder in your Siebel Server.
-
Restart the Gateway Server and the Siebel Server.
Before Running the Netbeans IDE
The Netbeans IDE needs to be configured to use the appropriate JAR files to correspond with the version of your Siebel Server. Before you use the Netbeans IDE to create your Siebel EAI Project, you must make sure that your local Netbeans IDE installation is using the proper JAR files for your Siebel Server.
 To Run Netbeans with Siebel 7.5.x
-
Using Windows Explorer, navigate to the Siebel Adapter directory for your Netbeans IDE.
If you installed the Netbeans IDE in the c:\JavaCAPS\edesigner directory, then navigate to
c:\JavaCAPS\edesigner\usrdir\modules\ext\siebeleaiadapter
-
If you have previously used Siebel 7.7 or 7.8.x with this installation of the Netbeans IDE, then remove the following files from this directory:
-
Siebel.jar
-
SiebelJI_enu.jar
-
-
Copy the following files from your Siebel 7.5.x system (SiebelTools/Classes) to this location:
-
SiebelJI.jar
-
SiebelJI_Common.jar
-
SiebelJI_enu.jar
-
-
Restart the Netbeans IDE
 To Run the Netbeans IDE with Siebel 7.7 or 7.8.x
-
Using Windows Explorer, navigate to the Siebel Adapter directory for your Netbeans IDE.
If you installed the Netbeans IDE in the c:\JavaCAPS\edesigner directory, then navigate to
c:\JavaCAPS\usrdir\modules\ext\siebeleaiadapter
-
If you have previously used Siebel 7.5.x with this installation of the Netbeans IDE, then remove the following files from this directory:
-
SiebelJI.jar
-
SiebelJI_Common.jar
-
SiebelJI_enu.jar
-
-
Copy the following files from your Siebel 7.7 or 7.8.x system (SiebelTools/Classes) to this location:
-
Siebel.jar
-
SiebelJI_enu.jar
-
-
Restart the Netbeans IDE
Creating the OTD
Steps required to create an OTD include:
-
Selecting a wizard type
-
Specifying connection information
-
Selecting integration objects
-
Specifying OTD names
 To Create the OTD
-
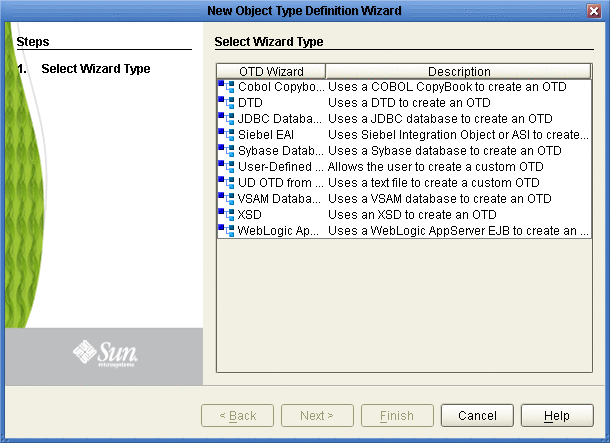
On the Project tree, right click the Project and select New ⇒ Object Type Definition from the shortcut menu. The Select Wizard Type page appears, displaying the available OTD wizards. See the following figure.
-
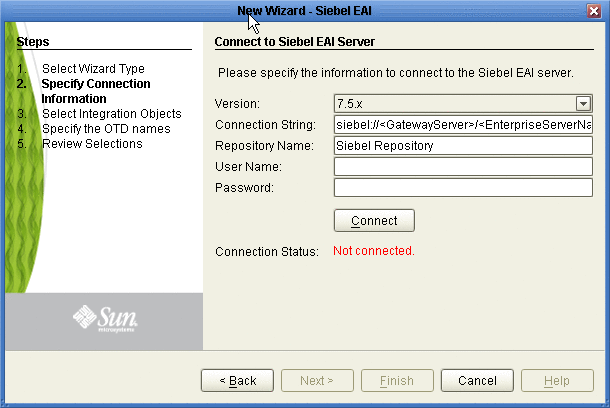
From the New Object Type Definition Wizard window, select SiebelEAIWizard and click the Next button. The Connect to Siebel EAI Server window appears.
-
Enter the following information into the text fields:
-
Version: the Siebel Server version (the same version used to create the OTD appears by default)
-
Connection String:
-
For Siebel 7.5.x:
siebel://<GatewayServer>/<EnterpriseServerName>/<ApplicationObjectManager>/<SiebelServerName>
-
For Siebel 7.7 and 7.8.x:
siebel://<SiebelServerName>:<port>/<EnterpriseServerName>/<ApplicationObjectManager>
-
-
Repository Name: Siebel Repository
-
User Name: a valid user name
-
Password: a valid password
-
-
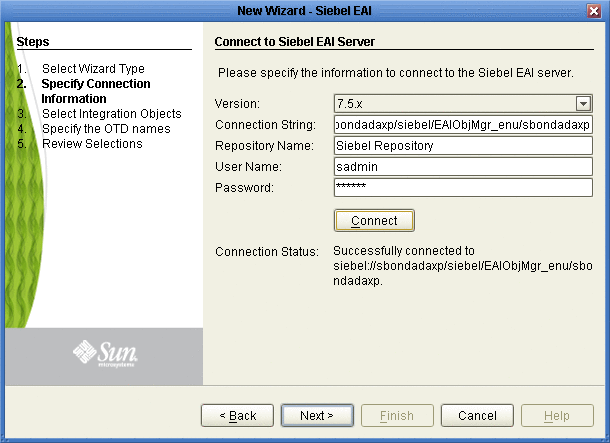
Click the Connect button. A message appears confirming a successful connection.
-
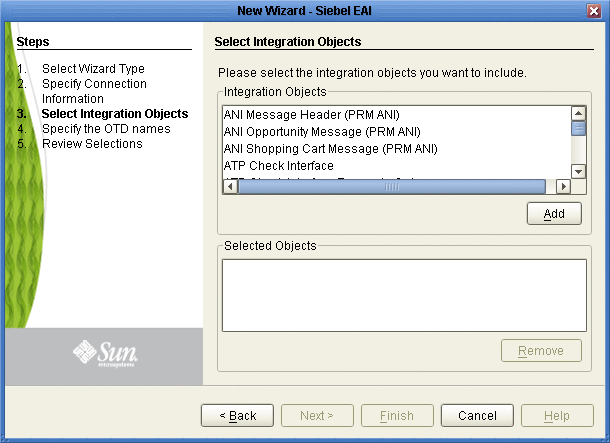
Click the Next button. The Select Integration Objects window appears.
-
Scroll down the Integration Objects selection table and select Account Interface.
-
Click the Add button. Account Interface appears in the Selected Objects window.
-
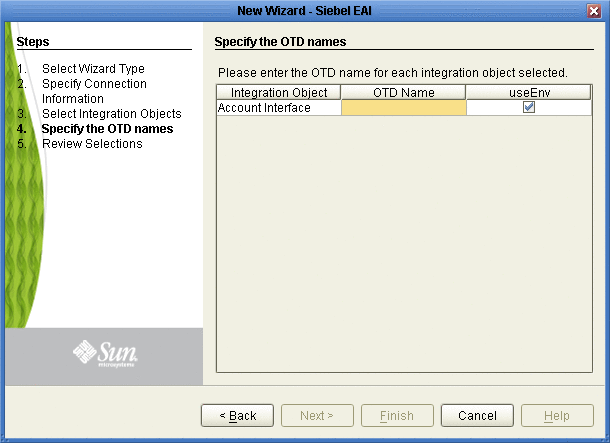
Click the Next button. The Specify the OTD names window appears.
-
In the OTD Name column, enter the name for the new OTD.
-
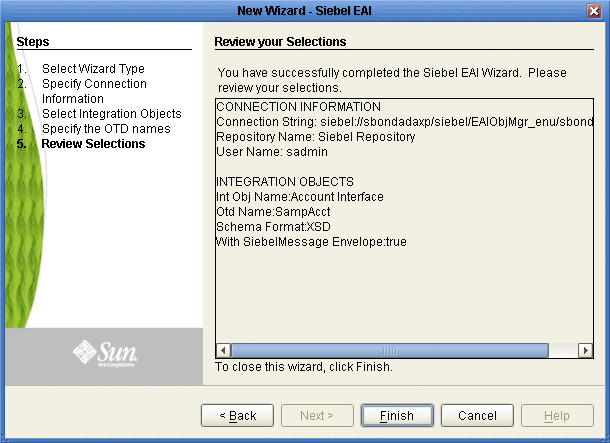
Click the Next button. The Review your Selections window appears.
-
Click the Finish button. A message appears confirming the successfully generated OTD. See the following figure.

 To Relaunch the OTD
-
From the Project tree, right-click the OTD and select Version Control ⇒ Check Out from the shortcut menu. The Version Control - Check Out dialog box appears.
-
Select Check Out on the Version Control - Check Out window.
-
Right-click the OTD once again and select Relaunch.
The Connect to Siebel EAI Server window appears.
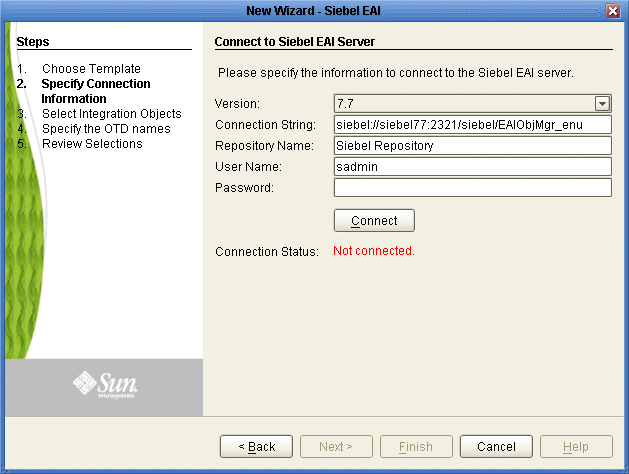
The fields (with the exception of Password) will be populated with metadata information selected when building the original OTD.
-
Enter a valid password in the Password field.
-
Click the Connect button. A message appears confirming a successful connection.
-
Click the Next button. The Select Integration Objects window appears. The Selected Objects window will already be populated with the previously selected Integration Object.
Note –If you attempt to select a different Integration Object, an error dialogue will appear.
-
Click the Next button. The OTD Name column will already be populated with the original OTD’s name.
-
Click the Next button. The Review your Selections window appears.
-
Click the Finish button. A message appears confirming the successfully generated OTD.
- © 2010, Oracle Corporation and/or its affiliates
