Creating a VSAM OTD
The following steps are required to create a new OTD for the VSAM Adapter.
Select Wizard Type
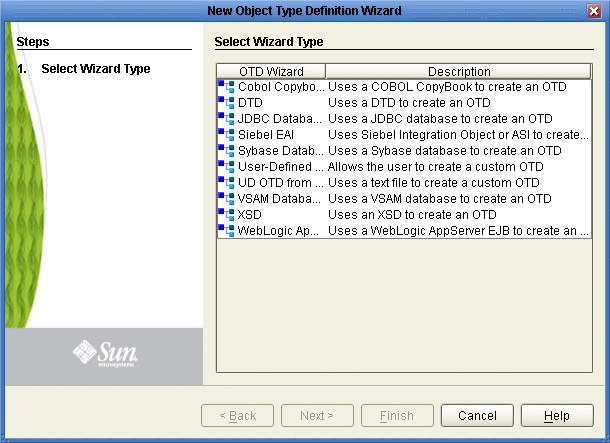
Select the type of wizard required to build an OTD in the New Object Type Definition Wizard.
 To Select the VSAM Database OTD Wizard
-
On the Project tree, right click the Project and select New ⇒ Object Type Definition from the shortcut menu. The Select Wizard Type page appears, displaying the available OTD wizards.
-
From the New Object Type Definition Wizard window, select the VSAM Database and click Next. See Figure 1–26.
Figure 1–57 OTD Wizard Selection
Connect To Database
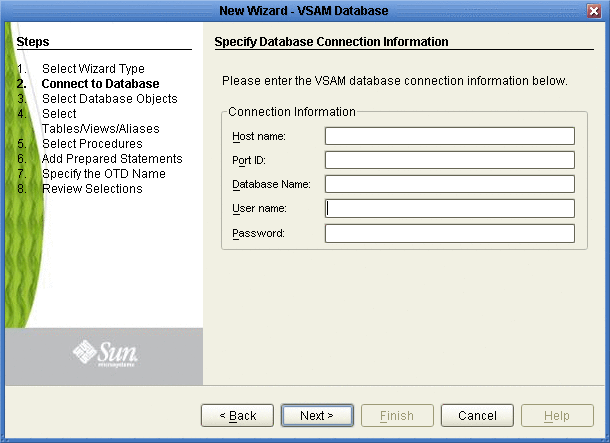
Enter the VSAM database connection information in the Connection Information frame.
Required Database Connection Fields include:
-
Host name– the database service host name.
-
Port ID– the database service connection port ID/number.
-
Database name– the name of the VSAM database.
-
User name– a valid VSAM database username.
-
Password– a password for the user name noted above.
Select Database Objects
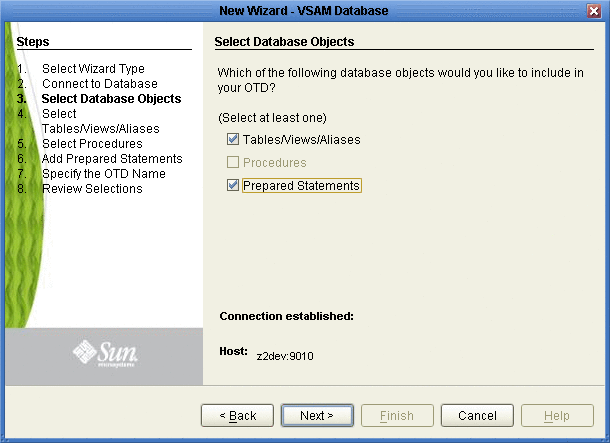
Select the type of VSAM database objects you want included in the OTD.
 To Select Database Objects
-
When selecting Database Objects, you can select any combination of Tables, Views, or Prepared Statements you would like to include in the OTD file. Click Next to continue (see the following figure).
Note –Views are read-only and are for informational purposes only.
Figure 1–58 Select Database Objects
Select Tables/Views/Aliases
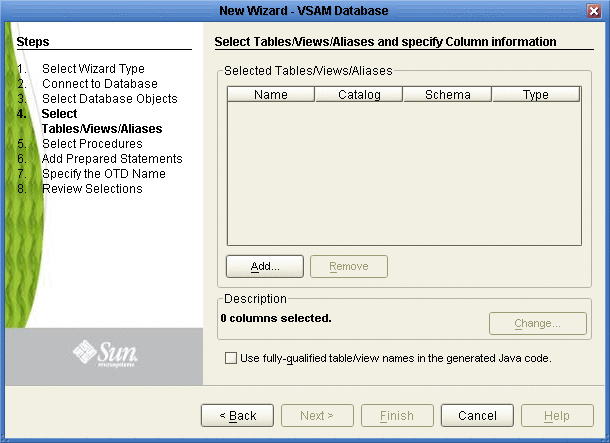
Select the types of tables or views required in the OTD.
Note –
Aliases are not supported in the current release of the VSAM adapter.
 To Select Table and Views
-
In the Select Tables/Views/Aliases window, click Add (see the following figure).
Figure 1–59 Select Tables/Views/Aliases
-
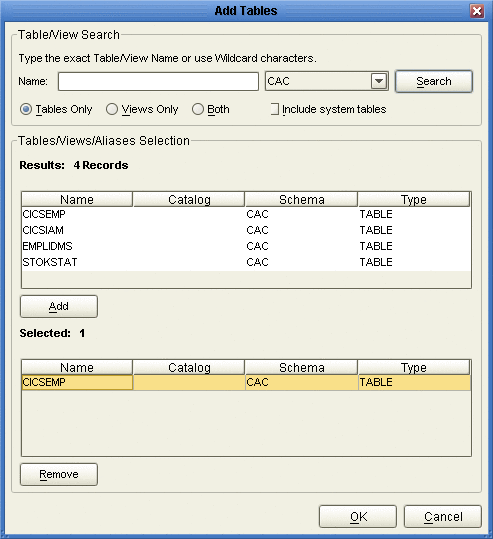
In the Add Tables window, select if your selection criteria will include table data, view only data, both, and/or system tables.
-
From the Table/View Name drop down list, select the location of your database table and click Search (see the following figure).
Figure 1–60 Database Wizard - All Schemes
-
Select the table of choice and click OK.
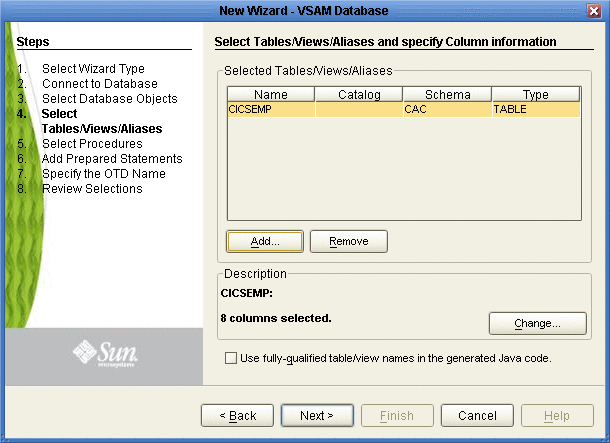
The table selected is added to the Selected Tables/Views/Aliases section (see the following figure).
Figure 1–61 Selected Tables/Views/Aliases window with a table selected
-
In the Selected Tables/Views/Aliases section, review the table(s) you have selected. To make changes to the selected Table or View, click Change. If you do not wish to make any additional changes, click Next to continue.
-
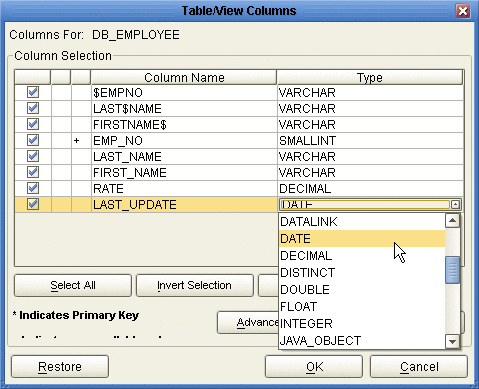
In the Table/View Columns window, you can select or deselect your table columns. You can also change the data type for each table by highlighting the data type and selecting a different one from the drop down list. If you would like to change any of the tables columns, click Change (see the following figure).
The data type is usually listed as Other when the driver cannot detect the data type. In these situations we recommend changing the data type to one that is more appropriate for the type of column data.
Figure 1–62 Table/View Columns
-
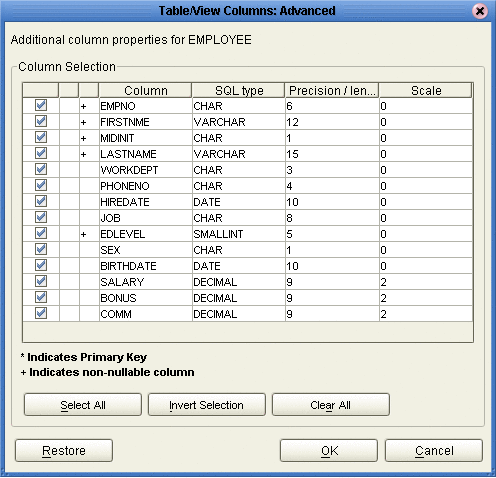
Click Advanced to change the data type, percision/length, or scale. Once you have finished your table choices, click OK. In general, you will not need to make any changes (see the following figure).
Figure 1–63 Table/View Columns— Advanced
Add Prepared Statement
Add a Prepared Statement object to your OTD.
Note –
When using a Prepared Statement, the ResultsAvailable() method will always return true. Although this method is available, you should not use it with a while loop. Doing so would result in an infinite loop at runtime and will stop all of the system's CPU. If it is used, it should only be used with the if statement.
 To Add Prepared Statements
-
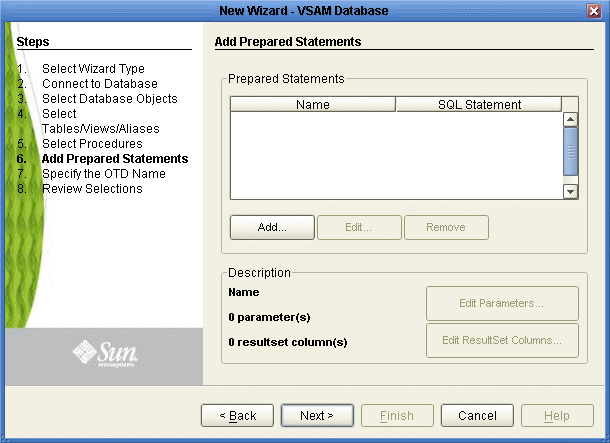
On the Add Prepared Statements window, click Add.
Figure 1–64 Prepared Statement
-
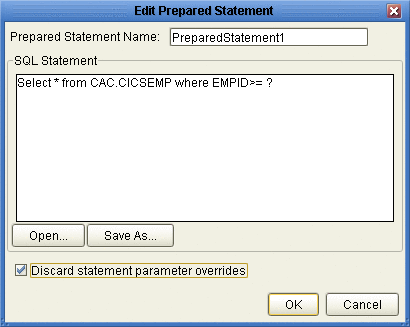
Enter the name of a Prepared Statement or create a SQL statement by clicking in the SQL Statement window. If you are not logging into the VSAM database with the default user name, you must enter the Table schema name in the SQL Prepared Statement. When finished creating the statement, click Save As giving the statement a name.
This name will appear as a node in the OTD. Click OK (see the following figure).
Figure 1–65 Prepared SQL Statement
-
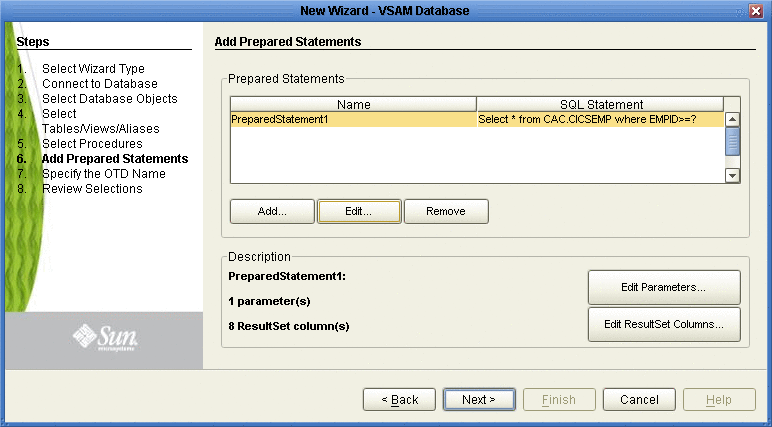
On the Add Prepared Statement window, the name you assigned to the Prepared Statement appears. To edit the parameters, click Edit Parameters. You can change the datatype by clicking in the Type field and selecting a different type from the list.
-
Click Add if you want to add additional parameters to the Statement or highlight a row and click Remove to remove it. Click OK.
Figure 1–66 Edit the Prepared Statement Parameters
-
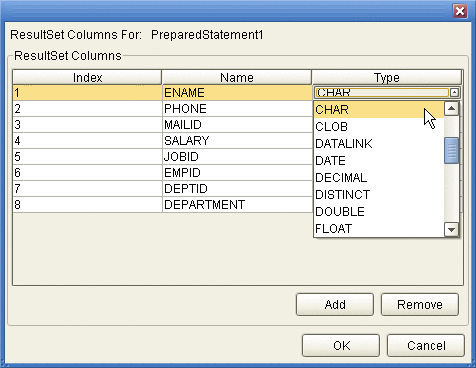
To edit Resultset Columns, click Edit Resultset Columns. The ResultSet Columns window appears (see the following figure).
Figure 1–67 ResultSet Columns
-
Click Add to add a new ResultSet column. Both the Name and Type are editable.
-
Click OK to return to the Add Prepared Statements window.
Specify the OTD Name
Specify the name that your OTD will display in the Java CAPS IDE.
 To Specify the OTD Name
-
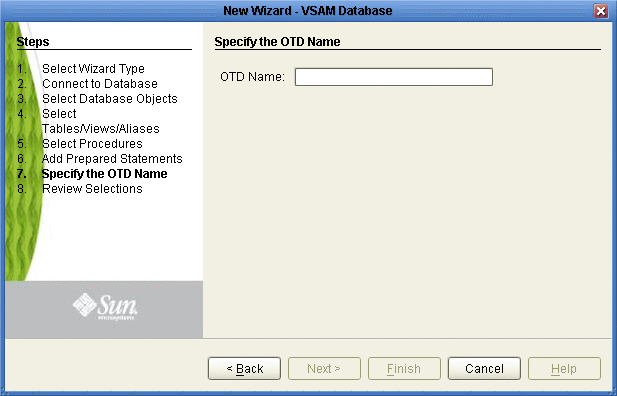
Enter a name for the OTD. The OTD contains the selected tables and the package name of the generated classes (see the following figure).
Figure 1–68 Naming an OTD
-
Click Next.
Review Selections
Review the selections made for the new OTD.
 To Review Your OTD Selections
-
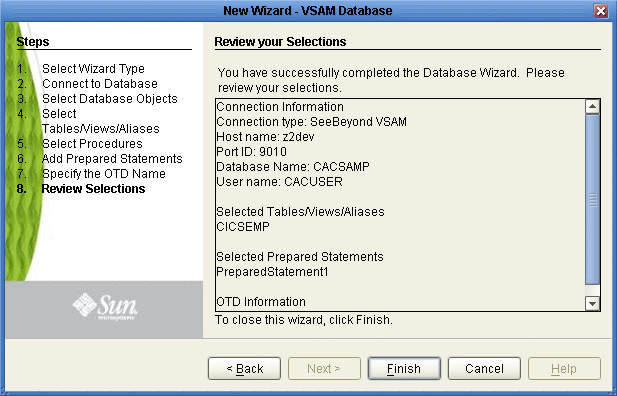
View the summary of the OTD. If you find you have made a mistake, click Back and correct the information.
-
If you are satisfied with the OTD information, click Finish to begin generating the OTD (see the following figure).
The resulting OTD appears on the Java CAPS IDE.
Figure 1–69 Database Wizard - Summary
- © 2010, Oracle Corporation and/or its affiliates
