Using OpenSSO Enterprise to Enable Oracle Federation in the Identity Provider Environment
To enable Oracle Access Manager for federation in the Identity Provider environment, follow these steps:
-
Install and configure OpenSSO Enterprise in the Identity Provider container.
-
Install and configure OpenSSO Enterprise in the Service Provider container.
-
Configure OpenSSO Enterprise for SAMLv2 Identity Provider protocols.
-
Configure Oracle Access Manager Agent to protect OpenSSO Enterprise URLs.
Installing and Configuring OpenSSO Enterprise in the Identity Provider Container
Follow the installation instructions in the Sun OpenSSO Enterprise 8.0 Installation and Configuration Guide. Make sure that the Identity Provider container is one of the supported Oracle Web Gate containers. Also make sure that the user repository is same as the Oracle Access Manager so that both OpenSSO Enterprise and Oracle Access Manager provide a session for the same user.
Installing and Configuring the Oracle WebGate
Follow the instructions in the section Installing the WebGate in the Oracle Access Manager Installation Guide.
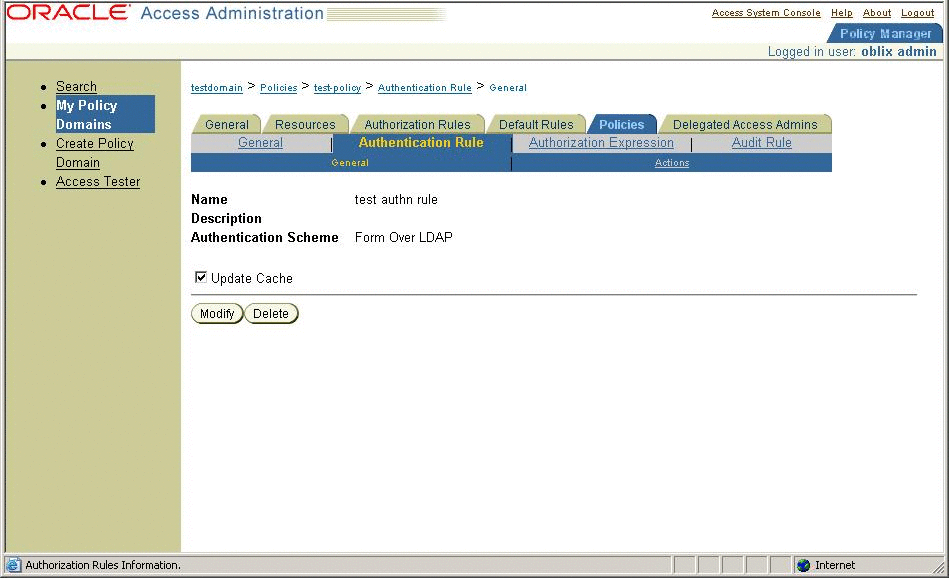
Make sure that Oracle single sign-on is working for the protected URLs. Do not protect the OpenSSO Enterprise URLs yet because you must first configure OpenSSO Enterprise for authentication modules. For now, protect a temporary URL to ensure that Oracle WebGate is working properly. A temporary policy in Oracle Access Manager could be configured as in the following figure:
Figure 3–9 Configuring a temporary policy

Installing the Custom Oracle Authentication Module
In OpenSSO Enterprise, install a custom authentication module for Oracle Access Manager. After exploding the OpenSSO Enterprise WAR file, the custom authentication module is located under the directory base-dir/samples/thirdparty/oblix. Follow the instructions in the README.txt file for building and configuring a custom authentication module. Make sure that the custom authentication module is working before proceeding.
The custom authentication module implements the OpenSSO Enterprise pluggable interface AMLoginModule. The AMLoginModule interface validates the Oracle Access Manager session using the Oracle Access Manager SDK , and then creates an OpenSSO Enterprise session.
To configure the custom Oracle Authentication Module, provide the following information:
- OblixCookieName:
-
Name of the Oblix session cookie
- OblixSDKInstallDir:
-
Directory where the Oblix SDK is installed and configured. Make sure that ObAccessClient.xml is configured.
- RemoteUserHeaderName:
-
The name of the header for an authenticated user after successful authentication.
- CheckRemoteUserOnly:
-
If true, the authentication modules looks only for the remote user header name.
Installing and Configuring OpenSSO Enterprise in the Service Provider Container
Follow the installation instructions in the Sun OpenSSO Enterprise 8.0 Installation and Configuration Guide. A good practice is to install the Identity Provider and Server Provider in different domains. If that is not possible, make sure they use different cookie names or cookie domains. You do not have to install the OpenSSO Enterprise web policy agent to protect the OpenSSO Enterprise URLs at this time. First make sure that SAML2 is set up and working properly.
Setting Up SAML2
Before loading metadata, read the following sections and be sure you understand the changes that must be made to the metadata. The SAML2 samples contains instructions on how to setup SAML2.
In all, you must have Identity Provider metadata and extended metadata, as well as Service Provider metadata and extended metadata. In the Identity Provider, import Identity Provider metadata and extended metadata as hosted metadata. Import Service Provider metadata and extended metadata as remote entity metadata. To change the hosted or remote attributes, locate the extended metadata XML element <EntityConfig> which contains the following attribute with default value:
hosted=true |
Change the value to false.
 To Configure the Identity Provider OpenSSO
Enterprise for SAMLv2 Identity Provider Protocols
-
Generate the metadata templates on both Identity Provider and Service Provider environments.
You can use one of the following methods:
-
Use the famadm command.
-
Use a browser:
http:host:port/opensso/famadm.jsp
-
At the Identity Provider, run the following command:
famadm create-metadata-templ -y idp_entity_id -u amadmin
-f admin_password_file_name -m idp_standard_metadata
-x idp_extended_metadata -i idp_meta_alias
where idp_meta_alias is "/idp".
-
At the Service Provider, run the following command:
famadm create-metadata-templ -y sp_entity_id -u amadmin
-f admin_password_file_name -m sp_standard_metadata
-x sp_extended_metadata -s sp_meta_alias
where sp_meta_alias is "/sp".
-
-
Customize extended metadata.
Use one of the following options:
-
To the Identity Provider extended metadata, add an attribute named AuthUrl.
This URL attribute is used by the SAML protocols to redirect to an OpenSSO Enterprise authentication module. In this use case, the redirect is to the custom Oracle Authentication Module. Example:
<Attribute name="AuthUrl">
<Value>http://host:port/opensso/UI/Login?module=OAMAuth</Value>
</Attribute>
-
Make the custom Oracle authentication module as the default login module in OpenSSO Enterprise.
A consequence of using this option is that you have to specify an LDAP login module for logging in as adminstrator. The Service Provider extended metadata has an attribute named as transientUser. Set this value to your anonymous user. Example:
<Attribute name="transientUser">
   <Value>anonymous</Value>
</Attribute>
-
-
Change the hosted attribute in the Identity Provider and Service Provider extended metadata when loading remote metadata.
For a remote Identity Provider or Service Provider, set the value to "false" or "0".
-
Load the metadata.
-
Create circle of trust.
Add the circle of trust to the extended metadata. In the extended template files, you will see a sample circle of trust. Edit the following to correspond to your circle of trust.
<Attribute name="cotlist">
<Value>samplesaml2cot</Value>
</Attribute>
-
Load the hosted metadata in both the Identity Provider and Service Provider.
You can use either the famadm command or the OpenSSO Enterprise console.
-
Exchange the metadata .
Import the Service Provider metadata into the Identity Provider, and import the Identity Provider metadata into the Service Provider.
-
Load the metadata.
-
-
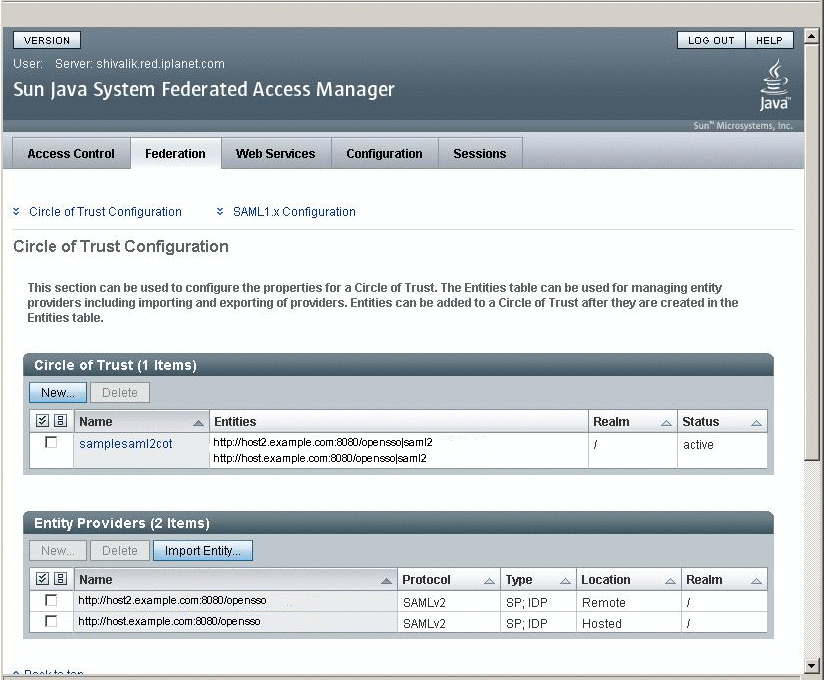
After successfully exchanging the metadata, verify through the OpenSSO Enterprise administration console that the metadata has been configured correctly.

To Configure Oracle Access Manager Agent to protect OpenSSO Enterprise URLs
There are many different ways to configure Oracle Access Manager Policy to protect OpenSSO Enterprise URLs. At minimum, you must configure a policy to protect the SAML Single Sign-On Service URL. The real-time policy can be different based on other deployment requirements. The Oracle Access Manager session must be established before the SAML Assertion is generated.
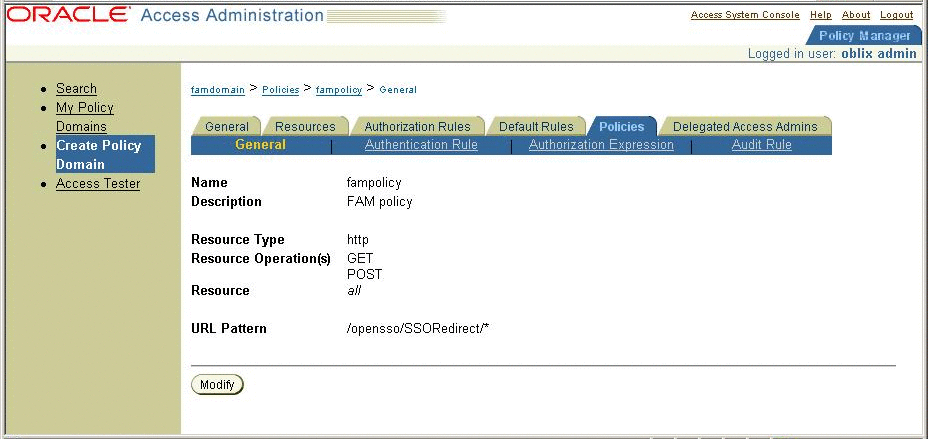
In Oracle Access Server Policy Console, create a policy domain named fampolicy to protect only the OpenSSO Enterprise Single Sign-On Service URL.
Figure 3–10 Creating a policy domain

 To Configure the Service Provider
-
Install the OpenSSO Enterprise web policy agent in the Service Provider environment to protect OpenSSO Enterprise Service Provider.
Follow the instructions in the Sun Java System Access Manager Policy Agent 2.2 Release Notes.
There is no restriction on the type of policy agent you use. However, be sure use an agent that is supported on the container where the application to be protected is deployed.
-
Change the policy agent login URL.
After verifying that simple single sign-on with the OpenSSO Enterprise works properly, change the policy agent login URL to the OpenSSO Enterprise SAML2 SP initiated Single Sign-on Service URL. Example:
http://<sphost>:<spport>/opensso/saml2/jsp/spSSOInit.jsp?metaAlias
=<SP MetaAlias>
&idpEntityID=<IDP Entity ID>&NameIDFormat=transient
 To Test the Single Sign-On
- © 2010, Oracle Corporation and/or its affiliates
