| Exit Print View | |
Sun OpenDS Standard Edition 2.0 Administration Guide |

|
Configuring the Directory Server
Managing Administration Traffic to the Server
Overview of the Administration Connector
Accessing Administrative Suffixes
To Configure the Administration Connector
Configuring the Directory Server With dsconfig
Overview of the dsconfig Command
Using dsconfig in Interactive Mode
Configuring a Directory Server Instance
To Display the Properties of a Component
To Modify the Properties of a Component
To Modify the Values of a Multi-Valued Property
Configuring the Connection Handlers
To Display All Connection Handlers
Configuring the LDAP Connection Handler
To Control Which Clients Have LDAP Access to the Directory Server
Configuring the LDIF Connection Handler
To Enable the JMX Alert Handler Through the LDIF Connection Handler
Configuring the JMX Connection Handler
To Change the Port on Which the Server Listens for JMX Connections
Configuring Plug-Ins With dsconfig
Modifying the Plug-In Configuration
To Display the List of Plug-Ins
To Enable or Disable a Plug-In
To Display and Configure Plug-In Properties
To Configure Plug-In Invocation Order
Utilities That Can Schedule Tasks
Controlling Which Tasks Can Be Run
Scheduling and Configuring Tasks
To Configure Task Notification
To Configure Task Dependencies
Managing and Monitoring Scheduled Tasks
To Obtain Information About Scheduled Tasks
Managing the Directory Server With the Control Panel
To Specify the Trust Manager Provider and Trust Store Algorithm Used by the Control Panel
Configuring and Testing the DSML Gateway
Deploying the DSML Gateway in Apache Tomcat
Deploying the DSML Gateway in Sun Java System Web Server 7
Confirming the DSML Gateway Deployment
Confirming the DSML Gateway Deployment with JXplorer
Confirming the DSML Gateway Deployment with the Directory Server Resource Kit
You can deploy the DSML Gateway in Glassfish using either the autodeploy feature or the graphical administration interface.
For example, if you want the application context to be /dsml, then re name it to dsml.war before putting it in the autodeploydirectory.
Glassfish automatically detects the new WAR file and makes it available for use, usually in a few seconds.
See Configuring the DSML Gateway and Confirming the DSML Gateway Deployment for information about completing your DSML deployment.
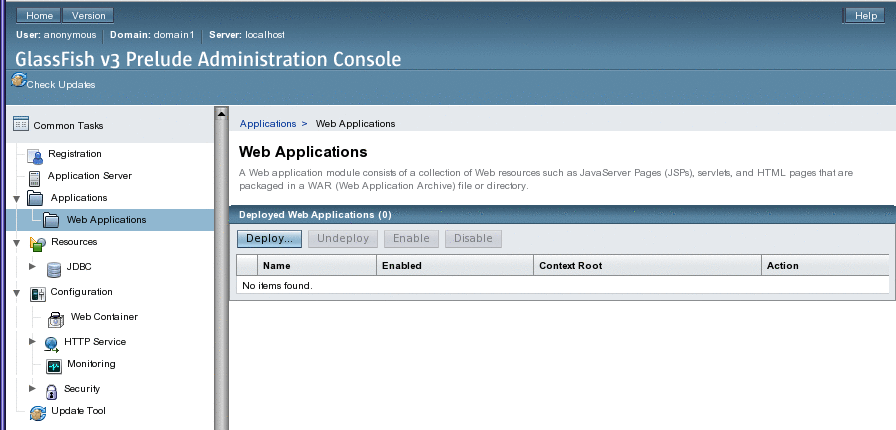
The available web applications are displayed. Unless you have previously installed web applications, the list is empty.

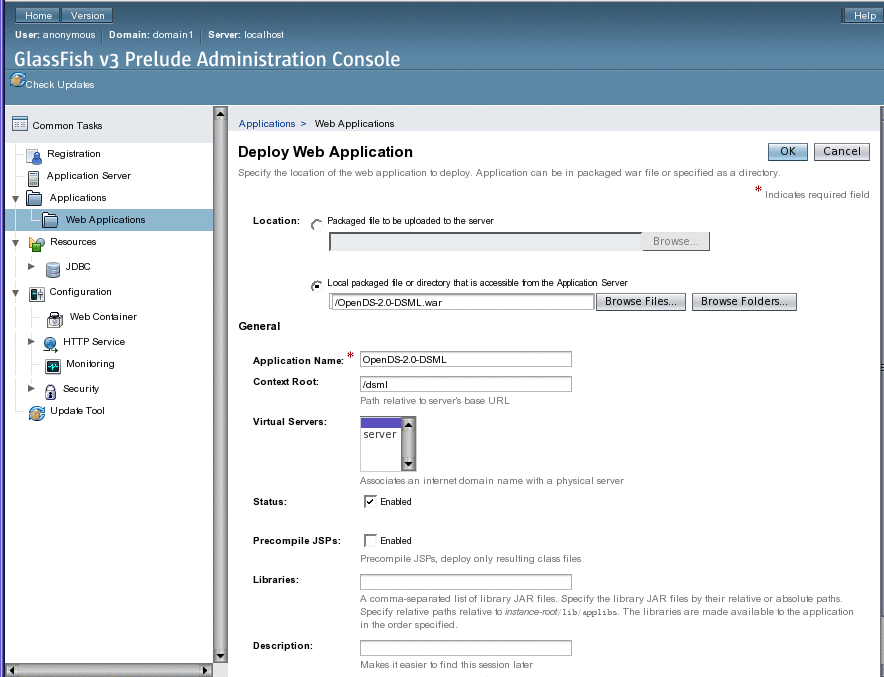
The Deploy Enterprise Applications/Modules page appears in the browser, displaying fields where you specify either the WAR file to the server or specify the path to a WAR file already on the server system.

See Configuring the DSML Gateway and Confirming the DSML Gateway Deployment for information about completing your DSML deployment.