| June 2006 [Part number: 819-6550-10] |
|
|
In this walkthrough, you will be introduced to the Sun
Java Enterprise System
(Java ES) installer, the Java ES
components, and the key tasks of performing a Java ES
installation.
|
Sun Java Enterprise System (Java ES) consists of a
collection of Sun
server-side
products and their supporting shared components that work together to
support
distributed
applications across a network. All
Java ES components are installed using
the Java ES installer. The product
components are selectable, while the shared components are installed
automatically to support the Java ES components you select in the
installer.
This
tutorial begins after the Java ES software
distribution is downloaded and expanded, and the installer is ready to
run.
Instructions for getting the software and for performing a full
installation can be accessed at the Sun
Java
Enterprise System Installation Documentation Center.
Contents
You can install Java ES
interactively using a graphical or text-based interface, or without
interaction (silently) by
means of a reusable state file. (This tutorial uses graphical mode.)
Interactive Installation
- Graphical mode provides
an interactive graphical wizard that leads you through the tasks of
installing the Java ES software
on a graphical workstation. The command to run
the graphical installer is ./installer.
- Text-based mode provides
the same functionality as graphical mode, but you are prompted
for responses
on a line-by-line basis in a terminal window. The command to run
the text-based installer is ./installer
-nodisplay.
Script-based Installation
Silent
mode is a
repeatable method used for installing Java
ES on multiple hosts that share similar configurations.
- You first run aninteractive installation session
where your responses to
the installer
are captured as a set of name-value pairs in a state file. The command
to run the installer to create a state file is ./installer
-saveState statefile_name.
- Using the
state file as input, you then run the
installer
on other hosts. The command to run
the installer using a state file is ./installer
-state statefile-name.
To start the installer in graphical mode:
- As superuser, navigate to the
directory where you downloaded and expanded the software. For example:
cd
/java_es_05Q4/solaris-sparc
- Run the installer in graphical mode:
./installer
Tip: A way to
practice with the installer, or to survey what is on your host, is to
run
the following command, which runs the installer but does
not install software:
./installer -no
The Welcome page is displayed.
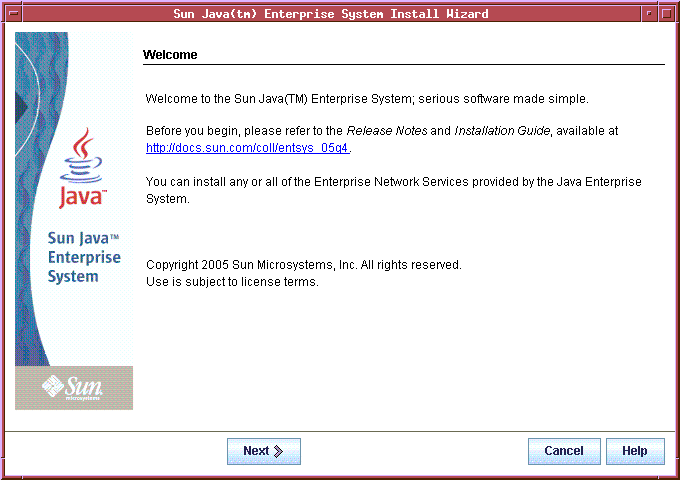
The Welcome page provides the URL to the Java ES system
documentation.
Buttons along the bottom of the page allow you to direct the installer.
When you click Help, information about the page is displayed.
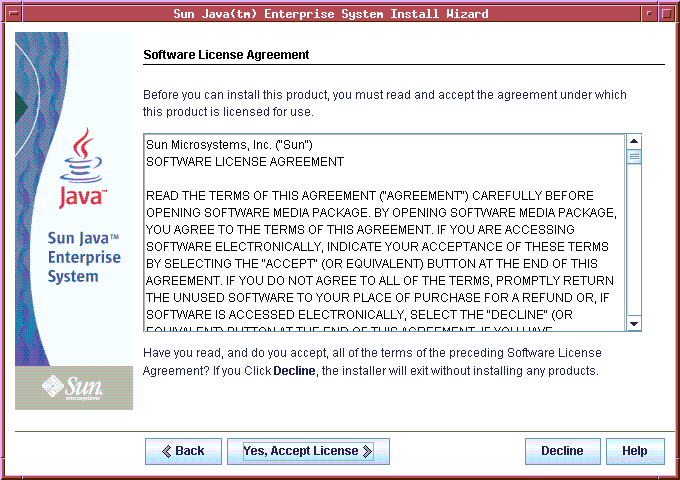
When you click Next, the
License Agreement page is displayed.
After you accept the license agreement, the Language Support page is
displayed.
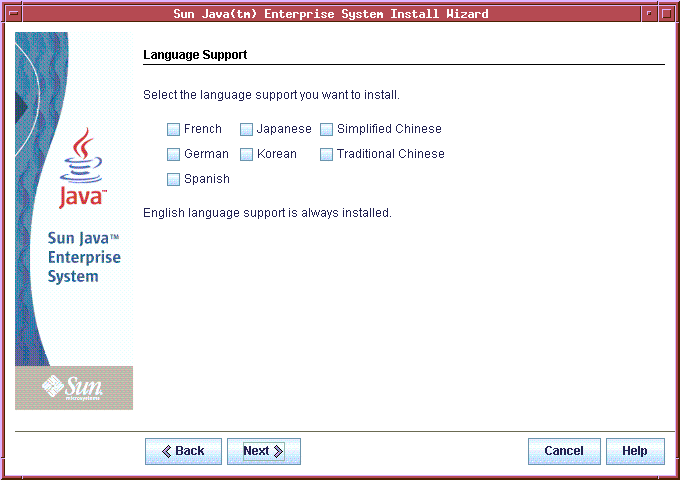
If your operating system language is not listed on this page, the
installer runs in English.
The installer automatically installs English versions of all
Java ES components.
In addition, you can choose to install component packages in any of the
languages
listed. During an installation session, the language you choose applies
to all of the
components that you are installing.
Tip:
To install some components in one
language and other
components in other languages, your must run the installer multiple
times.
When you click Next, the
installer surveys the host where you are installing and
determines if any Java ES software is already installed that might
affect
your
installation. This process could take a few moments depending on what
software
is on
your host. If incompatible
versions of
components are found, the installer prompts you to remove or upgrade
them.
Tip:
The Java ES
installer does not perform distributed
installations. You install and configure the
Java ES software one host at a time. It is important to plan your
installation sessions carefully so that you create the distributed
environment for your
deployment architecture.
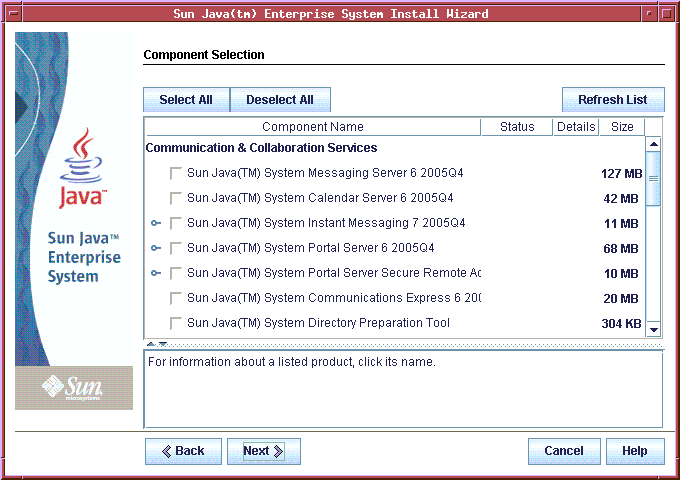
When the installer finishes the software survey on your host, the
Component
Selection page is displayed.
Selecting
Components for Installation
When you choose the
components you want to install on a host, the Java ES
installer checks for component dependencies and correct versioning. Any
additional components that are required are automatically selected. The
installer also provides for installation-time
configuration for some of the components
being installed.
The Component Selection page lists the selectable components. To see
the subcomponents, expand the components that have expansion turners to
the left of
the check boxes (for example, Instant Messaging). Click here to see a
complete listing of the Java
ES selectable components and
their
subcomponents.
Component Dependencies
Many of the selectable components depend upon other components to
provide their own core
functions. The installer
automatically selects additional Java ES components if a selected
component requires them.
If a component appears dimmed and is not available for selection on the
Component Selection page, a correct version of the
component is already installed on the host. The Status and Details
columns contain
information on components, if available. The buttons on the top of the
page do the following:
- Select All selects
all components and subcomponents.
Tip: If you want to
install most components but not all, click
Select All and deselect the components or subcomponents you do not
want.
- Deselect All deselects
all of your selections so that
you can start over with a clear Component Selection page.
- Refresh List redisplays
the page after changes have
been made.
If you click Next when component dependencies
are not yet met, the installer displays one or more messages
informing you of the
problem and telling you what action to take. Some typical unmet
dependency situations are:
- You did not select a web container, but a web container is
required by one of the components you selected.
- You deselected a component or subcomponent that is
required.
- You want to use a remote copy of a required component, so
you deselected it.
Version Compatibility
If
incompatible versions of selectable components exist on the host, you
are required to remove the components.
Selectable
components cannot be upgraded by the installer, with one exception: if
Application Server and Message Queue were bundled with the Solaris OS,
the installer gives you the option of upgrading them. Instructions for
manually upgrading components are contained in the Sun Java Enterprise
System Upgrade Guide.
When you install Java ES, the installer automatically
installs the required shared
components if they are not already
installed on the host. If some shared components are already on the
host, but
the versions do not match the
Java ES release
requirements, the Shared Components Upgrade Required page is displayed.
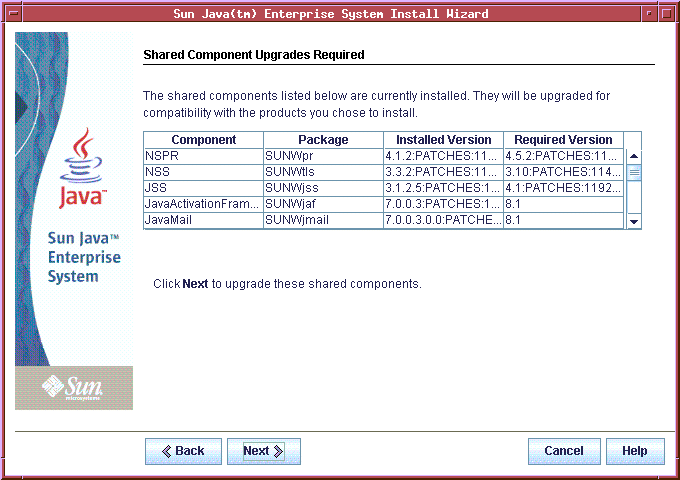
If you do not want the installer to automatically upgrade the
displayed
shared components, click Cancel. You must then manually upgrade some or
all of the shared components and
restart the installation. To confirm that
you want the installer to
automatically upgrade the
shared components to the correct versions, click Next.
The
Installation Directories
page displays the default directories for the components you selected.
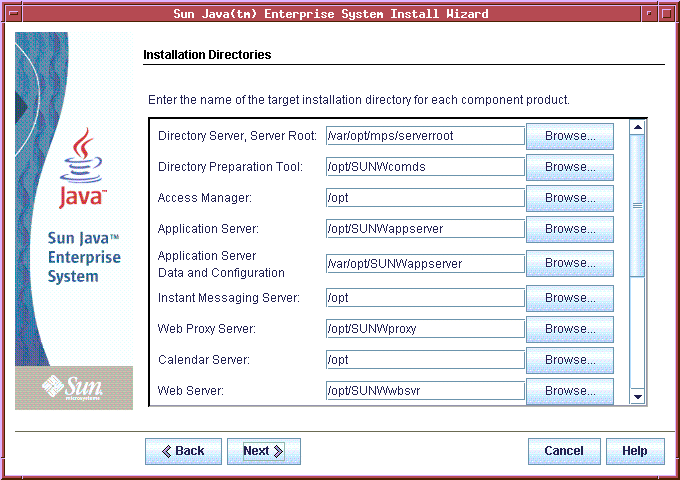
Each component has a default directory location where the software for
that component is installed. If the default
directories are not
acceptable, browse for alternative paths and make any changes needed.
When you click Next, the
installer runs a system check to verify that system requirements are
met. If any of the requirements are not met, messages tell you
what you
need to do. Typical issues are:
- Memory
is not at the recommended level.
- Patches are missing (the patch numbers are displayed when
you click View Report).
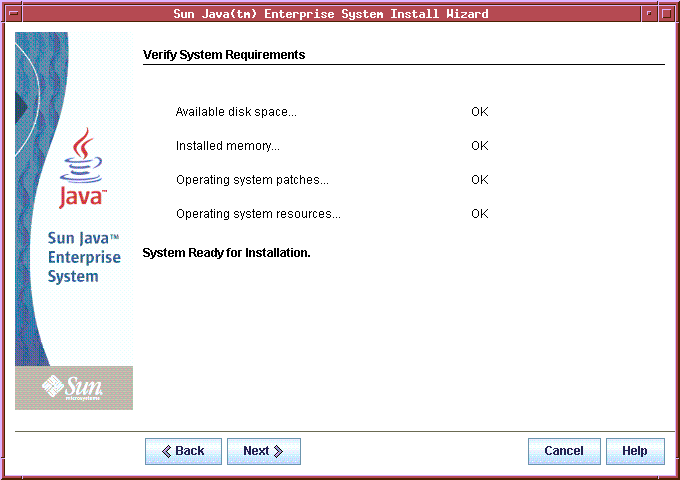
If you can resolve reported problems without stopping the installer
(such as installing required patches), do
so, then click Check Again to
recheck the system. Otherwise, you might have to cancel the
installation and start over after resolving the problem.
When the system check is complete and you are satisfied
with the state of the system, click Next.
If the Configuration Type page is displayed, some of the components you
have selected can be configured during
installation. If none of the
components you selected can be configured during installation,
Configure Later is automatically selected and the Configuration Type
page is not displayed.
Choosing How to
Configure
The Configuration Type page allows you to specify how the installer
handles configuration for the components that you selected.
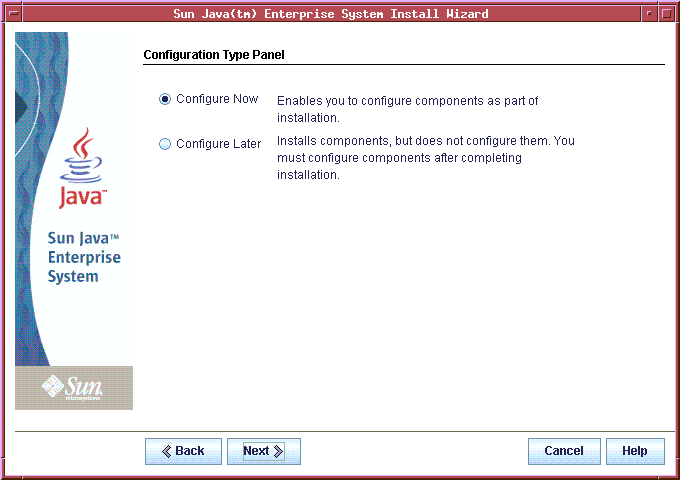
You have the following
choices:
- Configure Now allows you to configure
those components that permit configuration during installation. You do
this
by providing configuration values when prompted by the installer.
Runnable instances are created. Components
that can be configured during installation include Access Manager,
Administration Server, Application Server, Directory Server, Directory
Proxy Server, HADB, Portal Server, Portal Server Secure Remote Access,
Web Server, and Web Proxy Server. All other components must use the
Configure Later type.
After installation: The components that you configured during
installation can be started
and verified as soon as installation is finished. For the components that cannot be configured during
installation, you will create runnable instances by
manually supplying
configuration values through component configuration wizards or
configuration files.
- Configure Later instructs the installer
to copy component software files to the host. You might be asked
to enter a few minimum values that are necessary for copying the
packages. The
installer proceeds
without doing further configuration, and no runnable instances are
created. There are two common reasons for choosing Configure
Later. Either the components you select can only be configured later,
or you want to do special configuration of components after
installation rather than during installation. All components can
use the Configure Later type.
After installation: You create runnable instances by
manually supplying
configuration values to component configuration wizards or
configuration files.
When you click Next, the
Common Server
Settings page is displayed.
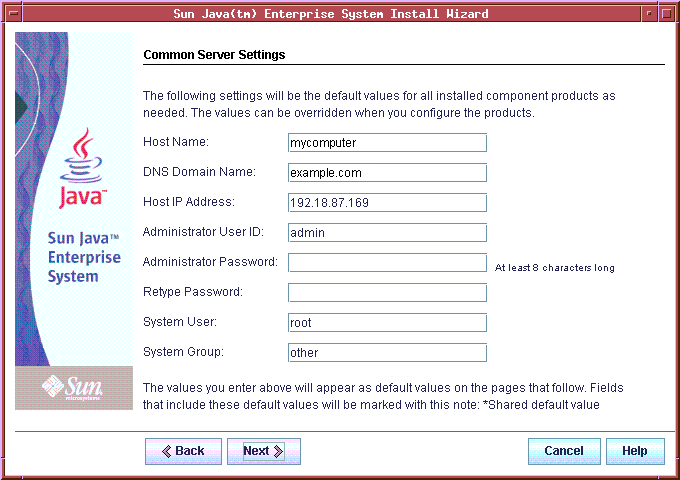
Common server settings are
parameters that multiple components
use. For example, most components require that you specify an
administrative ID and
password. By setting these common values, you are setting default
values for all component
administrative IDs and passwords.
On this page, you can accept the defaults or enter
alternate values to answer the
installer questions
regarding these global fields. Values that you enter here appear as
default values
on the component configuration pages.
Click Next to proceed to the
configuration pages for any installer-configurable components that you
selected for a Configure Now installation. A typical component
configuration page
looks like this:
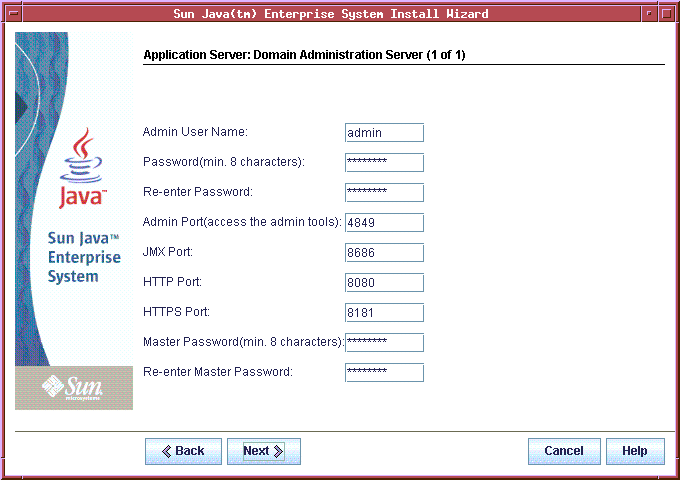
Component configuration settings are parameters that apply to
a particular component. These settings are requested during
installation if you
have selected the Configure Now type. Some of these settings are
populated from
the common server settings.
This example page for Application Server presents some of the
parameters that are required to configure Application Server. You can
accept the
default values or enter other values.
The installer continues to display configuration pages until you have
provided the required configuration information for all
of the components that you selected. When you click Next on the last configuration
page, the Ready to Install page is displayed.
The Ready to Install page lists the components that you have selected
for installation.
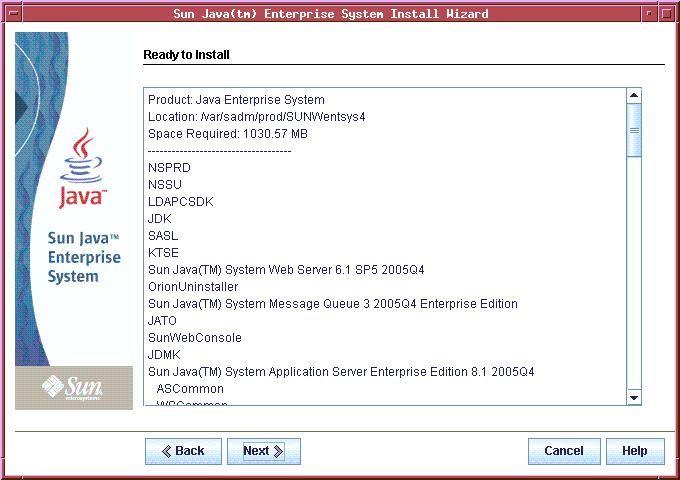
- Review the components listed. To make
any necessary changes, do the following:
- To return to a previous page, click Back until the page
you want is
displayed.
- Make your changes.
- Click Next to
move forward
through the installer again. You
do not need to re-enter previously entered values. However, new
dependency,
compatibility, and system checks might need to be performed.
- When
you are
satisfied with the Ready to Install list, click Next. The Product
Registration page is displayed.
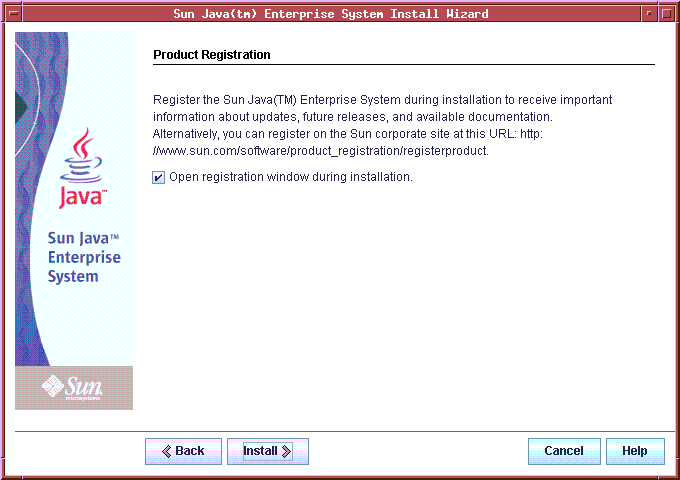
If you want to register your products while software is being
installed, accept the default.
When you click Install, the installer begins installing
software. The Installing page is displayed.
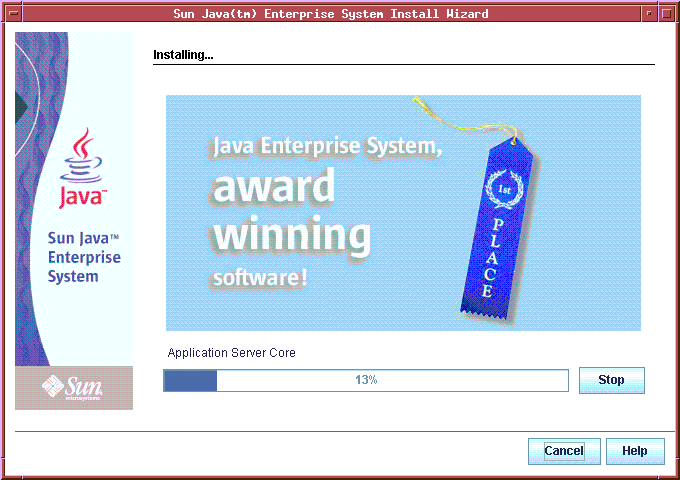
Shared components are installed or upgraded first, then the
selectable
components are installed. During installation, the following occurs:
- A progress bar displays the overall percentage complete.
- The names of packages are displayed as they are installed.
- If you accepted the product registration option, a separate
browser
window allows you to register.
The amount of time that installation takes depends on the size and
complexities of your installation.
Completing the
Installation
After the software is installed, the Installation Complete
page
is displayed. The selected components, all required shared components,
and the Java ES
uninstaller are now
installed on this host.
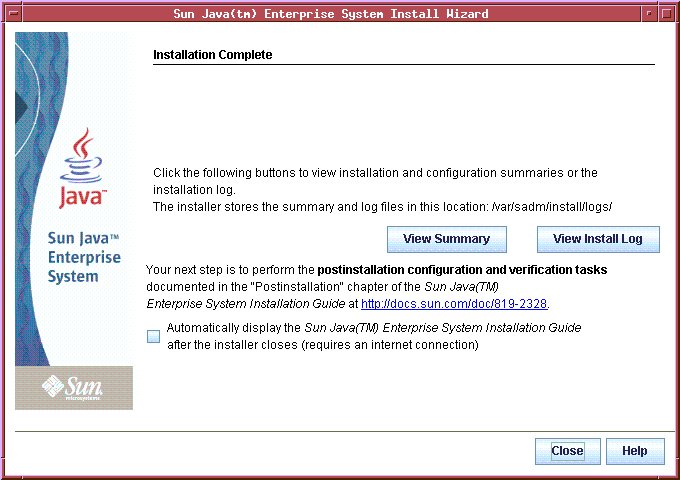
Any issues from the installation, such as insufficient memory,
are
noted on this page. The View buttons provide access to the
installation summary
and logs.
- Click View Summary to examine
information about each
component
installed and the settings you specified. If you chose the Configure
Now type, this
summary lists all of the configuration values.
- Click View Install Log to examine the
installer’s
log messages for the components.
- Select the check box to automatically display the Sun
Java Enterprise System
Installation Guide for
UNIX after
installation.
- To
continue with the final steps of installation, find the
postinstallation
configuration instructions in
the Sun Java Enterprise System
Installation Guide for UNIX.
- Click Close to
exit the installer.
After Java ES component software is
copied to your host, do the following to complete the
installation:
- Complete all postinstallation configuration
- Verify success by starting the components
When you have completed installation on one host, you can install the
software on the next host.
Your deployment might have additional requirements such
as directory replication, single sign-on, high availability,
third-party web containers, and so on. Guidelines on these situations
as well as detailed instructions for all the tasks described in this
tutorial can be accessed in the Sun
Java Enterprise System Installation
and Initial Configuration Documentation Center.
Important things to understand about
the Java ES installer:
- The installer runs on the local host. Installation happens
one host at a time only.
- The installer can tell what is installed the local host,
not on a remote host.
- The installer cannot upgrade selectable components, but
it can
upgrade shared components.
- The installer can configure only some components, and only
for a Configure Now installation.
- If you do a Configure Now installation, you need
to
provide configuration values for most components during installation.
- If you do a Configure Later installation, you need to
configure all components after installation.
- After the installer finishes, the packages are installed
but
nothing is
started, not even configured components.
- At least some manual configuration is required
after
every installation.
Additional material that might be useful for understanding
Java ES installation:
List of
Selectable
Java ES Components
In the Component Selection page of the Java ES installer, the
selectable components
are grouped by the services they help to provide. Subcomponents are
indented after those components that have selectable subcomponents.
Communications Services
- Sun Java System Messaging Server 6 2005Q4
- Sun Java System Calendar Server 6 2005Q4
- Sun Java System Instant Messaging 7 2005Q4
- Instant Messaging Server Core; includes server and
multiplexor
software
- Instant Messenger Resources
- Access Manager Instant Messaging Service
- Sun Java System Portal Server 6 2005Q4
- Sun Java System Portal Server Secure Remote Access 6 2005Q4
- Secure Remote Access Core
- Gateway
- Netlet Proxy
- Rewriter Proxy
- Sun Java System Communications Express 6 2005Q4
- Sun Java System Directory Preparation Tool 6 2005Q4
- Communication Services Delegated Administrator 2005Q4
- Delegated Administrator Console and Utility
- Delegated Administrator Server
Web & Application Services
- Sun Java System Application Server Enterprise Edition 8.1
2005Q4
- Domain Administration Server
- Application Server Node Agent
- Command Line Administration Tool
- Load Balancing Plugin, used with either Web
Server 6 or minimum Apache Web Server 1.3.33, selectable at
configuration (default
is Web Server).
- PointBase Database
- Sample Applications
- Sun Java System Web Server 6.1 SP5 2005Q4
- Sun Java System Web Proxy Server 4.0 2005Q4
- Sun Java System Message Queue 3 2005Q4 Enterprise Edition
- Service Registry 3 2005Q4
Directory & Identity Services
- Sun Java System Access Manager 7 2005Q4
- Identity Management and Policy Services Core (includes
Delegated Administrator)
- Access Manager Administration Console
- Common Domain Services for Federation Management
- Access Manager SDK
- Sun Java System Directory Server 5 2005Q4
- Sun Java System Directory Proxy Server 5 2005Q4
Availability Services
- High Availability Session Store (HADB) 4.4.2
- Sun Cluster 3.1 8/05
- Sun Cluster Core
- Sun Cluster Agents for Sun Java System
- HA/Scalable Sun Java System Web Server
- HA Sun Java System Application Server
- HA Sun Java System Message Queue
- HA Sun Java System Calendar Server
- HA Sun Java System Administration Server
- HA Sun Java System Directory Server
- HA Sun Java System Messaging Server
- HA Sun Java System Application Server EE (HADB)
- HA Sun Java System Instant Messaging
Administrative Services
- Sun Java System Administration Server 5 2005Q4
List of Java ES
Shared
Components
This release of Java ES includes these shared components:
- Ant (Jakarta ANT Java/XML-based build tool) 1.6.2
- Apache Derby Database 10.0.2.1
- Apache Common Logging (ACL) 1.0.3
- Berkeley Database 4.2.52
- Common agent container 1.1
- ICU (International Components for Unicode) 3.2
- IMSDK (Instant Messaging SDK) 6.2.8
- J2SETM
(Java 2
Platform, Standard Edition)
platform
5.0 Update 3
- JAF (JavaBeansTM Activation
Framework) 1.0.3
- JATO (Java Studio Enterprise Web Application Framework)
2.1.5
- JavaHelpTM Runtime 2.0
- JavaMailTM Runtime 1.3.2
- JAXB (Java Architecture for XML Binding) Runtime 1.0.4
- JAXP (Java API for XML Processing) 1.2.6
- JAXR (Java API for XML Registries) Runtime 1.0.7
- JAXRPC (Java API for XML-based Remote Procedure Call)
Runtime 1.1.2
- JCAPI (Java Calendar API) 1.2
- JDMK (Java Dynamic ManagementTM
Kit) Runtime 5.1
- JSS (Java Security Services) 2.1.4 and 4.1
- KTSE (KT Search Engine) 1.3.2
- LDAP C SDK 5.11
- LDAP Java SDK 4.18
- MA Core (Mobile Access Core) 1.0.6
- NSPR (Netscape Portable Runtime) 4.5.2
- NSS (Network Security Services) 3.10
- SAAJ (SOAP with Attachments API for Java) 1.2.1
- SASL (Simple Authentication and Security Layer) 2.18
- Sun Explorer Data Collector (Solaris OS only) 4.3.1
- Sun Java Monitoring Framework 1.0.1
- Sun Java Web Console 2.2.4
- WSCL (Web services Common Library) 1.0
|


