SPARC: To Perform an Installation or Upgrade With the Solaris Web Start Program
-
Decide if you want to install the software by using the DVD-ROM or CD-ROM drive or by using a net image.
-
If you're using a DVD-ROM or CD-ROM drive, insert the Solaris 9 DVD or Solaris 9 Installation CD.
-
If you're using a net installation image, change directories to where the installation media is located. You might need to contact your network administrator for the location. The following command is an example.
% cd /net/install-svr/export/s9/sparc
-
-
Boot the system.
-
If the system is new, out-of-the-box, turn on the system.
-
If you want to install or upgrade an existing system, shut down the system.
-
To boot from the local DVD or CD, type:
ok boot cdrom [[- nowin]]
-
To boot from an install server on a network, type:
ok boot net [[- nowin]]
-
nowin
Specifies to run the Solaris Web Start program in CLI mode.
The Solaris Web Start installation begins.
-
-
If you are prompted, answer the system configuration questions.
-
If you preconfigured all of the system configuration information, the Solaris Web Start program does not prompt you to enter any configuration information. Proceed to Step 7.
-
If you did not preconfigure the system configuration information, use the "Worksheet for Installation" or the "Worksheet for Upgrading" to help you answer the system configuration questions.
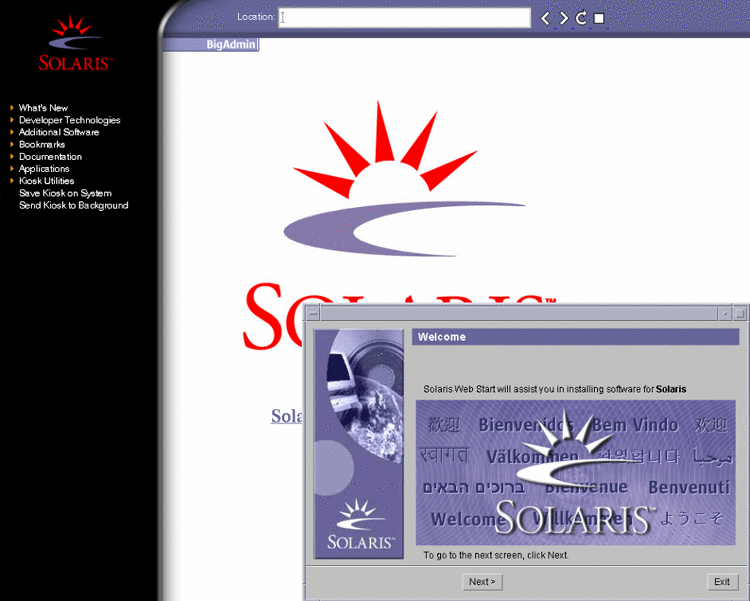
If you are using the GUI, after you confirm the system configuration information, the Solaris Web Start Installation Kiosk and Welcome to Solaris dialog box appear. If your system has insufficient memory, the Kiosk does not display.
Figure 14-1 Solaris Web Start Kiosk Menu

You can click on any link in the Kiosk menu.
Note -In some situations, the Kiosk might cover a dialog box. To display a hidden dialog box, from the Kiosk menu, choose Send Kiosk to Background.
The Installer Questions screen appears.
-
-
Decide if you want to reboot the system automatically and if you want to automatically eject the disc. Click NEXT.
The Specify Media screen appears.
-
Specify the media you are using to install: CD or DVD, Network, HTTP, FTP, or Local tape.
-
Decide if you want to perform an initial installation or an upgrade.
The Solaris Web Start program determines if the system can be upgraded. You must have an existing Solaris root (/) file system. If you are upgrading by using the Solaris 9 Installation CD, you must have a 512-Mbyte slice. The Solaris Web Start program detects the necessary conditions and then upgrades the system.
-
Follow the instructions on the screen to install the Solaris software and any additional software on the system.
When the Solaris Web Start program finishes installing the Solaris software, the system reboots automatically or prompts you to reboot manually.
After the installation is finished, installation logs are saved in a file. You can find the installation logs in the following directories:
-
/var/sadm/system/logs
-
/var/sadm/install/logs
-
-
If you are upgrading the Solaris software, you might need to correct some local modifications that were not preserved. For detailed instructions, refer to "To Correct Local Modifications After Upgrading".
- © 2010, Oracle Corporation and/or its affiliates
