|
|
| Sun ONE Application Server 7 J2EE CA Service Provider Implementation Administartor's Guide |
The Sample Connector and its Use in the Sample ApplicationThis module describes the following topics:
- Overview About Using the Comet Sample Application
- Compiling and Assembling the Sample Application
- The Sample Connector
- The Sample Application
Overview About Using the Comet Sample Application
The Comet Sample Connector can be used to illustrate how a J2EE CA compliant connector can be deployed and then operate with a J2EE CA compliant application server. The sample contains the following components:
- Sample J2EE CA Connector
- Sample Application
- Sample Backend
Compiling and Assembling the Sample Application
To easily recompile, assemble and deploy the application, see J2EE Application Assembler in the Studio 4,Enterprise Edition for Java JavaHelp for details on using a build facility to quickly perform these tasks.
For example, to rebuild the entire application from scratch, follow these steps:
- Compile and Assemble Application
Execute "build" under comet/src/
The default target core will be executed to rebuild the WAR, JAR and EAR files.
- Redeploy the Application.
Execute "build deploy" under comet/src/
- Restart the Application Server.
An application server restart will be necessary if you've modified deployment descriptors. For servlet and/or JSP modification, no restart is necessary.
- To clean the sample application project area, execute "build clean".
The Sample Connector
The comet.rar file contains the sample connector files that are archived into a .rar file according to the connector specification architecture. The file is located in [sun7 installation directory]/ sun70/samples/j2ee/connector/assemble/comet.rar.
Description of Sample Connector (comet.rar)
The following describes the files in the Comet Connector Sample:
- META-INF/ra.xml — contains standard deployment information.
- comet.jar— contains JAVA classes and error messages file
- META-INF/sun-ra.xml — contains additional deployment information beyond the standard deployment descriptor.
META-INF/ra.xml
The Comet Sample ra.xml file contains the Host and Port configuration properties.
Their values are set to:
Host: localhost
Port: 8020
These values may be modified before deployment.
The following code displays the sample ra.xml file.
The following is an example of a sample ra.xml file:
<?xml version="1.0" encoding="UTF-8"?>
<!--
Copyright 2002 Sun Microsystems, Inc. All rights reserved.
-->
<!DOCTYPE connector PUBLIC '-//Sun Microsystems, Inc.//DTD Connector 1.0//EN' '
http://java.sun.com/dtd/connector_1_0.dtd'>
<connector>
<display-name>CometResourceAdapter</display-name>
<vendor-name>sun</vendor-name>
<spec-version>1.0</spec-version>
<eis-type>Comet</eis-type>
<version>1.0</version>
<resourceadapter>
<managedconnectionfactory-class>samples.connectors.simple.CometMana gedConnectionFactory</managedconnectionfactory-class>
<connectionfactory-interface>javax.resource.cci.ConnectionFactory</ connectionfactory-interface>
<connectionfactory-impl-class>samples.connectors.simple.CometConnec tionFactory</connectionfactory-impl-class>
<connection-interface>javax.resource.cci.Connection</connection-int erface>
<connection-impl-class>samples.connectors.simple.CometConnection</c onnection-impl-class>
<transaction-support>NoTransaction</transaction-support>
<config-property>
<config-property-name>Host</config-property-name>
<config-property-type>java.lang.String</config-property-type>
<config-property-value>localhost</config-property-value>
</config-property>
<config-property>
<config-property-name>Port</config-property-name>
<config-property-type>java.lang.String</config-property-type>
<config-property-value>8020</config-property-value>
</config-property>
<authentication-mechanism>
<authentication-mechanism-type>BasicPassword</authentication-mechan ism-type>
<credential-interface>javax.resource.security.PasswordCredential</c redential-interface>
</authentication-mechanism>
<reauthentication-support>false</reauthentication-support>
</resourceadapter>
</connector>
comet.jar
The comet.jar file contains the Java interfaces, implementation and utility classes, required by the resource adapter and the error messages file. The filename is samples.connectors.simple.Messages.properties. The messages file may be modified to comply with the internationalization standards (I18N).
META-INF/sun-ra.xml
The sun-ra.xml contains additional deployment information as follows:
Pooling Configuration
The table below lists the pooling configuration attributes. The left most column lists the attribute; the middle column lists its default value; the right most column provides a description of the attribute.
Security Role Map
The security role map attributes are used to perform mapping from the principal received during Servlet/EJB authentication, to credentials accepted by the EIS.
It is possible to map multiple principals to the same backend principal.
JNDI Name
The jndi-name is used as the jndi lookup name for all applications that use this connector. The jndi name should be unique. For example the jndi-name comet should be referred to as java:comp/env/eis/comet in the jndi namespace lookup.
The following code displays the sample sun-ra.xml file.
The following is a code example of the sun-ra.xml file
<?xml version="1.0" encoding="UTF-8"?>
<!DOCTYPE sun-connector PUBLIC "-//Sun Microsystems, Inc.//DTD Sun ONE Application Server 7.0 Connector 1.0//EN" "http://www.sun.com/software/sunone/appserver/dtds/sun-connector_1_ 0-0.dtd">
<sun-connector>
<resource-adapter jndi-name="Comet" max-pool-size="20" steady-pool-size="10" max-wait-time-in-millis="300000" idle-timeout-in-seconds="5000">
</resource-adapter>
<role-map map-id="mainframe">
<map-element>
<principal user-name="keren"></principal>
<backend-principal user-name="pazit" password="tulip" credential="credential">
</backend-principal>
</map-element>
</role-map>
</sun-connector>
Deploying the Sample Connector
You need to deploy the sample connector to the application server so that the sample connector can be used.
To Deploy the Sample Connector
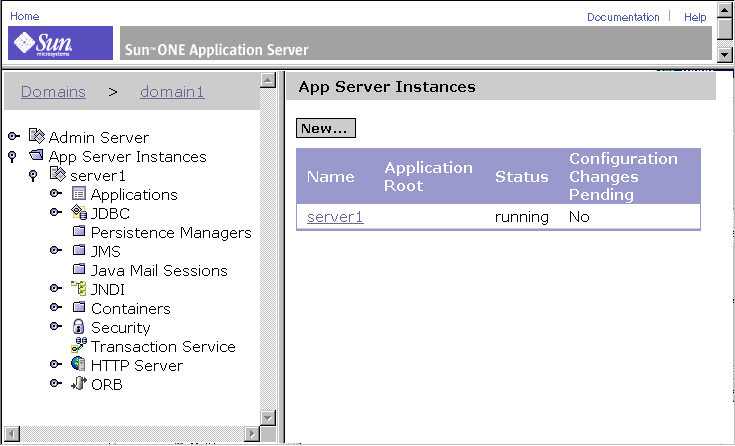
- Start the Admin Server Tool.
Note The default instance name is server1
The following figure is displayed:
- Select Application Server Instances-[instance name]-Applications > Connector Modules.
The following figure is displayed:
.
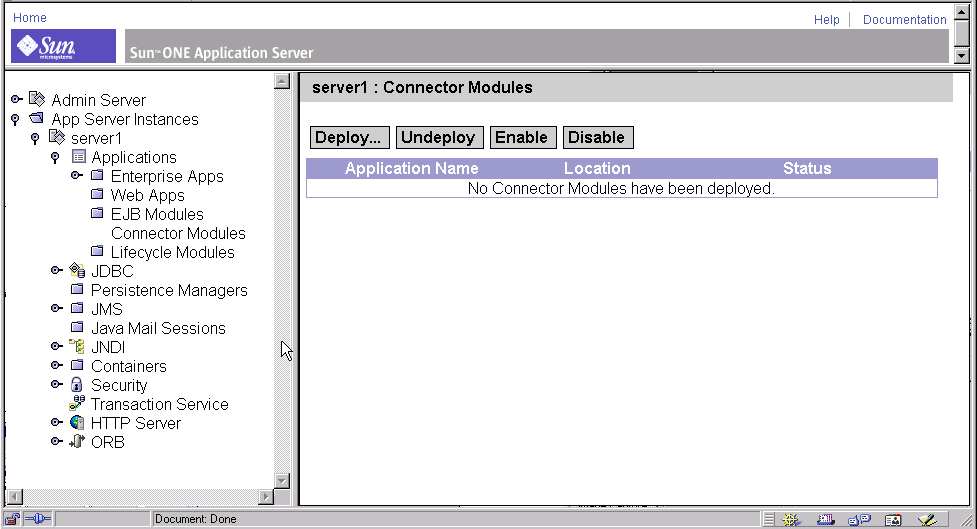
- Click Deploy.
- Browse to the location where the comet.rar file is located.
The comet.rar file contains the sample connector files that are archived into a .rar file according to the connector specification architecture.
The directory is:
[sun7 installation directory]/samples/connectors/simple
- Click OK. The following figure is displayed.
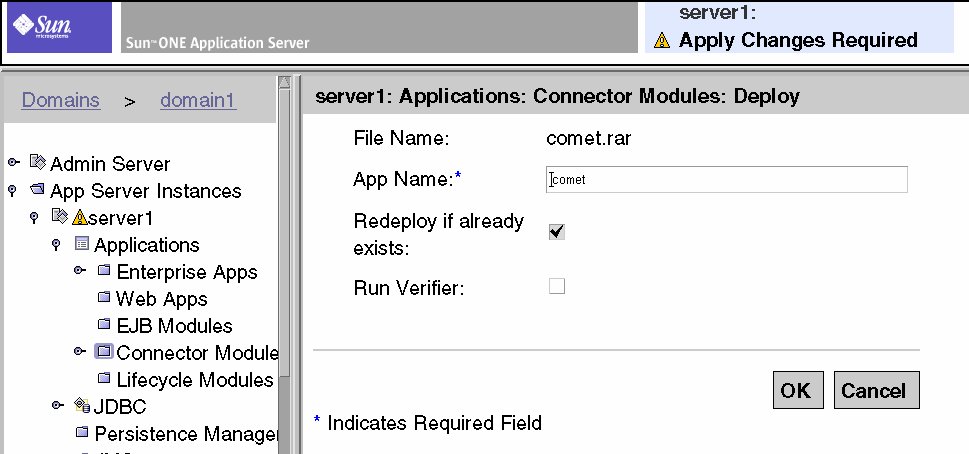
- Insert the App Name: Comet
Comet is the connector JNDI name that is used by the application to find the connector.
- Click OK.
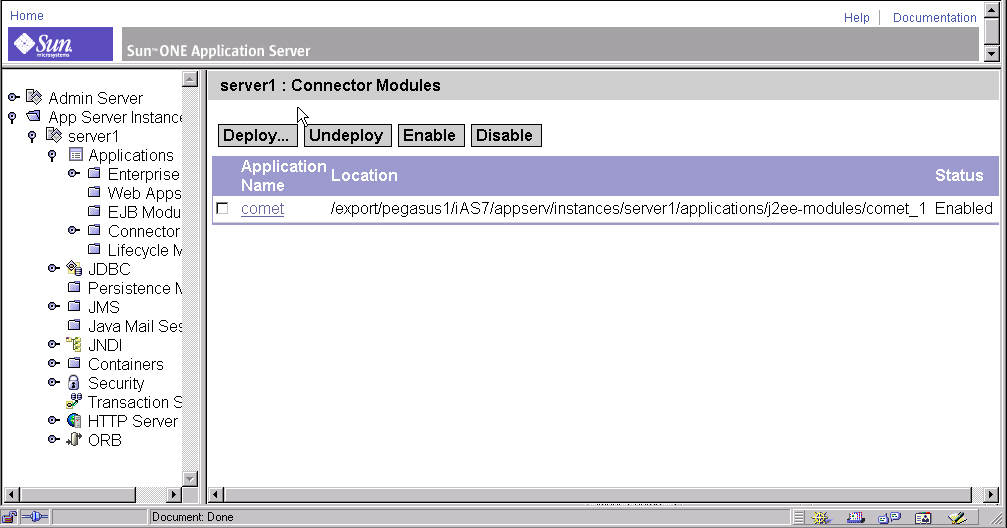
The connector is added to the Connector Modules list. The following figure is displayed.
The Sample Application
The Comet Sample application operates the Comet connector that sends and receives messages from a backend system. You need to deploy the sample application and connector before you can use/operate it.
Directory Structure of the Sample Application
In general, the top-level directory of every sample application contains the following:
- src directory — contains source code for sample application
- docs — directory where all documentation is available
- assemble — contains the .EAR file that needs to be deployed to the application server
Deploying the Sample Application
The following process describes how to deploy the application.
To Deploy the Sample Application
- Load the Admin Server Tool.
- Click the Application Server Instances-[instance name]-Applications > Enterprise Applications. See the following figure.
Note The default instance name is server1
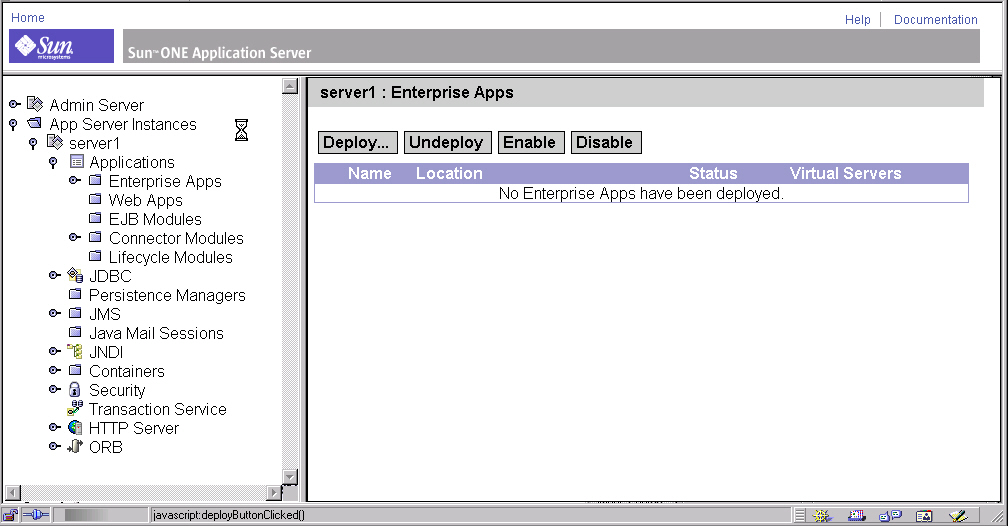
- Click Deploy. See the following figure.
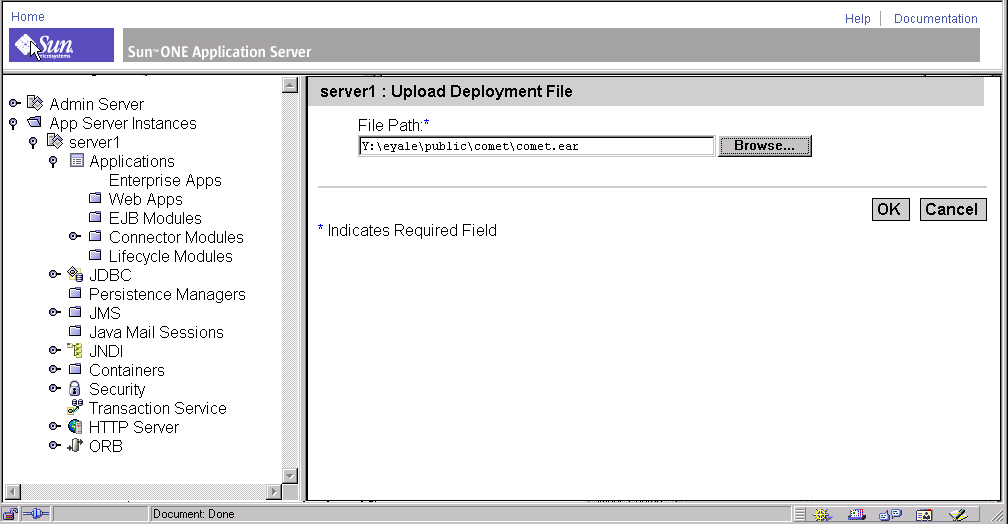
- Browse to the comet.ear file path:
The comet.ear file contains the Sample application files that are archived into .ear file.
- Click OK. The following figure is displayed.
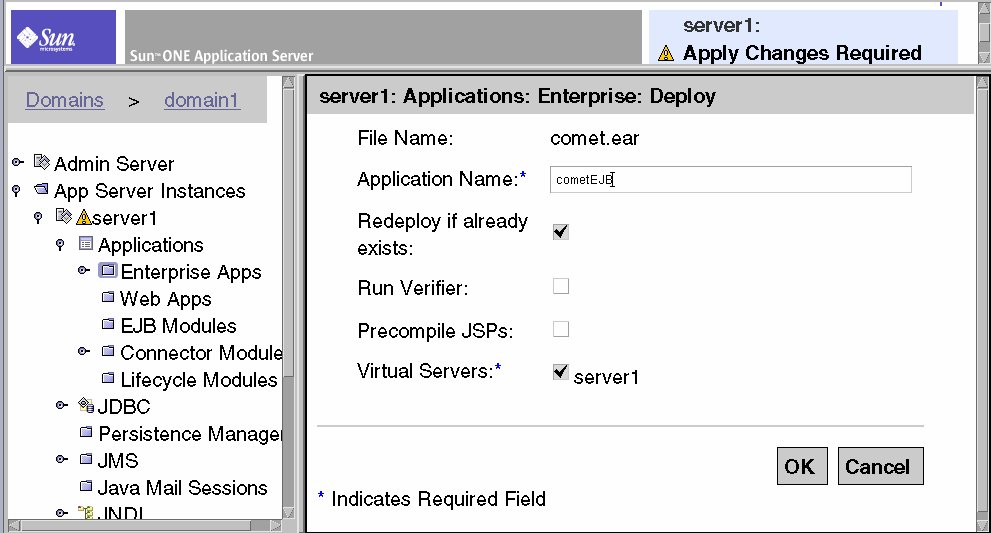
- Enter the Application Name: CometEJB and click OK.
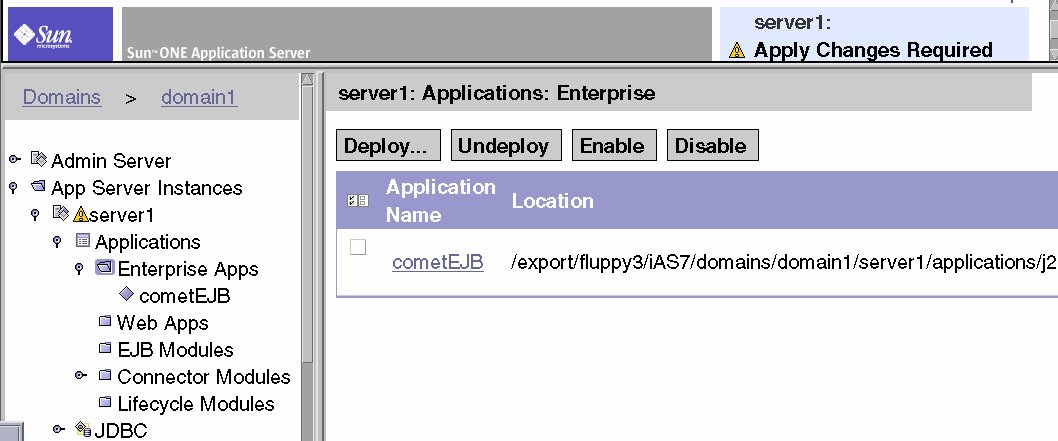
The application is added to the Enterprise Applications list. See the following figure.
How to Operate the Sample
The following process describes how to operate the Comet sample.
To Operate the Sample
- Execute the sample backend.
The backend receives and sends data from sample connector using http port 8020.
- From the [sun7 installation directory]/sun70/samples/j2ee/backend/assemble
run the command: java -classpath ./backend.jar Server 8020
- Load the application server.
From the directory [sun7 installation directory]/sun70/instances/[instance name] run the startserv script.
Note The default instance name is server1.
- Open the browser and insert the sample url:
The following figure is displayed.
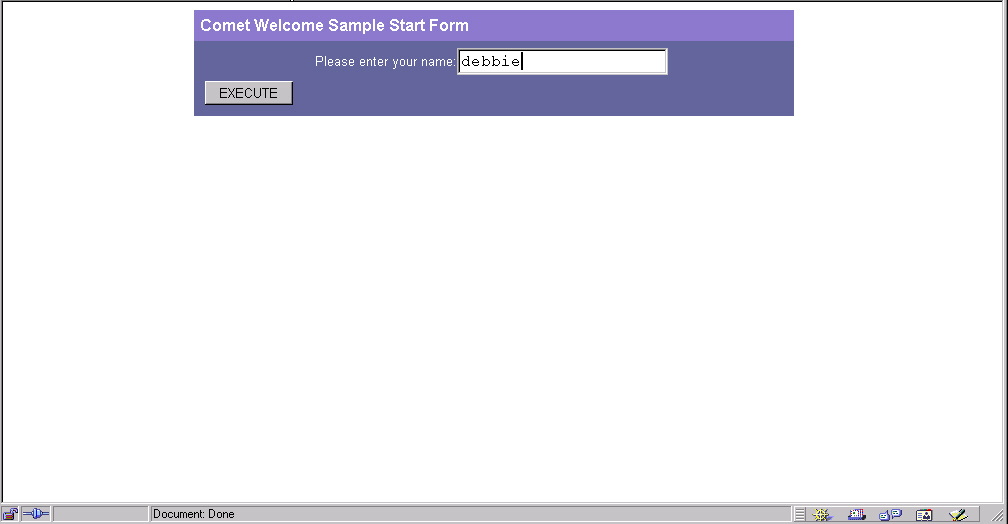
- Enter your name and click EXECUTE.
The Hello message appears.