Using Removable Media
Nautilus supports the following
removable media:
-
Floppy diskette
-
CD-ROM
-
Iomega Zip disk
-
Iomega Jaz disk
-
Digital Video Disc (DVD)
When Nautilus detects a new media, an object
for the media is added to the desktop. You can display the contents of the
media in a Nautilus window. You can drag-and-drop
files and folders between removable media.
You can protect media, and format media. You can also create slices on Zip and Jaz media. A slice is a partition of a disk. An object for each slice appears on the desktop.
Note –
Removable media works on Solaris 9 only.
To Display Media Contents
You can display media contents in any of the following ways:
-
Double-click on the object that represents the media on the desktop.
-
Right-click on the object that represents the media on the desktop, then choose Open.
A Nautilus window displays the contents of
the media. To reload the display, click on the Reload
button.
To Display Media Properties
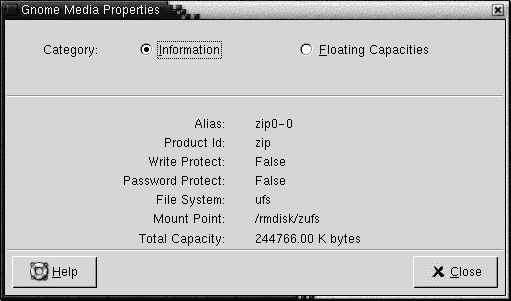
To display the properties of removable media, right-click on the object that represents the media on the desktop, then choose Media Properties. A Media Properties dialog is displayed.

To view general information on the media, select the Information option. The following table describes the information dialog elements on the Media Properties dialog:
|
Dialog Element |
Description |
|---|---|
|
Alias |
Displays the name of the media. |
|
Product Id |
Displays the media type. |
|
Write Protect |
Indicates whether the media is write-protected. |
|
Password Protect |
Indicates whether the media is password-protected. |
|
File System |
Displays the file system in which the media is formatted. |
|
Mount Point |
Displays the file system location where the device is attached. |
|
Total Capacity |
Displays the total amount of storage space on the media. |
To view the amount of used storage space and available storage space on the media, select the Floating Capacities option. The storage space details are displayed on the Media Properties dialog.
To Format Media
To format media is to prepare the media for use with a particular file system. When you format media, you overwrite any existing information on the media. You can format the following media:
-
Floppy diskette
-
Zip disk
-
Jaz disk
To format media, perform the following steps:
-
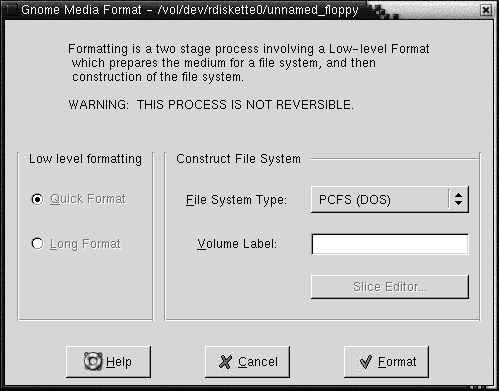
Right-click on the object that represents the media on the desktop, then choose Format. A Media Format dialog is displayed.

-
Select your format options in the Media Format dialog. The following table describes the elements on the dialog:
-
Click Format to format the media.
To Create Slices
You can only modify or delete slices as part of the format process. You can slice the following media:
-
Zip disk
-
Jaz disk
You cannot create more than seven slices on a media. In the slice creation process, an additional backup slice is created. The additional slice always takes the numeric identifier 2. Slice 2 exists for system purposes only. Slice 0 must always use the UFS file system.
To slice a Zip disk or Jaz disk manually perform the following steps:
-
Right-click on the object that represents the media on the desktop, then choose Format.
-
Select your format options in the Media Format dialog. You can only create slices on media if you select UFS in the File System Type drop-down list. For more information on format options, see the previous section.
-
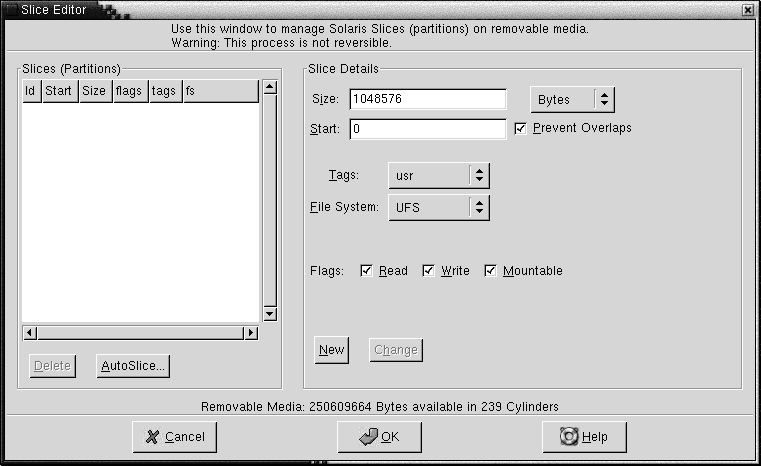
Click on the Slice Editor button. The Slice Editor dialog is displayed.

-
To create slices automatically, click on the AutoSlice button. A dialog is displayed. Type the number of slices that you want on the media. Click OK. Slices are created in approximately equal sizes on the media.
-
To create a slice manually, enter your slice options in the Slice Editor dialog, then click on the New button. The following table describes the elements on the dialog:
-
To edit a slice, enter your slice options in the Slice Editor dialog, then click on the Change button.
-
Click OK to close the Slice Editor dialog.
To Protect Media
You can protect removable media from write operations, or from read operations and write operations. You can protect media with or without a password. You can protect the following types of media:
-
Jaz disk
-
Zip disk
To view the protection of media, right-click on the object that represents the media on the desktop, then choose Media Properties.
Nautilus recognizes the protection on media. Nautilus displays emblems on the desktop objects that represent
the media, to indicate the type of protection that applies. Nautilus also recognizes if a floppy diskette is write-protected.
To protect media from write actions, right-click on the object that represents the media on the desktop. Choose Write Protect.
To protect media from read actions and write actions, perform the following steps:
-
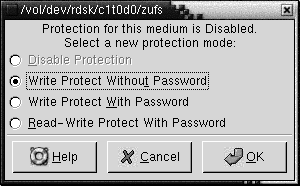
Right-click on the object that represents the media on the desktop, then choose Read Write Protect. A protection dialog is displayed.

-
Select one of the following options from the dialog:
Dialog Element
Description
Disable Protection
Select this option to remove protection from the media. If the media is protected by a password, a Password dialog is displayed. Type the password in the Password field, then click OK.
This option is only available if the media is protected.
Write Protect Without Password
Select this option to protect the media from write operations, without a password.
Write Protect With Password
Select this option to protect the media from write operations, with a password.
Read-Write Protect With Password
Select this option to protect the media from read operations and from write operations, with a password.
-
Click OK.
If you selected the Write Protect With Password option, or the Read-Write Protect With Password option, the Media Password Entry dialog is displayed. Type the password for the media, then type the password again to verify the password. Click OK to set the password.
To change the password for media, you must first disable the protection on the media, then apply the new password protection to the media.
To disable protection of media, right-click on the object that represents the media on the desktop. Choose Disable Protection.
To Eject Media
To eject media, right-click on the media object on the desktop, then choose Eject. If the drive for the media is a motorized drive, the media is ejected from the drive. If the drive for the media is not a motorized drive, a message is displayed when you can manually eject the media.
When you use the Eject command to eject media, the media is automatically unmounted.
- © 2010, Oracle Corporation and/or its affiliates
