Web Administrator Panels
This appendix lists the fields and elements in the Web Administrator graphical user interface. It includes the following sections:
Within each section, the Web Administrator windows are described in order alphabetically, by name.
Use the Add LUN wizard to create a new logical unit number (LUN) for Sun StorageTek 5310 and Sun StorageTek 5320 NAS appliances and gateway systems. You will create the LUN on an existing redundant array of independent disks (RAID) set, or over previously unallocated drives.
Type the required information in each window and click Next to continue. At the end of the wizard, you can review the information you have entered and then either edit it before saving it, or discard it by clicking Cancel.
Click a link below for information about that panel in the Add LUN wizard:
Select Controller Unit and Drives or RAID Set
This panel displays disk drives and redundant array of independent disks (RAID) sets that belong to each controller unit. A RAID set is a set of drives that you logically group together to provide capacity for one or more logical unit numbers (LUNs).
The following table describes the fields and buttons on this panel.
TABLE F-1 Fields and Elements on the Select Controller Unit and Drives or RAID Set Panel
|
Field
|
Description
|
|
Controller Unit
|
From the drop-down menu, select the controller unit that will manage the new LUN.
|
|
RAID Set
|
Select an existing RAID set, or click Use unassigned drives and select at least three drives from the graphical image on the right.
|
|
Drive Icons
|
Graphic representation of the drives in the NAS device. If you are using unassigned drives, select three or more drives for the new LUN. The icons reflect the status of each drive, as follows:
- For Sun StorageTek 5320 controller units and expansion units, see TABLE F-2 for a description of the drive-status icons.
- For Sun StorageTek 5300 controller enclosures and expansion enclosures, see TABLE F-3 for a description of the drive-status icons.
|
Sun StorageTek 5320 Drive Status Indicators
The Sun StorageTek 5320 drive images show the status of each drive, as described in the following table.
TABLE F-2 Sun StorageTek 5320 Drive Status Indicators (Add LUN)
|
Drive
|
Indication
|
 or or 
|
Drive is selected for LUN membership.
Drive is empty (left) or partially allocated to another LUN (right).
|
 or or 
|
Drive is available to be selected for LUN membership.
Drive is empty (left) or partially allocated to another LUN (right).
|
 or or 
|
Drive is not available for LUN membership.
Drive is empty (left) or partially allocated to another LUN (right).
|

|
Drive slot is empty (no drive present).
|
Sun StorageTek 5300 Drive Status Indicators
The Sun StorageTek 5300 drive images show the status of each drive, as described in the following table.
TABLE F-3 Sun StorageTek 5300 Drive Status Indicators (Add LUN)
|
Drive
|
Indication
|
 or or 
|
Drive is selected for LUN membership.
Drive is empty (left) or partially allocated to another LUN (right).
|
 or or 
|
Drive is available to be selected for LUN membership.
Drive is empty (left) or partially allocated to another LUN (right).
|
 or or 
|
Drive is not available for LUN membership.
Drive is empty (left) or partially allocated to another LUN (right).
|

|
Drive slot is empty (no drive present).
|
LUN Properties
Use this panel to specify the properties for the new LUN, as described in the following table.
TABLE F-4 Fields and Elements on the LUN Properties Panel
|
Field
|
Description
|
|
New LUN Assignment
|
|
LUN Size
|
Size of the logical unit number (LUN), from a minimum size of 100 megabytes (MB) to a maximum of the full disk capacity, not to exceed 2 terabytes. If the size is smaller than the actual disk capacity, the remaining capacity is available for new LUNs.
|
|
RAID Level
|
Redundant array of independent disks (RAID) configuration for the LUN (always RAID 5).
|
|
Preferred server ID ownership
|
Applicable with dual-server systems. Unique identifier assigned to this server that will manage the LUN.
|
|
Create New File Volume
|
Select to create the new LUN on the physical drives or RAID set selected, and to create a new file system on that LUN. Specify the name of the new file volume to the right.
|
|
Grow Existing File Volume
|
Select to create a LUN on the physical drives or RAID set selected, and to use that LUN to expand the storage for an existing file system. Select the target file system from the drop-down menu.
|
|
None
|
Select to create the new LUN, but to not create a file system on the LUN.
|
|
Drive Icons
|
Display-only graphic representation of the drives in the NAS device. The drives marked for use by the LUN were configured on the previous panel. The icons reflect the status of each drive, as follows:
- For Sun StorageTek 5320 controller units and expansion units, see TABLE F-2 for a description of the drive-status icons.
- For Sun StorageTek 5300 controller enclosures and expansion enclosures, see TABLE F-3 for a description of the drive-status icons.
|
Confirmation Panel
This panel displays a summary of the settings for the new LUN (logical unit number). Review the settings to make sure they are accurate, then click Finish to create the LUN.
The right side of the panel shows a graphic representation of the drives in the NAS device. The icons reflect the status of each drive, as follows:
- For Sun StorageTek 5320 controller units and expansion units, see TABLE F-2 for a description of the drive-status icons.
- For Sun StorageTek 5300 controller enclosures and expansion enclosures, see TABLE F-3 for a description of the drive-status icons.
Save Configuration
This panel displays the status as the logical unit number (LUN) is created.
Antivirus Configuration Panels
|
This section describes the fields and elements on the Configure Antivirus panel.
Configure Antivirus Panel
This panel enables you to configure antivirus software for the system.
The following table describes the fields and buttons on this panel.
TABLE F-5 Fields and Elements on the Configure Antivirus Panel
|
Field
|
Description
|
|
Enable Antivirus
|
Select to enable antivirus protection for NAS files.
|
|
Scan Engine IP Address
|
Internet Protocol (IP) address of the system that is running the scan engine software you want to use. You can specify up to four scan-engine systems.
|
|
Port #
|
Number of the port, on the scan-engine PC, through which the scan engine listens for scan requests. This is typically port 1344.
|
|
Max Conn
|
Maximum number of concurrent file scan operations (connections) the scan engine can support from the NAS device. This defaults to two, but is typically set higher.
|
|
Delete buttons

|
The panel contains two Delete buttons: one removes a scan engine from operation and one removes a file type from a list of file types. To remove a scan engine, select it and then click the Delete button.
To remove a file type from the list of included file types or the list of excluded file types, select the file type and then click the Delete button.
|
|
Options
|
Options that limit the file size for antivirus scan processing
|
|
|
Specifies the maximum size of file that can be sent to the scan engine for scanning. The file size can be specified as 1 to 1023 KB, MB, or GB.
|
|
|
Specifies the action to be taken if the specified size limit is exceeded.
|
|
Type
|
File types that you want scanned or ignored by the antivirus software. For each file type, specify its value in the List field and then click the Add button.
- File Types Included - Types of files to be scanned by the antivirus software, specified as a 1-to-4 character file extension. If no types are listed, all types are scanned. If any types are listed, only the listed types are scanned. File types are case insensitive, and support * and ? wildcard matching.
Note: If a file type is listed as both included and excluded, it is excluded.
- File Types Excluded - Types of files to be ignored by the antivirus software, specified as a 1-to-4 character file extension. File types are case insensitive, and support * and ? wildcard matching.
|
|
List
|
File types that you want scanned or ignored by the antivirus software. Enter new types in the field at the top of the list, then click the Add button to add that object to the full list, which displays below it.
|
|
Add button

|
Confirms that a new file type is added to the full list.
|
|
Apply
|
Click to save your changes.
|
|
Cancel
|
Click to clear the fields of new entries and close out of the window without saving your entries.
|
Configuration Wizard Panels
|
This section describes the fields and elements on the Configuration Wizard panels:
Configuration Wizard Panel
This is the first screen of the configuration wizard. The configuration wizard is a tool that enables you to configure newly attached systems by entering information in a series of windows.
Type the required information in each window and click Next to continue. At the end of the wizard, you can review the information you have entered and then either edit it before saving it, or discard it by clicking Cancel.
Confirmation Panel
This panel is the last screen of the configuration wizard. It enables you to confirm or discard the information you have entered in the configuration wizard.
Perform one of the following in this window:
- To change the information you have entered before saving it to the system:
a. Click the Back button to return to the window in which you want to make changes.
b. Make your changes and click Next to return to the Confirmation panel.
c. Click Finish.
Your changes are saved to the system.
- To save the configuration information that you have entered in the system, click Finish.
- To close out of the configuration wizard without saving any information, click Cancel.
Select Environment Panel
This panel enables you to configure the network environment for your newly attached system.
The following table describes the fields and buttons on this panel.
TABLE F-6 Fields and Elements on the Select Environment Panel
|
Field
|
Description
|
|
Network
|
|
Configure for Windows Only Networks
|
Select to set a Windows-only network for the system. Select this option if you have no Unix servers on your network.
|
|
Configure for Unix Only Networks
|
Select to set a Unix-only network for the system. Select this option if you have no Windows servers on your network.
|
|
Configure Both Windows and Unix Networks
|
Select to set a mixed Windows and Unix network for the system. Select this option if you have both Windows and Unix servers on your network.
|
This section describes the fields and elements on the File Replicator panels:
Add/Edit Mirror Window
This window enables you to add or edit a mirror, depending on whether you accessed the window by clicking Add or Edit.
The following table describes the fields and buttons in this window.
TABLE F-7 Fields and Elements on the Add/Edit Mirror Window
|
Field
|
Description
|
|
Volume
|
Select the file volume you want to mirror. This field is editable only if the window is in Add mode.
|
|
Mirror Host
|
Name of the server that hosts the mirrored file volume. This field is editable only if the window is in Add mode.
|
|
IP Address
|
Internet Protocol (IP) address to be used for the mirror connection. It is recommended that you use a private network link for mirroring (a link that is not accessible to other devices in the network).
|
|
Alternative IP Address
|
(Optional) IP address that will be used to maintain the mirror in the event that the first IP address becomes unavailable.
|
|
Password
|
Enter the system administrator password of the remote host.
|
|
Mirror Buffer Size (MB)
|
Available only if the window is in Add mode. Size of the mirror buffer, in megabytes (MB). The mirror buffer stores file-system write transactions while they are being transferred to the mirror host server. The size of the mirror buffer depends on a variety of factors, but it must be at least 100 MB and must be at least several gigabytes in size. You might want to create a mirror buffer that is approximately 10% of the size of the mirrored file volume. The size you specify is more a function of the write activity to the source file volume than it is of the file volume size. It is important to note that the file volume free space on the active server will be reduced by the allocation size of the mirror buffer.
|
|
Apply
|
Click to save your changes.
|
|
Cancel
|
Click to clear the fields of new entries and close out of the window without saving your entries.
|
Manage Mirrors Panel
This panel enables you to add, edit, or break mirrors between the active server and the mirror server. After a mirror has been broken on the active server, the mirrored file volume can be promoted, or made available for users, on the mirror server.
Note: If a file volume is compliance enabled, you cannot promote the file volume.
The following table describes the fields and buttons on this panel.
TABLE F-8 Fields and Elements on the Manage Mirrors Panel
|
Field
|
Description
|
|
Volume
|
File volume being mirrored.
|
|
Active Server
|
Name or IP address of the server on which the file volume originally exists.
|
|
Mirror Server
|
Name or IP address of the server that is hosting the mirrored file volume.
|
|
Sync Status
|
Status of the mirror:
- New - A new mirror is being created.
- Creating mirror log - The mirror buffer is being initialized.
- Connecting to host - The active server is connecting to the remote mirror server.
- Creating extent - Disk partitions are being created on the mirror server.
- Ready - The system is ready and waiting for the other system to be ready.
- Down - The network link is down.
- Cracked - The mirror is cracked.
- Syncing Volume - The file volume is being synchronized on the mirror server. There can be no I/O activity to the mirror volume during this process. The volume is taken offline to avoid transient file system errors and inconsistencies.
- In Sync - The mirror is in sync.
- Out of Sync - The mirror is out of sync.
- Error - An error has occurred.
- Mirror is out of space - The mirror has no more space available for storage use.
- Initializing Mirror Buffer percent-complete - The mirror showed signs of cracking and is replicating itself. The mirror file volume will go off-line until the percent-complete reaches 100%.
|
|
New
|
(Active server only) Click to mirror a file volume from the active server to the mirror server.
|
|
Break
|
Click to break the selected mirror. You can break a mirror volume from the active server or mirror server.
|
|
Edit
|
(Active server only) Click to edit the selected mirror.
|
|
Promote
|
(Mirror server only) Click to launch the Promote Volume window from which you can select the file volume located on the mirror server that you want to promote.
Note: You can only promote a mirror that has already been broken on the active server.
|
|
Change Roles
|
Click to enable the active volume to function as the mirror volume and vice versa. This does not change the original configuration on each volume. To change the mirror volume role, select the file volume and click Change Roles.
|
Promote Volume Window
This window enables you to promote a mirrored volume (make it available for users) on the mirror server. When you promote a volume, the original volume is treated as a separate volume. The promoted volume will no longer be associated with the original volume.
The following table describes the fields and buttons on this panel.
TABLE F-9 Fields and Elements on the Promote Volume Window
|
Field
|
Description
|
|
Available Volumes
|
Select the volume to be promoted.
|
|
Rename volume after promoting?
|
Select to rename the volume.
|
|
New Name
|
(Optional) Specify a new name for the volume, if you wish to change the name of the promoted volume. The name must begin with a letter of the alphabet (a-z, A-Z), and can include up to 12 alphanumeric characters (a-z, A-Z, 0-9).
|
|
Apply
|
Click to save your changes.
|
|
Cancel
|
Click to clear the fields of new entries and close out of the window without saving any changes.
|
Set Threshold Alert Panel
This panel enables you to set the threshold alert for all mirrored file volumes. The threshold alert is the percentage of mirror buffer usage at which a warning is sent to designated recipients.
The mirror buffer stores file-system write transactions while they are being transferred to the mirror host server. Increases in write activity to the active server or a damaged network link can cause the transference of write transactions to the mirror server to become backed up in the mirror buffer. If the mirror buffer becomes overrun in this process, the mirror will be cracked and no further transactions will occur between the active server and the mirror server until the mirror is reestablished.
To prevent this situation, the software sends warnings when the mirror buffer is filled to certain threshold percentages.
The following table describes the thresholds and buttons on this panel.
TABLE F-10 Fields and Elements on the Set Threshold Alert Panel
|
Field
|
Description
|

|
Click and drag this icon to move the threshold value along the scale. As you move the icon, the threshold value that is displayed on the right is updated.
|
|
Mirroring Buffer Threshold 1 (%)
|
The percentage of mirror buffer usage that triggers the first alert. The default value is 70%. This means that when the mirror buffer is 70% full, an alert will be issued.
|
|
Mirroring Buffer Threshold 2 (%)
|
The percentage of mirror buffer usage that triggers the second alert. The default value is 80%.
|
|
Mirroring Buffer Threshold 3 (%)
|
The percentage of mirror buffer usage that triggers the third alert. The default value is 90%.
|
|
Alert Reset Interval (Hours)
|
The amount of time the software will wait before re-issuing an alert that it has already issued. For example, if you set the Mirroring Buffer Threshold 1 to be 10% and the Alert Reset Interval to two hours, the first alert will be issued when the mirror buffer is 10% full. The software will not issue the Threshold 1 alert again for the next two hours. If at that time the mirror buffer usage is still beyond the 10% threshold, the Threshold 1 alert will be issued again. The default value is 24 hours.
|
|
Apply
|
Click to save your changes.
|
|
Cancel
|
Click to clear the fields of new entries and close out of the window without saving any changes.
|
View Mirror Statistics Panel
This panel enables you to view network statistics for mirrored file volumes.
The following table describes the thresholds and buttons on this panel.
TABLE F-11 Fields and Elements on the View Mirror Statistics Panel
|
Field
|
Description
|
|
Select Volume
|
|
List of Volumes
|
Select the mirrored file volume for which you would like to see network statistics.
|
|
Status
|
A line of text that describes the status of the mirror.
|
|
Transactions (transactions/second)
|
|
Incoming
|
The incoming transaction statistics for the selected volume, in terms of transactions per second:
- Avg - The average number of transactions per second traveling into the active server.
- Min - The lowest number of transactions per second that has traveled into the active server. The date and time that this number of transactions occurred is shown on the right, if available.
- Max - The largest number of transactions per second that has traveled into the active server. The date and time that this number of transactions occurred is shown on the right, if available.
|
|
Outgoing
|
The outgoing transaction statistics for the selected volume, in terms of transactions per second:
- Avg - The average number of transactions per second traveling from the active server to the mirror server.
- Min - The lowest number of transactions per second that has traveled from the active server to the mirror server. The date and time that this number of transactions occurred is shown on the right, if available.
- Max - The largest number of transactions per second that has traveled from the active server to the mirror server. The date and time that this number of transactions occurred is shown on the right, if available.
|
|
Mirror Buffer (transactions)
|
|
Size
|
The size of the mirror buffer, in terms of transactions (not bytes).
|
|
Free
|
The number of transactions left in the mirror buffer.
|
|
Utilization
|
The percentage of mirror buffer that is currently being used to hold transactions. If this value approaches 100%,check to make sure that all network links are functioning properly. In the event that a network link goes down, the buffer will be filled up and eventually overrun. This means that transactions are travelling into the active system faster than they are travelling into the mirror system, filling up the buffer. When the buffer is overrun, the mirror has been cracked.
After the network link is repaired, the system will begin the mirror update process until the mirrored file volume is back in sync. There can be no I/O activity to the mirror volume during the resync. The volume is taken offline to avoid transient file system errors and inconsistencies.
|
|
Fill Rate
|
The rate at which the mirror buffer is filling, transactions per second. If the fill rate is greater than zero, check that all network links are functioning properly. If a network link is disabled, transactions travel into the active system faster than they are travelling into the mirror system, filling up the buffer. If the buffer is overrun, the mirror has been cracked.
After the network link is repaired, the system begins the mirror update process until the mirrored file volume is back in sync. There can be no I/O activity to the mirror volume during the resync. The volume is taken offline to avoid transient file system errors and inconsistencies.
|
|
Network Statistics
Host
|
|
Hostname
|
The name of the host, recognized by the network, that will be used for the mirror buffer.
|
|
Connected
|
A line of text that indicates how the host being used by the mirror buffer is connected to the network.
|
|
Connected Since
|
The date on which the host that is being used by the mirror buffer was first connected to the network.
|
|
Link
|
|
Status
|
The link status of the mirror buffer on the network.
|
|
Link Quality
|
The quality of the mirror buffer link on the network.
|
|
Errors
|
Any errors associated with the mirror buffer link on the network.
|
|
Timeouts
|
The number of timeouts for the mirror buffer link on the network.
|
|
Drops
|
The number of drops for the mirror buffer link on the network.
|
|
Time of Last Transfer
|
The time and date at which the last transfer of memory buffer over the network occurred.
|
|
Request Control Blocks
|
|
Sent
|
The number of control blocks sent across the network by the memory buffer.
|
|
Total Bytes
|
The total bytes of control blocks sent across the network by the memory buffer.
|
|
Average Size
|
The average size of the memory buffer control blocks.
|
|
Rate
|
The rate, per second, of control blocks sent across the network by the memory buffer.
|
|
Transfer Rate
|
|
Average (kb/s)
|
The average rate, in terms of kilobytes per second, at which transfers occur for the memory buffer.
|
|
Max (kb/s)
|
The largest amount of transfers, in terms of kilobytes per second, that occurred for the memory buffer across the network.
|
|
When Max Occurred
|
The date and time when the maximum transfers occurred.
|
|
Response Time
|
|
Average (msec)
|
The average response time of the memory buffer.
|
|
Max (msec)
|
The highest response time of the memory buffer.
|
|
When Max Occurred
|
The date and time at which the highest response time occurred.
|
File Volume Operations Panels
|
This section describes the fields and elements on the File Volume Operations panels:
Add/Edit Checkpoint Schedule Window
This window enables you to add or edit a checkpoint schedule, depending on whether you accessed the window by clicking Add or Edit.
Note: A large amount of space and system memory is required for checkpoints. The more checkpoints there are on a system, the greater the effect on system performance.
The following table describes the fields and buttons in this window.
TABLE F-12 Fields and Elements on the Add/Edit Checkpoint Schedule Window
|
Field
|
Description
|
|
Volume
|
The volume for which you want to create or edit a checkpoint schedule. If you are editing the checkpoint schedule, you cannot select a different volume from this list.
|
|
Description
|
A line of text that describes the checkpoint. This is a mandatory field.
|
|
Keep Days + Hours
|
The period of time (number of days plus number of hours) for which the checkpoint will be retained after being created. In the Days box type an integer value between 0 and 99. From the Hours drop-down menu, select an integer value between 0 and 23. This is a mandatory field.
|
|
Days
|
The days on which the checkpoint is to be created. To select more than one item in this list, hold down the Ctrl key while clicking additional days.
|
|
AM Hours
|
The morning hours at which the checkpoint is to be created. To select more than one item in this list, hold down the Ctrl key while clicking additional items.
|
|
PM Hours
|
The evening hours at which the checkpoint is to be created. To select more than one item in this list, hold down the Ctrl key while clicking additional items.
|
|
Apply
|
Click to save your changes.
|
|
Cancel
|
Click to clear the fields of new entries and return to the values that were originally displayed in the window.
|
Add/Edit DTQ Setting Window
This window enables you to create or edit a directory in the file system and configure a quota for it.
The following table describes the fields and buttons in this window.
TABLE F-13 Fields and Elements on the Add/Edit DTQ Setting Window
|
Field
|
Description
|
|
DTQ Name
|
Name used to identify this directory tree quota. The name must begin with a letter of the alphabet (a-z, A-Z), and can include up to 30 alphanumeric characters: a-z, A-Z, 0-9 and underscores (_).
|
|
Dir Name
|
Name for the new directory. Directory quotas can only be configured for directories created in this field.
|
|
Path
|
If you get access to this panel from the System Manager window, the Path field is read-only.
If you get access to this panel from the Configure Directory Tree Quotas window, you can populate the Path field and add a directory tree quota.
Click the folders in the box below the Path field to populate the Path field. The box shows the directory tree structure for the file volume on which the directory will reside. To view the contents of a folder in this box, click the symbol next to the folder, or double-click the folder itself. Then select the directory that will contain the new directory for which you are setting this quota.
|
|
Disk Space Limits
|
Disk space limit for the directory, between No Limit and Custom:
- No Limit - Select to enable unlimited disk space usage for the directory.
- Custom - Select to designate a maximum amount of disk space that can be used on the directory. Specify whether the quota is to be determined in megabytes or gigabytes, and type the disk space limit in the Max Value field. Typing a value of 0 (zero) is equivalent to choosing No Limit.
|
|
File Limits
|
Maximum number of files that can be written to this directory, between No Limit and Custom.
- No Limit - Select to enable an unlimited number of files to be written to this directory.
- Custom - Select to designate a maximum number of files that can be written to this directory. Then type the file limit in the Max Value field.
|
|
Apply
|
Click to save your changes.
|
|
Cancel
|
Click to clear the fields of new entries and return to the values that were originally displayed in the window.
|
Add/Edit Quota Setting Window
This window enables you to add or edit user or group quotas, depending on how you accessed the window (by clicking Add or Edit). Quotas designate disk space and file limits for NT and Unix users and groups.
The following table describes the fields and buttons in this window.
TABLE F-14 Fields and Elements on the Add/Edit Quota Setting Window
|
Field
|
Description
|
|
Volume
|
Volume for which you are adding or editing a user or group quota.
|
|
User/Group
|
User or group for which you are adding or editing a quota. If you are adding a quota, specify whether the designated user or group belongs to a Unix or Windows environment by selecting the appropriate Unix or Windows radio button. Then select the user or group name (and Domain name, for NT users/groups) from the corresponding drop-down menus.
|
|
Disk Space Limits
|
Disk space limits for the selected user or group. Select one of the following:
- Default - Select to set the hard and soft limits to be the same as that of the default user or group, as shown in the Configure Directory Tree Quotas Panel.
- No Limit - Select to enable unlimited space usage by the user or group.
- Custom - Select to define soft and hard limits for the user or group. Specify whether the quota will be designated in kilobytes, megabytes, or gigabytes. Then type the maximum amount of disk space usage for the user or group in the Max Value field.
|
|
File Limits
|
Maximum number of files a user or group can write to the selected volume. Select one of the following:
- Default - Select to set the hard and soft limits to be the same as that of the default user or group, as shown in the Configure Directory Tree Quotas Panel.
- No Limit - Select to enable an unlimited number of files to be written by the user or group.
- Custom- Select to define soft and hard limits for the user or group. Specify whether the quota will be designated in kilobytes, megabytes, or gigabytes. Then type the maximum number of files to be written by the user or group in the Max Value field.
|
|
Apply
|
Click to save your changes.
|
|
Cancel
|
Click to clear the fields of new entries and return to the values that were originally displayed in the window.
|
Attach Segments Panel
You can attach segments to the selected primary volume on the Create File Volumes panel or by right-clicking a System Manager object and choosing the appropriate attach segments menu option.
This window or panel enables you to attach segments to an existing primary file volume. Only one segment can be attached at a time.
Note: After a segment is attached, it cannot be detached from a primary file volume. Instead, it becomes a permanent part of that volume.
The following table describes the fields and buttons on this panel.
TABLE F-15 Fields and Elements on the Attach Segments Panel
|
Field
|
Description
|
|
Existing Volumes
|
Click an existing volume to which you want to attach segments.This field is available only from the Create File Volumes panel.
|
|
Available Segments
|
A list of the existing file segments (name, logical unit number (LUN), size (in megabytes) that are available to be attached to primary volumes. If no segments exist, you can create a segment on the Create File Volumes/Segments Panel. For more information, see Creating a File Volume or Segment Using the Create File Volumes Panel.
|
|
Apply
|
Click to save your changes.
|
|
Cancel
|
Click to clear the fields of new entries and return to the values that were originally displayed on the panel.
|
Configure Directory Tree Quotas Panel
This panel enables you to administer quotas for specific directories in the NAS file system. Directory tree quotas determine how much disk space is available for a directory, and how many files can be written to it.
Note: Quotas can only be created and configured for directories that you create from this panel, not for previously existing directories.
The following table describes the fields and buttons on this panel.
TABLE F-16 Fields and Elements on the Configure Directory Tree Quotas Panel
|
Field
|
Description
|
|
Volume
|
Select a primary volume for which you want to configure a directory tree quota.
|
|
DTQ Name
|
The name of the directory tree quota that is applied to a directory on the selected volume.
|
|
Max Size (MB)
|
The largest amount of disk space that can be used in the directory, in megabytes.
|
|
Size Used (%)
|
The percentage of disk space that is currently being used in the directory.
|
|
Max File
|
The largest number of files that can be written to the directory.
|
|
File Used
|
The number of files that are currently written to the directory.
|
|
Path
|
The full path of the directory on the selected volume.
|
|
Refresh
|
Click to update the panel with the latest information about the selected volume.
|
|
New
|
Click to launch the Add DTQ Setting window. From this window, you can create a new directory on the selected volume and can apply a new directory tree quota to that directory.
|
|
Edit
|
Click to launch the Edit DTQ Setting window. From this window, you can edit the selected directory tree quota.
|
|
Delete
|
Click to delete the selected directory tree quota from the table.
|
Configure User and Group Quotas Panel
This panel enables you to administer user and group quotas on volumes for NT and Unix users and groups. User and group quotas determine how much disk space is available to a user or group, and how many files a user or group can write to a volume. Before setting user or group quotas, you must enable quotas for the selected volume on the Edit Volume Properties Panel.
The table displays root, default, and individual quotas for the selected volume. By default, the root user and root group have no hard or soft limits for space or files. The settings for default user and default group are the settings for all users who do not have individual quotas set. For more information about quota limits, see About Configuring User and Group Quotas.
Note: If you want to use user and group quotas, it is recommended that you set up a default disk space or file limit before allowing user or group access. This ensures that users and groups cannot write more data or files than allowed before you configure specific user or group quotas.
The following table describes the fields and buttons on this panel.
TABLE F-17 Fields and Elements on the Configure User and Group Quotas Panel
|
Field
|
Description
|
|
Volume
|
Select an existing volume for which you want to create a user or group quota.
|
|
Users
|
Select to display existing user quotas that are applied to the selected volume.
|
|
Groups
|
Select to display existing group quotas that are applied to the selected volume.
|
|
ID
|
The unique identifier assigned to the user or group quota.
|
|
Name
|
The name of the user or group quota.
|
|
Windows Name
|
The name of the user or group quota as recognized by the Windows environment.
|
|
KB Used
|
The amount of disk space that is currently being used on the volume by the user or group.
|
|
Soft KB Limits
|
A value, equal to or lower than the Hard KB Limits value, that triggers a grace period of seven days. After this grace period is over, the user or group cannot use any more disk space on the volume until the amount of consumed disk space is below the soft limit.
|
|
Hard KB Limits
|
A value, equal to or higher than the Soft KB Limits value, that determines the maximum amount of disk space that can be used on the selected volume by the user or group.
|
|
KB Limits Grace
|
If kilobyes are in excess of soft block quota, the time remaining in the seven-day grace period. Field is blank if the user is within soft quota.
|
|
Files Used
|
The number of files that have been written to the selected volume by the user or group.
|
|
Soft File Limits
|
A value, equal to or lower than the Hard File Limits value, that triggers a grace period of seven days. After this grace period is over, the user or group cannot write any more files to the volume until the number of files already written to the volume is below the soft limit.
|
|
Hard File Limits
|
A value, equal to or higher than the Soft File Limits value, that determines the maximum number of files that can be written to the volume by the user or group.
|
|
File Limits Grace
|
If currently in excess of soft files quota, time remaining in the seven-day grace period. Field is blank if user is within hard quota.
|
|
New
|
Click to launch the New Quota Settings window. From this window, you can create a new user or group quota for the selected volume.
|
|
Edit
|
Click to launch the Edit Quota Settings window. From this window, you can edit the selected user or group quota.
|
Create Checkpoint Window
This window enables you to create a checkpoint.
The following table describes the fields and buttons in this window.
TABLE F-18 Fields and Elements on the Create Checkpoint Window
|
Field
|
Description
|
|
Volume Name
|
Volume for which you want to create or edit a checkpoint (display-only).
|
|
Auto Delete
|
Select to enable the system to assign a name to the checkpoint, and to remove the checkpoint after the time specified in Keep Days and Hours has elapsed. Specify the following:
Keep Days + Hours - The number of days and hours the checkpoint will be retained. In the Days field, type an integer value between 0 and 99. From the Hours drop-down menu, select an integer value between 0 and 23.
|
|
Manual
|
Select to always retain the checkpoint until it is manually deleted.
In the Name field, specify the name by which the checkpoint will be saved. The name can include any alphanumeric characters except a slash (/), and can be up to 23 characters in length.
|
|
Apply
|
Click to save your changes.
|
|
Cancel
|
Click to clear the fields of new entries and return to the values that were originally displayed in the window.
|
Create File Volumes/Segments Panel
You create a volume or segment by using the Create File Volumes panel or by right-clicking on the System Manager from the navigation panel and then choosing the appropriate menu option.
You can create a maximum of 31 file volumes for each logical unit number (LUN). A single file volume is limited to 256 gigabytes. However, you can create a larger volume by attaching segments to a primary volume. You can attach up to 63 segments.
Before creating a file volume of segments, scan for disks that might have been added to the system recently. To perform this scan, do one of the following:
- From the navigation panel, right-click System Manager and choose Scan for New Disks.
- From the navigation panel, choose File Volume Operations > Create File Volumes and select Scan for New Disks.
The following table describes the fields and buttons on this panel.
TABLE F-19 Fields and Elements on the Create File Volumes/Segments Panel
|
Field
|
Description
|
|
LUN
|
Click the logical unit number (LUN) on which you want to create a file volume or segment. A maximum of 31 file volumes can be created for each LUN. Clicking on a LUN updates the graphic image, which shows how the LUN is configured, as described in the Legend section.
|
|
Name
|
The name of the file volume or segment. The name must begin with a letter of the alphabet (a-z, A-Z), and can contain up to 12 alphanumeric characters (a-z, A-Z, 0-9). You cannot name a file volume of the Raw type. The Raw type of volume always has the name "raw`" and is limited to one for each LUN.
|
|
Partition
|
If partitions exist, select the partition on which you want to create a file volume or segment. If they do not exist, you can use the Initialize Partition Table button to create 31 partitions.
|
|
Size
|
Enter the size of the new file volume or segment. From the drop-down menu, select either megabytes (MB) or gigabytes (GB).
|
|
Type
|
This field is available only on the File Volume Operations > Create File Volumes panel. Select the type of partition: Primary, Segment, or Raw.
|
|
Virus Scan Exempt
|
Select to exempt the file volume from antivirus scan.
|
|
Compliance Archiving
|
This field is available only if you are creating a file volume on a primary partition and you are on the File Volume Operations > Create File Volumes panel. Click to enable the compliance and then click either a mandatory or advisory compliance enforcement volume. Mandatory compliance volumes cannot be deleted.
|
|
Legend
|
Identifies the colors used in the graphic image of the selected LUN:
- Orange - Indicates the primary partition on the LUN.
- Light Blue - Indicates the segmented partition on the LUN.
- Green - Indicates the file-volume mirror (applicable when the Sun StorageTek File Replicator option is licensed and enabled).
- Blue - Indicates that the DOS read-only attribute is applied to the LUN. This DOS read-only attribute is only used on the flash disk for the system volume.
- White - Indicates the free space on the LUN.
- Brown - Indicates the raw partition on the LUN, if any.
|
|
Scan for New Disks
|
This button is available only if you are on the File Volume Operations > Create File Volumes panel. Click to find disks that have been added to the system.
|
|
Initialize Partition Table
|
Click to create 31 partitions in the LUN, if they do not already exist.
|
|
Apply
|
Click to save your changes.
|
|
Cancel
|
Click to clear the fields of new entries and return to the values that were originally displayed on the panel.
|
Delete File Volumes Panel
This panel enables you to delete the selected file volume from the configuration.
Note: If the volume is a mandatory compliance volume, it cannot be deleted.
The following table describes the fields and buttons on this panel.
TABLE F-20 Fields and Elements on the Delete File Volumes Panel
|
Field
|
Description
|
|
Name
|
The name of the volume that you want to delete.
|
|
LUN
|
The logical unit number (LUN) on which the volume resides. If the volume is made from multiple partitions that reside in multiple LUN. In this situation, the table lists all LUN/partition pairs.
|
|
Partition #
|
The LUN partition on which the volume resides. The volume might reside on multiple partitions that reside in multiple LUNs. In this situation, the table lists all LUN/partition pairs.
|
|
Size (MB)
|
The size of the volume, in megabytes.
|
|
Apply
|
Click to delete the selected volume.
|
|
Cancel
|
Click to clear the fields of new entries and return to the values that were originally displayed on the panel.
|
Edit Volume Properties Panel
This panel enables you to edit the properties of a volume, such as its name, checkpoint option, and quota option.
Note: Compliance volumes cannot be renamed or have their compliance feature disabled. Raw volumes cannot be renamed or have their properties changed.
The following table describes the fields and buttons on this panel.
TABLE F-21 Fields and Elements on the Edit Volume Properties Panel
|
Field
|
Description
|
|
Volumes
|
Click the volume that you want to edit.
|
|
Volume Name
|
The name of the selected volume.
|
|
New Name
|
New name of the selected volume (applicable if you wish to change the name). The name must begin with a letter of the alphabet (a-z, A-Z), and can contain up to 12 alphanumeric characters (a-z, A-Z, 0-9).
|
|
Virus Scan Exempt
|
Select to exempt the volume from antivirus scan.
|
|
Enable Checkpoints
|
Click to enable checkpoints for the volume. You must select this box if you plan to maintain file-volume checkpoints, or to run NDMP backups. For information about creating checkpoints, see About File-System Checkpoints.
Note: If you clear this checkbox, any checkpoints taken already will be deleted immediately, regardless of their defined retention.
|
|
Checkpoint Configuration
|
Options that configure checkpoint processing:
- Use for Backups - Select if you plan to create NDMP backups for the file volume. NDMP performs backups from a copy of the file volume, thereby avoiding potential problems that can occur when working with live data. The backup checkpoint will be deleted immediately after finishing the backup.
- Automatic - Select to create and remove checkpoints based on a user-configured schedule.
|
|
Enable Quotas
|
Click to enable quotas for the selected volume.
|
|
Enable Attic
|
Click to temporarily save deleted files in the.attic$ directory located at the root of the volume. By default, this option is enabled.
In rare cases on very busy file systems, the .attic$ directory can be filled faster than it processes deletes, leading to a lack of free space and slow performance. In such a case, disable the .attic$ directory by deselecting this option.
|
|
Compliance Archiving
|
These options are available only if you enabled the advisory compliance enforcement version of the compliance archiving software when you created the volume. Options that enable you to configure compliance archiving software:
- Enabled - An indicator of whether the volume has compliance archiving software enabled.
- Mandatory (No Administrator Override) - The volume is mandatory compliant. You cannot configure this volume to be advisory compliant.
- Advisory (Allow Administrator Override) - The volume is advisory compliant. If you want to enable mandatory compliance, you must upgrade to the Mandatory Compliant version of the software, and this is a one-time event.
- Default Retention Period - Click to specify how long WORM (write once, read many) files will be retained on the volume if the client does not provide a retention time. The default retention period for a volume is used if a retention period is not applied to a file before that file is retained. Changing the default retention period for a volume does not affect files that have already been retained.
|
|
Apply
|
Click to save your changes.
|
|
Cancel
|
Click to clear the fields of new entries and return to the values that were originally displayed on the panel.
|
Manage Checkpoints Panel
This panel enables you to view existing checkpoints (one line per checkpoint, per volume), create new checkpoints, and edit and remove existing checkpoints.
The following table describes the fields and buttons on this panel.
TABLE F-22 Fields and Elements on the Manage Checkpoints Panel
|
Field
|
Description
|
|
Volumes
|
List of volumes defined. Click a volume to view a list of checkpoints.
|
|
Status
|
Number of checkpoints for the selected volume, and the kilobtyes used to store the checkpoints. For example, 1/256 checkpoints, 12K bytes used.
|
|
Name
|
Checkpoint name.
|
|
Creation Date
|
Date when the checkpoint was created.
|
|
Expiration Date
|
Date when the checkpoint will be deleted.
|
|
Create
|
Click to launch the Create Checkpoint window. From this window, you can create a new checkpoint for the selected volume.
|
|
Remove
|
Click to delete the selected checkpoint.
|
|
Rename
|
Click to launch the Rename Checkpoint window, used to edit the name of the selected checkpoint.
|
Rename Checkpoint Window
This window enables you to rename the selected checkpoint.
Note: If you rename a scheduled checkpoint, it will be marked as a manual checkpoint, and it will not be deleted automatically by the NAS software.
The following table describes the fields and buttons in this window.
TABLE F-23 Fields and Elements on the Rename Checkpoint Window
|
Field
|
Description
|
|
Volume Name
|
The name of the volume for which this checkpoint was created. You cannot edit this field.
|
|
Old Name
|
The name of the checkpoint. You cannot edit this field.
|
|
New Name
|
The new name that you want to assign to the checkpoint.
The name can include any alphanumeric characters except a slash (/), and can be up to 23 characters in length.
|
|
Apply
|
Click to save your changes.
|
|
Cancel
|
Click to clear the fields of new entries and return to the values that were originally displayed in the window.
|
Schedule Checkpoints Panel
This panel enables you to schedule the creation of checkpoints for existing file volumes. You can also view, edit, and remove existing checkpoint schedules. For each checkpoint, this panel displays the volume name, a description, the scheduled checkpoint times and days and the amount of time for which the checkpoint will be retained.
The following table describes the fields and buttons on this panel.
TABLE F-24 Fields and Elements on the Schedule Checkpoints Panel
|
Field
|
Description
|
|
Volume
|
A list of all volumes on the system. The first one is selected by default.
|
|
Current Checkpoints
|
A table of existing checkpoints
|
|
Description
|
A line of text that identifies the checkpoint for the selected volume.
|
|
Days
|
The days on which the checkpoint runs.
|
|
AM Hours
|
The morning hours at which the checkpoint runs.
|
|
PM Hours
|
The afternoon and evening hours at which the checkpoint runs.
|
|
Keep
|
The period of time (number of days plus number of hours) for which the checkpoint is to be retained.
|
|
New
|
Click to launch the New Checkpoint Schedule window. From this window, you can create a new checkpoint schedule for a volume.
|
|
Remove
|
Click to remove a checkpoint. Select the checkpoint to highlight it and then click the Remove button.
|
|
Edit
|
Click to launch the Edit Checkpoint Schedule window. Select the checkpoint to highlight it and then click the Edit button.
|
|
Schedule
|
A grid of seven days and 24 hours with a checkmark in the cell for each scheduled checkpoint. If you select a checkpoint in the checkpoint table to highlight it, the same checkpoint is highlighted in this grid. If more than one checkpoint is scheduled for the same time, it is displayed in a warning color. This grid is read-only.
|
|
Detailed Schedule
|
A grid of seven days and 24 hours with the retention period of the checkmark in the cell for each scheduled checkpoint. This is the same information as in the Keep field. This grid is read-only.
|
|
Forecast Active
|
A grid of days of the week and number of checkpoints to show the number of active checkpoints on any given time. When you roll the mouse over a portion of the grid, the specific day and number of active checkpoints is displayed. The arrow keys change the display to the previous or next week.
|
New/Edit Checkpoint Schedule Panel
This panel enables you to create a new checkpoint schedule or change an existing checkpoint schedule for file volumes. Use this panel a description of the checkpoint, the times and days for the checkpoint schedule, and the amount of time for which the checkpoint is retained.
The following table describes the fields and buttons on this panel.
TABLE F-25 Fields and Elements on the New/Edit Checkpoints Schedule Panel
|
Field
|
Description
|
|
|
A grid of seven days and 24 hours with a checkmark in the cell for each scheduled checkpoint for the current file volume.
To create a checkpoint: Click on the cell for the day and time for the new checkpoint. The background color of the cell changes and a checkmark symbol is displayed in the cell. If the cell is gray and does not change when you click, an existing checkpoint is overlapping that time.
To edit a checkpoint: Click on the cell that shows the checkmark for the checkpoint you want to change. The information for that checkpoint is displayed in the Description and Keep fields.
|
|
Description
|
Enter a character string to distinguish this checkpoint from existing ones.
|
|
Keep
|
Enter the number of days and select the number of hours for which the checkpoint is to be retained. This information is displayed each time a user rolls the mouse over the checkpoint in the Schedule Checkpoints panel.
|
|
Apply
|
Click to save your changes.
|
|
Cancel
|
Click to clear the fields of new entries and return to the values that were originally displayed in the window.
|
Segment Properties Window
This window enables you to view the properties of a selected segment. You can open this window by right-clicking a segment from System Manager and selecting Properties.
The following table describes the fields and buttons on this panel.
TABLE F-26 Fields and Elements on the Attach Segments Panel
|
Field
|
Description
|
|
Name
|
The name of the segment.
|
|
LUN
|
The logical unit number (LUN) on which the segment exists.
|
|
Size
|
The size of the segment.
|
|
Partition
|
The partition associated with the selected segment.
|
|
Cancel
|
Click to clear the fields of new entries and return to the values that were originally displayed on the panel.
|
View Volume Partitions Panel
This panel enables you to view the logical unit numbers (LUNs) available to the system and the volumes that are associated with the LUNs.
The following table describes the fields and buttons on this panel.
TABLE F-27 Fields and Elements on the View Volume Partitions Panel
|
Field
|
Description
|
|
Volumes
|
Click the volume to view its location on the existing LUNs.
|
|
Legend
|
Indicators in the graphical depiction of the LUN configuration:
- Orange - Indicates the primary partition on the LUN.
- Light Blue - Indicates the segmented partition on the LUN.
- Green - Indicates the file-volume mirror (applicable only with the Sun StorageTek File Replicator option is licensed and enabled).
- Blue - Indicates the DOS read-only attribute is applied to the LUN. This DOS read-only attribute is only used on the flash disk for the system volume.
- White - Indicates the free space on the LUN.
- Brown - Indicates the raw partition on the LUN, if any.
The selected volume on a LUN is indicated by diagonal lines (///).
|
|
LUN
|
The name of the LUN on which the selected volume resides.
|
|
Partition #
|
The LUN partition on which the volume resides.
|
|
Use (%)
|
The percentage of space used on the volume.
|
|
Type
|
The type of volume, such as primary, segmented, or raw.
|
|
Free (MB)
|
The amount of space available for storage use in megabytes.
|
|
Capacity (MB)
|
The total amount of space for storage use in megabytes.
|
This section describes the fields and elements on the High Availability panels:
Enable Failover Panel
Note: This panel is available only for cluster configurations (appliances and gateway systems).
Use this panel to enable head failover for your cluster appliance or gateway system. A failover occurs when one of the servers (heads) in a dual-server system fails. The functioning server takes over or manages the Internet Protocol (IP) addresses and logical unit numbers (LUNs) formerly managed by the failed server. When the failed server is manually brought back online, original ownership or control of the said LUNs and IP address is restored in a process called failback or recovery. For more information about failover, see About Enabling Failover.
Note: When a failed server is brought back online, you must initiate the recovery process from the Recover panel. For more information, see Initiating Recovery.
The following table describes the fields and buttons on this panel.
TABLE F-28 Fields and Elements on the Enable Failover Panel
|
Field
|
Description
|
|
Automatic Failover
|
Click to have the system initiate failover in the event of a server failure.
|
|
Head Status
|
An indicator of the health of the server.
|
|
Link Failover
|
|
Enable Link Failover
|
Click to enable link failover, which ensures that head failover occurs when any network interface that is assigned a "primary" role fails. This type of failure is referred to as a "link down" condition. If the partner's network link is down, the server that wants to induce the failover must wait the specified amount of time after the partner server reestablishes its network link.
Note: The system must be rebooted after enabling or disabling link failover for the change to take effect.
|
|
Down Timeout
|
The number of seconds a server waits before inducing head failover., in the event that the network link on one server becomes unreliable and the network link on its partner server is healthy.
|
|
Restore Timeout
|
The number of seconds the partner server's primary link must be up in order for the failover to take place. The Restore Timeout is used only when a link down induced failover is initiated but aborted due to the partner server's primary link being down.
|
|
Partner Configuration
|
|
Name
|
The name of the partner server.
|
|
Gateway
|
The gateway IP address of the partner server.
|
|
Private IP
|
The IP address reserved for the heartbeat connection between the two servers. The IP address cannot be changed.
|
|
Apply
|
Click to save your changes.
|
|
Cancel
|
Click to clear the fields of new entries and return to the values that were originally displayed in the window.
|
Recover Panel
Note: This panel is available only for cluster configurations (appliances and gateway systems).
This panel enables you to initiate recovery after a failed server (head) is brought back online. You must verify that the failed server is operable and online before proceeding to the recovery process.
You can also transfer LUN ownership to another server using the Recover panel. For example, if you create a LUN on head 1, you can select the LUN from the (NEW) Restore RAID Configuration list, click >, and click Apply to transfer ownership to head 2. You can only transfer LUN ownership to the other server in the cluster, you cannot take ownership of the other server's LUNs.
The following table describes the fields and buttons on this panel.
TABLE F-29 Fields and Elements on the Recover Panel
|
Field
|
Description
|
|
Current RAID Configuration
|
|
Head 1
|
The name of the server, designated as Head 1, that you want to recover.
|
|
Head 2
|
The name of the server, designated as Head 2, that you want to recover.
|
|
(NEW) Restore RAID Configuration
|
|
Controller 0/Head 1
|
Depending on your configuration, this is either the logical unit number (LUN) mapping for controller 0 or the LUN mapping for Head 1.
|
|
Controller 1/Head 2
|
Depending on your configuration, this is either the LUN mapping for controller 1 or the LUN mapping for Head 2.
|
|
Cancel
|
Click to clear the fields of new entries and return to the values that were originally displayed on the panel.
|
|
Apply
|
Click to save your changes.
|
|
Recover
|
Click to Recover the selected server.
|
Set LUN Path Panel
This panel enables you to define, edit, and restore, the logical unit number (LUN) paths for a file volume.
A LUN path is a designation of the hardware route, from server to redundant array of independent disks (RAID) controller, used to access a file volume in a LUN. Every file volume has two LUN paths. The alternate path is used when the primary path fails.
The following table describes the fields and buttons on this panel.
TABLE F-30 Fields and Elements on the Set LUN Path Panel
|
Field
|
Description
|
|
LUN
|
The LUN on which file volumes are located.
|
|
Volumes
|
The specific file volumes on the LUN.
|
|
Active Path (HBA/SID)
|
The currently active hardware path over which the LUN communicates with the system. Hardware paths are identified by the host bus adapter (HBA) number, starting with 1, and the Small Computer Systems Interface (SCSI) identifier (ID) number of the first drive in the LUN, which is the controller. For example, 1/1 designates HBA 1 and SCSI controller target 1.
|
|
Primary Path (HBA/SID)
|
The preferred hardware path over which the LUN communicates with the system. The primary path is also the path to which a LUN path can be "restored." If a primary path is not specified, the system uses the first available path.
|
|
Alternate Path (HBA/SID)
|
The alternate hardware path over which the LUN can communicate with the system if the primary path fails.
|
|
Edit
|
Click to launch the Primary Path window. From this window, you can edit the primary path for the selected volumes.
|
|
Restore
|
Click to restore the active path to the primary path for the selected volumes.
|
|
Auto-assign LUN Paths
|
Click to have the software assign LUN paths to the selected volumes.
|
Set Primary Path Window
This window enables you to define the primary path, which is the hardware route that the software uses to send information to the shared logical unit number (LUN). The secondary path is used when the primary path fails.
The following table describes the fields and buttons on this panel.
TABLE F-31 Fields and Elements on the Set Primary Path Window
|
Field
|
Description
|
|
LUN Name
|
The read-only name of the LUN for which you are setting the primary path.
|
|
Primary Path
|
The host bus adapter (HBA) and Small Computer Systems Interface (SCSI) identifier (ID) that define the path. Select the path you want from the drop-down menu.
|
|
Volumes
|
The read-only name of the volume on the selected LUN.
|
|
Text box
|
A line of text that indicates the HBAs, SIDs, and the status of the available paths.
|
|
Apply
|
Click to save your changes.
|
|
Cancel
|
Click to clear the fields of any entries and close out of the window without saving the changes.
|
iSCSI Configuration Panels
|
This section describes the fields and elements on the iSCSI Configuration panels:
Add/Edit iSCSI Access Window
This window enables you to create or edit an Internet Small Computer Systems Interface (iSCSI) access list, depending on whether you accessed the window by clicking Add or Edit. An iSCSI access list defines a set of iSCSI initiators that can access one or more iSCSI logical unit numbers (LUNs) on the NAS device. When you define each iSCSI LUN, you will associate the appropriate access list with that LUN.
The following table describes the fields and buttons in this window.
TABLE F-32 Fields and Elements on the Add/Edit iSCSI Access Window
|
Field
|
Description
|
|
Name
|
The name of the access list, specified as any one or more characters.
|
|
CHAP Initiator Name
|
The full name of the Challenge Handshake Authentication Protocol (CHAP) initiator that is configured by the iSCSI initiator software.
The default CHAP initiator name for a Windows iSCSI client is:
iqn.1991-05.com.microsoft:iscsi-winxp
If you leave this field blank, CHAP authorization will not be required. Refer to the iSCSI initiator documentation for more information.
|
|
CHAP Initiator Password
|
The CHAP initiator password (minimum of 12 characters).
|
|
Initiator IQN Name
|
The initiator iSCSI Qualified Name (IQN) name, specified as any one or more characters. If you leave this field blank, any initiator can access the target.
|

|
Click to add the Initiator IQN name to the list of initiators that can access the target LUN.
|
|
Initiator IQN List
|
The list of initiators that can access the target LUN.
|

|
This button is available only if the target LUN that is associated with the selected initiator is inactive. Click to remove the selected initiator from the list. The initiator then no longer has access to the LUN.
|
|
Apply
|
Click to save your changes.
|
|
Cancel
|
Click to clear the fields of new entries and return to the values that were originally displayed in the window.
|
Add/Edit iSCSI LUN Window
This window enables you to add or edit an Internet Small Computer Systems Interface (iSCSI) logical unit number (LUN), depending on whether you accessed the window by clicking Add or Edit. An iSCSI LUN can be accessed by iSCSI initiators.
Before adding or editing an iSCSI LUN, ensure that you have created an access list for the LUN. For more information, see Creating an iSCSI Access List.
The following table describes the fields and buttons in this window.
TABLE F-33 Fields and Elements on the Add/Edit iSCSI LUN Window
|
Field
|
Description
|
|
Name
|
The name of the iSCSI LUN. The name can include one or more alphanumeric characters (a-z, A-Z, 0-9), hyphens (-) and periods (.), and colons (:).
The target name you specify will be prefixed with the full iSCSI Qualified Name (IQN) name according to the following naming convention:
iqn.1986-03.com.sun:01:mac-address.timestamp.user-specified-name
For example, if you type the name lun1, the full name of the iSCSI target LUN is:
iqn.1986-03.com.sun:01:mac-address.timestamp.lun1
Note: The timestamp is a hexadecimal number representing the number of seconds after 1/1/1970.
|
|
Alias
|
(Optional) A brief description about the target LUN.
|
|
Volume
|
The name of the NAS file volume where the iSCSI LUN will be created.
|
|
Capacity
|
The maximum size for the LUN, in bytes, kilobytes, megabytes, or gigabytes (maximum of 2 terabytes).
|
|
Thin Provisioned
|
Select the Yes checkbox to create a thin provisioned LUN. A thin provisioned LUN sets the file size attribute to the specified capacity, but the disk blocks are not allocated until data is written to the disk.
If you create a non-thin provisioned LUN, disk blocks will be allocated based on the capacity of the LUN you are creating. When creating non-thin provisioned iSCSI LUNs, allow approximately 10% extra space on the volume for file-system metadata. For example, a 100 gigabyte iSCSI LUN must reside on a 110 gigabyte volume to allow non-thin provisioned LUN creation.
For more information about deciding to use thin provisioned or non-thin provisioned LUNs, see About SCSI Thin-Provisioned LUNs.
|
|
Access
|
Select the existing access list for this LUN from the drop-down list.
|
|
Apply
|
Click to save your changes.
|
|
Cancel
|
Click to clear the fields of new entries and return to the values that were originally displayed in the window.
|
Configure Access List Panel
This panel displays the access lists defined for the NAS OS. An Internet Small Computer Systems Interface (iSCSI) access list defines a set of iSCSI initiators that can access one or more iSCSI logical unit numbers (LUNs) on the NAS device.
From this panel, you can add, remove, or edit an access lists.
The following table describes the fields and buttons on this panel.
TABLE F-34 Fields and Elements on the Configure Access List Panel
|
Field
|
Description
|
|
Name
|
Name of the access list.
|
|
CHAP Initiator Name
|
Name of the Challenge Handshake Authentication Protocol (CHAP) initiator that is configured by the iSCSI initiator software.
|
|
Add
|
Click to launch the Add iSCSI Access window. From this window, you can add a new access list.
|
|
Remove
|
Click to remove the selected access list from the Configure Access List table.
|
|
Edit
|
Click to launch the Edit iSCSI Access window. From this window, you can edit the selected access list.
|
Configure iSCSI LUN Panel
This panel displays the Internet Small Computer Systems Interface (iSCSI) logical unit numbers (LUNs) defined to the NAS OS.
From this panel, you can add, remove, or edit iSCSI LUN definitions. You can also promote an iSCSI LUN (applicable after promoting the corresponding file volume).
The following table describes the fields and buttons on this panel.
TABLE F-35 Fields and Elements on the Configure iSCSI LUN Panel
|
Field
|
Description
|
|
Name
|
The name of the iSCSI LUN.
|
|
Alias
|
A brief description about the target LUN.
|
|
Volume
|
The name of the volume on which the iSCSI LUN is to be created.
|
|
Promote iSCSI LUN
|
Click to launch the Promote iSCSI LUN window.
|
|
New
|
Click to launch the Add iSCSI LUN window. From this window, you can add a new iSCSI LUN.
|
|
Remove
|
Click to remove the selected iSCSI LUN from the Configure Access List table.
|
|
Edit
|
Click to launch the Edit iSCSI LUN window. From this window, you can edit the selected iSCSI LUN.
|
Configure iSNS Server Panel
Use this panel to enable use of an Internet Storage Name Service (iSNS) server for iSCSI target discovery. The NAS iSNS client inter-operates with any standard iSNS server, such as Microsoft iSNS Server 3.0.
The following table describes the fields and buttons on this panel.
TABLE F-36 Fields and Elements on the Configure iSNS Server Panel
|
Field
|
Description
|
|
iSNS Server
|
The Internet Protocol (IP) address or Domain Name Service (DNS) name of the iSNS server.
|
|
Apply
|
Click to save your changes.
|
|
Cancel
|
Click to clear the fields of new entries and return to the values that were originally displayed on the panel.
|
Promote iSCSI LUN Window
After promoting a file volume that contains iSCSI logical unit numbers (LUNs), you must promote each iSCSI LUN on that file volume. This panel enables you to promote an iSCSI LUN.
The following table describes the fields and buttons on this panel.
TABLE F-37 Fields and Elements on the Promote iSCSI LUN Panel
|
Field
|
Description
|
|
Name
|
iSCSI target IQN identifier for the LUN to be promoted (as displayed on the Configure iSCSI LUN panel).
|
|
Alias
|
A brief description about the LUN. This field is filled in based on the original iSCSI LUN definition, but you can change it, if desired.
|
|
Volume
|
The name of the file volume name of the file volume where the promoted LUN resides (that is, the name of the file volume as it was just promoted).
|
|
Access
|
The name of the access list
|
|
Apply
|
Click to save your changes.
|
|
Cancel
|
Click to clear the fields of new entries and return to the values that were originally displayed in the window.
|
Monitoring and Notification Panels
|
This section describes the fields and elements on the Monitoring and Notification panels:
Configure SNMP Panel
This panel enables you to configure Simple Network Management Protocol (SNMP) monitoring. SNMP is an industry standard for coordinating the operation of diverse network devices.
The following table describes the fields and buttons on this panel.
TABLE F-38 Fields and Elements on the Configure SNMP Panel
|
Field
|
Description
|
|
Enable SNMP
|
Click to enable SNMP monitoring for the system.
|
|
Server SNMP Community Name
|
The name of the SNMP community to which the system belongs.
|
|
Contact Info
|
The name of the person who is responsible for this system.
|
|
System Location
|
The network location of the system. This location can be physical or logical.
|
|
Destination IP Address
|
The Transmission Control Protocol/Internet Protocol (TCP/IP) address for the server that is designated as an SNMP trap destination, in the event of system errors.
|
|
Port #
|
The port to which the system will send traps. The default value is port 162.
|
|
Version
|
The SNMP protocol version (either 1 or 2).
|
|
Community
|
The community string for the trap destination.
|
|
Enable
|
Click to enable this target address to become a trap destination.
|
|
Remove
|
To remove a trap destination, select it and then click the Remove button.
|
|
Apply
|
Click to save your changes.
|
|
Cancel
|
Click to clear the fields of new entries and return to the values that were originally displayed on the panel.
|
Configure System Auditing Panel
This panel enables you to configure system auditing. You can set up system auditing so that records of particular system events are stored in separate audit log files.
Note: There is no Web Administrator graphical user interface support for reading or removal of audit logs. To read audit log files, you must use the praudit command, which converts the binary information in the audit logs into readable text.
The following table describes the fields and buttons on this panel.
TABLE F-39 Fields and Elements on the Configure System Auditing Panel
|
Field
|
Description
|
|
Enable System Auditing
|
Select to enable system auditing.
|
|
Log File Configuration
|
|
Store Log Files to Volume
|
The volume on which system audit log files are stored.
Note: Selectable volumes are non-system volumes. You must create special purpose audit volumes. (For instructions, see Creating a File Volume or Segment Using the Create File Volumes Panel.)
|
|
Max Log File Size (1 to 1024)
|
The largest size to which a system audit log file can grow, from 1 to 1024 megabytes.
|
|
Apply
|
Click to save your changes.
|
|
Cancel
|
Click to clear the fields of new entries and return to the values that were originally displayed on the panel.
|
Diagnostic Email Window
This window lets you send email notifications to recipients.
The following table describes the fields and buttons on this panel.
TABLE F-40 Fields and Elements on the Diagnostic Email Window
|
Field
|
Description
|
|
Problem Description
|
Type a description of the problem in this text field. This is a mandatory entry and is limited to 256 characters.
|
|
Recipient Information
|
|
Email Address
|
Type the email address of the recipient.
|
|
Notification
|
Click to have notifications sent to the email recipient.
|
|
Diagnostics
|
Click to have diagnostic information sent to the email recipient.
|
|
List
|

|
Click to add the new recipient to the list of recipients.
|

|
Click to remove the selected recipient from the list of recipients.
|
|
Recipient
|
The email address of the recipient.
|
|
Notification
|
Click to have notifications sent to the email recipient.
|
|
Diagnostics
|
Click to have diagnostic information sent to the email recipient.
|
|
Send
|
Click to send the email notification.
|
|
Cancel
|
Click to clear the fields of new entries and return to the values that were originally displayed on the panel.
|
|
Save Recipients List
|
Click to save the new recipient to the list.
|
Display System Log Panel
This panel enables you to selectively view, print, and save system log messages. The system software logs and displays the following types of events:
- Emergency
- Alert
- Critical
- Error
- Warning
- Notice
- Information
- Debug
The following table describes the fields and buttons on this panel.
TABLE F-41 Fields and Elements on the Display System Log Panel
|
Field
|
Description
|
|
File
|
The name of the log file that you are viewing. This field is blank when you are viewing the system log file.
|
|
Date
|
The date upon which the event occurred.
|
|
Time
|
The time, in military format, at which the event occurred.
|
|
Description
|
A line of text that describes the event.
|
|
Event Types
|
Click the types of events that you want displayed on this panel. To update the log file so that it displays only the selected event types, click Refresh.
|
|
Print
|
Click to print the log.
|
|
Save As
|
Click to save the log as an HTML file on your local system.
|
|
Silence Alarm
|
(Sun StorageTek 5210 NAS appliances only.) Click to silence the redundant array of independent disks (RAID) alarm.
|
Set Up Email Notification Panel
This panel enables you to set the name of the Simple Mail Transport Protocol (SMTP) server and designate email notification recipients. In the event of a system error, the system will send a detailed email message to the designated recipients through the SMTP server.
Recipient email addresses are displayed in the List box. When an error is detected, the system logs the error in the system log file and sends email notifications and warnings to the listed recipients.
Note: If you are accessing this panel through the configuration wizard, click Next to save your changes and proceed to the next panel.
The following table describes the fields and buttons on this panel.
TABLE F-42 Fields and Elements on the Set Up Email Notification Panel
|
Field
|
Description
|
|
SMTP Server Name
|
The name of the SMTP server.
|
|
Mail From
|
The email address of the sender.
|
|
Email Address
|
The email address of the recipient.
|
|
Notification
|
Click to have notifications sent to the email recipient.
|
|
Diagnostics
|
Click to have diagnostic information sent to the email recipient.
|
|
List
|

|
Click to add the new recipient to the list of recipients.
|

|
Click to remove the selected recipient from the list of recipients.
|
|
Recipient
|
The email address of the recipient.
|
|
Notification
|
Click to have notifications sent to the email recipient.
|
|
Diagnostics
|
Click to have diagnostic information sent to the email recipient.
|
|
Notification Level
|
|
Errors
|
Select to notify recipients of system errors but not system warnings.
|
|
Errors and Warnings
|
Select to notify recipients of all system warnings and errors.
|
|
None
|
Select to disable email notifications. The appliance or gateway system will not send any notifications.
|
|
Apply
|
Click to save your changes.
|
|
Cancel
|
Click to clear the fields of new entries and return to the values that were originally displayed on the panel.
|
Set Up Logging Panel
This panel enables you to set up logging for the system. You can enable remote logging if your system includes a syslogd Unix server.
Before you can enable remote logging, the following conditions must be met:
- The system must be able to send the system log to this remote syslogd server. (See Setting Up Logging.)
- DNS settings must be configured.
The following table describes the fields and buttons on this panel.
TABLE F-43 Fields and Elements on the Set Up Logging Panel
|
Field
|
Description
|
|
Enable Remote Syslogd
|
Click to enable the system message logger and its designated server.
|
|
Server
|
The name of the server to which the system log will be sent.
|
|
Facility
|
From the drop-down menu, select the facility code to be assigned to all NAS messages that are sent to the log.
|
|
Facility
|
Select the types of system events for which to generate log messages. Each type of event represents a different priority, or severity level:
- Emergency - Specifies emergency messages. These messages are not distributed to all users. Emergency priority messages can be logged into a separate file for reviewing.
- Alert - Specifies important messages that require immediate attention. These messages are distributed to all users.
- Critical - Specifies critical messages not classified as errors, such as hardware problems. Crit and higher-priority messages are sent to the system console.
- Error - Specifies any messages that represent error conditions, such as an unsuccessful disk write.
- Warning - Specifies any messages for abnormal, but recoverable, conditions.
- Notice - Specifies important informational messages. Messages without a priority designation are mapped into this priority message.
- Info - Specifies informational messages. These messages are useful in analyzing the system.
- Debug - Specifies debugging messages.
|
|
Enable Local Log
|
Click to enable local system logging, which enables the system to save log messages locally.
|
|
Local File
|
The path and file name of the system log. The log cannot be written to the /cvol or /dvol directory.
|
|
Archives
|
The maximum number of archive files, from 1 to 9.
|
|
Size
|
The maximum allowable size, in kilobytes, for each archive file. The allowable range is from 100 through 999,999 kilobytes.
|
|
Apply
|
Click to save your changes.
|
|
Cancel
|
Click to clear the fields of new entries and return to the values that were originally displayed on the panel.
|
Set Up UPS Monitoring Panel
This panel enables you to set up uninterruptible power supply (UPS) monitoring (not UPS management). For more information about the UPS events that can be monitored, see About UPS Monitoring.
Note: Before you can enable UPS monitoring on this panel, the UPS monitoring service must be connected to the system. Otherwise, the UPS monitoring system will notify you that there is a UPS failure.
The following table describes the fields and buttons on this panel.
TABLE F-44 Fields and Elements on the Set Up UPS Monitoring Panel
|
Field
|
Description
|
|
Enable UPS Monitoring
|
Click to enable UPS monitoring for the system. In order to work properly, the UPS monitoring service must be connected to the system.
|
|
Apply
|
Click to save your changes.
|
|
Cancel
|
Click to clear the fields of new entries and return to the values that were originally displayed on the panel.
|
View Fan Status Panel
This panel enables you to view the status and revolutions per minute (RPMs) of each fan assembly in the appliance or gateway server.
The following table describes the fields and buttons on this panel.
TABLE F-45 Fields and Elements on the View Fan Status Panel
|
Field
|
Description
|
|
Fan
|
The fan for which you are viewing a status condition.
|
|
Status
|
A visual indicator of the status of the fan:
- Green diamond - The RPMs are normal for this fan.
- Red diamond - The RPMs have exceeded an acceptable range for this fan. If the revolutions per minute fall below 1800 for a fan, an email notification will be sent to the designated email recipients. For more information about setting up email notifications, see Setting Up Email Notifications.
|
|
RPM
|
The number of RPMs for the fan.
|
The identification of fans vary, depending on where it is being viewed: from the Web Administrator interface, event log, or the physical label, as shown in Sun StorageTek 5320 NAS Appliance Server Fan Identification.
TABLE 4-2 Sun StorageTek 5320 NAS Appliance Server Fan Identification
|
Web Administrator
|
Label on Fan
|
syslog/remote syslog
|
|
1
|
FT0/FM0
|
0
|
|
2
|
FT0/FM1
|
1
|
|
3
|
FT0/FM2
|
2
|
|
4
|
FT1/FM0
|
3
|
|
5
|
FT1/FM1
|
4
|
|
6
|
FT1/FM2
|
5
|
View File Volume Usage Panel
This panel enables you to view how each file volume is being used.
The following table describes the fields and buttons on this panel.
TABLE F-46 Fields and Elements on the View File Volume Usage Panel
|
Field
|
Description
|
|
Name
|
The name of the file volume.
|
|
Capacity
|
A graphical representation of the amount of space used on the file volume and the amount of space available to be used.
|
|
Volume Status
|
The status of the volume: read/write (r/w) or read only (r/o).
|
|
Requests
|
The number of requests processed for the volume since the volume was mounted.
|
|
Active
|
The number of requests processed for the volume in the last ten minutes.
|
View Power Supply Status Panel
This panel enables you to view the current status of all power supplies for the system.
The following table describes the fields and buttons on this panel.
TABLE F-47 Fields and Elements on the View Power Supply Status Panel
|
Field
|
Description
|
|
Power Supply
|
The power supply for which you are viewing a status condition.
|
|
Status
|
A visual indicator of the status of the power supply:
- Green diamond - The voltage and temperature levels are normal for this power supply.
- Red diamond - The voltage and temperature levels have exceeded the acceptable range. An email will be sent to the designated email recipients to notify them of this condition. For more information about setting up email notifications, see Setting Up Email Notifications.
|
|
Description
|
The status condition of the power supply. The status is one of the following:
- Green - Normal
- Red - Failed or AC Missing
- Red - AC power missing
- Red - Power supply has failed
- Red - The power supply is missing
|
View Temperature Status Panel
This panel enables you to view the temperature of the sensors in the appliance or gateway server.
The following table describes the fields and buttons on this panel.
TABLE F-48 Fields and Elements on the View Temperature Status Panel
|
Field
|
Description
|
|
Sensor
|
The sensor for which you are viewing a status condition.
|
|
Status
|
A visual indicator of the status of the sensor:
- Green diamond - The sensor is operating within the normal temperature range.
- Red diamond - The temperature has exceeded the acceptable range. If the temperature rises above 55 degrees Celsius (131 degrees Fahrenheit), an email will be sent to the designated email recipients. For more information about setting up email notifications, see Setting Up Email Notifications.
|
|
Value
|
The temperature of the sensor.
|
View Voltage Regulator Status Panel
This panel enables you to view the current readings for voltage regulators on the system. Voltage regulators are devices or circuits that regulate the voltage fed to a microprocessor.
The following table describes the fields and buttons on this panel.
TABLE F-49 Fields and Elements on the View Voltage Regulator Status Panel
|
Field
|
Description
|
|
Voltage Regulator
|
The voltage regulator for which you are viewing a status condition.
|
|
Status
|
A visual indicator of the status of the power supply:
- Green diamond - The voltage level is normal for this voltage regulator.
- Red diamond - The voltage level has exceeded the acceptable range for this voltage regulator. An email will be sent to the designated email recipients to notify them of this condition. For more information about setting up email notifications, see Setting Up Email Notifications.
|
|
Current Value
|
The number of volts currently being fed to the microprocessor.
|
Network Configuration Panels
|
This section describes the fields and elements on the Network Configuration panels:
Bond NIC Ports Panel
This panel enables you to add, edit, remove, and recover network interface card (NIC) port bonds.
The following table describes the fields and buttons on this panel.
TABLE F-50 Fields and Elements on the Bond NIC Ports Panel
|
Field
|
Description
|
|
Bond ID
|
The unique NIC port bond designation for this bond.
|
|
Type
|
The type of bond, which can be either of the following:
- Port aggregation - Also known as "channel bonding" or "trunking." Lets you scale network I/O by joining NIC ports. This forms a single network channel of high bandwidth from two or more channels of lower bandwidth. You must have a minimum of two available NIC ports for port bonding.
Note: All NIC ports in an aggregation bond must be of the same type of interface card (such as, Fast Ethernet with Fast Ethernet), be connected to the same subnet, and be connected to adjacent ports. For systems that use switches, the switches must support port (or channel) bonding.
|
|
|
- High availability - Provides NIC port failover. Multiple NIC ports can be bonded to a primary port as back-up ports. When the primary port fails, the software switches to the back-up port at the top of the list of high-availability bonded ports. If that port also fails, the port next on the list is used, and so on.
Note: NICs in a high availability bond do not have to be the same type of interface card or be connected to the same subnet.
|
|
Status
|
Color coded statuses:
- Normal (green)
- Failover (yellow)
- Down (red) - This occurs if the ports fail, if the primary port and slave ports in a high-availability bond fail, or if failover is unsuccessful.
|
|
IP Address
|
The Internet Protocol (IP) address designated for the port bond.
|
|
Subnet Mask
|
The subnet mask associated with the bond.
|
|
Broadcast Address
|
The broadcast address associated with the bond.
|
|
Slaves
|
Any slave ports in the bond.
|
|
New
|
Click to launch the Create Port Bond window. From this window, you can create a new port bond.
|
|
Edit
|
Click to launch the Edit Port Pond window. From this window, you can edit the selected port bond.
|
|
Remove
|
Click to remove the port bond from the table.
|
|
Recover
|
Click to recover from a NIC port failover. Clicking Recover starts the recovery process. The failed NIC port must be online before you attempt to recover.
|
Configure Network Adapters Panel
This panel enables you to configure Dynamic Host Configuration Protocol (DHCP) for the system or specify the Internet Protocol (IP) address, netmask, and broadcast for each network controller. In addition, this panel enables you to add IP aliases for each network interface card (NIC).
The following table describes the fields and buttons on this panel.
TABLE F-51 Fields and Elements on the Configure Network Adapters Panel
|
Field
|
Description
|
|
Enable DHCP
|
Click to enable DHCP. DHCP enables the system to dynamically acquire an IP address from the DHCP server. If you want to manually configure the static IP address, subnet mask, and/or gateway IP, do not select this checkbox.
|
|
Adapter
|
A list of the existing NIC ports. If you have already created a port bond, that port bond is displayed in this list. Ports that are not bonded are labeled Port x, whereas ports that are bonded are labeled Bond x.
Note: If ports are bonded, you cannot create alias IP addresses for each port, but instead you create the alias for the bond. For example, if you have bonded Port 2 and Port 3 to form Bond 1, you cannot add alias IP addresses to Port 2 or Port 3. You can only add aliases to Bond 1.
|
|
IP Address
|
The primary IP address for the NIC port that is selected in the Adapters list.
|
|
Netmask
|
An indicator that shows which portion of an IP address identifies the network address and which portion identifies the host address.
|
|
Broadcast
|
The read-only broadcast address for the NIC port that is selected in the Adapters list. The broadcast address is the IP address used to send broadcast messages to the subnet.
|
|
Role
|
The role for the NIC port that is selected in the Adapters list. Valid roles are as follows:
- Primary - This port role identifies an active network port. At least one port must be assigned a primary role.
In cluster configurations, the primary port plays an integral part in the failover process. When you assign this role to a port, the partner server in the cluster saves a copy of the IP address of that port as an inactive alias IP address. In addition, when you configure alias IP address on either server, the partner server holds those IP address as additional inactive alias IP addresses. If a failover occurs, the healthy server activates the inactive alias IP addresses corresponding to the IP addresses for the failed server, allowing network access to continue as if the failed server were still active.
You cannot aggregate primary NIC ports.
|
|
|
- Independent - This port role designates an active network port used for purposes other than serving data. Independent ports are typically used for remote backup. Identify at most one independent port per server.
You cannot aggregate independent NIC ports or configure alias IP addresses for them.
- Mirror - This port role is applicable only with the Sun StorageTek File Replicator option is licensed and enabled. It indicates that the port connects this server to another server for purposes of mirroring file volumes. Use the same port on both the source and target servers for mirroring. For more information about mirroring, see About Mirroring.
Mirror ports support port aggregation and alias IP addressing.
- Private - This port role is applicable only for cluster appliances and cluster gateway systems. It is reserved for the heartbeat, a dedicated network link that constantly monitors the status of the other server. Each server in a dual-server configuration has one and only one private port.
You cannot configure alias IP addresses for private ports.
|
|
Interface
|
Interface-specific information that applies to the selected NIC port:
- Description - A line of text that describes the selected adapter.
- H/W Address - The Hardware (H/W) or Media Access Control (MAC) address, which is a unique address in hexadecimal format, that is used by network software to distinguish this network card from others on the network. This address is encoded on the network card at the factory.
- Speed - The speed (Mb data/sec) at which data is transmitted over the network.
- MTU/Max MTU - The current Maximum Transmission Unit (MTU) of the selected adapter. MTU is the largest frame length that can be sent on a physical medium. The maximum MTU value is the default value of 1500. The minimum value is 552. The TCP Max segment size is the IP Maximum datagram size minus 40. The default IP Maximum Datagram Size is 576. The default TCP Maximum Segment Size is 536.
|
|
Statistics
|
Input/Output (I/O) information about the selected NIC port:
- Packets In/Out - The number of packets in and out for this NIC port.
- Errors In/Out - The number of errors in and out for this NIC port.
- Collisions - The number of transmission collisions for this NIC port.
- Clear Counters - Click to clear all counts on the Statistics tab: packets, errors, and collisions.
|
|
IP Aliases
|
The alias IP address applied to the selected NIC port. There can be up to nine aliases for single-server systems, and up to four aliases for dual-server systems. For dual-server systems only, the value in this field can be the primary IP address of the corresponding port on the partner server, if necessary.
Typically, IP aliases specify the IP addresses of obsolete systems that have been replaced by NAS storage.
|
|
Partner IP Aliases
|
The primary IP address of the corresponding port on the partner server, if necessary. This field displays the IP addresses of the partner server that are reserved for back-up purposes. These are the IP addresses that will be activated by the remaining server in the event of a failover. This field is available only for dual-server systems.
|

|
Click to move the IP alias value that you typed from the IP Aliases field into the list of available IP aliases.
|

|
Click to remove the selected IP alias from the list of available IP aliases.
|
|
Apply
|
Click to save your changes.
|
|
Cancel
|
Click to clear the fields of new entries and return to the values that were originally displayed on the panel.
|
Create/Edit Port Bond Window
This window enables you to create or edit a bond between two or more network interface card (NIC) ports. This bond forms either a port aggregation bond or a high availability bond.
In a port aggregation bond, ports are combined to produce a higher bandwidth port. All NICs in this type bond must be of the same type of interface card (for example, Fast Ethernet with Fast Ethernet) and connect to the same subnet. In a high availability bond, ports are bonded to create port failover (NIC port redundancy). In this type of bond, NICs can be of different type of interface cards and be connected to different subnets.
The following table describes the fields and buttons in this window.
TABLE F-52 Fields and Elements on the Create/Edit Port Bond Window
|
Field
|
Description
|
|
IP Address
|
The Internet Protocol (IP) address designated for the port bond.
|
|
Subnet Mask
|
This field is available only if DHCP is disabled. The subnet netmask for the first NIC port added to the port bond.
|
|
Broadcast Address
|
The broadcast address associated with the bond. This broadcast address is used by the first NIC port (the primary port) listed in the NIC Ports in This Bond field.
|
|
Partner IP Address
|
(Dual-server configuration only) Type the IP address of the partner server that will be activated by the remaining server in the event of a failover.
|
|
Port Aggregation
|
The type of bond, also known as "channel bonding" or "trunking." Lets you scale network I/O by joining NIC ports. This forms a single network channel of high bandwidth from two or more channels of lower bandwidth. You must have a minimum of two available NIC ports for port bonding.
Note: All NIC ports in an aggregation bond must be of the same type of interface card (for example, Fast Ethernet with Fast Ethernet), be connected to the same subnet, and be connected to adjacent ports. For systems that use switches, the switch must support port (or channel) bonding.
|
|
High Availability
|
The type of port bond that provides NIC port failover. Multiple NIC ports can be bonded to a primary port as back-up ports. When the primary port fails, the software switches to the back-up port at the top of the list of high-availability bonded ports. If that port also fails, the port next on the list is used, and so on.
Note: NICs in a high-availability bond do not have to be the same type of interface card or be connected to the same subnet.
|
|
Available NIC Ports
|
The NIC ports available to be bonded.
|

|
Click the top button to move the selected port from the Available NIC Ports box to the NIC Ports in This Bond box. Click the bottom button to move the selected port from the NIC Ports in This Bond box to the Available NIC Ports box.
|
|
NIC Ports in This Bond
|
The ports that already exist in this bond.
|

|
If this is a high availability bond type, use the up and down arrow buttons to organize the order of the ports. The first port in the NIC Ports in This Bond list is the primary port. The second port is the first port to be used in case of a failover. The next port in the list is used in case the port before it also fails.
|
|
Apply
|
Click to save your changes.
|
|
Cancel
|
Click to clear the fields of new entries and return to the values that were originally displayed in the window.
|
Set Gateway Address Panel
This panel enables you to specify the gateway address.
The following table describes the fields and buttons on this panel.
TABLE F-53 Fields and Elements on the Set Gateway Address Panel
|
Field
|
Description
|
|
Gateway
|
The gateway address for the system.
|
|
Apply
|
Click to save your changes.
|
|
Cancel
|
Click to clear the fields of new entries and return to the values that were originally displayed on the panel.
|
Set Server Name Panel
This panel enables you to configure basic information about the NAS server on your network.
The following table describes the fields and buttons on this panel.
TABLE F-54 Fields and Elements on the Set Server Name Panel
|
Field
|
Description
|
|
Server Name
|
The name by which the server is known on the network. The name must begin with a letter of the alphabet (a-z, A-Z) or number 0-9 and can include up to 30 alphanumeric characters: a-z, A-Z, 0-9, hyphens (-), underscores (_), and periods (.).
|
|
Company Name
|
The company name, up to 32 characters, that will be included in any diagnostic email messages sent from this system.
|
|
Contact Name
|
The contact name, up to 32 characters, that will be included in any diagnostic email messages sent from this system.
|
|
Contact Phone #
|
The phone number of the contact who will be included in any diagnostic email messages that are sent from this system.
|
|
Apply
|
Click to save your changes.
|
|
Cancel
|
Click to clear the fields of new entries and return to the values that were originally displayed on the panel.
|
Set Up DNS Panel
This panel enables you to set up the Domain Name Service (DNS) name service, which includes specifying the domain name and adding or removing a DNS server.
Note: If you are using DNS without Dynamic DNS, you must add the host name and Internet Protocol (IP) address of the system to the DNS database before entering values on this panel. If you are using Dynamic DNS, you do not need to manually update the DNS database. For more information, see your DNS documentation.
Note: If you are accessing this panel through the configuration wizard, click Next to save your changes and proceed to the next panel.
The following table describes the fields and buttons on this panel.
TABLE F-55 Fields and Elements on the Set Up DNS Panel
|
Field
|
Description
|
|
Enable DNS
|
Select to enable DNS on the system.
|
|
Domain Name
|
The DNS domain name, which is the name by which the domain is known to the network.
|
|
Server
|
The IP address of a DNS server that you want to make available to the network.
|
|
Server List
|
Each existing DNS server that is available to the network. The DNS server at the top of the list is queried first for domain name resolution.
|

|
Click to add the server entry that you typed from the Server field to the Server List.
|

|
Click to remove the selected server from the Server List.
|

|
Click to move the selected server up one position in the Server List.
|

|
Click to move the selected server down one position in the Server List.
|
|
Enable Dynamic DNS
|
Select to enable a dynamic DNS client to add the system into the DNS namespace. If you enable dynamic DNS, you must also configure the Kerberos realm and Key Distribution Center (KDC) server on the Configure Domains and Workgroups Panel. When Dynamic DNS is enabled, non-secure dynamic updates occur, if allowed by the DNS server.
|
|
DynDNS User Name
|
The user name of a Windows 2000 user with whom the dynamic DNS client can authenticate to perform secure dynamic DNS updates. This user must reside within the Active Directory Service (ADS) domain and the Kerberos realm that is specified on the Configure Domains and Workgroups Panel.
Note: If the domain administrator user name is displayed in this field but the ADS update fails, the domain administrator password must be changed (on the domain controller). This is only required for the administrator user, and the same password can be reused. For more information, see the Microsoft Support Services Web Site, Article Q248808.
|
|
DynDNS Password
|
The password of the DynDNS user. If you are updating this field, delete the entire password before entering a new one.
|
|
Apply
|
Click to save your changes.
|
|
Cancel
|
Click to clear the fields of new entries and return to the values that were originally displayed on the panel.
|
View the Routing Table Panel
This panel enables you to view the following information about network routes.
TABLE F-56 Fields and Elements on the View the Routing Table Panel
|
Field
|
Description
|
|
Destination
|
The Internet Protocol (IP) address of the destination, which can refer either to a network or to a host. There must be one default route (such as, 0.0.0.0), one loop-back route (such as, 127.0.0.1), at least one network route, and at least one host route.
|
|
Gateway
|
The gateway address through which the packets travel to the destination.
|
|
Mask
|
The netmask for the destination network.
|
|
Interface
|
The type of interface that is used to send packets over the network.
|
|
Flags
|
Indicators of the route status. Each type of status indication is represented by a combination of the following flags:
u - route usable
g - destination is a gateway
h - host entry (net otherwise)
r - host or net unreachable
d - created dynamically (by redirect)
m - modified dynamically (by redirect)
D - message confirmed
M - subnet mask present
c - generate new routes on use
x - external daemon resolves name
l - generated by ARP or ESIS
S - manually added
2 - protocol specific routing flag
1 - protocol specific routing flag
|
This section describes the fields and elements on the RAID panels:
Add Hot-Spare Window
Use this window to designate a drive as a hot-spare for NAS appliances. You do so by clicking on the drive image that you want.
The following table describes the drive images and buttons in this window.
TABLE F-57 Drive Images and Buttons in the Add Hot-Spare Window
|
Drive
|
Indication
|
|
Drive icons
|
Graphic representation of the drives in the NAS device. If you are using unassigned drives, select three or more drives for the new LUN. The icons reflect the status of each drive, as follows:
- For Sun StorageTek 5320 controller units and expansion units, see TABLE F-2 for a description of the drive-status icons.
- For Sun StorageTek 5300 controller enclosures and expansion enclosures, see TABLE F-3 for a description of the drive-status icons.
- For Sun StorageTek 5210 devices, see Add LUN Window.
|
|
Apply
|
Click to save your changes.
|
|
Cancel
|
Click to clear the fields of new entries and return to the values that were originally displayed on the panel.
|
Add LUN Window
Use this window to add a logical unit number (LUN) to the system configuration for Sun StorageTek 5210 NAS appliances.
To add a new LUN, first select (click on) each drive that will belong to the LUN. Select a minimum of three drives.
The drive images show the status of each drive, as described in the following table.
TABLE F-58 Sun StorageTek 5210 Add LUN Drive Status Indicators
|
Drive
|
Indication
|
|
Controller enclosure drives
|
|

|
Drive is available for LUN membership.
|
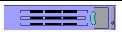
|
Drive is selected for LUN membership.
|
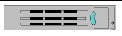
|
Drive is not available for LUN membership.
|

|
Drive slot is empty (no drive present).
|
|
Expansion enclosure drives
|
|

|
Drive is available for LUN membership.
|

|
Drive is selected for LUN membership.
|

|
Drive is not available for LUN membership.
|

|
Drive slot is empty (no drive present).
|
The following table describes the other fields and buttons in this window.
TABLE F-59 Fields and Buttons on the Add LUN Window
|
Field
|
Description
|
|
New LUN Assignments
|
|
RAID Level
|
Redundant array of independent disks (RAID) configuration for the LUN (always RAID 5).
|
|
Controller
|
Number to identify the controller that will manage the new LUN.
|
|
Head ID
|
Applicable with dual-server systems. Unique identifier assigned to this server that will manage the LUN.
|
|
Create New File Volume
|
Select to create the new LUN on the physical drives selected, and to create a new file system on that LUN. Specify the name of the new file volume to the right.
|
|
Grow Existing Volume
|
Select to create a LUN on the physical drives selected, and to use that LUN to expand the storage for an existing file system. Select the target file system from the drop-down menu.
|
|
None
|
Select to create the new LUN, but to not create a file system on the LUN.
|
|
Apply
|
Click to save your changes.
|
|
Cancel
|
Click to cancel the request and clear all fields.
|
Locate Drive Window
Use this window to activate the drive indicator lights for one or more drives. This allows you to physically locate those drives.
The following table describes the drive images and buttons in the window.
TABLE F-60 Fields and Buttons on the Locate Drive Window
|
Field
|
Indication
|
|
Drive Icons
|
Graphic representation of the drives in each controller unit and each expansion unit. Select (click on) the drive you want to locate.:
The icons reflect the status of each drive, as follows:
- For Sun StorageTek 5320 controller units and expansion units, see TABLE F-2 for a description of the drive-status icons.
- For Sun StorageTek 5300 controller enclosures and expansion enclosures, see TABLE F-3 for a description of the drive-status icons.
- For Sun StorageTek 5210 devices, see Add LUN Window
|

|
Click to cause the drive indicator light or lights on the selected drive to flash.
|

|
Click after physically locating the drive, to stop flashing the indicator lights.
|
|
Cancel
|
Click to close the window.
|
Locate Drive Tray Window
Use this window to activate the drive indicator lights for all drives in a specific controller unit or expansion unit. This allows you to physically locate the unit.
The following table describes the drive images and buttons in the window.
TABLE F-61 Fields and Buttons on the Locate Drive Tray Window
|
Field
|
Indication
|
|
Drive Icons
|
Graphic representation of the drives in each controller unit and expansion unit. Select (click on) any drive in the controller or expansion unit you want to locate.
The icons reflect the status of each drive, as follows:
- For Sun StorageTek 5320 controller units and expansion units, see TABLE F-2 for a description of the drive-status icons.
- For Sun StorageTek 5300 controller enclosures and expansion enclosures, see TABLE F-3 for a description of the drive-status icons.
- For Sun StorageTek 5210 devices, see Add LUN Window
|

|
Click to cause all drive indicator lights on the selected drive tray to flash.
|

|
Click after physically locating the drive tray, to stop the flashing the indicator lights.
|
|
Cancel
|
Click to close the window.
|
Manage RAID Panel
This panel enables you to manage your redundant array of independent disks (RAID) array. The top portion shows a graphical representation of disks. The bottom portion lists logical unit number (LUN) information in tabular form.
Note: As an alternative navigational method on this panel, you can use your keyboard:
- To move to the next field or element on the panel, press the Tab key.
- To perform a function, such as launching a window, press the Alt key + Underlined character on a button. For example, to launch the New LUN window, press Alt + a.
The following table describes the fields and buttons on this panel.
TABLE F-62 Fields and Elements on the Manage RAID Panel
|
Field
|
Description
|
|
Legend
|
A key that describes the status of the disks and the LUNs. LUNs do not use the black or pink status.
- Black - A disk is not present in the slot. (Does not apply to LUNs.)
- Green - A disk is present in the slot and is functional (online). The disk does not need to be assigned to a LUN.
- Orange - A LUN is rebuilding. The LUN Status field shows percent complete during the rebuilding process. After the LUN is rebuilt with a hotspare, the copy back process begins. The Status field shows percent complete during the copy back process.
- Yellow - A LUN is being created as indicated on the disk and in the LUN Status field.
- Red - A disk has failed. You can safely remove the disk for replacement. If the failed disk is not assigned to a LUN, the Status field changes to green (online) because rebuilding is not required. The LUN status field is red.
- Pink - A disk has been replaced. (Does not apply to LUNs.)
|
|
LUN/Drive
|
The name of the drive.
|
|
Capacity
|
The total amount of space available for storage use on the selected LUN.
|
|
Status
|
The status of the drive in the LUN.
|
|
RAID Level
|
The RAID configuration.
|
|
LUN Ownership
|
The user who owns the LUN.
|
|
Remove LUN
|
Click to remove the selected LUN from the RAID array.
|
|
New LUN
|
Click to launch the Add LUN wizard and add a LUN to the RAID array. This button is available only if at least three drives are available in the RAID array.
|
|
Remove HS
|
Click to remove a hot-spare from the RAID array.
|
|
Rebuild
|
(Sun StorageTek 5210 NAS appliance only) Click to rebuild the LUN after replacing a failed disk.
|
|
Add HS
|
Click to launch the Add Hot-Spare window. From this window, you can add a hot-spare to the RAID array.
|
|
Locate Drive
|
Click to open the Locate Drive window, which is used to cause the drive indicator lights on a physical drive to flash.
|
|
Locate Drive Tray
|
Click to open the Locate Drive Tray window, which is used to cause the drive indicator lights to flash on all the physical drives in a specific controller unit or expansion unit.
|
View Controller/Enclosure Information Panel
This panel displays information about redundant array of independent disks (RAID) controllers and controller units.
The following table describes the fields and buttons on this panel.
TABLE F-63 Fields and Elements on the View Controller/Enclosure Information Panel
|
Field
|
Description
|
|
Controller Information
|
List of controllers for the NAS device.
|
|
Vendor
|
Name of the controller vendor.
|
|
Model
|
Model number of the controller.
|
|
Firmware Release
|
Release level of the controller firmware.
|
|
Enclosure Information
|
|
Tray IDs or Enclosure identifiers
|
For Sun StorageTek 5310 and Sun StorageTek 5320 NAS appliances, the tray ID for the controller unit that houses the selected controller (top), as well as the tray ID for each expansion unit that is connected to the controller unit.
For Sun StorageTek 5210 NAS appliances, a list of expansion enclosures.
|
|
Vendor
|
The name of the vendor for the controller unit or expansion unit.
|
|
Model
|
The model number of the controller unit or expansion unit.
|
|
Firmware Release
|
Applicable for Sun StorageTek 5310 and Sun StorageTek 5320 expansion units only. The release level of the expansion-unit firmware.
|
View LUN Information Panel
This panel enables you to view the logical unit numbers (LUNs) in the system.
The following table describes the fields and buttons on this panel.
TABLE F-64 Fields and Elements on the View LUN Information Panel
|
Field
|
Description
|
|
LUNs
|
A list of the LUNs in your system.
|
|
Vendor
|
The name of the LUN vendor.
|
|
Product
|
The LUN product.
|
|
Product Revision
|
The revision of the LUN product.
|
|
Size
|
The size of the LUN.
|
|
ID Type
|
The type of identifier used by the LUN.
|
|
Vendor ID
|
The identifier of the LUN vendor.
|
|
Vendor Specific ID
|
The identifier specific to the vendor.
|
|
Vendor Specific ID Extension
|
The extension of the identifier that is specific to the vendor.
|
This section describes the fields and elements on the System Activity panels:
View Networking Activity Panel
This panel enables you to view the number of I/O requests per second, for clients accessing the NAS appliance or gateway system.
The following table describes the fields and buttons on this panel.
TABLE F-65 Fields and Elements on the View Networking Activity Panel
|
Field
|
Description
|
|
Clients
|
The Internet Protocol (IP) address of the client.
|
|
Requests (IO/sec)
|
The number of I/O requests, per second.
|
View System Activity Panel
This panel enables you to view the I/O requests per second between the system and the peripheral devices with which it communicates. The following are the peripheral devices that can be displayed on this panel:
- CPU - System central processing unit (CPU)
- Memory - System random access memory (RAM)
- Port Aggregation x - Port aggregation x
- Controller x - Redundant array of independent disks (RAID) controller x
- dac1d0xx - Logical unit numbers (LUNs) xx
- PORTx - Network interface card (NIC) port x
- Host Adapter x - Internet Small Computer Systems Interface (iSCSI) host adapter x (for tape backup device)
Note: The names and number of devices being monitored will vary, depending on the appliance or gateway-system hardware configuration.
The following table describes the fields and buttons on this panel.
TABLE F-66 Fields and Elements on the View System Activity Panel
|
Field
|
Description
|
|
Device
|
The peripheral device that communicates with the system.
|
|
Current Load (IO/sec)
|
The current load of the device, in terms of I/O requests per second.
|
|
Peak Load (IO/sec)
|
The peak load (highest value) reached by the device, in terms of I/O requests per second.
|
This section describes the fields and elements in the System Backup panel.
Set Up NDMP Panel
This panel enables you to set up the architecture for the Network Data Management Protocol (NDMP), which is an open protocol for network-based backup. NDMP architecture lets you use any NDMP-compliant backup administration application to back up your network attached storage device.
You must configure the backup administration application to log into the systems and to locate the devices on which the file volumes reside. You must also configure the volumes to enable checkpoints and backup checkpoints.
See Setting Up NDMP Backups and Enabling File-System Checkpoints.
The following table describes the fields and buttons on this panel.
TABLE F-67 Fields and Elements on the Set Up NDMP Panel
|
Field
|
Description
|
|
NDMP NIC
|
List of network interface card (NIC) adapters and port bonds that are configured with an independent or primary role. The following information displays for each:
- Adapter - Name of the NDMP NIC adapter or port bond.
- IP Address - The IP address of the adapter or port bond.
Select the port adapter or bond port used to transfer data to the backup tape drive (typically an interface configured with independent roles). Make sure the port you select connects to the gateway that is identified below this field.
|
|
Gateway
|
Display-only. IP address of the gateway through which clients from other subnets connect with the NDMP server. The selected NIC must be on the same subnet as the gateway in order to communicate with NDMP clients that are behind the gateway.
|
|
NDMP Log
|
Full path, such as /vol_ndmp, for the directory used to store intermediate backup data and a permanent log of backup history. The directory must be independent from the volumes scheduled for backup, and at least 2 gigabytes in size.
|
|
Apply
|
Click to save your changes.
|
|
Cancel
|
Click to clear the fields of new entries and return to the values that were originally displayed on the panel.
|
This section describes the fields and elements in the System Manager panels:
Edit NFS Export Window
This window enables you to update the access permission for the selected NFS export and update the mapping of the UID for root users.
The following table describes the fields and buttons in this window.
TABLE F-68 Fields and Elements on the Edit NFS Export Window
|
Field
|
Description
|
|
Hosts
|
The hosts to which the selected export is defined.
|
|
Access
|
|
Read/Write
|
Select to assign read/write access privileges to the export.
|
|
Read/Only
|
Select to assign read/only access privileges to the export.
|
|
No Access
|
Select to assign no access privileges to the export.
|
|
Map Root User
|
|
Anonymous User
|
Select to map the user ID (UID) of root users (users with a UID of 0) to the user ID of the anonymous user (the user nobody).
|
|
Root User
|
Select to have root users use the UID of root (uid=0).
|
|
Map to UID
|
Select to map the UID of root users to the UID that you specify in the field.
|
|
Apply
|
Click to save your changes.
|
|
Cancel
|
Click to clear the fields of new entries and close out of the window without saving any changes.
|
Server Properties Window
This window enables you to view the basic properties of the appliance or gateway-system server. To open this window, right-click the volume name under System Manager.
The following table describes the fields and buttons in this window.
TABLE F-69 Fields and Elements on the Server Properties Window
|
Field
|
Description
|
|
Name
|
The name of the server.
|
|
Model
|
The model number of the server.
|
|
Serial #
|
The serial number of the server.
|
|
OS Version
|
The current version of NAS software running on the server.
|
|
Cancel
|
Click to close out of the window.
|
Volume Properties Window
This window enables you to view the properties of the selected volume. To open this window, right-click System Manager and select Properties.
The following table describes the fields and buttons on this window.
TABLE F-70 Fields and Elements on the Volume Properties Window
|
Field
|
Description
|
|
Label
|
The label of the volume.
|
|
Compliance
|
Whether compliance archiving software is enabled for the volume.
|
|
Checkpoints
|
Whether checkpoints are enabled for the volume.
|
|
Quotas
|
Whether quotas are enabled for the volume.
|
|
Capacity
|
The total amount of storage space on the volume. A graphical representation of storage usage is displayed:
- Used - The amount of space used on the volume.
- Free - The amount of space available for storage use on the volume.
|
|
Partitions
|
|
Legend
|
Indicators in the graphical depiction of the selected logical unit number (LUN) configuration:
- Orange - Indicates the primary partition on the volume.
- Light Blue - Indicates the segmented partition on the volume.
- Green - Indicates the file-volume mirror (applicable only with the Sun StorageTek File Replicator option is licensed and enabled).
- Blue - Indicates that the DOS read-only attribute is applied to the volume. This DOS read-only attribute is only used on the flash disk for the system volume.
- White - Indicates the free space on the volume.
- Brown - Indicates the raw partition on the LUN, if any.
|
|
Lun
|
The name of the LUN on which the selected volume resides.
|
|
Partition
|
The LUN partition on which the volume resides.
|
|
Use (%)
|
The percentage of space used on the volume.
|
|
Type
|
The type of volume, such as primary or segmented.
|
|
Free (MB)
|
The amount of space available on the volume for storage use, in megabytes.
|
|
Capacity (MB)
|
The total amount of space on the volume for storage use, in megabytes.
|
|
Cancel
|
Click to close out of the window.
|
This section describes the fields and elements on the System Operations panels:
Online System Registration
This panel enables you to register your Sun account and NAS server information with Sun Services.
The following table describes the fields and elements in the Online System Registration panel:
TABLE F-71 Fields and Elements on the Online System Registration Panel
|
Field
|
Description
|
|
Disclaimer
|
Read the Sun privacy statement and click Agree to continue with the registration process.
|
|
Agree
|
Click the checkbox after reading and agreeing to the disclaimer.
|
|
If you do not have your Sun Account, click here to get it.
|
Click the link to go to the Sun Online Account Registration portal. Click Register to sign up for a Sun account.
|
|
Apply
|
Click to save your changes.
|
|
Cancel
|
Click to clear the fields of new entries and return to the values that were originally displayed in the window.
|
|
Sun Account
|
|
Sun Account ID
|
Enter the account ID supplied by Sun. If you do not have your account ID and password, click the link
|
|
Sun Account Password
|
Enter the account ID supplied by Sun.
|
|
May Sun Contact you
|
Click the checkbox to allow contact.
|
|
Proxy Server
|
|
Http Proxy Server
|
If your site is using a proxy server to communicate with Sun, enter the name or IP address of the proxy server. Ask your network administrator for the names and port numbers of the proxy server.
|
|
Port
|
Enter the port number for the proxy server.
|
|
Proxy User Name
|
If your proxy server requires authentication, enter the proxy user name.
|
|
Proxy Password
|
Enter the proxy user name password.
|
|
Options
|
|
|
Send Heartbeat Data?
|
Click the checkbox to allow data to be sent to Sun Services.
|
|
Send Fault Events?
|
Click the checkbox to allow data to be sent to Sun Services.
|
Activate Options Panel
This panel enables you to view existing licenses on the system, add licenses to and remove licenses from the system, and enable temporary licenses on the system.
The following table describes the fields and buttons on this panel.
TABLE F-72 Fields and Elements on the Activate Options Panel
|
Field
|
Description
|
|
Module
|
The name of the licensable module.
|
|
State
|
Whether the license is valid.
|
|
Status
|
Whether the license is active.
|
|
Origination
|
The date on which the license became active, in YYYYMMDD format. If this field displays a value of 00000000, the license is immediately active.
Note: This date is validated against the secure clock.
|
|
Expiration
|
The date on which the license expires, in YYYYMMDD format. If this field displays the value of 00000000, the license never expires.
Note: This date is validated against the secure clock.
|
|
Key
|
The unique license key assigned to the license.
|
|
Add
|
Click to launch the Add License window. From this window, you can add a new license to the appliance or gateway-system server.
Note: Licenses cannot be added to the system until the secure clock is initialized. The secure clock is initialized the first time you set the date and time on the system. For more information, see Setting the Time and Date Manually.
Make sure you set the time accurately, as the secure clock can only be set once. After you set the initial time and date, the license is not affected by additional changes to the time and date.
|
|
Remove
|
Click to delete the selected license from the system.
|
|
Temporary Licenses
|
Click to launch the Enable Temporary Licenses window. From this window, you can activate any available temporary licenses on the system.
|
|
Import
|
Click to read license information from a file (the default system license path is searched) and import the information into the system.
|
Add License Window
This window enables you to add a license with the specified parameters to the system.
The following table describes the fields and elements in this window.
TABLE F-73 Fields and Elements on the Add License Window
|
Field
|
Description
|
|
Module
|
The licensable module name.
|
|
Origination
|
The date on which the license becomes active, at 0000:00 hours.
|
|
Expiration
|
The date on which the license expires, at 2359:59 hours.
Note: Dates are specified in the format YYYYMMDD. The special date string 00000000 indicates that there is no restriction. If this string is used as the origination date, the license is active immediately; if it is used as the expiration date, the license never expires.
|
|
Key
|
The license key, which must be in UUID format: XXXXXXXX-XXXX-XXXX-XXXXXXXXXXXXXXXX.
|
|
Apply
|
Click to save your changes.
|
|
Cancel
|
Click to clear the fields of new entries and return to the values that were originally displayed in the window.
|
Assign Language Panel
This panel enables you to specify the language displayed by the Web Administrator application. The application supports Unicode, officially known as the Unicode Worldwide Character Standard. This is a system for the interchange and display of international and classical languages.
Note: If you are accessing this panel through the configuration wizard, click Next to save your changes and proceed to the next panel in the wizard.
The following table describes the fields and buttons on this panel.
TABLE F-74 Fields and Elements on the Assign Language Panel
|
Field
|
Description
|
|
Codepage
|
Select a language codepage for the appliance or gateway-system server.
|
|
Apply
|
Click to save your changes.
|
|
Cancel
|
Click to clear the fields of new entries and return to the values that were originally displayed on the panel.
|
Enable Temporary Licenses Window
This window lets you enable the available temporary licenses for the system.
The following table describes the fields and elements in this window.
TABLE F-75 Fields and Elements on the Enable Temporary Licenses Window
|
Field
|
Description
|
|
Module
|
The licensable module name.
|
|
Duration
|
The number of days for which this temporary license will be enabled.
|
|
Apply
|
Click to save your changes.
|
|
Cancel
|
Click to clear the fields of new entries and return to the values that were originally displayed in the window.
|
Import Licenses Window
This window enables you to import a license from a file.
Note: If you copy and paste, or manually enter the license information, please be sure you do not accidentally insert any line breaks within the license information. Otherwise, the lines will not be recognized as valid entries.
The following table describes the fields and elements in this window.
TABLE F-76 Fields and Elements on the Enable Temporary Licenses Window
|
Field
|
Description
|
|
Import License Field
|
The license information of the license you want to import.
|
|
Apply
|
Click to save your changes.
|
|
Cancel
|
Click to clear the fields of new entries and return to the values that were originally displayed in the window.
|
|
Browse
|
Click to import the license from a file.
|
Set Administrator Password Panel
This panel enables you to set the system administrator password. In a cluster configuration, when you set the administrator password on one server (H1), the same password is propagated to the other server (H2).
The following table describes the fields and buttons on this panel.
TABLE F-77 Fields and Elements on the Set Administrator Password Panel
|
Field
|
Description
|
|
Old
|
The existing system administrator password. If there is no password, leave this field is blank.
|
|
New
|
The new system administrator password. The password must be at least one and no more than 20 characters long. If you want to disable the administrator password, leave this field blank.
|
|
Confirm
|
The new system administrator password, typed a second time.
|
|
Apply
|
Click to save your changes.
|
|
Cancel
|
Click to clear the fields of new entries and return to the values that were originally displayed on the panel.
|
Set Remote Access Panel
This panel enables you to set up network services that are used to remotely administer the NAS server. The following are the available network services:
- Telnet
- Remote Login
- Remote Shell
- Secure Shell, Web Admin (over Hypertext Transfer Protocol (HTTP))
- Secure Web Admin (over Secure Hypertext Transfer Protocol (HTTPS))
The following table describes the fields and buttons on this panel.
TABLE F-78 Fields and Elements on the Set Remote Access Panel
|
Field
|
Description
|
|
Secure Mode
|
Click to enable only those protocols that are deemed to be secure. This disables all other services. The following are the secure protocols:
- Secure Web Admin, which uses the Secure Socket Layer (SSL) over HTTP
- Secure Shell (ssh)
|
|
Service
|
The existing services that are available to the NAS server.
|
|
Enabled
|
Click to enable the corresponding service for remote access to the NAS server.
|
|
Comment
|
A line of text that describes the service.
|
|
Apply
|
Click to save your changes.
|
|
Cancel
|
Click to clear the fields of new entries and return to the values that were originally displayed on the panel.
|
Set Time and Date Panel
This panel enables you to set the server date and time.
The following table describes the fields, elements, and buttons on this panel.
TABLE F-79 Fields and Elements on the Set Time and Date Panel
|
Field
|
Description
|
|
Calendar
|
The current year, month, and day, in graphical format. To change the current year or month, select the options that you want from the appropriate drop-down menus on the calendar. To update the day, click the calendar itself.
|
|
Clock
|
The current time, in graphical format. To change the current time, select a new time from the drop-down menus located immediately above the clock. These drop-down menus display the time in military format (for example, 1:30 is displayed as 13:30).
|
|
Time Zone Drop-Down Menu
|
The current time zone where the server is located. To change the time zone, select a new time zone from the drop-down menu.
|
|
Apply
|
Click to save your changes.
|
|
Cancel
|
Click to clear the fields of new entries and return to the values that were originally displayed on the panel.
|
Set Up Time Synchronization Panel
This panel enables you to synchronize the NAS server time to either the Network Time Protocol (NTP) protocol or an RDATE server. NTP is an Internet protocol used to synchronize the clocks of computers to a reference time source, such as a radio, satellite receiver or modem. Typical NTP configurations use multiple redundant servers and diverse network paths to achieve high accuracy and reliability.
The RDATE time protocol provides a site-independent date and time. It is a protocol that can retrieve the time from another machine on your network. RDATE servers are commonly present on Unix systems.
The following table describes the fields and buttons on this panel.
TABLE F-80 Fields and Elements on the Set Up Time Synchronization Panel
|
Field
|
Description
|
|
Manual Synchronization
|
Select to use neither NTP nor RDATE time synchronization.
|
|
NTP Synchronization
|
Select to use NTP synchronization, which requires that you have at least one NTP server on the network. The following options are specific to NTP synchronization:
- Enable Server 1, Enable Server 2 - Click either checkbox to enable that NTP server. Up to two NTP servers can be enabled.
- NTP Server -The name or Internet Protocol (IP) address of the NTP server that the NAS server will poll for the current time.
- Auth Type - Select the type of authentication to be used between the NAS server and the NTP server. Authentication support enables the NAS server to use a key and key identifier to verify that the NTP server is known and trusted. The NTP server and the NAS server must agree on the key and key identifier to authenticate their messages.
|
|
|
- Key ID - The key identifier that is associated with the private key from the ntp. key file that will be used with this NTP server. This field needs a value only if Symmetric Key was selected in the Auth Type field. The valid range for the Key ID value is 1 to 65534.
Note: The ntp. key file must be copied to the \etc directory before symmetric key authentication is used.
- Min Poll Rate - The minimum polling rate for NTP messages. This value to the power of 2 indicates the minimum number of seconds of the polling interval. For example, a value of 6 represents 36 seconds. The valid range for this field is 4 to 17. The default value of 6 is sufficient for most installations.
- Max Poll Rate - The maximum polling rate for NTP messages. This value to the power of 2 indicates the maximum number of seconds of the polling interval. For example, a value of 4 represents 16 seconds. The valid range for this field is 4 to 17 but it must be larger than the minimum polling interval value. The default value of 10 is sufficient for most installations.
- Enable Broadcast Client - Click to have the NAS server respond to NTP server broadcast messages received on any interface. This is intended for configurations involving one or more NTP servers with a large number of clients that require time synchronization from those servers.
- Require Broadcast Server Authentication - Click to require the NTP client to verify that a server that has broadcast messages to the NAS server is a known and trusted server.
|
|
RDATE Synchronization
|
Select to use the RDATE server time synchronization with the NAS server. The following options are specific to RDATE server synchronization:
- RDATE Server - The name or IP address of the RDATE server.
- Tolerance - The maximum tolerance between the time on the NAS server and the time received from the RDATE server, between 0 and 3600 seconds. If the NAS server time is later or earlier than the RDATE server time by less than this number of seconds, the NAS server time will be synchronized with RDATE server time. If there is a larger discrepancy, the NAS server time will not be synchronized with the RDATE server. This validation occurs every day at 11:45 p.m.
|
|
Apply
|
Click to save your changes.
|
|
Cancel
|
Click to clear the fields of new entries and return to the values that were originally displayed on the panel.
|
Shut Down the Server Panel
This panel enables you to halt or reboot your NAS appliance or gateway server.
The following table describes the fields and buttons on this panel.
TABLE F-81 Fields and Elements on the Shut Down the Server Panel
|
Field
|
Description
|
|
None
|
Click to perform neither a shutdown nor a reboot of the server, or servers.
|
|
Halt both heads
|
Click to shut down both servers in a cluster configuration. Check to be sure both servers in the cluster are in the NORMAL state. To restart, you must manually power on the servers. This field is available only for dual-server cluster systems.
|
|
Reboot both heads
|
Click to shut down and restart both servers in a cluster configuration. This field is available only for dual-server (cluster) systems.
|
|
Halt
|
Click to shut down the server. To restart, you must manually power on the server. This field is available for single-server systems.
|
|
Reboot
|
Click to shut down and restart the server. This field is available for single-server systems.
|
|
Reboot Previous Version version-number
|
Select to shut down and restart the server, or servers, with an earlier version of the software. Use this option if you upgraded the software but encountered a problem. The server, or servers, is restarted with the last software used before the upgrade.
In a cluster configuration, you must perform this action on each server in the cluster.
Note: It is recommended that you check with Technical Support before choosing this option.
|
|
Halt this head
|
Click to shut down this server (the one to which you are currently logged on). The other server remains online. To restart, you must manually power on the server. This field is available only for dual-server systems.
|
|
Reboot this head
|
Click to shut down and restart this server (the one to which you are currently logged on). The other server remains online. This field is available only for dual-server systems.
|
|
Apply
|
Click to execute a server shutdown or reboot.
|
|
Cancel
|
Click to clear the fields of new entries and return to the values that were originally displayed on the panel.
Note: You cannot cancel a server shutdown or reboot after the shutdown or reboot has been initiated. Clicking Cancel only removes the entries you have typed on the panel.
|
Update Software Panel
This panel displays the current Sun StorageTek NAS software version on the server, and enables you to update the server with later versions of the software. You can update the server by downloading software from the Sun Microsystems web site and uploading it from your floppy or CD-ROM drive.
The following table describes the fields and buttons on this panel.
TABLE F-82 Fields and Elements on the Update Software Panel
|
Field
|
Description
|
|
The Current OS Version
|
The current version of NAS software running on the server.
|
|
Update Server from a File
|
|
Path
|
The full path to the software file on your workstation. This file, which you can obtain from the Sun Microsystems web site, can be used to update the NAS software version on the server.
|
|
Browse
|
Click to locate the software file you want to install from your workstation.
|
|
Update
|
Click to execute the software upload from the file you have selected. When you have completed the upload process, the system prompts you to reboot the server. Click Yes to reboot, or No to continue without rebooting. The software update will not occur until you have rebooted the system.
|
Unix Configuration Panels
|
This section describes the fields and elements on the Unix Configuration panels:
Add/Edit Comment Window
This window enables you to add or edit a comment about a Network File System (NFS) export, depending on how you accessed the window (by clicking the Add or Edit icon on the Configure Exports Panel).
The following table describes the fields and buttons in this window.
TABLE F-83 Fields and Elements on the Add/Edit Comment Window
|
Field
|
Description
|
|
Add Comment
|
Up to 80 characters of text describing an NFS export. You can start the comment text with the # character, or omit the # character to add a blank line.
|
|
Ok
|
Click to save your changes.
|
|
Cancel
|
Click to clear the fields of new entries and close out of the window without saving any changes.
|
Add/Edit Host Window
This window enables you to add or edit a host, depending on whether you accessed the window by clicking Add or Edit.
Caution: Exercise caution when granting trusted status to hosts. Trusted hosts have root access to the NAS file system, and can thus perform administrative functions in that file system.
The following table describes the fields and buttons in this window.
TABLE F-84 Fields and Elements on the Add/Edit Host Window
|
Field
|
Description
|
|
Host Name
|
The name of the host. The host name must begin with an alphabetic character or a number, and can include up to 63 alphanumeric characters, total: a-z, A-Z, 0-9, hyphens (-), and periods (.), but must not end with a hyphen or period character.
|
|
IP Address
|
The Internet Protocol (IP) address of the host.
|
|
Apply
|
Click to save your changes.
|
|
Cancel
|
Click to clear the fields of new entries and return to the values that were originally displayed in the window.
|
Add/Edit NFS Export Window
You can add and edit Network File System (NFS) exports from by clicking the Add or Edit icon on the Configure Exports Panel or by right-clicking a System Manager item and choosing the appropriate Add Export menu option.
You can only add NFS exports to whole volumes.
The following table describes the fields and buttons in this window.
TABLE F-85 Fields and Elements on the Add/Edit NFS Export Window
|
Field
|
Description
|
|
Volume
|
This field is available only if you clicked Add on the Configure Exports panel. Select the volume for which you are adding or editing an NFS export. You can only select whole volumes.
|
|
Path
|
This field is available only if you clicked Add on the Configure Exports panel. The directory for which you want to grant Unix NFS host access. Leaving this field blank exports the root directory of the volume.
|
|
Full Path
|
The full path to the exported directory on the volume.
|
|
Access
|
|
Read/Write
|
Select to grant the specified hosts Read/Write permissions on the selected volume.
|
|
Read/Only
|
Select to grant the specified hosts Read/Only permissions on the selected volume.
|
|
No Access
|
Select to grant the specified hosts No Access permissions on the selected volume.
|
|
Map Root User
|
|
Anonymous User
|
Select to map the user ID of root users to the user ID of anonymous users on this export.
|
|
Root User
|
Select to map the user ID of root users to the user ID of root (UID=0) on this export.
|
|
Map to UID
|
Select to assign a specific user ID to be used for root users on this export, and type the user ID.
|
|
Hosts
|
|
Host Netgroups
|
This field is editable only in Add mode. Select to define the NFS export for a net group. From the drop-down menu, select the net group to which you want to assign the export.
|
|
Host Group
|
This field is editable only in Add mode. Select to define the NFS export for a host group. From the drop-down menu, select general (all hosts), trusted (all trusted hosts), or a user-defined host group.
|
|
Known Host
|
This field is editable only in Add mode. Select to define the export to a host that was added on the Set Up Local Hosts panel. From the drop-down menu, select the host to which you want to assign the export.
|
|
Other Host
|
This field is editable only in Add mode. Select to define the export to an individual host that you have not added through the Set Up Local Hosts panel. In the field to the right, type the name of the host.
|
|
Ok
|
Click to save your changes.
|
|
Cancel
|
Click to clear the fields of new entries and close out of the window without saving any changes.
|
Add Hostgroup Member Window
This window enables you to add members to the selected host group.
The following table describes the fields and buttons in this window.
TABLE F-86 Fields and Elements on the Add Hostgroup Member Window
|
Field
|
Description
|
|
Host Netgroups
|
Select this option and identify a Net group that is defined on an external NIS server to add as a member.
|
|
Host Group
|
Select this option and identify a host group to add as a member.
|
|
Known Host
|
Select a host that you have manually added on the Set Up Local Hosts panel or that exists on an external NIS server to add as a member.
|
|
Other Host
|
Type a host that is not available from the Set Up Local Hosts panel to add as a member.
|
|
Apply
|
Click to save your changes.
|
|
Cancel
|
Click to clear the fields of new entries and close out of the window without saving any changes.
|
Add Hostgroup Window
This window enables you to add a host group to the configuration.
The following table describes the fields and buttons in this window.
TABLE F-87 Fields and Elements on the Add Hostgroup Window
|
Field
|
Description
|
|
Add Hostgroup
|
The name of the host group that you want to add. The name must begin with a letter of the alphabet (a-z, A-Z), and can include up to 80 alphanumeric characters: a-z, A-Z, 0-9, hyphens (-), and periods (.), but must not end with a hyphen or period character.
|
|
Apply
|
Click to save your changes.
|
|
Cancel
|
Click to clear the fields of new entries and close out of the window without saving any changes.
|
Configure Exports Panel
This panel enables you to specify access privileges for Unix users to specified volumes. The table on this panel shows the current Network File System (NFS) export information, including the accessible directories, host name, and access level (read/write or read/only) for each export.
Any host name beginning with @ represents a group of hosts. For instance, a host name of @general represents a predefined host group that includes all hosts. A host name of @trusted represents a predefined host group that includes trusted hosts.
Any host name beginning with & represents a host net group. For example, &group1 represents netgroup, group1.
The following table describes the fields and buttons on this panel.
TABLE F-88 Fields and Elements on the Configure Exports Panel
|
Field
|
Description
|
|
Full Path
|
The full path to the directory for which you want to grant Unix NFS access privileges.
|
|
Host
|
The name of the host, or hosts, that have access privileges on the volume.
|
|
Access
|
The level of access the host has on the volume. Access can be read/write (R/W) or read/only (R/O).
|
|
Map Root User
|
The method for mapping the user ID for root users. For more information, see Creating Exports.
|

|
Click to launch the Add NFS Export window. From this window, you can add a new NFS export to the configuration.
|

|
Click to launch the Add Comment window. From this window, you can add a comment to the Configure Exports table.
|

|
Click to launch the Edit NFS Export window or the Edit Comment window. From this window, you can edit the selected NFS export or comment.
|

|
Click to delete the selected NFS export or comment from the table.
|

|
Click to move the selected NFS export or comment to the top of the table.
|

|
Click to move the selected NFS export or comment up one listing in the table.
|

|
Click to move the selected NFS export or comment down one listing in the table.
|

|
Click to move the selected NFS export or comment to the bottom of the table.
|
Configure Name Services Panel
This panel enables you to specify the order in which name services (NS) are used for group, Net group, host, and user lookup functions. The NS lookup order controls the sequence in which the name services are searched to resolve a query. The supported name services are: NIS, NIS+, NSSLDAP, DNS, and Local. Before you can use a name service for name resolution, the service must be enabled.
The following table describes the fields and buttons on this panel.
TABLE F-89 Fields and Elements on the Configure Name Services Panel
|
Field
|
Description
|
|
Groups Order
|
Click to display the name services that are available to be searched for group lookup functions.
|
|
Netgroup Order
|
Click to display the name services that are available to be searched for Net group lookup functions.
|
|
Hosts Order
|
Click to display the name services that are available to be searched for user lookup functions.
|
|
Users Order
|
Click to display the name services that are available to be searched for host lookup functions.
|
|
Services Not Selected
|
The available name services that will not be used for lookup functions.
|

|
Click the top button to move the selected name service from the Services Not Selected list to Services Selected. Click the bottom button to move the selected name service from the Services Selected list to Services Not Selected.
|
|
Services Selected
|
The available services, in sequential order, that will be used for lookup functions. These services must be enabled.
|

|
These buttons are available only if there is more than one name service in the Services Selected list. Click the top button to move the selected name service up in the list. Click the bottom button to move the selected name service down in the list.
|
|
Apply
|
Click to save your changes.
|
|
Cancel
|
Click to clear the fields of new entries and return to the values that were originally displayed on the panel.
|
Remove NFS Export Window
This window enables you to delete a Network File System (NFS) export from the configuration.
The following table describes the fields and buttons on this panel.
TABLE F-90 Fields and Elements on the Configure Exports Panel
|
Field
|
Description
|
|
Host
|
The name of the host, or hosts, that have access privileges on the volume.
|
|
Access
|
The level of access the host has on the volume. Access can be read/write (R/W) or read/only (R/O).
|
|
Apply
|
Click to delete the selected NFS export from the configuration.
|
|
Cancel
|
Click to exit out of the window without saving any changes.
|
Set Up FTP Panel
This panel enables you to set up File Transfer Protocol (FTP) service on the system and to define user access to the system by using FTP.
The following table describes the fields and buttons on this panel.
TABLE F-91 Fields and Elements on the Set Up FTP Panel
|
Field
|
Description
|
|
Enable FTP
|
Select to enable FTP on the system. If the FTP service is enabled, the FTP server accepts incoming connection requests.
|
|
Allow Guest Access
|
Select to enable access to the FTP server by anonymous users.
|
|
Allow User Access
|
Select to enable access to the FTP server by all users. If this checkbox is deselected, only admin and root users can access the FTP server.
|
|
Allow Admin Access
|
Select to enable access to the FTP server by all root users. A user is considered a root user if he or she is the special admin Sun StorageTek user or if his or her user identifier (UID) is equal to 0.
|
|
Enable Logging
|
Select to enable FTP logging.
|
|
Log File Name
|
This field is available only if logging is enabled. The name of the FTP log file.
|
|
Apply
|
Click to save your changes.
|
|
Cancel
|
Click to clear the fields of new entries and return to the values that were originally displayed on the panel.
|
Set Up Hostgroups Panel
This panel enables you to monitor and manage the host groups database. Groups and group members can be added to or deleted from this database. Host groups are used to define a collection of hosts that can be used in Network File System (NFS) exports. Groups consist of predefined system groups and user-defined groups. The two predefined groups are the Trusted and iso8859 groups.
The following table describes the fields and buttons on this panel.
TABLE F-92 Fields and Elements on the Set Up Hostgroups Panel
|
Field
|
Description
|
|
Groups
|
Select a group from the drop-down menu to display its members in the Group Members list.
|

|
Click to launch either the Add Hostgroup or the Add Hostgroup Member window, depending on whether you click this button in the Groups or the Group Members section of the panel. For more information about adding new host groups or host group members, see Adding a Host Group or Adding a Member to a Host Group.
|

|
Click to delete the selected host group or selected host group member, depending on whether you click this button in the Groups or the Group Members section of the panel.
|
|
Group Members
|
The members of the selected host group.
|
Set Up Local Hosts Panel
This panel enables you to add, edit, or remove host entries from the system host file.
Caution: Exercise caution in granting trusted status to hosts. Trusted hosts have root access to the NAS file system, and can therefore perform administrative functions in that file system.
The following table describes the fields and buttons on this panel.
TABLE F-93 Fields and Elements on the Set Up Local Hosts Panel
|
Field
|
Description
|
|
Host Name
|
The name of the host. The host name must begin with an alphabetic character or a number, and can include up to 63 alphanumeric characters, total: a-z, A-Z, 0-9, hyphens (-), and periods (.),but must not end with a hyphen or period character.
|
|
IP Address
|
The Internet Protocol (IP) address of the host.
|
|
New
|
Click to launch the Add Host window. From this window, you can add a host to the system host file.
|
|
Remove
|
Click to delete the host from the system host file.
|
|
Edit
|
Click to launch the Edit Host window. From this window, you can edit information about the selected host.
|
Set Up NIS Panel
This panel enables you to set up the Network Information Service (NIS) name service for the system. If you are running a pure Windows network, you do not need to set up NIS.
Note: If you are accessing this panel through the configuration wizard, make your changes and click Next to proceed to the next panel.
The following table describes the fields and buttons on this panel.
TABLE F-94 Fields and Elements on the Set Up NIS Panel
|
Field
|
Description
|
|
Enable NIS
|
Select to enable NIS, which configures the system to import the NIS database for host, user, and group information.
|
|
Domain Name
|
The name of the domain to be used for NIS services.
|
|
Server
|
The Internet Protocol (IP) address or name of the NIS server from which the NIS database is imported.
|
|
Check Rate
|
The frequency, in minutes, that NIS information is refreshed. The default is 5 minutes.
|
|
Use Broadcast
|
Select to acquire the NIS server name or IP address. This option is useful if you know the NIS domain name but not the NIS server name.
|
|
Update Hosts
|
Select to download the host information from the NIS server to the system.
|
|
Update Users
|
Select to download the user information from the NIS server to the system.
|
|
Update Groups
|
Select to download the group information from the NIS server to the system.
|
|
Update Netgroups
|
Select to download the Net group information from the NIS server to the system.
|
|
Apply
|
Click to save your changes.
|
|
Cancel
|
Click to clear the fields of new entries and return to the values that were originally displayed on the panel.
|
Set Up NIS+ Panel
This panel enables you to set up the Network Information Service Plus (NIS+) name service for the system. If you are running a pure Windows network, you do not need to set up NIS+.
Before enabling NIS+ on this panel, you must perform configuration steps on your NIS+ server. For more information, see Setting Up NIS+.
The following table describes the fields and buttons on this panel.
TABLE F-95 Fields and Elements on the Set Up NIS+ Panel
|
Field
|
Description
|
|
Enable NIS+
|
Select to enable NIS+ on the system.
|
|
Home Domain Server
|
The name or Internet Protocol (IP) address of the NIS+ home domain server.
|
|
NIS+ Domain
|
The name of the NIS+ home domain.
|
|
Secure RPC Password
|
The password used by the system to enable communication with the NIS+ server.
|
|
Search Path
|
The domains that NIS+ searches through when looking for information. This field can be blank if you want NIS+ to search only the home domain and its parents.
For example, if the NIS+ domain is eng.sun.com and the Search Path field is blank, the system first searches eng.sun.com then sun.com, and so on, when resolving names. Conversely, if the Search Path value is sun.com., the system searches only the domain sun.com when resolving names.
|
|
Use Broadcast
|
Select to acquire the NIS+ server name or IP address. This option is useful if you know the NIS+ home domain name but not the NIS+ server name.
|
|
Apply
|
Click to save your changes.
|
|
Cancel
|
Click to clear the fields of new entries and return to the values that were originally displayed on the panel.
|
Set Up NSSLDAP Panel
This panel enables you to set up Name Service Switch Lightweight Data Access Protocol (NSSLDAP), which is a Unix service that enables user account authentication.
The following table describes the fields and buttons on this panel.
TABLE F-96 Fields and Elements on the Set Up NSSLDAP Panel
|
Field
|
Description
|
|
Enable NSSLDAP
|
Select to enable NSSLDAP for the system.
|
|
Domain (DN)
|
The Lightweight Data Access Protocol (LDAP) domain name, in domain name (DN) or LDAP format.
|
|
Password
|
The bind password on the NSSLDAP server.
|
|
Server
|
The Internet Protocol (IP) address of the NSSLDAP server.
|
|
Proxy (DN)
|
The NSSLDAP proxy (entryDN).
|
|
Apply
|
Click to save your changes.
|
|
Cancel
|
Click to clear the fields of new entries and return to the values that were originally displayed on the panel.
|
Windows Configuration Panels
|
This section describes the fields and elements on the Windows Configuration panels:
Add/Edit Group Panel
This window enables you to add or edit a group, depending on whether you accessed the window by clicking Add Group or Edit Group.
The following table describes the fields and buttons in this window.
TABLE F-97 Fields and Buttons on the Add/Edit Group Window
|
Field
|
Description
|
|
Group
|
The name of the group.
|
|
Comment
|
(Optional) A brief line of text that describes the group.
|
|
Apply
|
Click to save your changes.
|
|
Cancel
|
Click to clear the fields of new entries and return to the values that were originally displayed in the window.
|
New Share Window
You can add shares from two places in the Web Administrator GUI:
- From the Configure Shares panel, by selecting New.
- From the System Manager panel, by selecting a volume or directory and choosing the appropriate option from the right-click menu (Sharing > New Share).
Use the New Share window to specify or modify a static Server Message Block (SMB) share, depending on whether you accessed the window in Add or Edit mode.
The following table describes the fields and buttons in this window.
TABLE F-98 Fields and Buttons on the New Share Window
|
Field
|
Description
|
|
Share Name
|
Name of the share. This is the name that users will see on the network.
The share name can be up to 15 characters in length, and can include any alphanumeric characters except those listed below:
" / \ [ ] : | < > + ; , ? * =
|
|
Comment
|
(Optional) Brief line of text that describes the share. You can enter up to 60 alphanumeric characters.
|
|
Mac Extensions
|
Select this Desktop DB Calls checkbox to allow the system to access and set Macintosh desktop database information. Enabling this option speeds up Macintosh client file access on the NAS appliance or gateway-system, and allows non-Macintosh clients to access Macintosh files.
|
|
Volume Name
|
TBS
|
|
Directory
|
TBS
|
|
Container
|
Applicable only if Active Directory Service (ADS) is enabled for the share, as described under Configure Domains and Workgroups Panel. Specify the location in the ADS directory where the share will be published.
Type the container information following LDAP DN (Lightweight Directory Access Protocol, distinguished name) notation. Objects, such as users and shares, are located in Active Directory domains according to a hierarchical path, which includes each level of "container" objects.
Type the path in terms of the cn (common name) folder or ou (organizational unit) of the share. Do not include the domain name in the path. The cn containers are default folders in the root folder. All other containers are ou folders. For example, if the share will reside in a shares organizational folder within an organizational parent folder called accounting, you would type the following:
ou=shares,ou=accounting
|
|
Virus Scan Exempt
|
Select to exempt the share from antivirus scan..
|
|
User ID
|
This field is applicable only if Windows Workgroup mode (not NT Domain mode) is enabled, as described under Configure Domains and Workgroups Panel. Together with the Group ID field, it provides the sole means of security for NAS file ownership and access by Windows Workgroup users.
User identification (UID) of the user accessing the volume/directory through this share. The default value for this field is 0 (zero), which is the value of the Unix root user. Use caution when assigning a zero value, however. In Windows Workgroup mode, typing zero in this field disables all security on all files and directories in the share.
|
|
Umask
|
This field is applicable only if Windows Workgroup mode is enabled.
Access permissions for the share, specified as a three-digit number. For detailed information about access permissions for shares, see About Share Access Permissions.
|
|
R/W Password
|
This field is available only if Windows Workgroup mode is enabled.
Password for Windows Workgroup users who will have read/write access to the share.
|
|
R/O Password
|
This field is available only if Windows Workgroup mode is enabled.
The password for Windows Workgroup users who will have read-only access to the share.
|
|
Group ID
|
This field is applicable only if Windows Workgroup mode is enabled.
Group identification (GID) of the user accessing the volume/directory through this share. The default value for this field is 0 (zero), which is the value of the Unix root user. Use caution when assigning a zero value, however. In Windows Workgroup mode, typing zero in this field disables all security on all files and directories in the share.
|
|
Confirm R/W Password
|
Same as the R/W Password field, for confirmation.
|
|
Confirm R/O Password
|
Same as the R/O Password field, for confirmation
|
|
Apply
|
Click to save your changes.
|
|
Cancel
|
Click to clear the fields of new entries and return to the values that were originally displayed in the window.
|
Edit Share Window
You can edit shares from two places in the Web Administrator GUI:
- From the Configure Shares panel, by selecting Edit.
- From the System Manager panel, by selecting a volume or directory and choosing the appropriate option from the right-click menu (Sharing > Edit Share).
Use the Edit Share window to specify or modify a static Server Message Block (SMB) share, depending on whether you accessed the window in Edit mode.
The following table describes the fields and buttons in this window.
TABLE F-99 Fields and Buttons on the Edit Share Window
|
Field
|
Description
|
|
Old Share Name
|
Display-only, and applicable only in Edit mode. Current name of the share.
|
|
Share Name
|
Name of the share. This is the name that users will see on the network.
The share name can be up to 15 characters in length, and can include any alphanumeric characters except those listed below:
" / \ [ ] : | < > + ; , ? * =
|
|
Comment
|
(Optional) Brief line of text that describes the share. You can enter up to 60 alphanumeric characters.
|
|
Mac Extensions
|
Select this Desktop DB Calls checkbox to allow the system to access and set Macintosh desktop database information. Enabling this option speeds up Macintosh client file access on the NAS appliance or gateway-system, and allows non-Macintosh clients to access Macintosh files.
|
|
Path
|
Applicable only if you requested this screen for Add processing from the System Manager. Path (volume name and directory, as applicable) you want to share.
Display-only for Add processing. Editable for Edit processing.
|
|
Container
|
Applicable only if Active Directory Service (ADS) is enabled for the share, as described under Configure Domains and Workgroups Panel. Specify the location in the ADS directory where the share will be published.
Type the container information following LDAP DN (Lightweight Directory Access Protocol, distinguished name) notation. Objects, such as users and shares, are located in Active Directory domains according to a hierarchical path, which includes each level of "container" objects.
Type the path in terms of the cn (common name) folder or ou (organizational unit) of the share. Do not include the domain name in the path. The cn containers are default folders in the root folder. All other containers are ou folders. For example, if the share will reside in a shares organizational folder within an organizational parent folder called accounting, you would type the following:
ou=shares,ou=accounting
|
|
Virus Scan Exempt
|
Select to exempt the share from antivirus scan.
|
|
User ID
|
This field is applicable only if Windows Workgroup mode (not NT Domain mode) is enabled, as described under Configure Domains and Workgroups Panel. Together with the Group ID field, it provides the sole means of security for NAS file ownership and access by Windows Workgroup users.
User identification (UID) of the user accessing the volume/directory through this share. The default value for this field is 0 (zero), which is the value of the Unix root user. Use caution when assigning a zero value, however. In Windows Workgroup mode, typing zero in this field disables all security on all files and directories in the share.
|
|
Umask
|
This field is applicable only if Windows Workgroup mode is enabled.
Access permissions for the share, specified as a three-digit number. For detailed information about access permissions for shares, see About Share Access Permissions.
|
|
R/W Password
|
This field is available only if Windows Workgroup mode is enabled.
Password for Windows Workgroup users who will have read/write access to the share.
|
|
R/O Password
|
This field is available only if Windows Workgroup mode is enabled.
The password for Windows Workgroup users who will have read-only access to the share.
|
|
Group ID
|
This field is applicable only if Windows Workgroup mode is enabled.
Group identification (GID) of the user accessing the volume/directory through this share. The default value for this field is 0 (zero), which is the value of the Unix root user. Use caution when assigning a zero value, however. In Windows Workgroup mode, typing zero in this field disables all security on all files and directories in the share.
|
|
Confirm R/W Password
|
Same as the R/W Password field, for confirmation.
|
|
Confirm R/O Password
|
Same as the R/O Password field, for confirmation
|
|
Apply
|
Click to save your changes.
|
|
Cancel
|
Click to clear the fields of new entries and return to the values that were originally displayed in the window.
|
Add/Edit SMB/CIFS User or Group Map Window
This window enables you to add or edit the SMB/CIFS user or group map, depending on whether you accessed the window by clicking Add or Edit on the Configure Maps Panel.
The following table describes the fields and buttons in this window.
TABLE F-100 Fields and Buttons on the Add/Edit SMB/CIFS User or Group Map Window
|
Field
|
Description
|
|
NT Group
|
|
Account
|
The NT account name of the user or group you want to map.
|
|
RID
|
The relative identifier that uniquely identifies the NT user or group within the NT domain.
|
|
Unix Group
|
|
Name
|
The Unix user or group name to which you want to map the specified NT user or group.
|
|
ID
|
The identifier that uniquely identifies the Unix user or group within the Unix domain.
|
|
Apply
|
Click to save your changes.
|
|
Cancel
|
Click to clear the fields of new entries and return to the values that were originally displayed in the window.
|
Configure Autohome Panel
This panel enables you to configure temporary shares, created when a user logs in to the system and then removed when the user logs out. The mapping file /dvol/etc/autohome.map contains the rules and search options for determining whether to share a home directory when a Windows client connects to the server.
For more information, see About Autohome Shares.
The following table describes the fields and buttons on this panel.
TABLE F-101 Fields and Buttons on the Configure Autohome Panel
|
Field
|
Description
|
|
Default Rule
|
Select one of these rules to be used when no Specific Rule is defined or no Specific Rule maps to a user name.
|
|
Use Wildcard
|
Click to allow a share with any user name
|
|
Use Name Services
|
Click to allow a share with a user name if the user name matches an entry in either NIS or NIS+, based on lookup order. See (Set Up NIS, Setup NIS+, Configure Name Services). If there is no match, the share is not allowed.
|
|
No Default Rule
|
Click to require a match with one of the user names as defined by a Specific Rule.
|
|
Specific Rules
|
The list of rules that operate to allow a share with a user name. These rules take precedence over the default rules. Each rule consists of a Name, a Home Directory, and an ADS Container if enabled.
|
|
Name
|
Valid user name
|
|
Home Directory
|
The absolute directory path for the user name in the Name field. For example, if a user's home directory is /vol1/fort/tom, the Home Directory field contains /vol1/fort. The following substitutions can be used for the user name:
- Question mark (?) substitutes for the first character of the user name
- Ampersand (&) substitutes for the whole user name
For example, if a Home Directory is defined as /vol1/fort/?/&, the directory resolves to /vol1/fort/t/tom
For more information about how to specify valid values in this field, see About Autohome Shares.
|
|
ADS Container
|
(Available if ADS is enabled. See Configure Domains and Workgroups Panel) Specifies the Active Directory Service (ADS) container in which the temporary shares can be published. For more information about how to specify valid values in this field, see About Autohome Shares.
|

|
Use these controls to change the order of the rules in the list. Select a rule to highlight and then click on the arrow button to move the rule.
|

|
Click to add a new rule to the Specific Rules. This opens the Add Rule dialog.
|

|
To change a rule, select the rule and then click the Edit button. The Edit Rule dialog is displayed.
|

|
To remove a rule, select the rule and then click the Delete button.
|
|
Apply
|
Click to save your changes.
|
|
Cancel
|
Click to clear the fields of new entries and return to the values that were originally displayed on the panel.
|
Add/Edit Rule
Use this panel to define a rule in the mapping file /dvol/etc/autohome.map, used for determining whether to share a home directory when a Windows client connects to the server.
For more information, see Configure Autohome Panel.
The following table describes the fields and buttons on this panel.
TABLE F-102 Fields and Buttons on the Configure Autohome Panel
|
Field
|
Description
|
|
Name
|
Enter a valid user name
|
|
Home Directory
|
Enter the absolute directory path for the user name, starting with the volume name up to the user name. For example, if a user's home directory is /vol1/fort/tom, the Home Directory field contains /vol1/fort. You can use following characters to substitute for the user name:
- Question mark (?) substitutes for the first character of the user name.
- Ampersand (&) substitutes for the whole user name.
For example, if a Home Directory is defined as /vol1/fort/?/&, the directory resolves to /vol1/fort/t/tom
For more information about how to specify valid values in this field, see About Autohome Shares.
|
|
ADS Container
|
(Available if ADS is enabled. See Configure Domains and Workgroups Panel) Specifies the Active Directory Service (ADS) container in which the temporary shares can be published. For more information about how to specify valid values in this field, see About Autohome Shares.
|
|
OK
|
Click to save your changes.
|
|
Cancel
|
Click to clear the fields of new entries and return to the values that were originally displayed on the panel.
|
Configure Domains and Workgroups Panel
This panel enables you to configure Windows networking for either a Windows NT Domain or a Workgroup security model.
Note: If the security model changes between the Windows Workgroup and NT Domain model, a confirmation message prompts you to confirm an automatic server reboot. Click Yes to reboot the system.
The following table describes the fields and buttons on this panel.
TABLE F-103 Fields and Buttons on the Configure Domains and Workgroups Panel
|
Field
|
Description
|
|
Domain
|
|
Domain
|
Name of an existing domain. Domain names must not exceed the 15-character NetBIOS limit.
Note: If you want to enable Active Directory Service (ADS), type the name of the Windows 2000 domain in which ADS is running. The system must also belong to this domain.
|
|
User Name
|
Name of an existing domain user.
If you want to enable ADS, the user name in this field must be for a Windows 2000 user with administrative rights. This user must be the domain administrator or a user that is a member of the domain Administrators group. The ADS client performs secure ADS updates with this user.
Note: If the domain administrator user name is displayed in this field but the ADS update fails, the domain administrator password must be changed (on the domain controller). This is only required for the administrator user, and the same password can be reused. For more information, see the Microsoft Support Services Web Site, Article Q248808.
|
|
Password
|
Password of the domain user. For ADS, this is the Windows administrative user's password.
|
|
Enable ADS
|
Select if you want the Active Directory Service (ADS) software to publish Sun StorageTek shares to ADS, or remove Sun StorageTek shares from ADS. For more information about ADS and how to configure it, see About Active Directory Service.
|
|
ADS Information
|
Information specific to the Active Directory Service:
- Container - The ADS path location of the Windows 2000 administrative user in Lightweight Directory Access Protocol (LDAP) distinguished name (DN) notation. Type the path in terms of the user's cn (common name) folder or ou (organizational unit).
For example, if the user resides in a users folder within a parent folder called "accounting," you would type the following:
ou=users,ou=accounting
Note: Do not include the domain name in the path.
- Site - If the ADS domain controller is in a different subnet than the client, type the appropriate site name in the Site field. Otherwise, leave the Site field blank. If specified, the Site will be included when selecting a domain controller.
|
|
Kerberos Domain Information
|
Information specific to the Kerberos domain:
- Realm - The Kerberos realm name that is used to identify ADS (this is usually the ADS domain). This is usually the ADS domain or the Domain Name Service (DNS) domain. When you click Apply, this entry is converted to all uppercase letters.
- Server - The host name of the Kerberos Key Distribution Center (KDC) server. This is usually the host name of the primary domain controller in the ADS domain. If the software can locate the KDC server by using Domain Name Service (DNS) software, this field will be blank.
|
|
Workgroup
|
|
Name
|
Name of the workgroup.
|
|
Comments
|
Line of text that describes the network configuration.
|
|
Apply
|
Click to save your changes. If you are configuring Windows networking for a Windows NT domain, an account is created on the domain for this system.
|
|
Cancel
|
Click to clear the fields of new entries and to return the values that were originally displayed on the panel.
|
Configure Groups Panel
This panel enables you to administer local groups. Privileges are granted to individual local groups rather than to individual users.
Note: Local groups apply only to environments that use Common Internet File System (CIFS) networking. For more information about local groups, see About Local Groups.
The following table describes the fields and elements on this panel.
TABLE F-104 Fields and Elements on the Configure Groups Panel
|
Field
|
Description
|
|
Groups
|
The groups of which the system is aware. When you select a group from this list, the Group Members and the Group Privileges lists are updated with information specific to that group.
|
|
Group Members
|
The users that are members of the selected group. For information about adding and removing users to and from a group, see Adding and Removing Group Members and Configuring Privileges.
|
|
Group Privileges
|
The privileges that are applied to the selected group. For more information about the supported group privileges, see About Configuring Privileges for Local Groups
|
|
Comment
|
A line of text that describes the group.
|
|
Apply
|
Click to save your changes.
|
|
Add Group
|
Click to launch the Add Group window. From this window, you can create a new group. For more information, see Adding and Removing Group Members and Configuring Privileges.
|
|
Edit Group
|
Click to launch the Edit Group window. From this window, you can edit the name and comment text for the selected group. You cannot edit the following default groups: Administrators, Backup Operators, and Power Users.
|
|
Remove Group
|
Click to delete the selected group. You cannot delete the following default groups: Administrators, Backup Operators, and Power Users.
|
|
Refresh
|
Click to update the panel with the latest information.
Note: If you have made changes but you have not yet clicked Apply, clicking Refresh removes your changes from the panel.
|
Configure Mapping Policy Panel
If your system includes both Unix and Windows environments, this panel enables you to establish rules for an equivalence relationship between Unix users and groups and Windows users and groups.
Choosing a user and group mapping policy establishes credential equivalence on the NAS appliance or gateway system, to provide common access using either environment. For more information, see About Mapping User and Group Credentials.
The following table describes the fields and buttons on this panel.
TABLE F-105 Fields and Elements on the Configure Mapping Policy Panel
|
Field
|
Description
|
|
Windows <__> Unix User Mapping Choice
|
|
Default Mapping
|
Select to establish no predefined mapping rule between Windows and Unix users. New users are assigned newly-generated, unique user identifiers by the system.
|
|
Map by User Name
|
Select to map Unix and Windows users who have identical user names. This enables a user to access the NAS appliance or gateway system from both environments.
|
|
Map by Full Name
|
Select to map Unix and Windows users that have identical full names.
|
|
Windows <__> Unix Group Mapping Choice
|
|
Default Mapping
|
Select to establish no predefined mapping rule between Windows and Unix groups. New groups are assigned newly-generated, unique, group identifiers by the system
|
|
Map by Group Name
|
Select to map Unix and Windows groups that have identical group names.
|
|
Map to Primary Group
|
Select to map to the NFS group in the primary group field in the configured passwd file. For more information, see About Group Mapping.
|
|
Apply
|
Click to save your changes.
|
|
Cancel
|
Click to clear the fields of new entries and return to the values that were originally displayed on the panel.
|
Configure Maps Panel
This panel enables you to view existing mappings between Unix users and groups and Windows users and groups. It also enables you to manually configure mappings between Unix users and groups and Windows users and groups.
The following table describes the fields and buttons on this panel.
TABLE F-106 Fields and Elements on the Configure Maps Panel
|
Field
|
Description
|
|
Users
|
Select to display existing user mappings in the table.
|
|
Groups
|
Select to display existing group mappings in the table.
|
|
Unix Name
|
The name of the user or group as defined in the Unix environment.
|
|
Unix ID
|
The unique identifier assigned to the user or group in the Unix environment.
|
|
Windows Name
|
The name of the user or group as defined in the Windows environment.
|
|
Windows Domain
|
The domain to which the user or group belongs in the Windows environment.
|
|
Windows RID
|
The relative identifier (RID) assigned to the user or group in the Windows environment.
|
|
Add
|
Click to launch the Add SMB/CIFS User Map window or the Add SMB/CIFS Group Map window, depending on whether you selected Users or Groups at the top of the Configure Maps panel. From this window, you can configure a new user or group mapping. For more information, see Mapping Windows Groups and Users to Unix Groups and Users.
|
|
Remove
|
Click to delete the selected user or group mapping, depending on whether you selected Users or Groups at the top of the Configure Maps Panel.
|
|
Edit
|
Click to launch the Edit SMB/CIFS User Map window or the Edit SMB/CIFS Group Map window, depending on whether you selected Users or Groups at the top of the Configure Maps panel. From this window, you can edit the selected user or group mapping. For more information, see Editing a Mapping Between a Windows Group or User and a Unix Group or User.
|
Configure Shares Panel
This panel displays the current Server Message Block (SMB) shares and their attributes. Use this panel to create new shares, change the attributes of an existing share, or delete a share.
Note: After creating a volume, you must create a share for the volume. Users can then access the volume and create directories. After directories are created on the volume, you can create individual shares for them.
The following table describes the fields and buttons on this panel.
TABLE F-107 Fields and Buttons on the Configure Shares Panel
|
Field
|
Description
|
|
Name
|
Name of the share.
|
|
Path
|
Location of the share on the system.
|
|
Virus Scan
|
Displays whether the share is scanned for viruses.
|
|
Comment
|
Text description relating to the share (can be blank).
|
|
User
|
Applicable only if Windows Workgroup mode is enabled, as described under Configure Domains and Workgroups Panel.
User identification (UID) of the user accessing the volume/directory through this share.
|
|
Group
|
Applicable only if Windows Workgroup mode is enabled.
Group identification (GID) of the user accessing the volume/directory through this share.
|
|
Umask
|
Applicable only if Windows Workgroup mode is enabled.
Access permissions for the share, specified as a three-digit number. For detailed information about access permissions for shares, see About Share Access Permissions.
|
|
Container
|
Applicable only if Active Directory Service (ADS) is enabled for the share, as described under Configure Domains and Workgroups Panel.
ADS container in which the share is published.
|
|
Desktop DB Calls
|
Whether the system can access and set Macintosh desktop database information. If the On value is displayed in this field, Macintosh client file access is sped up and non-Macintosh clients can access Macintosh files in this share.
|
|
New
|
Click to open the New Share window and add a new share.
|
|
Remove
|
Click to remove the selected share. Click Yes on the verification screen to remove the share.
|
|
Edit
|
Click to open the Edit Share window and modify the selected share.
|
Remove Share Window
This window displays when you request removal of a share from the System Manager. Use it to remove a static Server Message Block (SMB) share.
The following table describes the fields and buttons in this window.
TABLE F-108 Fields and Elements on the Remove Share Window
|
Field
|
Description
|
|
Name
|
Name of the share.
|
|
User
|
Applicable only if Windows Workgroup mode is enabled, as described under Configure Domains and Workgroups Panel.
User identification (UID) of the user accessing the volume/directory through this share.
|
|
Group
|
Applicable only if Windows Workgroup mode is enabled.
Group identification (GID) of the user accessing the volume/directory through this share.
|
|
Apply
|
Click to remove the share.
|
|
Cancel
|
Click to exit out of the window without removing the share.
|
Set Up WINS Panel
If you are using a Windows or a mixed environment, this panel enables you to set up the Windows Internet Naming Service (WINS) server with the NAS software.
The WINS server enables computers on your network to communicate with each other by resolving Network Basic Input/Output System (NetBIOS) names to Internet Protocol (IP) addresses. If Server Message Block (SMB) is enabled, your system has a NetBIOS name.
If you are using a pure Unix environment, you do not need to set up WINS.
The following table describes the fields and buttons on this panel.
TABLE F-109 Fields and Buttons on the Set Up WINS Panel
|
Field
|
Description
|
|
Enable WINS
|
Select to enable WINS, which allows the system to be a WINS client.
|
|
Primary WINS Server
|
The IP address of the server that is consulted first for NetBIOS name resolution.
|
|
Secondary WINS Server
|
The IP address of the server that is consulted only if the primary WINS server is not responding.
|
|
Scope
|
A valid domain name as defined by the Domain Name Service (DNS) software. Defining a scope prevents this computer from communicating with any systems that do not have the same scope configured. Therefore, use caution with this setting. The scope is useful if you want to divide a large Windows workgroup into smaller groups. If you use a scope, the scope ID must follow NetBIOS name conventions or domain name conventions and is limited to 16 characters. For more information about valid values that you can enter in this field, see Setting Up WINS.
|
|
Apply
|
Click to save your changes.
|
|
Cancel
|
Click to clear the fields of new entries and return to the values that were originally displayed on the panel.
|
System Status Panel
This panel enables you to view general information about the network attached storage (NAS) system. In the bottom portion of the panel, the latest status of the system is displayed.
The following table describes the fields on this panel.
TABLE F-110 Fields on the System Status Panel
|
Field
|
Description
|
|
Name
|
Name of the NAS server.
|
|
Model
|
Server model number.
|
|
Serial #
|
Unique serial number of the system.
|
|
Up Time
|
Amount of time elapsed since the system was last turned on.
|
|
CPU Load
|
Current and peak central processing unit (CPU) load.
|
|
OS Version
|
Current version of NAS software running on the server.
|
|
Web Administrator Version
|
Version designation for the graphical Web Administrator application.
|