Changing the Schema Source
The program automatically provides default schema sources, but allows you to change the default schema.
 To Change the Default Schema Source
-
Click the Load Schema button on the Define Significant Attribute Mappings dialog box.
The Select Schema Sources panel is displayed.
Figure 8–31 Selecting Schema Sources

Use this panel to specify from which Sun Java System Directory Server schema server you want to read the schema. This schema contains the object classes that are available on your system, and object classes define which attributes are available for users on your system.
The program adds your configuration directory to the Sun Java System Directory schema server field by default.
-
To select a different server, click the Choose button.
The Select a Sun Schema Host dialog box is displayed. This dialog box contains a list of the configuration directories that gather administrative information about your directory sources.
From this dialog box, you can:
-
Create new configuration directories and add them to the list.
Click New, and when the New Configuration Directory dialog box displays; specify a Host, Port, User DN, and Password. Click OK when you are done.
-
Edit existing directories.
Click Edit, and when the Edit Configuration Directory dialog box displays, you can change the Host, Port, User DN, and/or Password. Click OK when you are done.
-
Remove directories from the list.
Select a directory name from the list and then click the Remove button.
-
-
Select a server from the list and click OK when you are done. (Generally, one of your Sun synchronization host(s) is a good choice as a schema source.)
-
Click the Next button and the Select Structural and Auxiliary Object Classes panel is displayed.
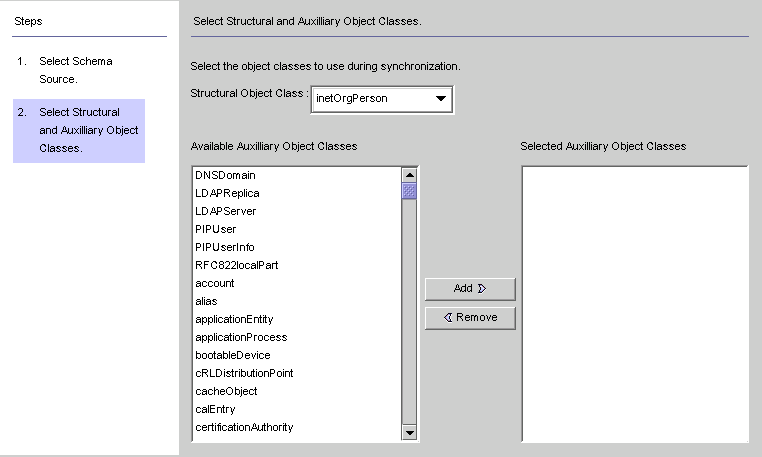
Figure 8–32 Selecting Structural and Auxiliary Object Classes

Use this panel to specify the object classes to synchronize, as follows:
-
Structural Object Class: Every entry that is created or synchronized from the selected Directory Server must have at least one structural object class.
-
Auxiliary Object Classes: These object classes augment the selected structural class and provide additional attributes for synchronization.
-
Select a structural object class from the drop-down list. ( Default is inetorgperson.)
-
Select one or more object classes from the Available Auxiliary Object Classes list pane, and then click Add to move your selection(s) to the Selected Auxiliary Object Classes list pane.
The selected object class(es) determine which Directory Server source attributes will be available for selection as significant or creation attributes. The object class(es) also determine the mandatory creation attributes.
To delete selections from the Selected Auxiliary Object Classes list, click the object class name and then click the Remove button.
-
When you are done, click Finish and the program loads the schema and selected object classes.
-
- © 2010, Oracle Corporation and/or its affiliates
