 To Configure the Keystore and Truststore on a Client
On the client side, a keystore and truststore file must be configured for some of the security mechanisms. Refer to the table in Summary of Client-Side Configuration Requirements for information on which mechanisms require the configuration of keystores and truststores.
If the mechanism configured for the service requires the configuration of keystores and truststores, follow these steps.
-
Check the table in Summary of Client-Side Configuration Requirements to see if a keystore needs to be configured for the client for the selected security mechanism. If so, continue.
-
In the Projects window, expand the node for the web service client.
-
Expand the Web Service References node.
-
Right-click the node for the web service reference for which you want to configure security options.
-
Select Edit Web Service Attributes.
When the Web Service References Attributes Editor is opened, select the WSIT Configuration tab to display the WSIT options.
-
Expand the Certificates section to specify the keystore and truststore information if required by the service.
-
Depending on what is required for the selected mechanism, you may specify the following information in the Certificates section:
-
Keystore Location: The directory and file name containing the certificate key to be used to authenticate the client. By default, the location is already set to the default GlassFish keystore, as-install/domains/domain1/config/keystore.jks.
-
Keystore Password: The password for the keystore used by the client. By default, the password for the GlassFish keystore is already entered. This password is changeit.
Note –When specified, this password is stored in a WSIT configuration file in clear text. Setting the keystore password in the development environment is fine, however, when you go into production, remember to use the container’s default CallbackHandler to obtain the keys from the keystore. This eliminates the need for the keystore passwords to be supplied by the users. You can also specify the passwords for keystores and truststores by specifying a CallbackHandler class that implements the javax.security.auth.callback.CallbackHandler interface in the Keystore Password, Truststore Password, or Key Password fields.
-
Load Aliases: Click this button to populate the Alias list with all of the certificates available in the selected keystore. This option will only work if the keystore location and password are correct.
-
Keystore Alias: Select the alias in the keystore. Refer to the table in Specifying Aliases with the Updated Stores to determine which alias is appropriate for the selected security mechanism.
-
Key Password: If the client key has been password-protected, type the password for this key. The GlassFish certificate key password is changeit.
-
Truststore Location: The directory and file name of the client truststore containing the certificate of the server. By default, this field points to the default GlassFish truststore, as-install/domains/domain1/config/cacerts.jks.
-
Truststore Password: The password for the truststore used by the client. By default, the password for the GlassFish truststore is already specified. The password is changeit.
Note –When specified, this password is stored in a WSIT configuration file in clear text. Setting the truststore password in the development environment is fine; however, when you go into production, remember to use the container’s default CallbackHandler to obtain the keys from the keystore. This eliminates the need for the keystore passwords to be supplied by the users. You can also specify the passwords for keystores and truststores by specifying a CallbackHandler class that implements the javax.security.auth.callback.CallbackHandler interface in the Keystore Password, Truststore Password, or Key Password fields.
-
Load Aliases: Click this button to populate the Alias list with all of the certificates available in the selected keystore. This option will only work if the truststore location and password are correct.
-
Truststore Alias: Select the alias of the server certificate and private key in the client truststore. Refer to the table in Specifying Aliases with the Updated Stores to determine which alias is appropriate for the selected security mechanism.
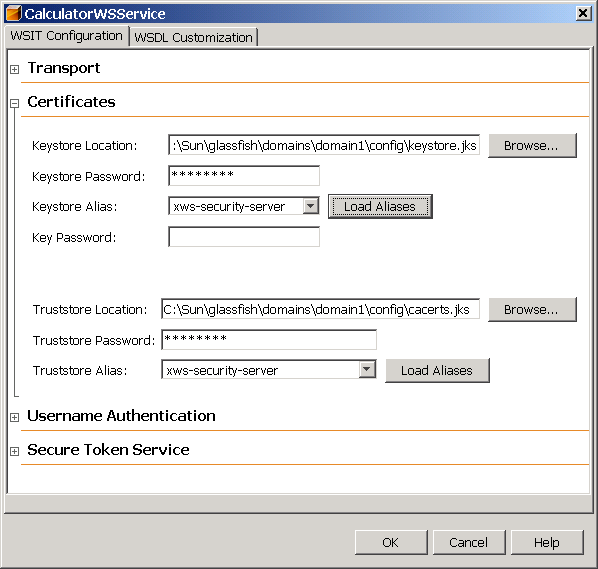
When the certificates are configured as suggested for some of the examples in this chapter, the dialog will appear as shown in Figure 7–6.
Figure 7–6 Client-side Certificate Configuration Dialog

-
-
Click OK to close the dialog.
- © 2010, Oracle Corporation and/or its affiliates
