 To Add a Broker to the Administration Console
-
Click on the Brokers item in the Administration Console window’s navigation pane and choose Add Broker from the Actions menu.
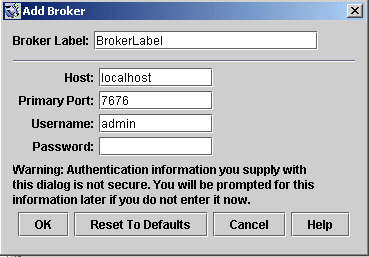
Alternatively, you can right-click on Brokers and choose Add Broker from the pop-up context menu. In either case, the Add Broker dialog box (Figure 2–3) will appear.
Figure 2–3 Add Broker Dialog Box

-
Enter a name for the broker in the Broker Label field.
This provides a label that identifies the broker in the Administration Console.
Note the default host name (localhost) and primary port ( 7676) specified in the dialog box. These are the values you must specify later, when you configure the connection factory that the client will use to create connections to this broker.
For this exercise, type the name MyBroker into the Broker Label field. Leave the Password field blank; your password will be more secure if you specify it at connection time.
-
Click OK to add the broker and dismiss the dialog box.
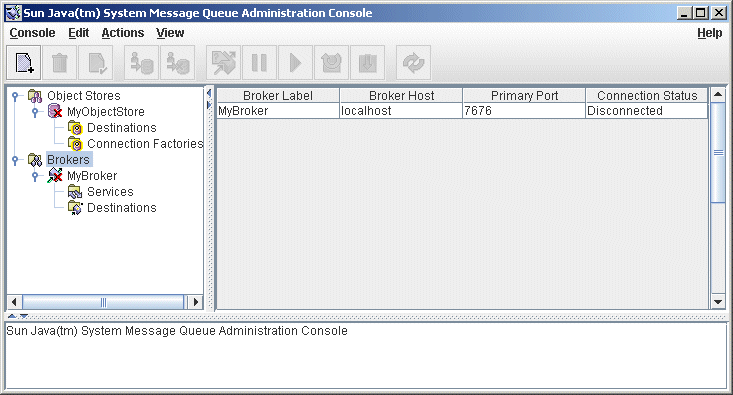
The new broker will appear under Brokers in the navigation pane, as shown in Figure 2–4. The red X over the broker’s icon indicates that it is not currently connected to the Administration Console.
Figure 2–4 Broker Displayed in Administration Console Window

Once you have added a broker, you can use the Properties command on the Actions menu (or the pop-up context menu) to display a Broker Properties dialog box, similar to the Add Broker dialog shown in Adding a Broker to the Administration Console, to view or modify any of its properties.
- © 2010, Oracle Corporation and/or its affiliates
