 Verify That the Trusted Extensions Roles
Work
To verify each role, assume the role. Then, perform tasks that only that role can perform.
Before You Begin
If you have configured DNS or routing, you must reboot after you create the roles and before you verify that the roles work.
-
For each role, log in as a user who can assume the role.
-
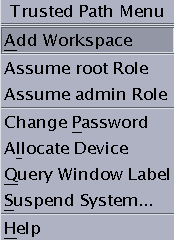
Open the Trusted Path menu.

-
From the menu, assume the role.
-
In the role workspace, start the Solaris Management Console.
$ /usr/sbin/smc &
-
Select the appropriate scope for the role that you are testing.
-
Click System Services, and navigate to Users.
You are prompted for a password.
-
Click a user.
-
The System Administrator role should be able to modify fields under the General, Home Directory, and Group tabs.
-
The Security Administrator role should be able to modify fields under all tabs.
-
The Primary Administrator role should be able to modify fields under all tabs.
-
- © 2010, Oracle Corporation and/or its affiliates
