| Oracle® VM User's Guide Release 3.0 for x86 Part Number E18549-03 |
|
|
PDF · Mobi · ePub |
| Oracle® VM User's Guide Release 3.0 for x86 Part Number E18549-03 |
|
|
PDF · Mobi · ePub |
This tutorial describes how to get started with Oracle VM, and walks you through discovering Oracle VM Servers, registering storage, setting up networking, setting up a storage repository and importing resources into it, creating a server pool and creating virtual machines. You should read and follow this tutorial if you are new to Oracle VM and want to quickly get up and running.
This tutorial includes a visual indicator graphic to show you where you are in relation to the tutorial steps, as shown below.

This tutorial includes the following steps, in the order you should perform them.

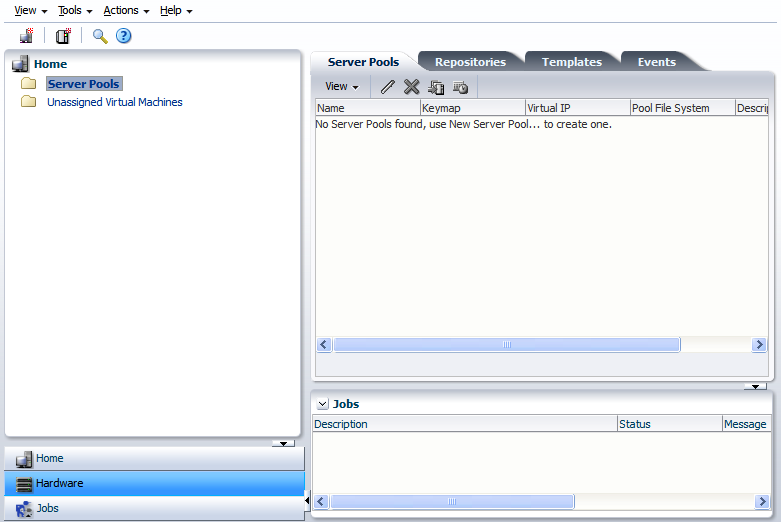
When you log into Oracle VM Manager, the Home view is the first screen displayed.
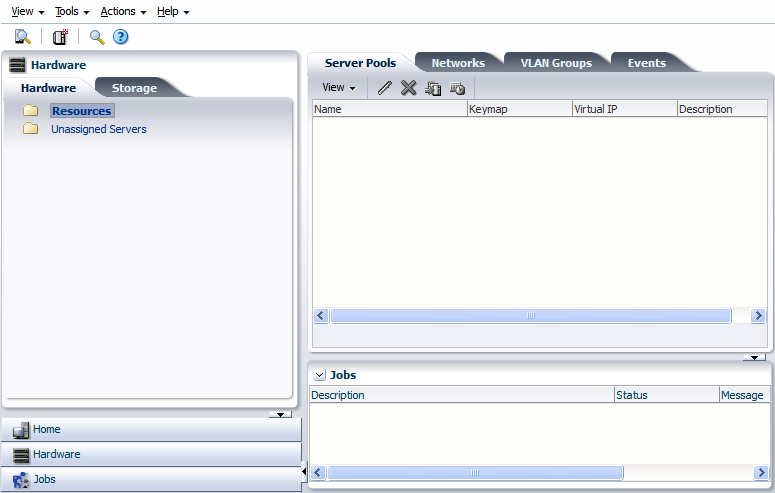
To set up your Oracle VM environment, you should move to the Hardware view. The Hardware view is where Oracle VM Servers, networking and external storage are added as resources.
When you add Oracle VM Servers to your Oracle VM Manager environment, this process is known as discovering Oracle VM Servers. This term is used often in this Guide. The first thing you should do to set up your virtualization environment is to discover your Oracle VM Servers.
When an Oracle VM Server is discovered, it contains some basic information about itself, and about any immediate connectivity to a shared SAN, but it is considered to be in an unconfigured state. Any storage attached to the Oracle VM Server is also discovered.
Example 4-1 Discover Oracle VM Servers
This example walks through discovering three Oracle VM Servers. Replace the IP addresses and the Oracle VM Agent password for that of your own environment.
To discover Oracle VM Servers:
Select the Hardware view.
Select Discover from the Actions menu. The Discover Servers dialog box is displayed.
Enter information about the Oracle VM Server(s) to be discovered.
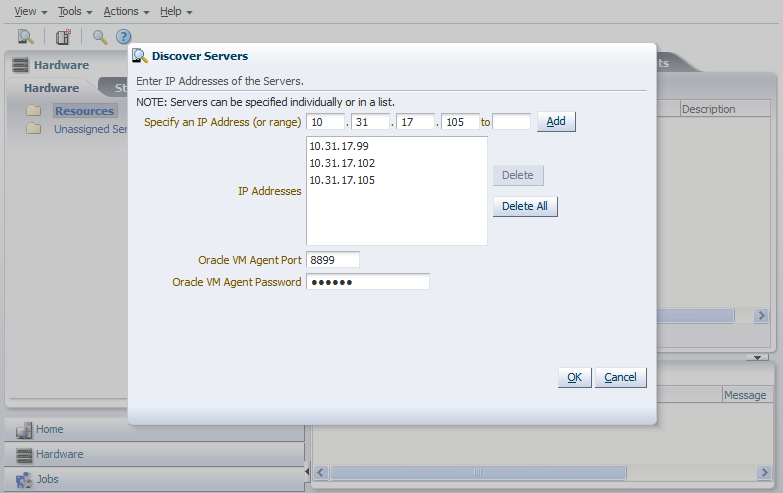
Click OK.
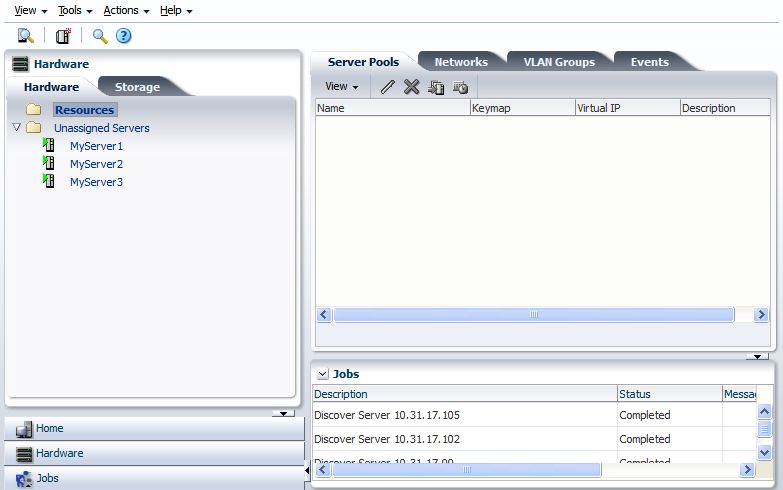
The Oracle VM Servers are discovered and added to the Unassigned Servers folder.
For more information on discovering an Oracle VM Server, see Section 7.8.1, "Discovering Oracle VM Servers".
Depending on your hardware and networking configuration, external storage may be automatically detected during discovery of the Oracle VM Servers. This is always the case with local OCFS2 storage on an Oracle VM Server.
When you have discovered your Oracle VM Servers, you should register your storage.

Storage refers to two different types of disk space: the space available for environment resources such as virtual machine templates and ISO files, and the logical or physical disks used by virtual machines. You can use two types of storage for virtual machines:
Virtual disks: disk image files on a file system.
Raw physical disks: LUNs accessed directly by the virtual machine.
Your storage can be any of the following:
iSCSI: Abstracted LUNs or raw disks accessible over existing Ethernet infrastructure (SAN)
FCP: Abstracted LUNs or raw disks accessible over Fibre Channel host bus adapters (SAN)
NFS: File-based storage over existing Ethernet infrastructure (NAS)
In addition to the storage entities you require for storage repositories, you should make sure you leave some disk space available to create storage entities of at least 12GB each to use as server pool file systems. The server pool file system is used to hold the server pool and cluster data, and is also used for cluster heartbeating. You create server pool file systems the same way you create storage entities for storage repositories. For more information about the use and management of clusters and server pools, see Chapter 7, "Managing Server Pools".
Your storage may have been automatically discovered when you discovered your Oracle VM Servers. If not, you must register it. If your storage server exposes a writable file system (through an NFS share or a Sun ZFS storage pool) register the file server using the procedure in Section 5.6.1, "Registering and Configuring File Servers". If your storage server exposes raw disks (SAN volumes, iSCSI targets and LUNs) register the storage array using the procedure in Section 5.6.3, "Registering and Configuring Storage Arrays".
The following examples show how to register a file server, and a storage array. Before you register any storage, you must first perform any storage configuration outside of the Oracle VM environment, such as creating and exporting file system mounts on an NFS server.
Example 4-2 Register NFS file server
This example uses a file server storage type (an NFS share). Replace the IP address for that of your own NFS server. On the NFS server you should have at least two file systems, one of at least 12GB for the server pool file system, and one larger file system for the repository.
To register a file server:
Select the Hardware view and open the Storage tab in the navigation pane.
In the navigation pane, select the File Servers tab and select Register File Server from the Actions menu. The Register File Server wizard is displayed.
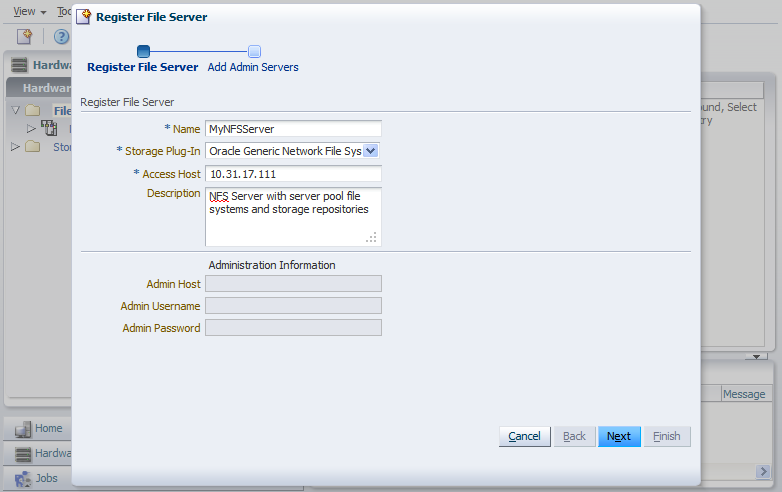
Enter information about your file server such as the IP address and click Next.
Assign one or more Oracle VM Servers to perform any required administration on the file server. Click Finish.
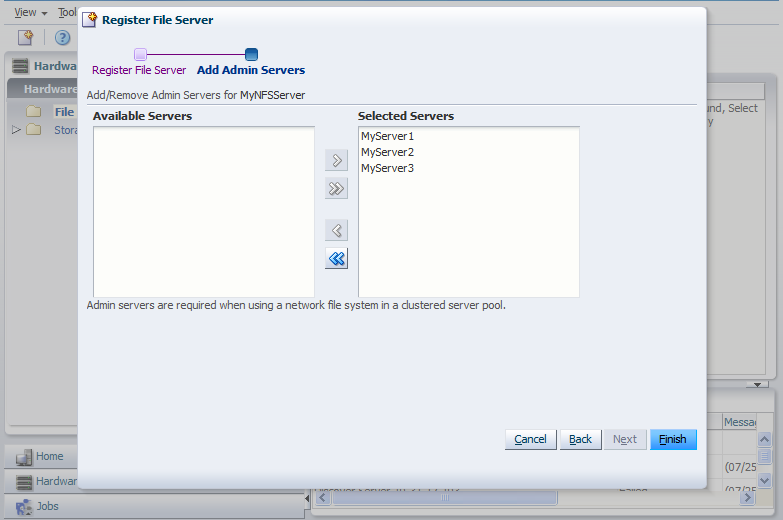
The new file server is displayed in the navigation pane, under File Servers. At this point, the Storage Connect plug-in has established a link to the storage location and discovered each file system on the file server. All the file systems for the NFS file server are added to Oracle VM Manager.
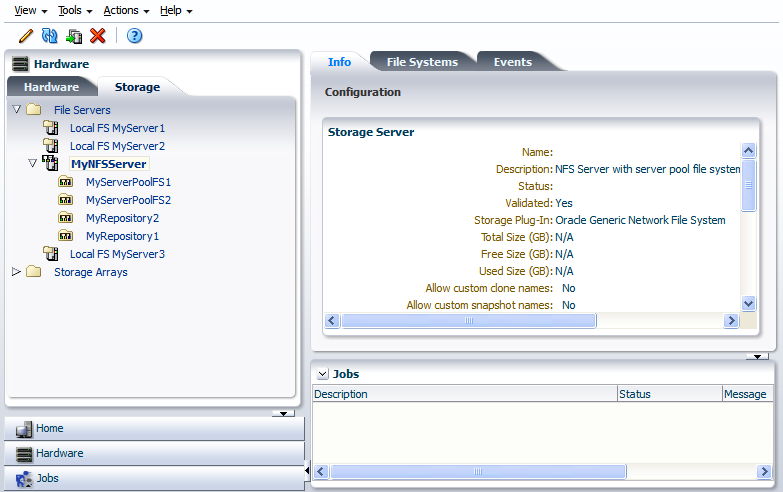
Before you can use a mount point, you must refresh it. Select each mount point on the file server individually, and select Refresh File System from the Actions menu.

You need to assign an Oracle VM Server to perform the work of refreshing the file system. Select one in the Refresh dialog box and click OK. Repeat this step to refresh all the server pool file systems and repositories you want to use.
For more information about registering and configuring storage, see Chapter 5, "Managing Storage".
Now your storage is ready to be used to create a storage repository or server pool file system.

Oracle VM has a number of network functions: Server Management, Live Migrate, Cluster Heartbeat, Virtual Machine, and Storage. The Server Management, Live Migrate and Cluster Heartbeat roles are automatically assigned to the management network when you discover Oracle VM Servers. The Virtual Machine and Storage roles are not automatically created, and you must manually create these. The Storage role is only required for Ethernet-based storage, so for the purposes of the NFS-based storage used in this tutorial, is not required. We do, however, need to create a network with the Virtual Machine role. This can be assigned to the existing management network, or a new network can be created and the Virtual Machine role assigned to it. This tutorial shows you how to create a new network.
Example 4-3 Create a Virtual Machine Network
This example creates a virtual machine network using network interface cards (NICs) on the Oracle VM Servers discovered earlier. In this example we are using bonded Ethernet ports. Each Oracle VM Server should have a set of Ethernet ports to use for the virtual machine network. Oracle recommends at least two ports per Oracle VM Server, one for the management network, and one for a network with the Virtual Machine role. Replace the information in this example with that of your Oracle VM Servers and environment.
To create a virtual machine network:
Select the Hardware view, and select the Hardware tab, then the Resources folder. Select the Networks tab in the management pane.

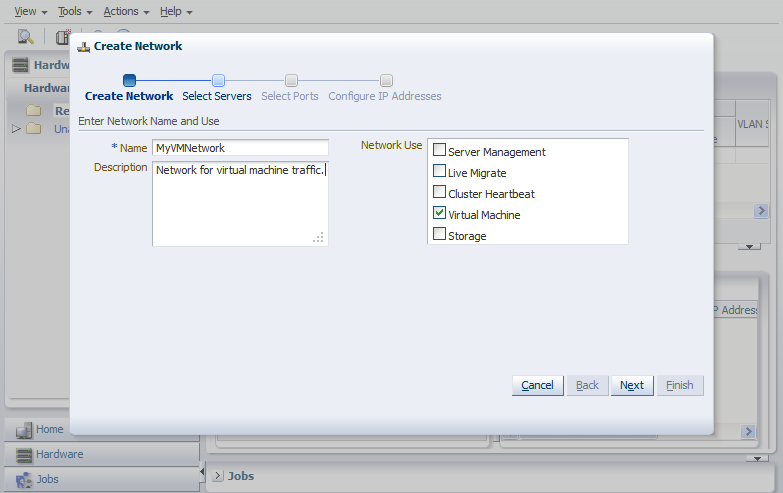
Click Create to start the Network Configuration wizard. Select the type of network to create, based on your network infrastructure. In this example we use the ethernet ports on each Oracle VM Server to create a network for virtual machine traffic. Click Next.

At the Create Network step, enter information about the network and the network functions. The Network Usage fields are where you decide which network functions are to be assigned to the network. Select Virtual Machine and click Next.
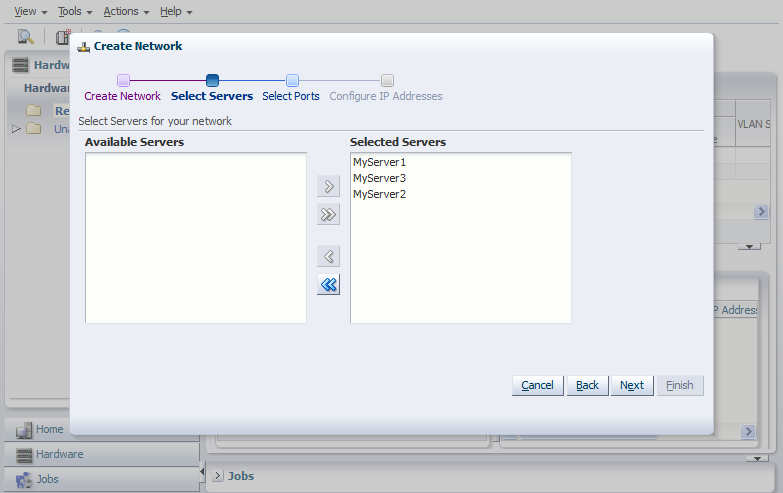
To discover the Ethernet ports on the Oracle VM Servers, select them and move them to the Selected Servers field, and click Next.
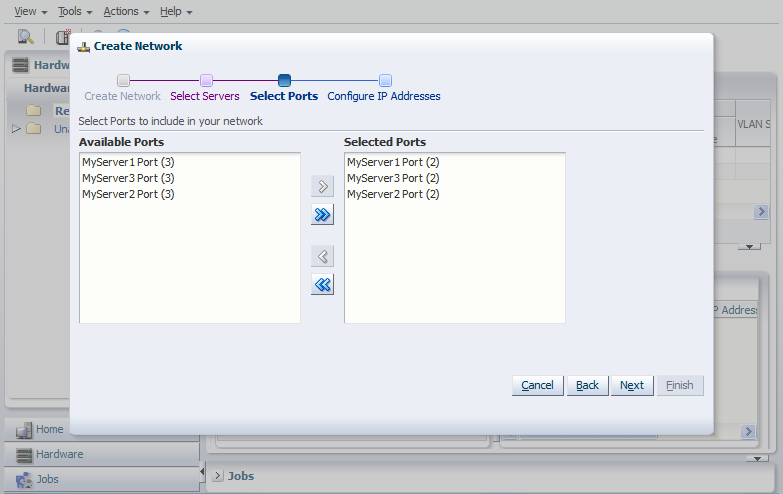
Select a port from each Oracle VM Server to use for the virtual machine network and click Next.
You can use static IP addresses, DHCP or have no IP addresses assigned to the network. In this example we do not need to use IP addresses as we are creating a network for use only by virtual machines, so we set the Addressing to None. Click Finish to create the network.

The newly created virtual machine network is created and listed in the Networks tab. This virtual machine network is ready to use when creating virtual machines.

See Chapter 6, "Managing Networks" for information on creating and configuring networks.
Now you have set up the virtual machine network, you should generate some virtual NICs to use in virtual machines to enable network connectivity.

The VNIC Manager creates Virtual Network Interface Cards (VNICs), which can be used by virtual machines as network cards. You create virtual network interfaces by defining a range of MAC addresses to use for each VNIC. Each MAC address corresponds with a single VNIC, which is used by a virtual machine. Before you can create a virtual machine which has the ability to connect to the network, you should generate a set of VNICs with the Vnic Manager. You only need to perform this step when you run out of VNICs, not each time you want to create a virtual machine.
This example generates 10 VNICs to use with virtual machines. The MAC addresses will differ in your environment, but the process is the same as that shown here.
To generate VNICs:
Select Vnic Manager from the Tools menu.
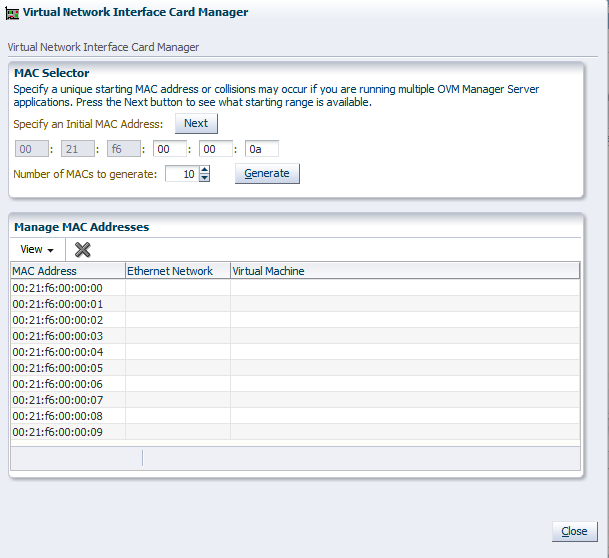
Click Next in the MAC Selector panel to get the next available MAC address.
Select the number of addresses that you want to create and click Generate.
Click Close to close the Vnic Manager.
See Section 8.6, "Using the VNIC Manager" for information on generating VNICs.
When you have generated VNICs, you can use them to add network connectivity to your virtual machines. Next, we create a server pool.

A server pool contains a group of Oracle VM Servers, which as a group perform virtual machine management tasks, such as High Availability (HA), implementation of resource and power management policies, access to networking, storage and repositories.
Example 4-5 Create a server pool
This example creates a server pool using the Oracle VM Servers, and the server pool file system on the file system-based storage (NFS server). You need an IP address to use as the virtual IP address to enable clustering and HA. Replace the server pool information in this example with that of your environment.
To create a server pool:
Select the Home view.
Select Create Server Pool from the Actions menu.
The Create Server Pool dialog box is displayed. Enter the server pool information:

An IP address is required to use as a virtual IP address to identify the master Oracle VM Server, which controls the other Oracle VM Server in the server pool.
Select Activate Cluster to enable clustering of the Oracle VM Servers in the server pool, which is required to enable HA.
Select Network File System as the file system type to use for the server pool. The server pool file system is used to hold the server pool and cluster data, and is also used for cluster heartbeating. Use the Location search icon to search for the server pool file system.
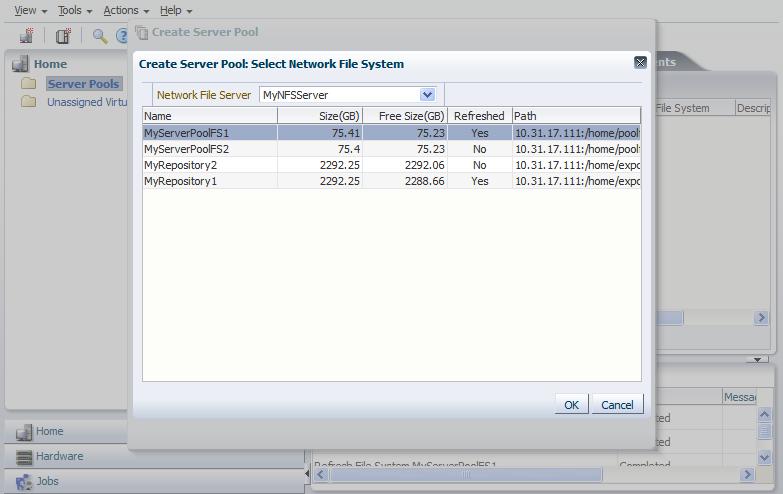
Select the file system to use for the server pool file system and click OK.
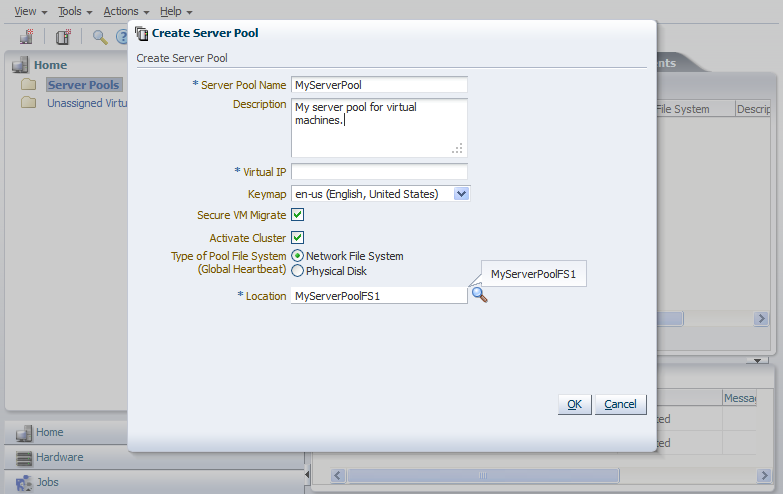
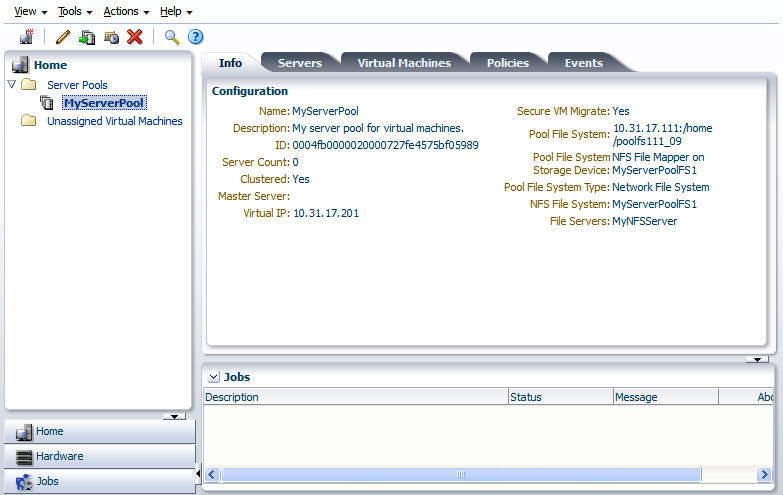
Click OK to create the server pool.
Now you have created a server pool, you can add the Oracle VM Servers to it.
Select the server pool in the navigator, then select Add/Remove Servers from the Actions menu.
Add the Oracle VM Servers to the Selected Servers field and click OK.
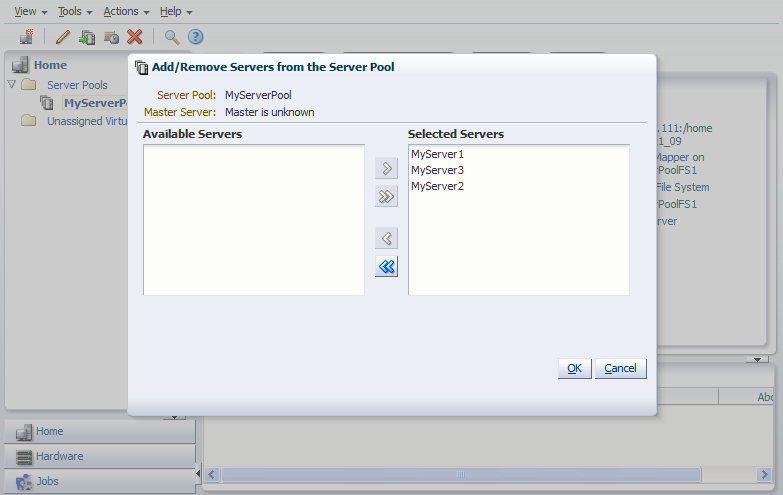
The Oracle VM Servers are added to the server pool and ready to use to create virtual machines.
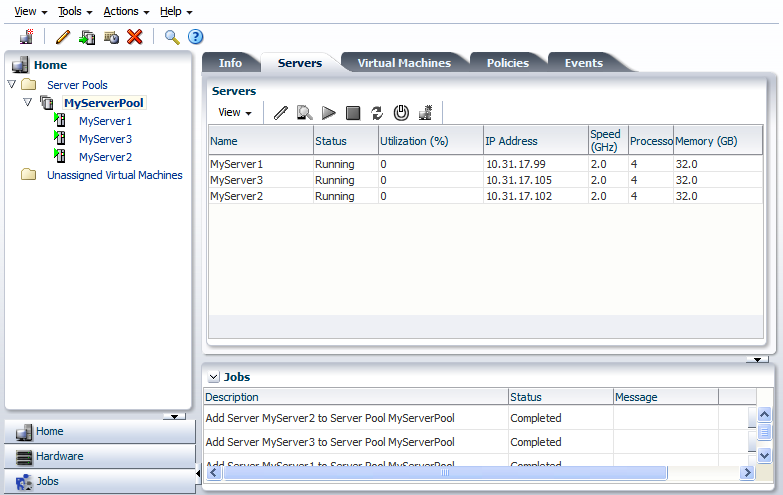
For more information on creating server pools and adding Oracle VM Servers, see Section 7.6, "Creating a Server Pool" and Section 7.7.1, "Adding an Oracle VM Server to a Server Pool".
The next step is to create a storage repository to use for virtual machine resources.

A storage repository is where Oracle VM resources may reside on the storage you registered in Section 4.2, "Register Storage". Resources include virtual machines, templates for virtual machine creation, virtual machine assemblies, ISO files (DVD image files), shared virtual disks, and so on.
You use Oracle VM Manager to create and configure storage repositories, and to present one or more storage repositories to Oracle VM Servers in a server pool. When the storage repository is accessible, you can start adding storage resources and building virtual machines with those resources.
Example 4-6 Create a storage repository
This example creates a storage repository to store virtual machine resources using an NFS file server. Use the larger of the file systems you refreshed earlier. Replace the file server and other names used in this example with that of your own environment.
To create a storage repository:
Select the Home view and select the Server Pools folder in the navigator.
In the management pane, select the Repositories tab.
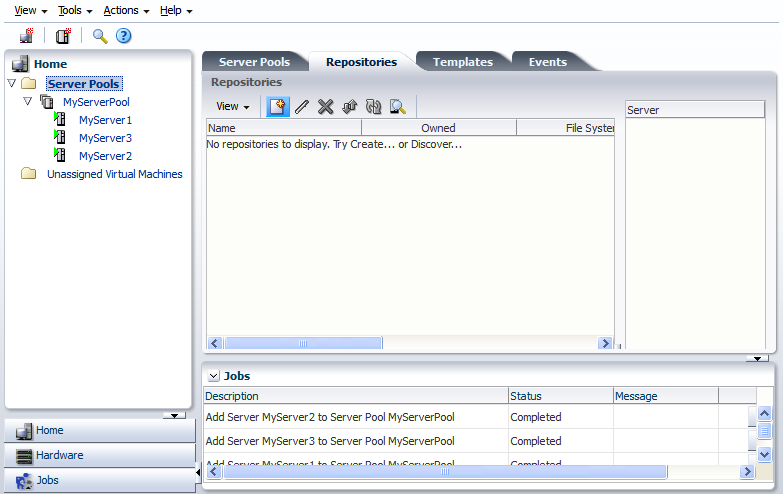
Click Create to create a new storage repository.
In the Create Repository dialog box, enter information about the repository.
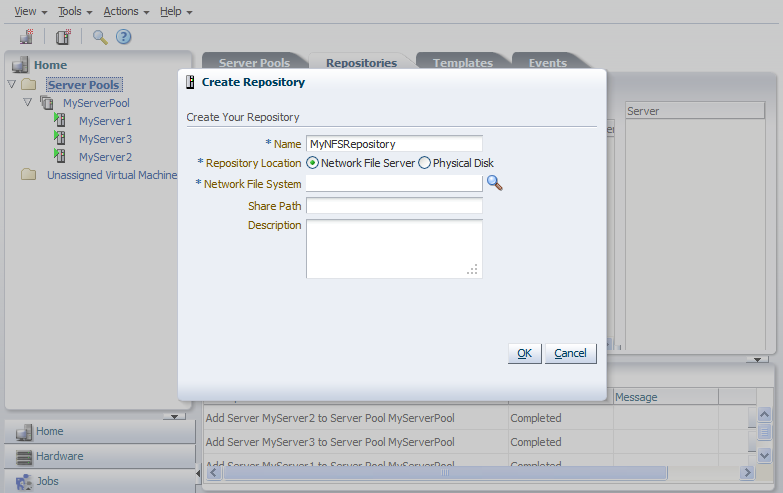
Select Network File Server as the Repository Location to use the NFS server. Click the search icon to search for the available file systems on the registered file server.
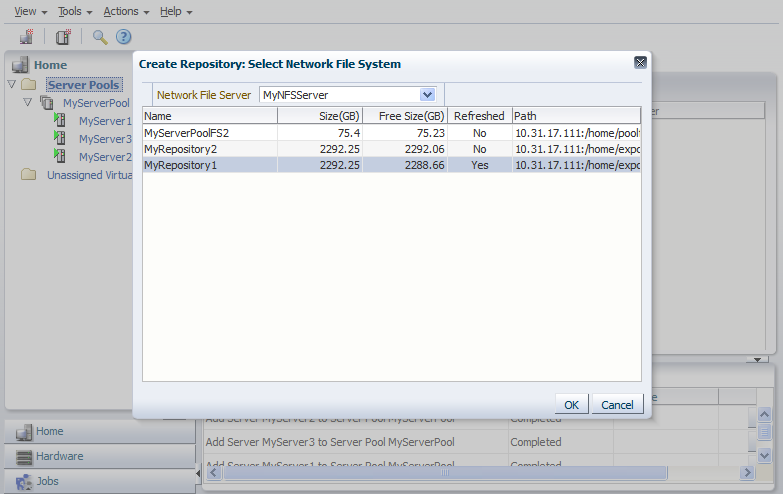
Select a file system and click OK.
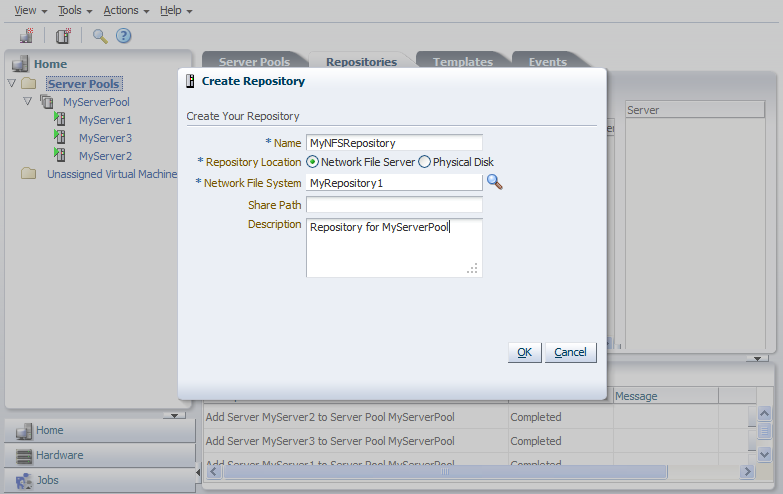
Click OK to create the new storage repository.
The new storage repository is displayed in the Repositories tab.
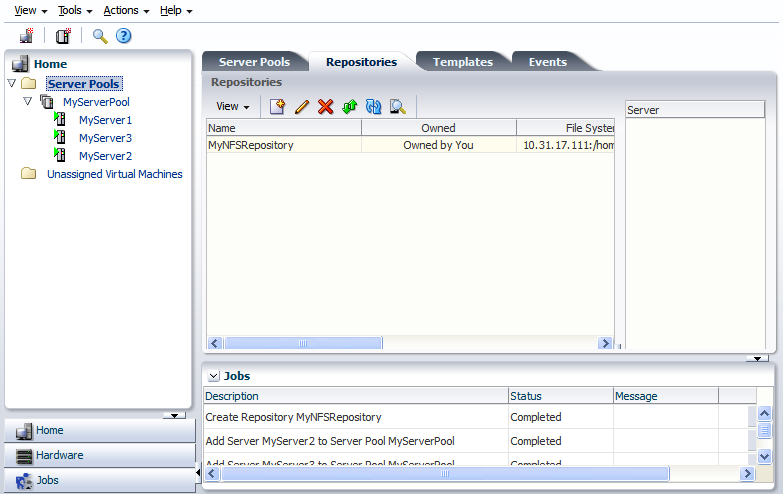
At this point, the storage repository has been created. However, to enable your Oracle VM Servers to use it, you must present the repository to the Oracle VM Servers in your server pool. Select the repository in table and click the Present/Unpresent Selected Repository icon.
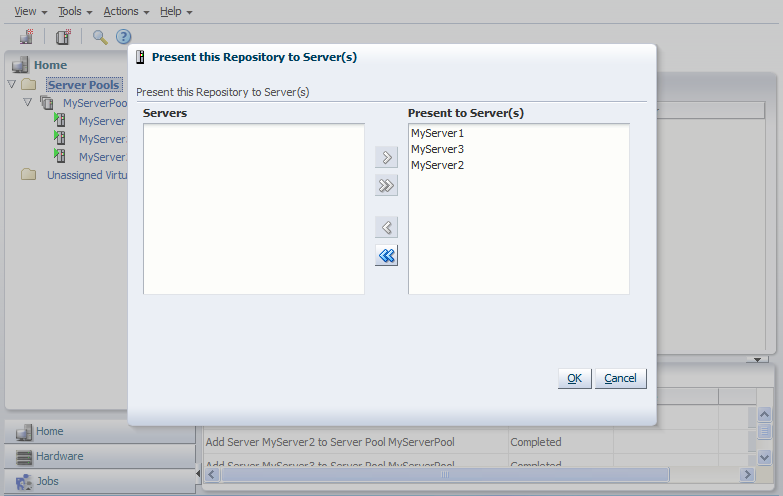
Select the Oracle VM Servers and move them to the Present to Server(s) field and click OK.
The Oracle VM Servers are now listed in the Server table when you select the repository. This table shows which Oracle VM Servers have access to the repository.

For more information about storage repositories, see Section 5.8, "Preparing and Configuring Storage Repositories".

Virtual machines require some form of installation media, whether it be a virtual machine template, virtual disk, ISO file, or mounted ISO file. Different domain types may require different installation source files. You can read about the different installation media in Section 8.4, "Virtual Machine Installation Media". The following examples show you how to import a virtual machine template, and an ISO file which are used in later steps to create virtual machines. A virtual machine template contains virtual machine configuration information, virtual disks that contain the operating system and any application software, packaged as a template file. An operating system ISO file is an image of the CDROM or DVD used to perform an operating system installation.
In this tutorial we use a virtual machine template and an Oracle Linux ISO file downloaded from the Oracle Software Delivery Cloud:
https://edelivery.oracle.com/linux
Download an Oracle VM template and an ISO file of the Oracle Linux operating system. Uncompress (unzip) the template file so that it is in the template.tgz format, not the downloaded template.zip format. Save the template and ISO file on a web server. Templates and other installation media must be available on a web server before being imported into Oracle VM Manager.
Example 4-7 Import a virtual machine template
This example shows you how to import the virtual machine template you downloaded from the Oracle Software Delivery Cloud. Replace the name and URL of the template with that of your template.
To import a virtual machine template:
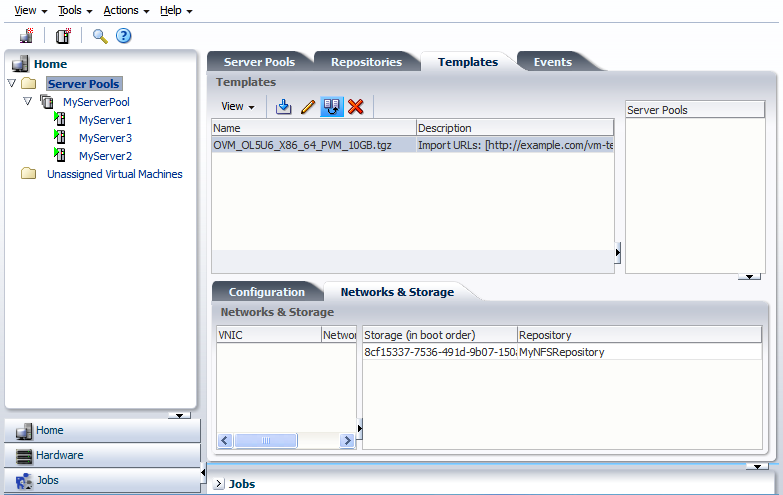
In the Home view click Server Pools in the navigation pane, then open the Templates tab in the management pane.
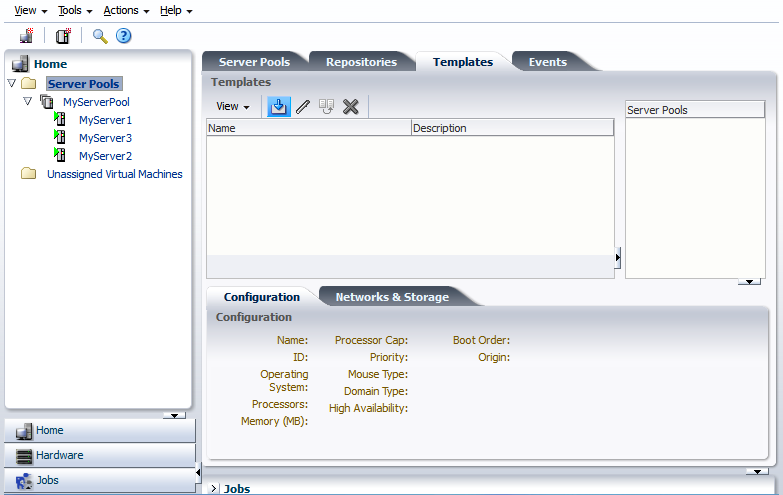
Click Import to open the Import Template dialog box.
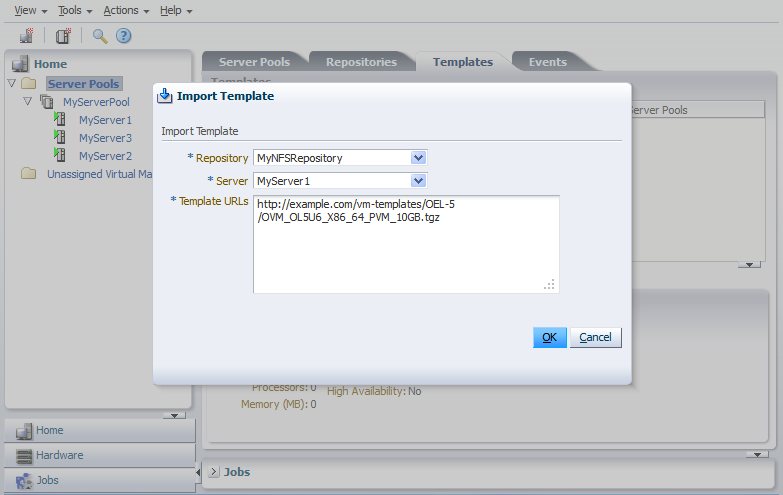
Select the repository you created earlier to store the template. Select an Oracle VM Server to use to the perform the template import, and enter the URL to the template you downloaded and stored on a web server. Click OK to import the template.
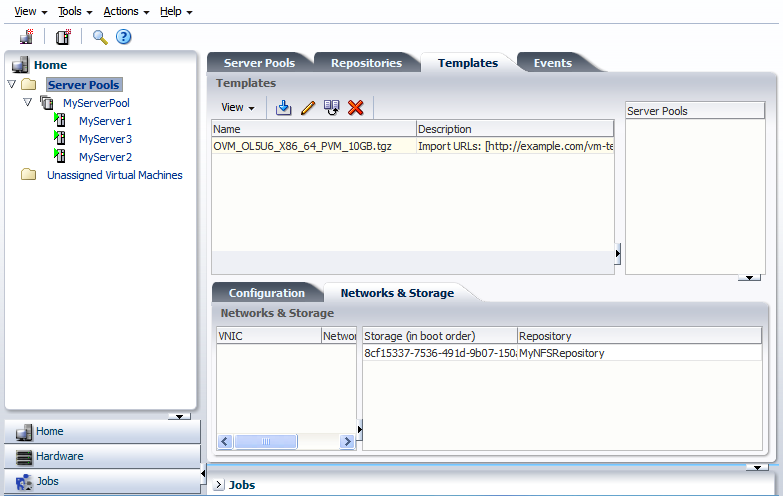
The import job can take some time to complete. When the import is complete, the new template is listed in the Templates table.
Example 4-8 Import an ISO file
This example shows you how to import the Oracle Linux ISO file you downloaded from the Oracle Software Delivery Cloud. Replace the name and URL of the ISO file with that of your file.
To import an ISO file:
In the Home view click Server Pools in the navigation pane, then open the Repositories tab in the management pane.
Select the storage repository we created earlier and open the ISOs tab below.

Click Import to open the Import ISO dialog box.
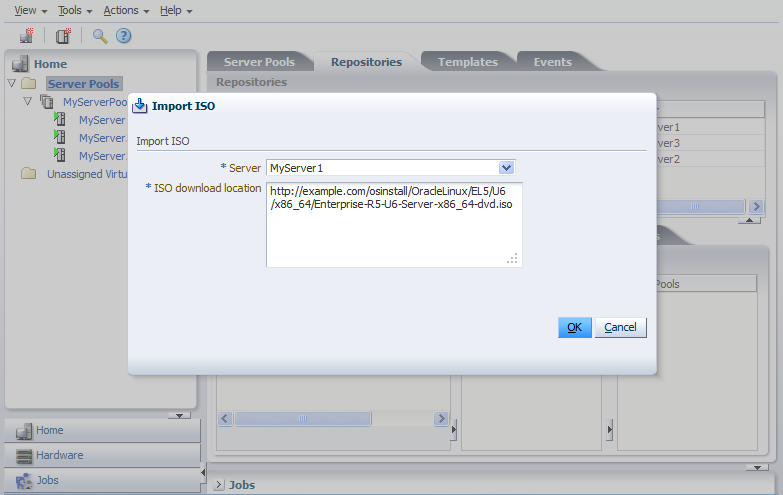
Select an Oracle VM Server from the Server list to perform the import, and enter the URL to the ISO file you want to import. Click OK to import the ISO file.
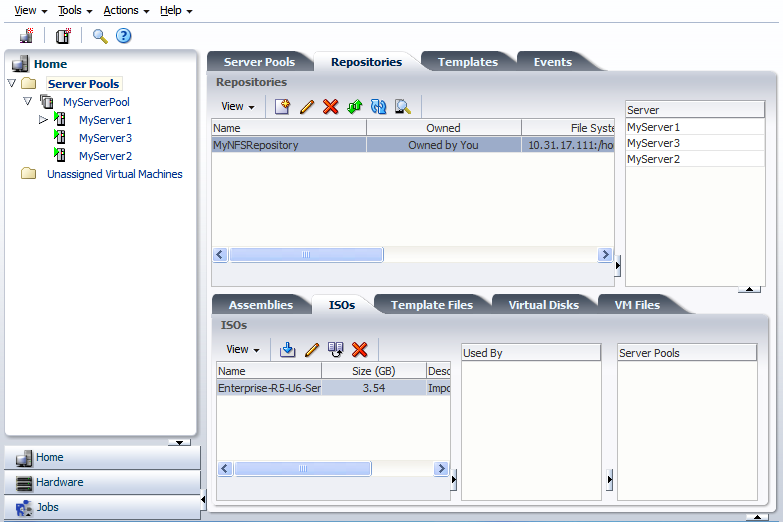
The import job can take some time to complete. When the import is complete, the ISO file appears in the table.
See Section 8.5, "Virtual Machine Resources" for information on importing, managing and using virtual machine resources.

When you have a virtual machine template an/or an ISO file that contains an the installation files for an operating system, you can create a virtual machine. If you use a virtual machine template, you need to clone the template to create a virtual machine. if you use an installation source ISO file, you can create a virtual machine directly from the ISO file. The examples in this tutorial first use a template, then an ISO file to create virtual machines. A final example shows you how to start a virtual machine and connect to the virtual machine's console.
Example 4-9 Create a virtual machine from a template
This example uses the virtual machine template you imported in Example 4-7, "Import a virtual machine template" to create a virtual machine, and deploy it in the server pool.
To create a virtual machine from a template:
In the Home view click Server Pools in the navigation pane, then open the Templates tab in the management pane. Select the template to clone and click Clone.
The Clone Virtual Machine or Template dialog box is displayed.
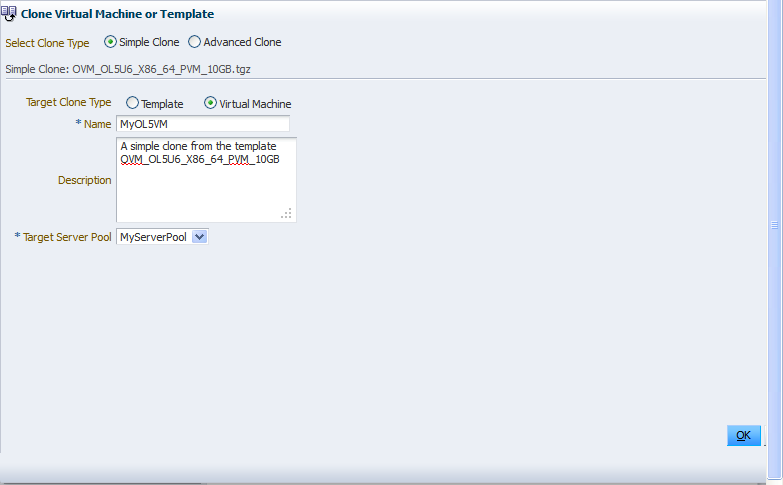
Select the Simple Clone radio button, the Virtual Machine radio button, and enter a name and optional description of the virtual machine. Select the server pool you created earlier in the Target Server Pool drop down. Click OK.
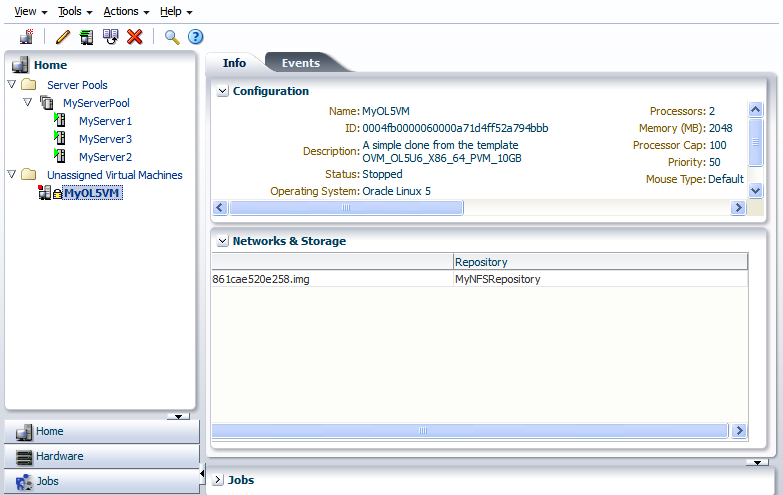
The template is cloned to create a virtual machine. The cloning job may take some time. During the clone job, the virtual machine is shown in the Unassigned Virtual Machines folder in the navigator.
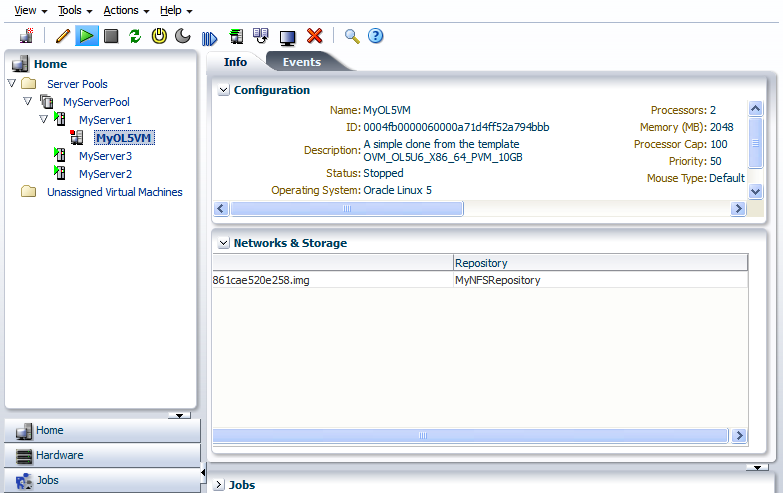
When the clone job is completed, the virtual machine is deployed to an Oracle VM Server in the server pool.
Example 4-10 Create a virtual machine from an ISO file
This example uses the ISO file you imported in Example 4-8, "Import an ISO file" to create a virtual machine, and deploy it in the server pool.
To create a virtual machine from an ISO file:
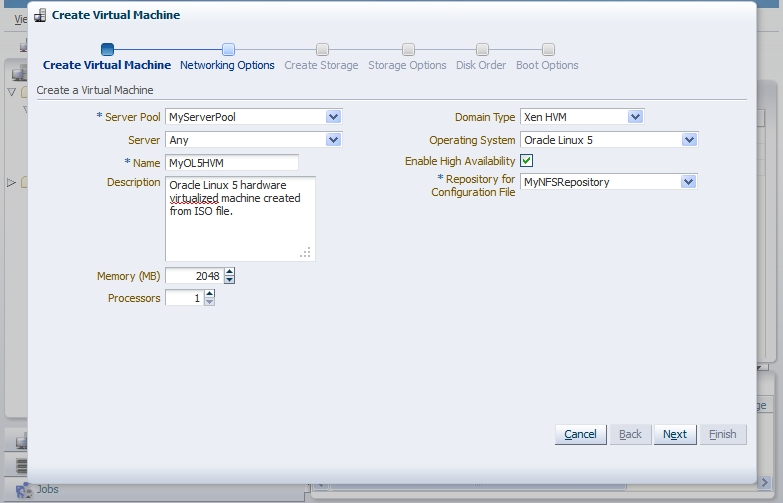
Select the Home view and Create Virtual Machine from the Actions menu.
The Create Virtual Machine wizard is displayed. In the Create Virtual Machine step, select the server pool you created earlier, enter a name for the virtual machine, and select the repository you created as the location to store the virtual machine configuration file. Click Next.
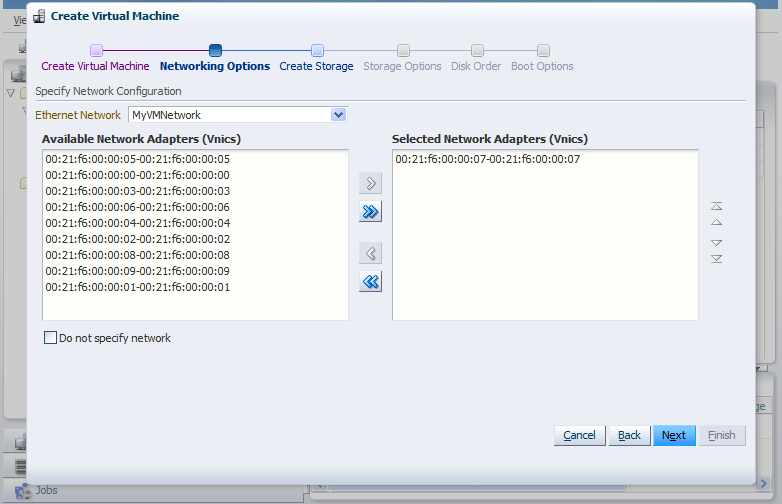
In the Networking Options step, select one or more VNICs and move them to the Selected Network Adapters (Vnics) field to add them to the virtual machine. Click Next.
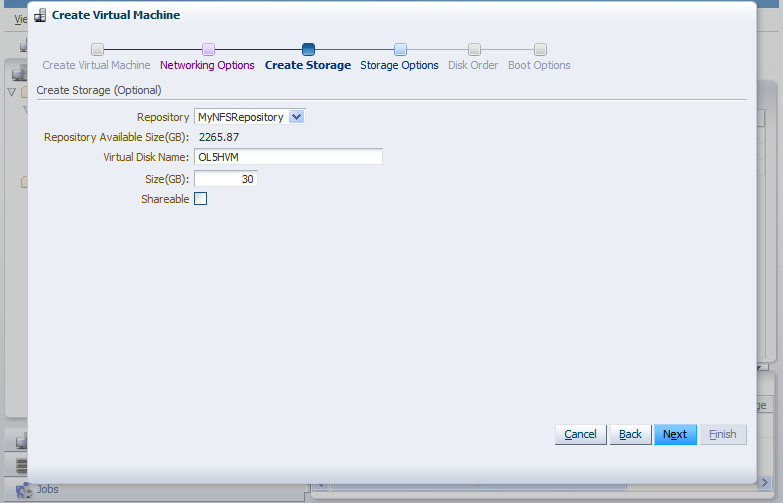
In the Create Storage step, create a virtual disk to use as the virtual machine's hard disk. Click Next.
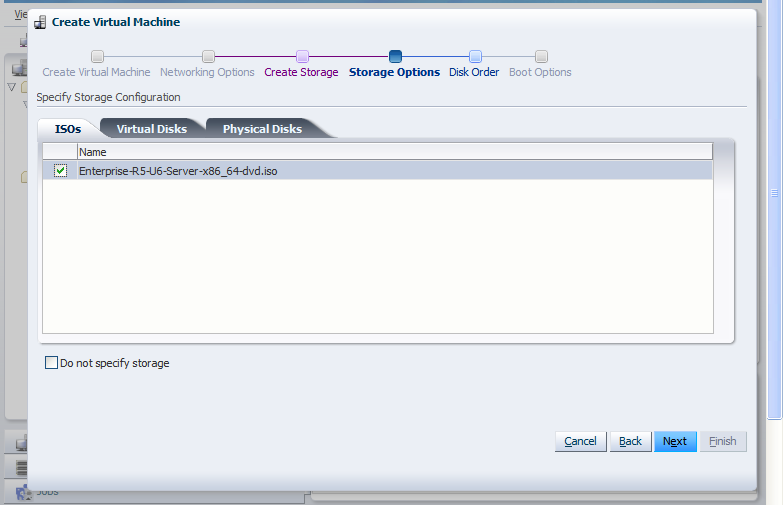
In the Storage Options step, select the Oracle Linux ISO file you imported. Click Next.
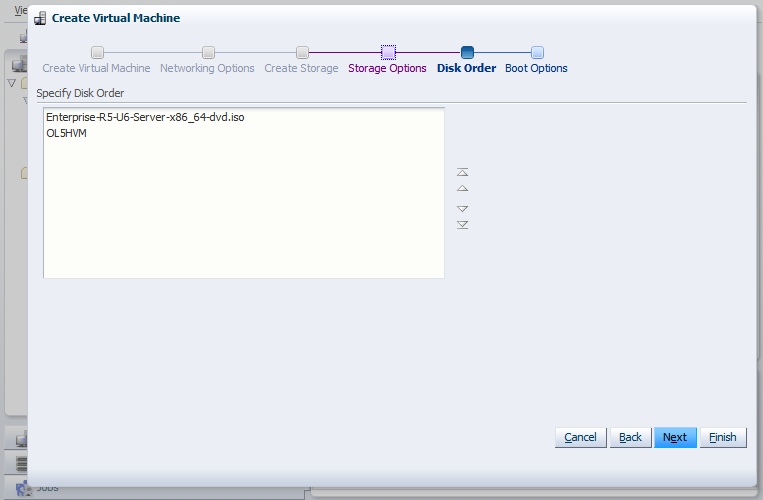
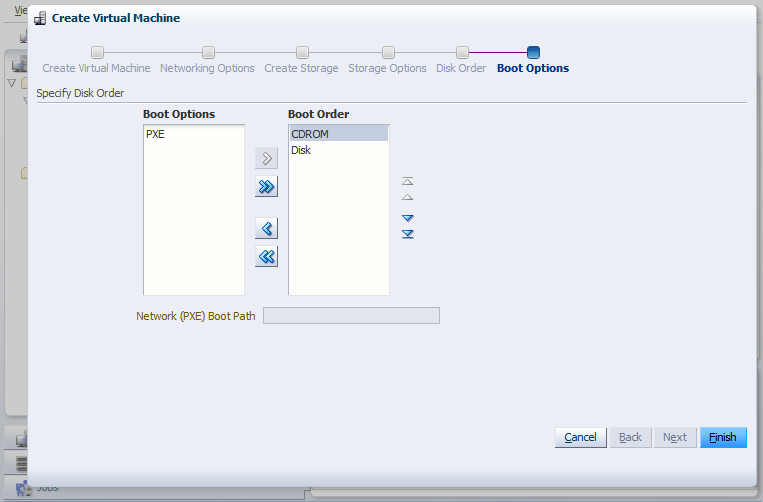
In the Disk Order step, select the disk order for your virtual machine. Move the ISO file to the top, followed by the virtual disk you created earlier in the wizard. Click Next.
In the Boot Options step, select the boot media and order for your virtual machine. Move the CDROM to the top, followed by Disk. Click Finish.
The virtual machine is created and deployed to an Oracle VM Server in the server pool.
Example 4-11 Starting a virtual machine and connecting to the console
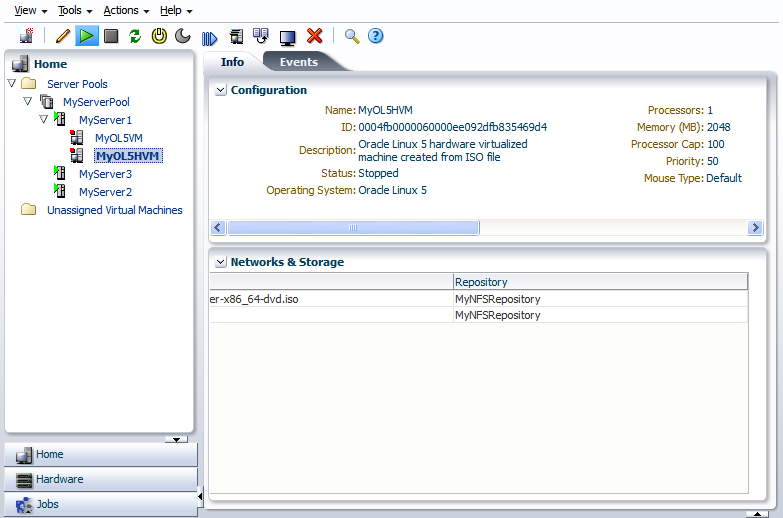
When a virtual machine is created, it is deployed to the server pool in a stopped state. This tutorial starts the virtual machine created with an ISO file, and logs into the virtual machine console.
To start a virtual machine, select the virtual machine and click Start.
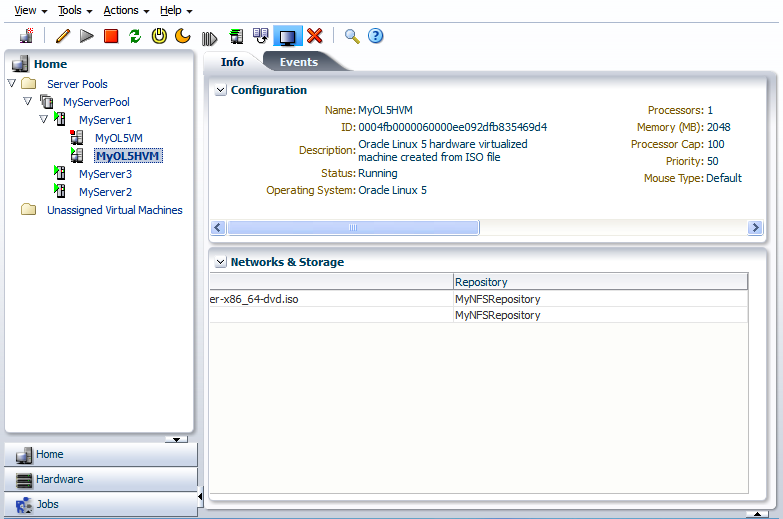
When the virtual machine is running, you can connect to the virtual machine's console and log in, if required. To connect to the console, click Console.
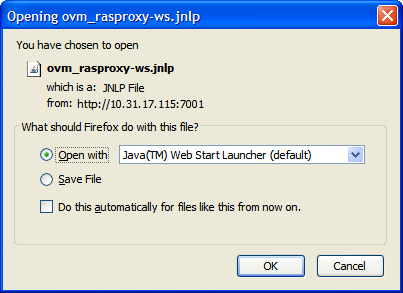
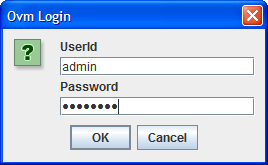
A dialog box, similar to the following, is displayed requesting to start a Java proxy to connect to the virtual machine. Click OK.
A console login dialog box is displayed. Enter the login you use for Oracle VM Manager and click OK.
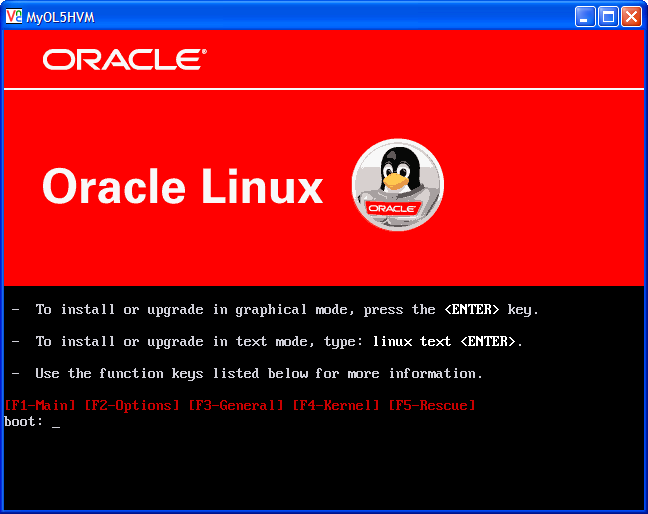
The virtual machine console is displayed. Log in and interact with the virtual machine as you would through any other VNC session. This example shows the initial installation screen for the virtual machine created with the Oracle Linux operating system ISO file.
See Chapter 8, "Managing Virtual Machines" for more information on creating and managing virtual machines.
|
Copyright © 2011, Oracle and/or its affiliates. All rights reserved. Legal Notices |
|