| Oracle® Enterprise Data Quality for Product Data Knowledge Studio Reference Guide Release 5.6.2 Part Number E23610-03 |
|
|
View PDF |
| Oracle® Enterprise Data Quality for Product Data Knowledge Studio Reference Guide Release 5.6.2 Part Number E23610-03 |
|
|
View PDF |
This chapter explains the various tasks related to managing your data lenses and sample data files.
This section describes how to manage your data lenses.
Various DataLens options that affect the operation of a data lens can be configured by you. From the Data Lens menu, select Data Lens Options.
The General tab is the default for setting data lens options.
| Classification Context
Instructs Knowledge Studio to include classification parents with children on drag and drop functions within the classification schema. Case Sensitive Text Parsing Preserves case and is applicable only to term nodes (purple) after this option is set. Term nodes contain all variations of a particular text item. For example, 'Cap' and 'CAP' must be independently specified. Clearing this check box ignores differences in capitalization, 'cap' only needs to specified once. When this option is toggled, all terminology and phrase rules will be consistent with the new case sensitive mode. Full Form / Generate Term Variants Automatically generates term variant as you create |
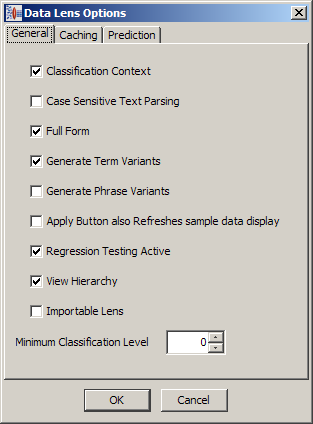 |
| terminology rules. For example, 'RES' is an abbreviation for 'RESISTOR'.
Generate Phrase Variants Results in the automatic creation of Terms and Phrase productions from standardized output. |
|
| Apply Button also Refreshes sample data display
Changes the Apply toolbar button so that it refreshes interface panes, as well as, applies editing changes to the currently open sample file. |
|
| Regression Testing Active
Activates the Regression Testing tabs throughout the Knowledge Studio. |
|
| View Hierarchy
Results in the full display of all hierarchical structures. |
|
| Importable Lens
Allows the Data lens to become available for import into other data lenses once it is checked into the Oracle DataLens Server. These data lenses are called Foundation Data Lenses. Note: To activate this functionality you must contact Oracle Consulting Services. |
|
| Minimum Classification Level
Allows you to determine the lowest level of classification that can be defined within the data lens. Maximum level is 5. |
|
The Caching tab can be selected to set the data lens cache parsed data results.
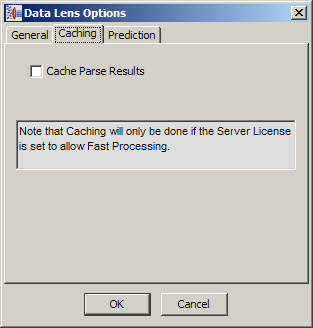
When selected, after each line of data is parsed the results are cached to the global cache so that it does not need to be re-parsed by that lens, which increases the speed at which data can be processed.
The Prediction tab can be selected to set the options associated with the terminology prediction functionality.
| Prediction Threshold (%)
Allows you to set the phase rule confidence rating threshold from zero to 100 percent. This threshold is used to determine whether unrecognized input text matches an existing term thus becoming a prediction. Note: Setting this option to zero may produce erroneous results so you should carefully examine any predictions before accepting them. Ignore optional missing attributes Allows you to specify that the prediction function ignore missing attributes. Missing attributes to ignore: Allows you to provide the attributes that you want to be ignored by the prediction function. |
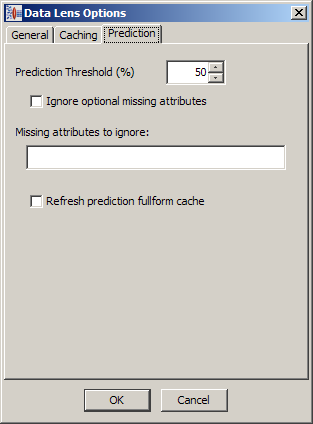 |
| Refresh prediction fullform cache
Refreshes the cache of full-form term variants that is maintained for prediction function use when OK is selected. The option is reset after each use. |
|
You can only check in data lenses that have not been previously checked in or those data lenses that you (the current user) have previously checked out. Checking in a data lens changes it to read-only.
From the Data Lens menu, click Check-in Data Lens….

Enter a check in comment, which will be associated with the new revision. You can use the Previous Comments button to view and copy the text of other comments for use in the new check-in comment.
Make selections from the check boxes that function as follows:
Deploy to Development after Check-In
The data lens is available for use by others after check-in and that the version in use is updated for use by DSAs.
Keep locked for more editing
The data lens cannot be check-out by other users for editing. Clearing this check box will make the data lens 'read-only' and activates the Delete local Data Lens check box.
Delete local Data Lens
Deletes this data lens from your local drive.
Click OK.
A verification that the data lens has been closed is displayed and the data lens itself is closed.
You can check out only those data lens that you (the current user) have checked in.
From the Data Lens menu, click Check-Out Data Lens….
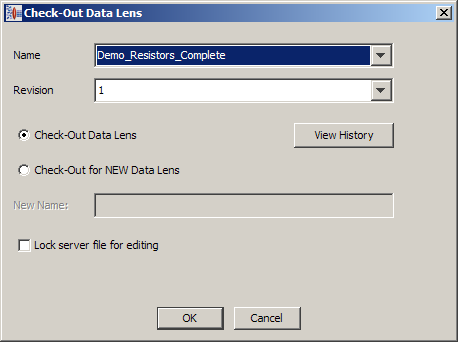
Select the data lens that you want to check out from the list of available data lens.
The Revision cannot be changed and increments automatically.
If you want to review the check in/out history of the selected data lens, click View History. The Revision History dialog appears listing all of the comments for each revision of the data lens.
Select whether you are simply checking out the selected data lens or that you want to base a new data lens on the selection using the two options. If you select Check-Out for NEW Data Lens, then you must provide a new name in the field provided.
If are checking out a data lens and do not want to edit it, select Lock server file for editing so that the data lens is read-only.
Click OK.
A verification that the data lens has been closed and is 'read only' is displayed.
You can delete an existing Data lens that is on your local computer from within the Knowledge Studio.
Open the data lens you want to delete.
From the Data Lens menu, click Delete Data Lens.
A warning to verify that this action should be taken is displayed.
Click OK to delete or Cancel to keep the data lens.
Additionally, you can delete any read-only (checked in) versions of data lens that reside on your local computer.
From the File menu, click Delete Read-Only Lenses.
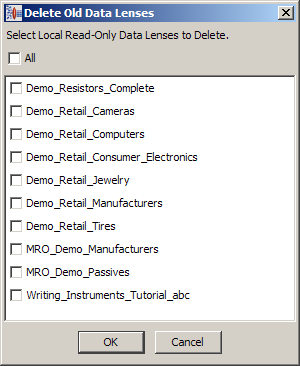
Select All or the individual data lenses you want to remove.
Click OK to delete the selected data lenses.
The selected data lenses are deleted from your local drive.
You can see if you have any tasks assigned to use with this feature.
From the View menu, select View My Tasks.
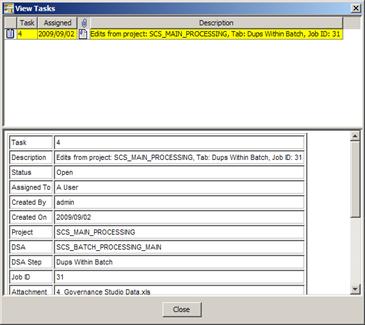
All assigned tasks are displayed in the top pane, while the bottom pane provides the details for the selected task.
Note:
Though the fields in the bottom pane appear to be editable, the changes are not saved.| Change Task Status
Changes the status of the task, see "Changing the Task Status". Download Attachments |
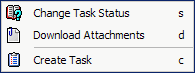 |
| You can download the file that was saved when the task was created for use in completing the task. A file save dialog appears for you to select the directory in which to save the file.
Create Tasks Create a new task, see "Creating a Task". |
|
The context-sensitive menu in the top pane is activated by right-clicking the attachment icon and is used as follows:
Selecting this option allows you to change the status of the task and/or reassign the task to another user.
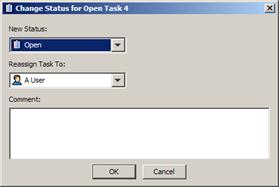
Select a new status and/or a user to reassign the task to from the lists.
Tip:
You can use the Unassigned Tasks user if you are unsure who you want to review this task and intend to assign it the proper person later.Enter a comment that reflects why you have effected the change for future reference or to alert the new recipient of the task why they are now responsible for it.
Click OK.
Selecting this option allows you to create an entirely new review task.
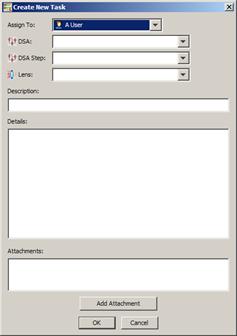
Select a user to complete this task.
Select the DSA and the DSA step that you want to change.
Select the data lens to which the change is to be applied.
Enter a description and specific instructions on how to perform the task.
If you have a data file or other information that you want to attach, click Add Attachment, locate the file, and then click OK.
Repeat this step until all necessary files are attached.
Click OK.
The task is created and an email containing the task details is sent to the assigned user.
This section explains how to view and change the information associated with a data lens.
A description can be provided to the data lens that provides a detailed description of the lens.
From the Edit menu, click Edit Lens Description. Enter a description to be assigned to the data lens and click OK.
This functionality provides an informational history about the lens; this can be used to track maintenance that has been performed.
From the Edit menu, click Edit Lens Description….
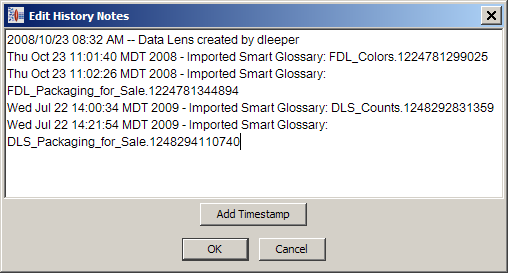
You can enter your own information to the existing list.
For each entry in the list, you can assign a timestamp by placing the cursor at the end of the entry and clicking Add Timestamp.
Any entry, including timestamps, can be modified.
Click OK to save the history notes.
This section explains how to work with data lens sample data files.
This feature allows you to create new sample data files to add to your existing set.
From the Edit menu, select New Sample Data.
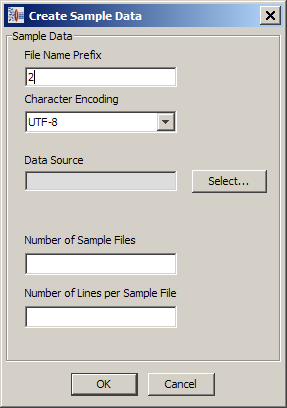
Use the default numerical file name prefix or enter your naming convention.
The names are similar to the files created during new data lens creation and will include the specified prefix. For example using the default numerical prefix, the first time you import sample data, the files will have names such as 2-baseline.xml, and 2-sample1.xml. Similarly, the next time you import sample data, they will have names like 3-baseline.xml and 3-sample1.xml.
Select the appropriate type of character encoding from the list.
Select the Data Source type from the popup menu by clicking Select… and locate the file you want to use.
Enter the number of sample files and lines contained in each file.
Click OK.
New sample files are created in the data sub-directory of your data lens.
Use this option to delete sample files that were created and associated with a data lens.
From the File menu, click the Delete Sample Files….
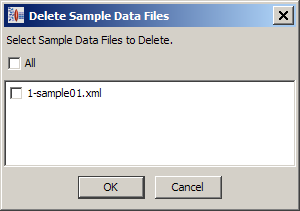
Select all sample files or the specific sample files you want to delete.
Click OK to delete the selected sample files.
This can be used if a group of sample files needs to be renamed for better identification.
From the File menu, click the Rename Sample Files….
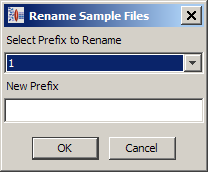
Select the sample file prefix to rename from the list.
Enter the new file prefix you want to use.
Click OK.
The sample file name changes can be reviewed from the File menu by clicking Select Data File… and reviewing the displayed list.
This functionality can be used if a new regression sample file, needs to be created that is a combination of existing sample files. The original sample files are not modified or deleted.
From the File menu, click Combine sample data.

Select the sample files that should be combined and click OK.
Enter a name for the new sample file.
If you want to open the newly created file, from the File menu, click Select Data File…. Then locate and open the new file.
|
Copyright © 2001, 2011, Oracle and/or its affiliates. All rights reserved. Legal Notices |
|