| Oracle® Enterprise Data Quality for Product Data Services for Excel Reference Guide Release 5.6.2 Part Number E23611-02 |
|
|
View PDF |
| Oracle® Enterprise Data Quality for Product Data Services for Excel Reference Guide Release 5.6.2 Part Number E23611-02 |
|
|
View PDF |
This chapter describes how to prepare for and install EDQP, log into the Oracle DataLens Server or change this server, and how to configure the application options.
This section provides detailed software and hardware prerequisites, and how to obtain the Services for Excel software in preparation for installing.
Note:
The Services for Excel 5.6.2.2 release is backward compatible with the 5.6.0, 5.6.1, and 5.6.2 releases; it is not compatible with the 5.5.03.02 release.You must ensure that the following Oracle DataLens Server hardware and software requirements are observed. These requirements represent the certified and supported server configurations.
Verify that you have met the minimum server requirements using the Oracle Enterprise Data Quality for Product Data Hardware and Software Specification found at the Oracle Enterprise Data Quality for Product Data Documentation Web site:
http://download.oracle.com/docs/cd/E20593_01/index.htm
This document contains all necessary specifications including example server configurations. Oracle DataLens Servers have been certified with these hardware and software requirements. For list of certified platforms and versions for Enterprise DQ for Product prior to installation, refer to the Oracle Enterprise Data Quality for Product Data Certification Matrix at:
http://www.oracle.com/technetwork/middleware/ias/downloads/fusion-certification-100350.html
Locate and select the Oracle Enterprise Data Quality for Product Data Server System Requirements and Supported Platforms option.
The following Enterprise DQ for Product prerequisites must be installed before using Services for Excel.
A Windows Administrator user account must be used to install or uninstall Services for Excel so that the necessary dynamic-link libraries (DLLs) are properly registered or unregistered.
Contact your system administrator for assistance in creating a new or identifying an existing Windows Administrator user account.
Locate and download the latest Services for Excel patch release:
Create a C:\dls_excelinstall directory.
Browse to the My Oracle Support Web site at:
Log in or register.
Click the Patches & Updates tab.
Click Product or Family (Advanced Search).
Search for Oracle Enterprise Data Quality for Product Data by beginning to enter the name in the Product field and then select it when it is displayed in the list.
Select the Release list, click the arrow adjacent to the Oracle Enterprise Data Quality for Product Data folder.
Select the EDQP 5.6.2 release and then click Close.
Click Search.
Select Patch 16849087: EDQP SERVICES FOR EXCEL 5.6.2.2 PATCH SET from the list of patches.
Click Download then click the p16849087_562_MSWIN-x86-64.zip link to download the file.
Unzip the p16849087_562_MSWIN-x86-64.zip file in a temporary directory.
Unzip the datalens_services_for_excel_5_6_2.zip file into the same temporary directory to unzip the DataLensServicesForExcelSetup.exe file.
You can identify the version of Services for Excel that you have installed using the following steps:
Start Microsoft Excel.
Locate the Add-Ins toolbar.
Click DataLens Help, and the select About DataLens Services for Excel.
The dialog displays an informational message about the Services for Excel product including the version, application path, installation path, user name, network domain, and the date
Note:
Version 5.6 is only backward compatible with version 5.5.03.02.The Services for Excel installer is a standard Windows Installer executable file and installs on both 32-bit and 64-bit Window operating system client machines running Microsoft Excel 2003, 2007, or 2010. Any previous versions of the software is automatically uninstalled as part of the installation. The Services for Excel installer file is obtained from the Oracle DataLens Server Welcome Web page.
Use the following steps to install the product on any supported client machine:
Ensure that Excel is closed.
Start your Oracle DataLens Server to use the Welcome Launch Pad. For details, see Oracle Enterprise Data Quality for Product Data Getting Started.
Click the AutoBuild button to download the appropriate Services for Excel installation file for your version of Excel.
Depending on the Download and Security settings in your browser, you may be asked to save the installer file, run it, or it automatically downloads.
If prompted by a Security Warning dialog, click Run to run the file and continue the installation.
Otherwise, locate the downloaded DataLensServicesForExcelSetup.exe file and double-click it to start the installation.
The installer begins, identifies the Excel version, installs accordingly, completes the installation, and starts Excel.
Note:
If a Warning is displayed prompting you to overwrite an existingDLS_Import_Template.project-date file, click Yes to update the file.Ensure that the Services for Excel Add-In toolbar is present.
The Services for Excel toolbar is identical in all supported versions of though they are presented differently. When using Excel 2007 or 2010, you must click the Add-Ins tab to access the toolbar. The appearance of the toolbar indicates a successful installation of the Services for Excel product.
The following sections describe known issues and any workarounds that may occur when installing or using Services for Excel.
Excel files do not open when you double-click an Excel workbook or short-cut to an Excel file
When opening Excel and an Excel file by double-clicking on it, Excel starts but the file is not opened. This is a known issue with the Excel application and can be corrected by following the instructions at the Microsoft Support Web site at
http://support.microsoft.com/kb/211494
Services for Excel Add-in does not appear in Excel 2003 on a 32-bit Windows 7 system after a successful Installation
This is a result of a problem with the 32-bit Microsoft Office 2003 Primary Interop Assemblies (PIA) including the necessary .Net Programmability Support not being installed and is a known issue. You can correct this issue by downloading and installing following the Microsoft Office 2003 PIA using the instructions at the Microsoft Download Web site at
http://www.microsoft.com/en-us/download/details.aspx?id=20923
Though Services for Excel can be installed independent from the EDQP client software, the client applications must be installed to enable the use of the AutoBuild application. AutoBuild interacts with Knowledge Studio and its associated data lenses and Smart Glossaries.
EDQP uses Java Web Start to initially install and maintain the current version of the software on your client desktop. The process requires you to access the Oracle DataLens Server to initiate the connection and download the software.The EDQP client applications are downloaded and installed using Java Web Start by browsing to the installation page for your Oracle DataLens Server as follows:
Ensure that you have the Java SE Runtime Environment (JRE) 6 Update 21 installed. You can download the JRE and obtain the installation instructions by browsing to:
http://www.oracle.com/technetwork/java/javase/downloads/index.html
Start Microsoft Internet Explorer.
Initiate a connection and download the client software by browsing to:
http://server:2229/datalens/datalens.jnlp
Where server is the hostname of your Oracle DataLens Server.
Note:
If you have setup a different port number for your application server other than 2229, you must use that port number in the following URL when browsing to the Oracle DataLens Server to download the client applications.The application download and verification begins.
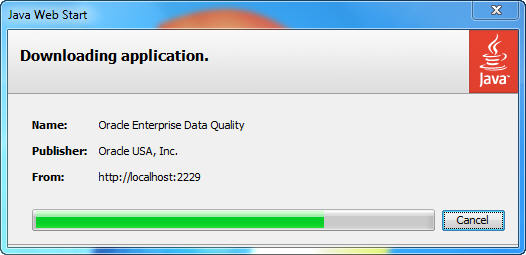
Note:
If you receive a File Download message indicating that the.jnlp file is not associated with a program, you do not have the supported JRE installed. Click Cancel and return to Step 1.After the verification completes, the installation begins. Enterprise DQ for Product files are digitally signed by a trusted source so the following security warning is displayed:
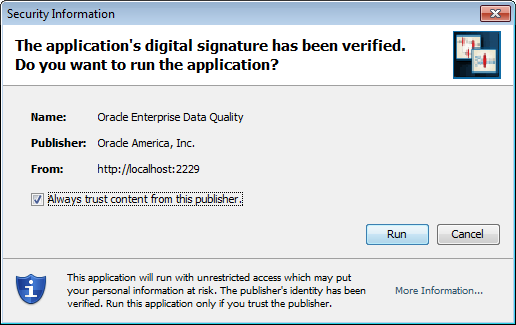
Tip:
To avoid this security dialog in the future, select the Always trust content from this publisher check box.Click Run to continue and complete the installation.
The Oracle Enterprise Data Quality for Product Data log on dialog is displayed.
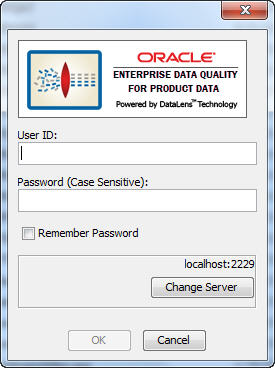
You can log in or change the user that is currently logged into the Oracle DataLens Server and change the server to use to transform your data.
Note:
You must log in to the server for all job processing activities. The login applies to all spreadsheets within the workbook. If you want to use a different login then use the Switch User option on the DataLens Tools menu. You can also open an entirely new workbook to log in as a different user.To change the user or Oracle DataLens Server, click DataLens Tools and select Switch User....
The Oracle Enterprise Data Quality for Product Data Login dialog box appears.
Enter a valid user name and password and click OK. You can avoid entering this password every time you logon as this user by selecting the Remember Password check box.
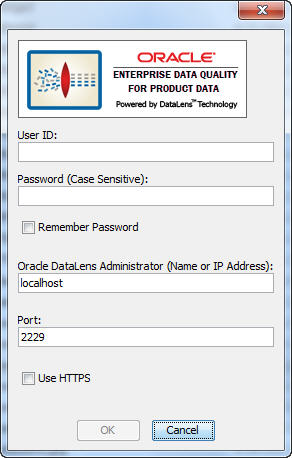
Changing the Oracle DataLens Administration Server
Click the Change Server button. Enter the name or IP Address of the Oracle DataLens Administration Server that you want to use to transform your data. If the server does not run on the default port number 2229, enter the correct port number. Click OK to change servers.
You can specify a server group or a specific server to use to transform your data.
To change the user or Oracle DataLens Server, click DataLens Tools and select Set Transform Server... .
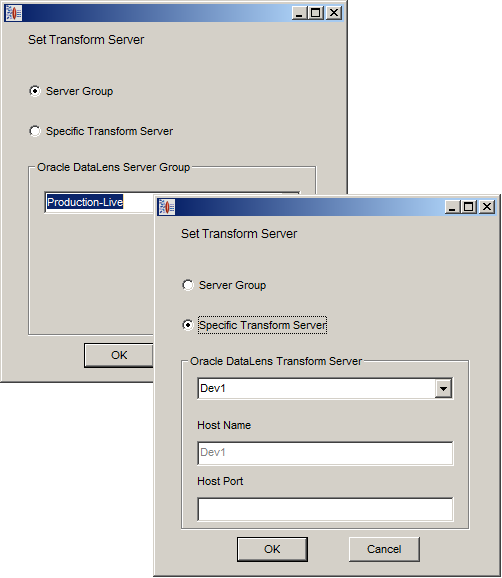
Set the Oracle DataLens Transform Server by selecting one of the following:
Select the server group from the Oracle DataLens Server Group list, and then click OK to change the server group.
Select a server from the Oracle DataLens Server Group list. If the server runs does not run on the default port number 2229, enter the correct port number. Click OK to change servers.
You can configure a Term Library to augment and enhance your data lens grammar. A Term Library is composed of the term variants found in an existing data lenses. You can either create a new Term Library or add to an existing Term Library .
On the Services for Excel toolbar, click DataLens Tools, and then select Options.

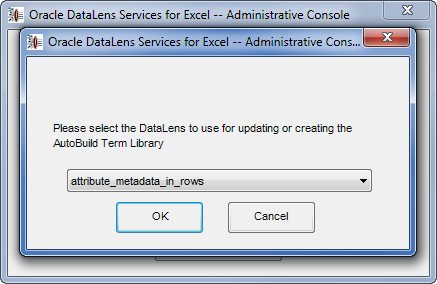
Select <Create New> to create a new Term Library or select a Term Library from the list to update an existing library.
The Term Library you create or update is used by AutoBuild by extracting terms from the data lens that you select. This is particularly useful when you have extensive term variant refinements (in fact, term variant refinement are the only type of refinement used in Term Libraries) in a data lens that you want to leverage in new data lens.
Click Update Term Library, and then select the data lens that you want to use to create an initial one or update the existing Term Library.
Click OK.
The Term Library is created or updated to include these new terms and variations. The extracted terms are case insensitive, all underscores, plurals, and duplicates (containing identical variants) are removed.
After creating a new Term Library it is automatically stored in the correct location required by AutoBuild, and then you can update the Term Library one data lens at a time. In Step 1 of the AutoBuild wizard, you can make your Term Library selection by clicking the Category Details button.
Upon completion, a report is displayed that details all of the terms that were updated for you to review and save.
Note:
If the data lens names do not display properly (as is sometimes the case with full-width characters), ensure that your Windows region and language options are set properly. For more information, see Windows Help.
|
Copyright © 2001, 2013, Oracle and/or its affiliates. All rights reserved. Legal Notices |
|