| Skip Navigation Links | |
| Exit Print View | |

|
Sun Blade X3-2B (formerly Sun Blade X6270 M3) Installation Guide for the Oracle Solaris Operating System |
| Skip Navigation Links | |
| Exit Print View | |

|
Sun Blade X3-2B (formerly Sun Blade X6270 M3) Installation Guide for the Oracle Solaris Operating System |
Sun Blade X3-2B Model Name Change
Getting the Latest Firmware and Software
About the Sun Blade X3-2B Installation Guide for the Oracle Solaris OS
About Oracle Solaris OS Installation
Oracle Solaris Installation Task Table
Supported OS Versions and Latest Information
Obtaining Oracle Solaris Documentation
Setting Up the Installation Session
Installing the Oracle Solaris OS
Install Supported Versions of the Oracle Solaris OS
Getting Server Firmware and Software
Firmware and Software Access Options
Available Software Release Packages
When you are configuring an operating system for a networked server, you might need to provide the logical name (assigned by the OS) and the physical name (MAC address) of each network interface. This topic shows you how to get this information.
Use this procedure to display information about MAC addresses and network interfaces, including their logical and physical names (MAC addresses).
Note - Alternatively, you can run these commands from a command shell.
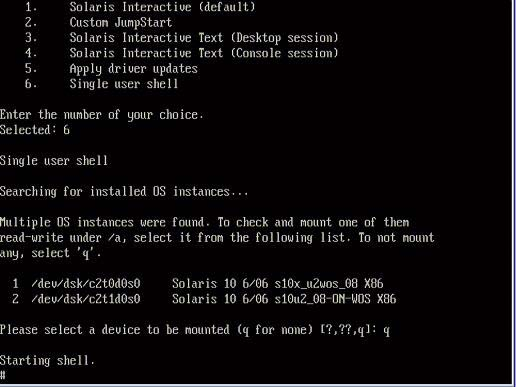
If a message appears about mounting an OS instance, select q. You should not mount any OS instance.
The message "Starting Shell" appears. See the following figure.

# ifconfig -a plumb
Note - The plumb process might take some time.
# ifconfig -a
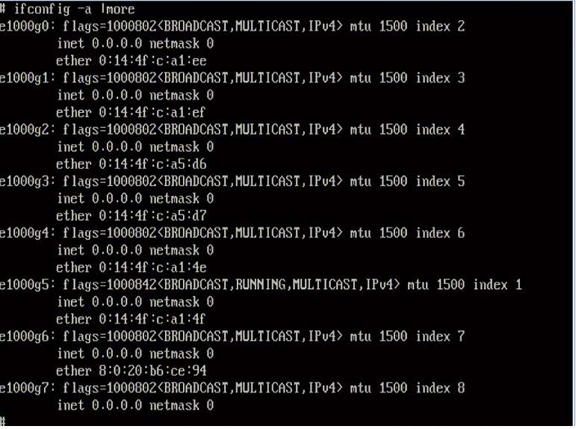
The output of Solaris named interfaces and MAC addresses appears. For example:

In the sample output above:
The el000g# entry in the first column refers to the Solaris logical named interface. This first column in the output identifies the logical names assigned by Solaris to the network interfaces.
The ether #:#:#:#:#:# entry in second column (third row) refers to the physical MAC address name of the network port.
For example:
The physical MAC address for the Solaris named network interface is e1000g0 is 0:14:4f:c:a1:ee.
This command restores the system configuration to the factory defaults.
 | Caution - The sys-unconfig(1M) command halts the system and restores the factory settings. Do not run this command unless you are ready to reconfigure your system. |
For example:
# sys-unconfig
WARNING
This program will unconfigure your system.  It will cause it
to revert to a "blank" system - it will not have a name or know
about other systems or networks.
This program will also halt the system.
Do you want to continue (y/n) ?
The system reboots and the configuration script starts.