| Oracle® On Track Communication Installation Guide Release 1 (1.0) Part Number E20956-03 |
|
|
View PDF |
| Oracle® On Track Communication Installation Guide Release 1 (1.0) Part Number E20956-03 |
|
|
View PDF |
Managed Servers host business applications, application components, Web services, and their associated resources. To optimize performance, Managed Servers maintain a read-only copy of the domain's configuration document. When a Managed Server starts, it connects to the domain's Administration Server to synchronize its configuration document with the document that the Administration Server maintains.
If you have selected Managed Servers, Clusters and Machines in the Select Optional Configuration screen, then the following screens of the configuration wizard appear before the Configuration Summary screen.
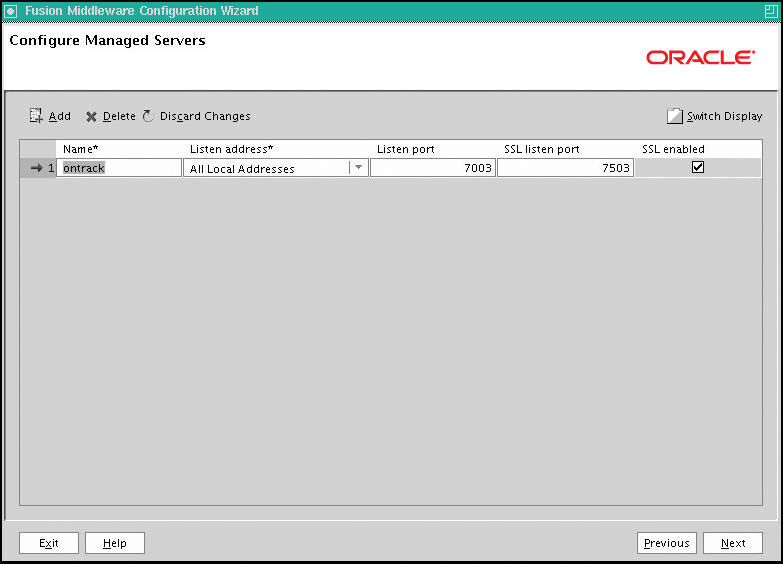
From this screen, you can add or delete Managed Servers. You can also change the settings for an existing Managed Server.
Name: Valid server names are a string of characters (alphabetic and numeric). The name must be unique in the domain.
Listen address: From the list, select a value for the listen address.
Listen port: Enter a valid value for the listen port to be used for regular, secure requests (through protocols such as HTTP and T3). The default value is the next available listen port. If you leave this field blank, then the default value is used. The valid listen port range is from 1 to 65535.
SSL enabled: Ensure that you enable SSL always because it is required for real-time plugin. By default, SSL is disabled for all new servers.
SSL listen port: This field is enabled only if you selected the SSL enabled check box. Enter a valid value to be used for secure requests (through protocols such as HTTPS and T3S). The default value is the next available listen port. If you leave this field blank, then the default value is used. The valid listen port range is from 1 to 65535.
To add a server, click Add and configure the settings for the new server.
To delete a server, select the server and click Delete. You can delete only one server at a time.
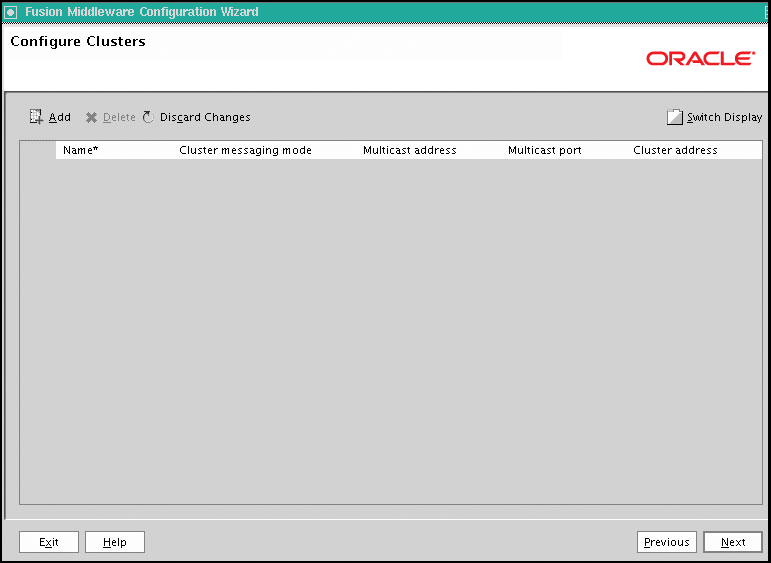
By creating clusters, you can group Managed Servers such that they operate as a single unit for hosting applications and resources.
Use this screen to add or delete clusters. You can also change the settings for an existing cluster.
Name: Enter a valid name. The name of the cluster must be unique among all component names within the WebLogic domain.
Cluster messaging mode: Select whether the messaging mode is unicast or multicast.
Multicast address: If you select multicast as the cluster message mode, then enter the multicast address for the cluster. This address is used by cluster members to communicate with each other.
Multicast port: If you select multicast as the cluster message mode, enter the multicast port for the cluster. The multicast port is used by cluster members to communicate with each other. The default value is 443.
Cluster address: Enter the addresses for identifying the Managed Servers in the cluster. A cluster address can be one of the following:
Comma-separated list of IP addresses or DNS names and ports
DNS name that maps to multiple IP addresses
localhost, DNS name, or IP address if the listen address of all Managed Servers is listening to the same address with unique port numbers
To add a cluster, click Add and configure the settings for the new server. For more information, see Appendix A.
To delete a cluster, select the server and click Delete.
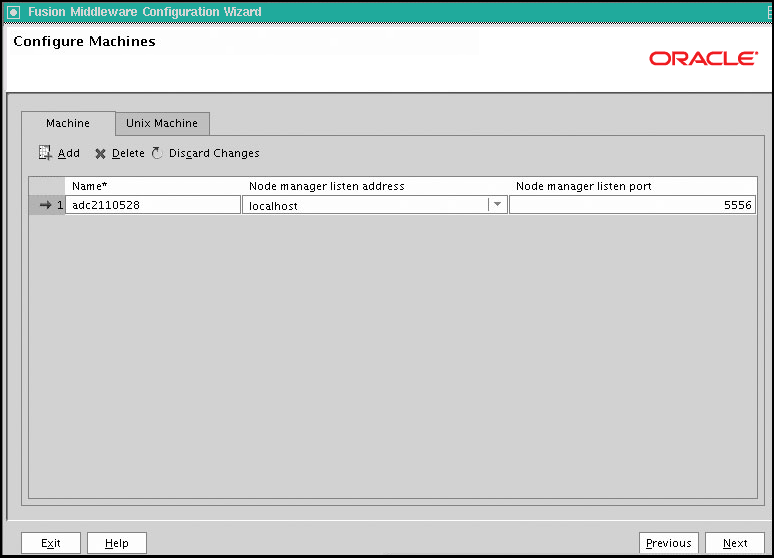
Use this screen to add or delete machines to the cluster, or to modify the settings for an existing machine. Each machine has the following configuration settings:
Name: Enter a valid machine name. The machine name is used to identify the machine within the WebLogic domain. It does not have to match the network name for the machine. The name must be unique among all component names within the domain.
Node manager listen address: Select a value from the list for the listen address used by Node Manager to listen for connection requests. By default, the IP addresses defined for the local system and local host are shown in the drop-down list. The default value is localhost.
If you specify an IP address for a machine that hosts the Administration Server and you need to access the WebLogic Server Node Manager, then you must disable host name verification.
Node manager listen port: Enter a valid value for the listen port used by Node Manager to listen for connection requests.
Post bind GID enabled: (Linux and UNIX machines only) Select this check box to enable a server running on this machine to bind to a UNIX group ID (GID) after it finishes all privileged startup actions. By default, this check box is not selected.
Post bind GID: (Linux and UNIX machines only) Enter the UNIX group ID (GID) under which a server on this machine runs after it finishes all privileged startup actions. Otherwise, the server continues to run under the group from which it was started. For this setting to take effect, you must select the post bind GID enabled check box.
Post bind UID enabled: (Linux and UNIX machines only) Select this check box to enable a server running on this machine to bind to a UNIX user ID (UID) after it finishes all privileged startup actions. By default, this check box is not selected.
Post bind UID: (Linux and UNIX machines only) Enter the UID under which a server on this machine runs after it finishes all privileged startup actions. Otherwise, the server continues to run under the account from which it was started. For this setting to take effect, you must select the post bind UID enabled check box.
Select the Machine tab (for Windows) or the UNIX Machine tab (for UNIX and Linux).
Click Add to add a new machine.
Click Delete to delete an existing machine.
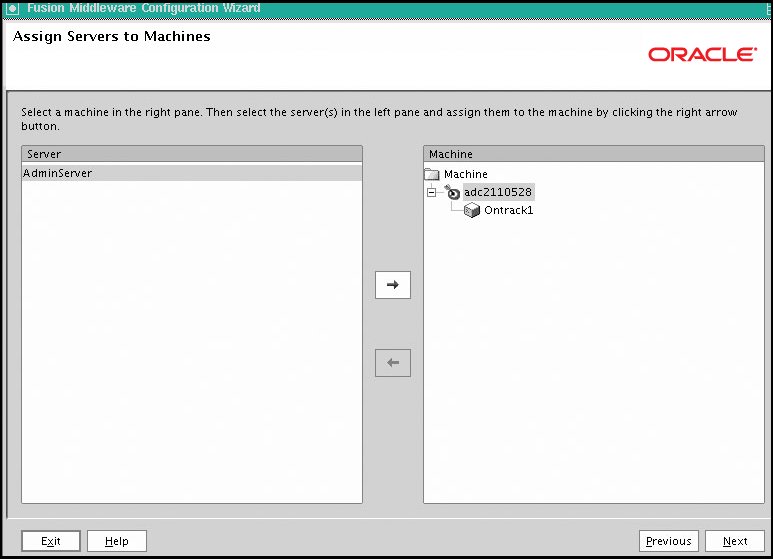
Use this screen to assign Oracle On Track instances to each of the systems you defined.
In the Machine list box, select the machine to which you want to assign a Oracle On Track (Ontrack1 as shown in the figure) instance.
Assign Oracle On Track instance to the selected system in one of the following ways:
Double-click the Oracle On Track instance in the Server list box.
Select the appropriate WebLogic Server instance in the Server list box and click the right arrow.
Hold Shift and click to select multiple servers in the Server list box. Then, click the right arrow.
The name of the Oracle On Track instance is removed from the Server list box and added, below the name of the target machine, in the Machine list box.
Click Next.
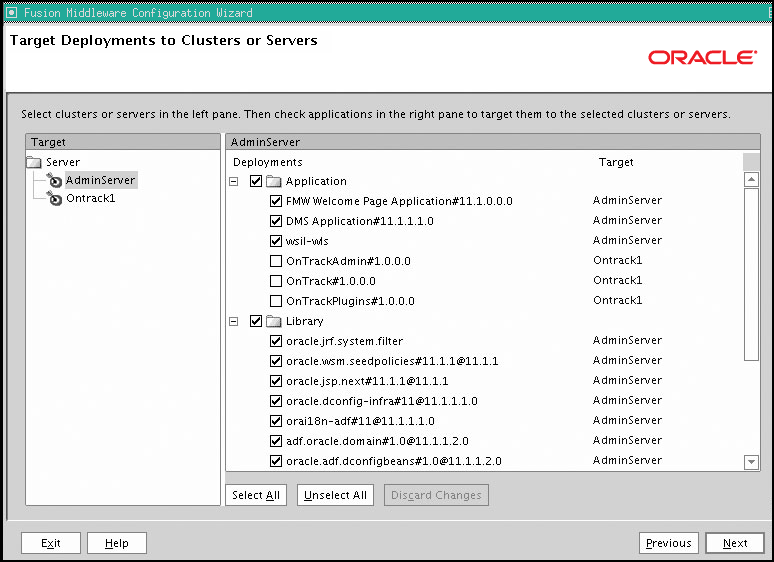
This screen enables you to target your deployments to servers or clusters.
The Configuration Wizard automatically takes care of all necessary deployment targeting.
Select Admin Server. You do not have to change anything on this screen unless specifically directed to do so.
Click Next.
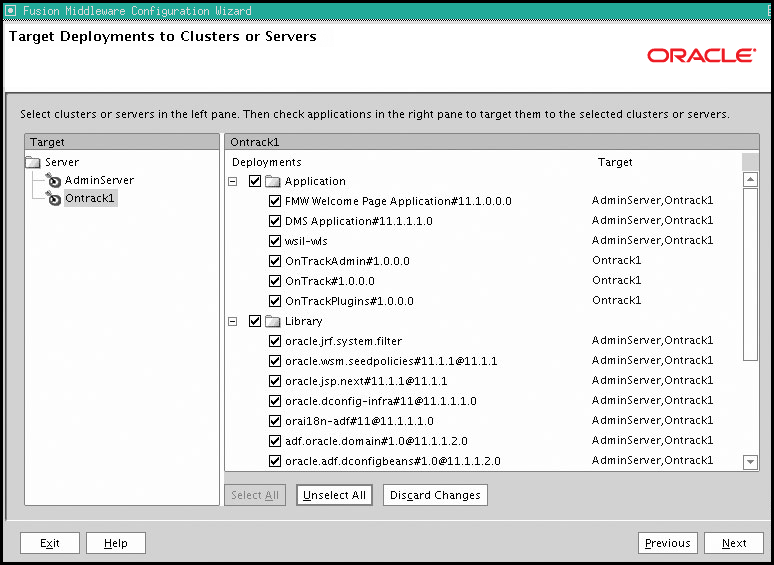
Ensure that you select the Managed Server and then click Select All.
Note:
If you do not select the managed server in the above screen, then the installation fails and you will have to do a manual clean up.Click Next.
For more information, see Creating WebLogic Domains Using the Configuration Wizard.
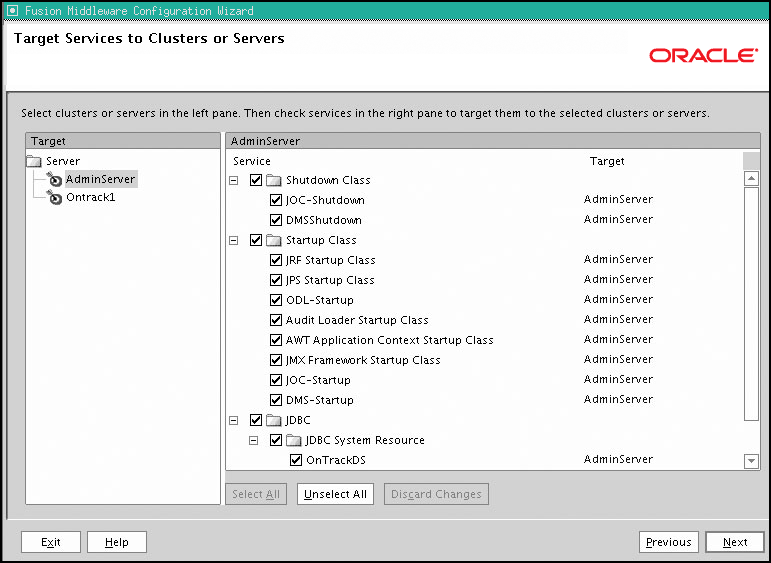
Use this screen to target your services (for example, JMS, JDBC, startup and shutdown classes) to servers or clusters. This enables your applications to use these services.
The Configuration Wizard automatically takes care of all necessary services targeting for administration server. You should not have to change anything on this screen unless specifically directed to do so.
In the left pane, select the server or cluster. Then, click Select All to deploy all the services to the server or the cluster. The Target column in the right pane shows you the servers and clusters to which each service is targeted.
Click Next.
The Configuration Summary screen opens.