B Oracle Service Bus Software Installation Screens
This appendix contains screenshots and descriptions for screens in the Oracle Fusion Middleware 11g Service Bus Installer, which is used to install the Oracle Service Bus 11g software.
It contains the following topics:
B.1 Welcome Screen
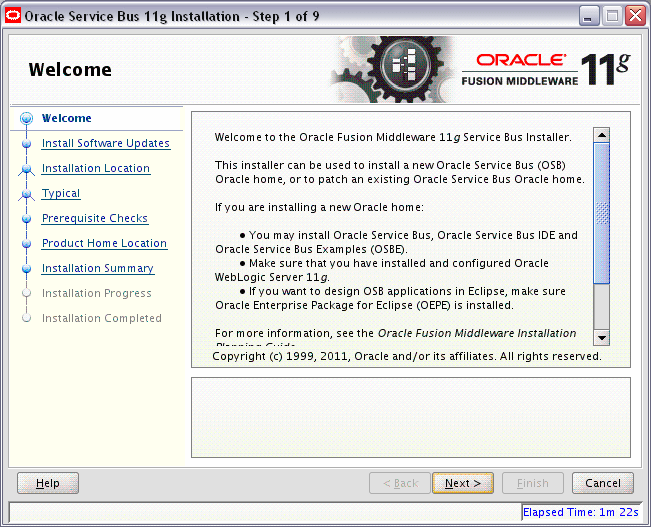
Description of the illustration install_welcome.gif
The Welcome screen is displayed each time you start the installer for Oracle Service Bus.
Click Next to continue.
B.2 Install Software Updates Screen
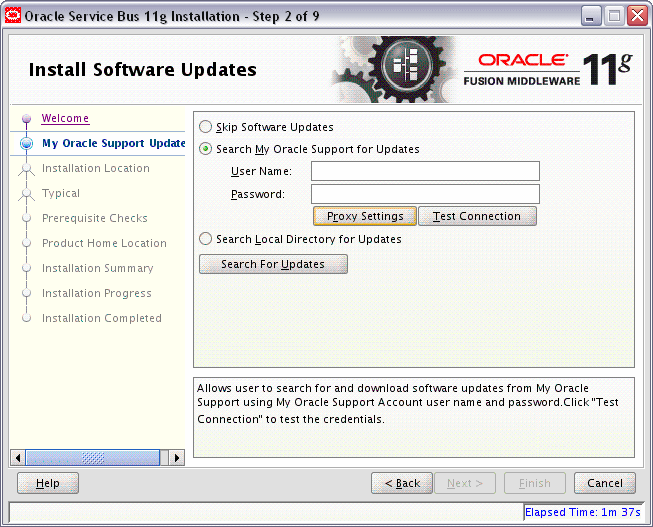
Description of the illustration install_sw_updates_1.gif
Select the method you want to use for installing software updates.
-
Skip Software Updates
You can choose to skip this option for now.
-
Search My Oracle Support for Updates.
If you have a My Oracle Support account, you can specify your account name and password to have the installer automatically download applicable software updates from My Oracle Support. After entering your credentials, you can test the connection by clicking Test Connection. Click Proxy Settings if you need to configure a proxy server in order to have the installer access My Oracle Support.
Configure your proxy server with the following screen:
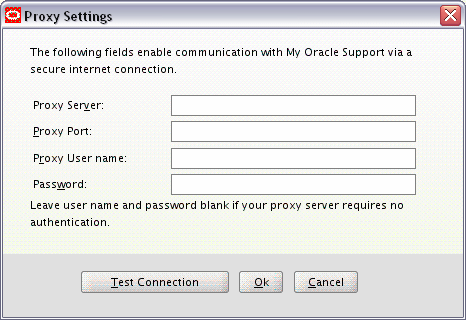
Description of the illustration install_sw_proxy.gif
-
Search Local Directory for Updates.
If you have software updates available locally, you can specify the location by using this option. When you select Search Local Directory for Updates an additional "Local Directory" field will appear, as shown below:
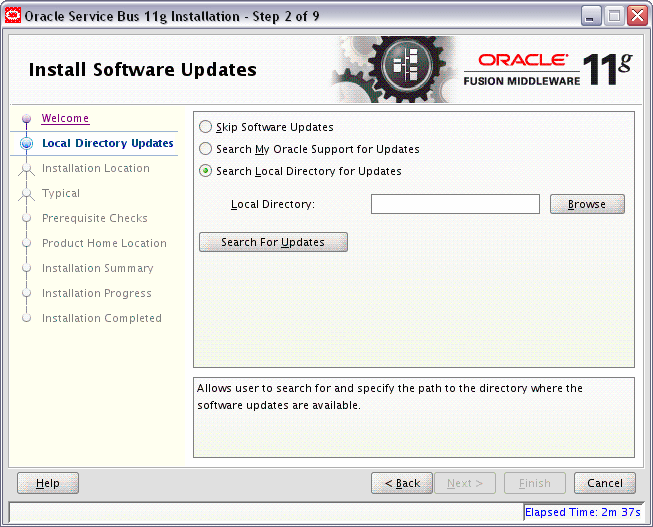
Description of the illustration install_sw_updates_2.gif
B.3 Installation Location Screen
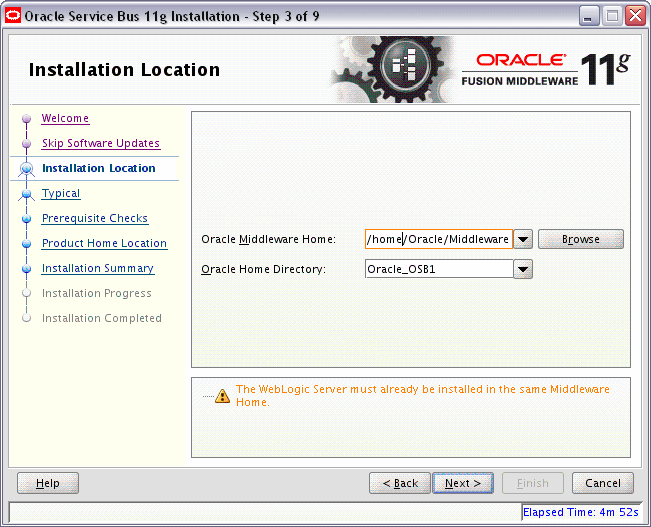
Description of the illustration install_location.gif
Enter the following information on the Specify Installation Location screen:
-
The absolute path to the directory where Oracle WebLogic Server was installed.
-
Oracle Home Directory
The directory name for your Oracle home:
-
You can specify a directory that already exists; this must be an empty directory inside the Oracle Middleware home (for example, you have created an empty directory inside the Middleware home in advance of this installation and should specify this directory here).
-
You can specify a pre-existing Oracle home directory (for example, you are reinstalling the software into an existing Oracle home that was created from a previous installation that was incomplete).
-
You can specify the name of a new directory that will be created for you inside the Middleware home.
Your Oracle home directory where your products will be installed. All software binaries will reside in this directory, and no runtime process can write to this directory.
Note:
This installation directory is referred to asOSB_ORACLE_HOMEthroughout the remainder of this document. -
Refer to "Oracle Fusion Middleware Directory Structure and Concepts" in Oracle Fusion Middleware Installation Planning Guide for more information about these directories.
If you are performing an installation on a Windows operating system, be sure that your directory paths are valid and do not contain double backslashes (\\).
After specifying the installation directories, click Next.
B.4 Installation Type Screen
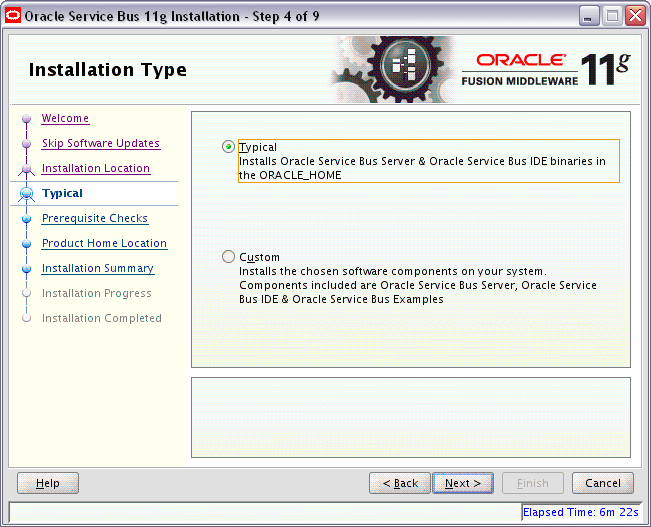
Description of the illustration install_type.gif
The Select Installation Type screen offers the following options:
-
Typical: installs Oracle Service Bus and Oracle Service Bus binaries in the Oracle home.
-
Custom: allows you to choose which Oracle Service Bus component you want to install on your system. The components to select from include the Oracle Service Bus server, Oracle Service Bus IDE, and Oracle Service Bus examples.
Click Next to continue after making your selection.
B.5 Components to Install Screen
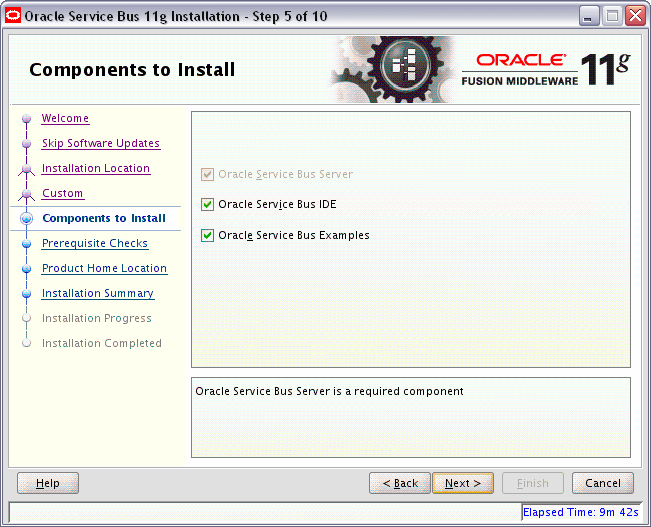
Description of the illustration install_components.gif
The Select Components screen is displayed only when you choose the Custom type of installation on the Select Installation Type screen.
Note that the Oracle Service Bus Server is a required component. You can select either Oracle Service Bus IDE or Oracle Service Bus Examples on this screen.
Note:
If you are installing on an HP-UX or AIX operating system, you must make sure that Oracle Service Bus IDE is not selected.After selecting the components to install, click Next.
B.6 Prerequisite Checks Screen
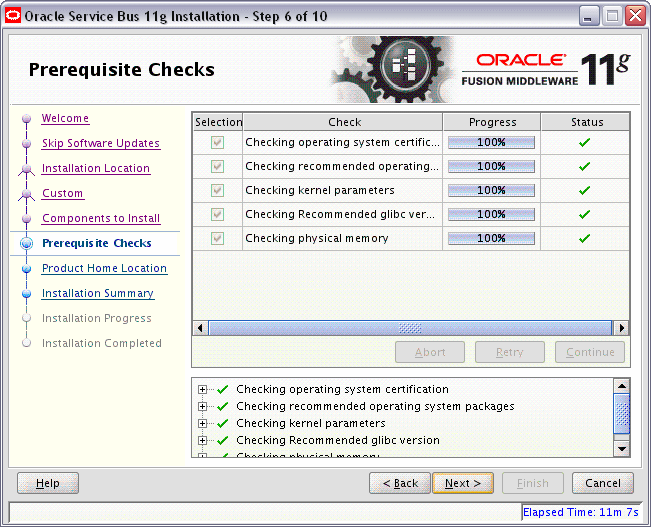
Description of the illustration install_prereqs.gif
The installation program ensures that you have a certified version, the correct software packages, sufficient space and memory to perform the operations that you have selected.
If there is a problem, a short error message appears in the bottom portion of the screen. Fix the error and click Retry to try again.
If you want to ignore the errors or warnings and continue with the installation, click Continue.
Click Abort to stop prerequisite checking for all components.
B.7 Product Home Location Screen
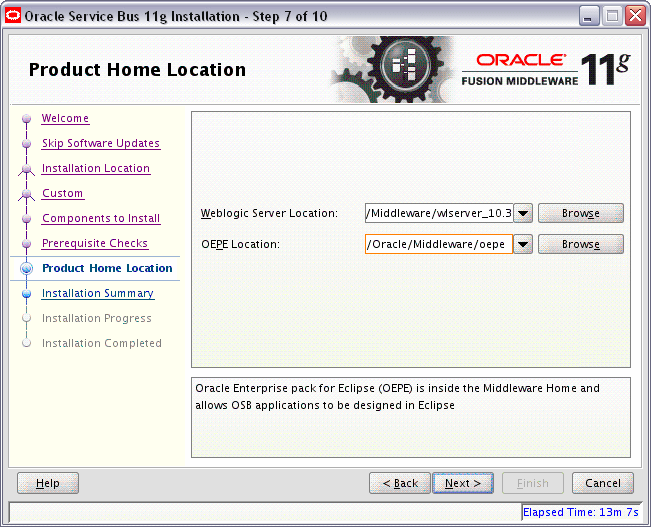
Description of the illustration install_product_home.gif
Enter the following information:
-
Oracle WebLogic Server Location
The directory name for your WebLogic Server home. This directory will automatically be created inside the Middleware home during the Oracle WebLogic Server installation. The default name for this directory is
wlserver_10.3. -
OEPE (Oracle Enterprise Pack for Eclipse) Location
The OEPE directory name. This directory will automatically be created inside the Middleware home. The default location is
oepe_11gR1PS3inside the Middleware home.Note:
This option only appears if you selected Oracle Service Bus IDE on the Components to Install Screen.
If you are performing an installation on a Windows operating system, be sure that your directory paths are valid and do not contain double backslashes (\\).
After specifying the installation directories, click Next.
B.8 Installation Summary Screen
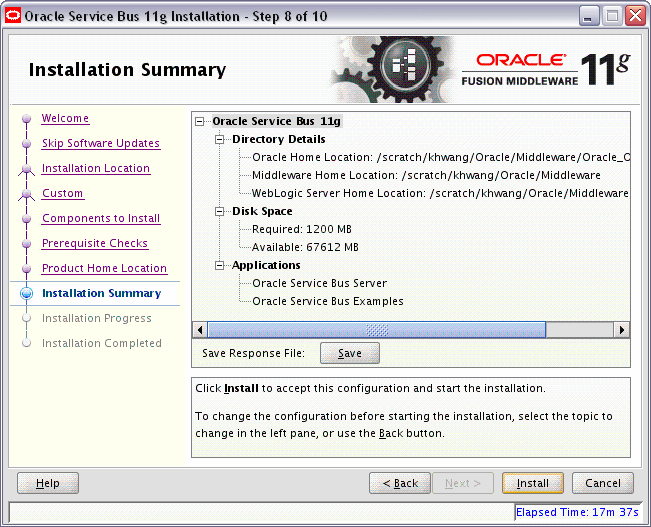
Description of the illustration install_summary.gif
The Installation Summary screen displays the following details:
-
Directory Details
-
Disk Space
-
Applications
Click Save to save the installation response file, which contains your responses to the Installer prompts and fields. You can use this response file to perform silent installations.
Note:
The installation response file is not saved, by default—you must click Save to retain it.Refer to "Oracle Fusion Middleware Directory Structure and Concepts" in Oracle Fusion Middleware Installation Planning Guide for more information about these directories.
Review the contents of this screen, and click Install to start installing the Oracle Service Bus 11g software.
B.9 Installation Progress Screen
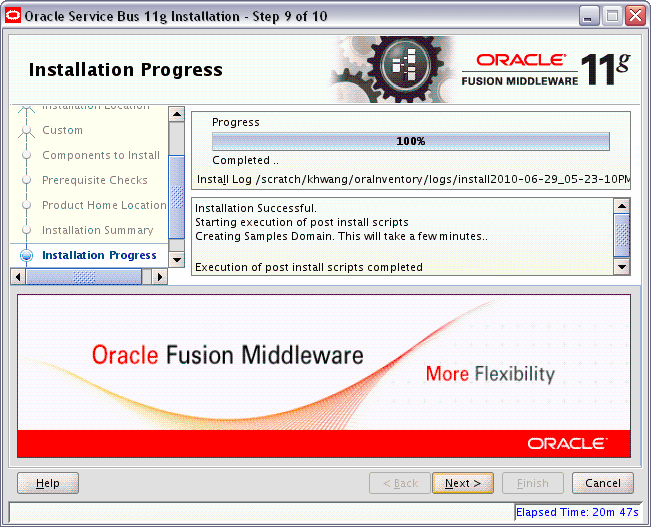
Description of the illustration install_progress.gif
This screen shows the progress of the installation of Oracle Service Bus products and components. When the installation progress is shown as 100%, click Next.
B.10 Installation Completed Screen
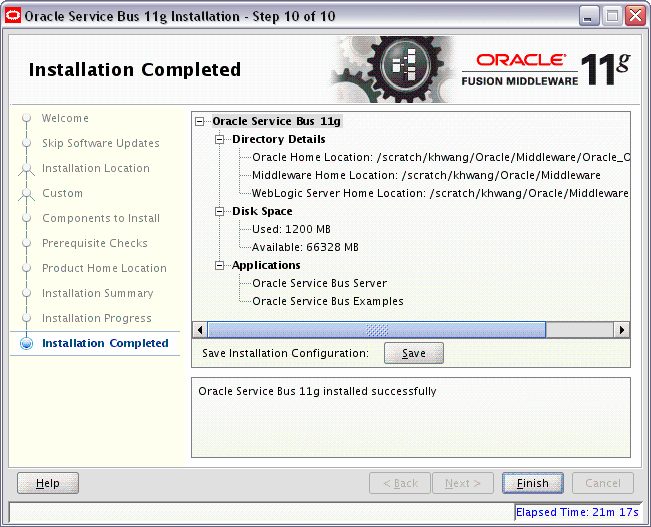
Description of the illustration install_completed.gif
The Installation Completed screen displays the result of the Oracle Service Bus installation. Click Finish to exit.