Configure Hardware for RAID (Oracle System Assistant)
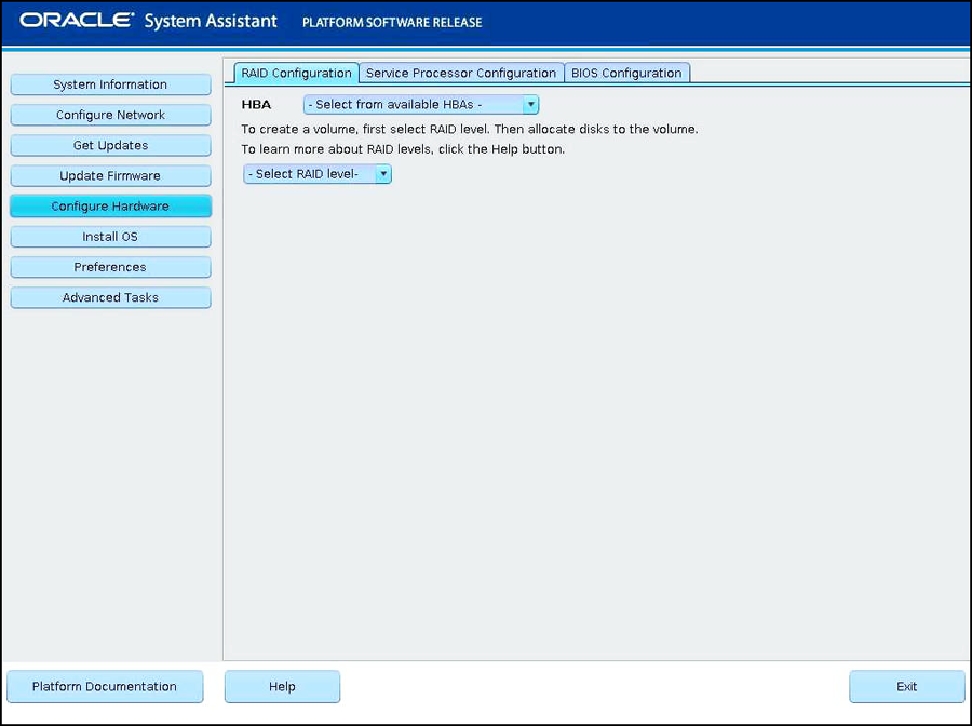
The Oracle System Assistant RAID Configuration screen allows you to configure RAID 0, RAID 1, RAID 5, or RAID 10 for the server storage drives.
Note - Perform this task before installing an operating system.
When you configure RAID volumes, the disks must be the same size and the same type (for example, SAS or SATA).
Before You Begin
Review Oracle's recommendations for drive slot population and virtual drive creation. See your server documentation for details.
-
Access Oracle System Assistant.
See Accessing Oracle System Assistant for details.
-
Click Configure Hardware and then click the RAID Configuration tab.
The RAID Configuration screen appears.

-
In the HBA list box, verify the HBA disk controller is correct.
For example, your server might support the SGX-SAS6-REM-Z Express Module or the SGX-SAS6-R-REM-Z Express Module (if you want to create a bootable volume). For more information about these HBAs, refer to your server hardware documentation.
Note - After you select an HBA, click the View Info button to see details about your controller. This feature is not available on Oracle System Assistant 1.1. -
In the Select RAID Level list box, select the RAID level, either RAID 0,
RAID 1, RAID 5, or RAID 10.
Note - You can use Oracle System Assistant to set only these RAID levels. To set other RAID levels, use the HBA Setup Utility.The number of disks allowed in an array depends on the controller. For example:
-
The SGX-SAS6-REM-Z HBA requires two or more disks and uses the Configuration Utility for configuration.
-
The SGX-SAS6-R-REM-Z HBA requires one or more disks and uses WebBIOS for configuration.
The Available Disks table appears.
-
-
In the Available Disks table, select the storage drives that you want to
add to the RAID configuration.
If a volume already exists on the disk, it appears in the Created Volumes section. If necessary, highlight and delete the existing volume.
Note - Disks must be the same size and type (SAS or SATA). -
Click the Create Volume button.
The Creating RAID Volume message appears.
-
If desired, type a volume name, and choose a stripe size.
If you choose, you can leave the volume name empty and add it later.
-
Click the Create button.
The volume is created. The Volume Details dialog box displays information about the highlighted volume.
-
Type the volume name in the Volume Details box if you did not do so
earlier, and then click the Save Changes button.
The RAID Configuration screen appears. This completes the RAID configuration.
-
To delete a RAID volume, in the RAID Configuration screen, select the
volume, and then click the Delete Volume button.
This action deletes all data on the existing volume.
-
To create a bootable volume:
Note - Your disk controller might not support this feature.- Select the volume in the RAID Configuration screen.
- Click the Details button for that volume.
-
Check Set as Bootable.
The RAID Configuration screen now indicates that the volume is bootable. This volume is now the boot device for the HBA.
- Click Save Settings.
See Also