24.3 Create the Layout of the Report
In this section, you will create a default layout for your report using the Report Wizard. You will then modify all the necessary layout objects for your graphics.
24.3.1 Create the initial layout of your report using the Report Wizard
-
In the Paper Layout view, choose Tools > Report Wizard to display the Report Wizard.
-
In the Report Wizard, on the Report Type page, select Create Paper Layout only.
-
On the Style page, select Group Above.
-
On the Groups page, click the following groups in the Available Groups list and click Down to specify the Print Direction and move them to the Displayed Groups list:
-
G_deptno
-
G_DEPTNO1
-
-
On the Fields page:
-
Click the double right arrows (>>) to move all of the fields to the Displayed Fields list.
-
In the Displayed Fields list, click deptno, then click the left arrow (<) to move this field back to the Available Fields list.
-
Do the same for DEPTNO1.
-
-
On the Labels page, delete the label for the Picture field.
-
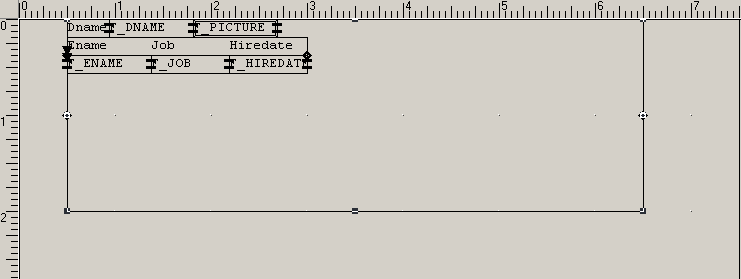
On the Template page, select No template, then click Finish to display your report layout in the Paper Layout view. It should look something like this:
Figure 24-3 Initial Paper Layout view for the dynamic graphics report

Description of "Figure 24-3 Initial Paper Layout view for the dynamic graphics report"
-
Save your report as
dynamicgraphics_your_initials.rdf.
24.3.2 Modify the layout of your report
Now that you have created an initial layout for your report, you can rearrange your layout objects and add dynamic graphics.
-
In the Paper Layout view, select all the objects by pressing Ctrl+A on your keyboard.
-
Use the arrow keys on your keyboard to move all the objects 0.5 inches (1.5 centimeters) to the right.
-
In the Paper Layout view, expand the screen so that you can see down to 7 inches (18 centimeters) on the ruler.
-
In the Object Navigator, find your report name, then navigate to Paper Layout > Main Section > Body > M_G_DEPTNO_GRPFR.
-
Click R_G_DEPTNO. In the Paper Layout view, the R_G_DEPTNO repeating frame should also be selected.
-
While the R_G_DEPTNO repeating frame is selected, click the right part of the frame, and drag it to 6.5 inches (16.5 centimeters). The repeating frame should now expand from the 3.0 inch (7.5 centimeter) mark to the 6.5 inch (16.5 centimeter) mark on the top ruler.
-
Now, click the bottom part of the frame, and drag it to 2.0 inches (5 centimeters). You can see where you are by looking at the left-hand ruler. The repeating frame should now expand from the 0.5 inch (1.3 centimeter) mark to the 2.0 inch (5 centimeter) mark on the left-hand ruler.
Figure 24-4 Paper Layout view of the modified layout

Description of "Figure 24-4 Paper Layout view of the modified layout"
-
Click the Flex Off button in the toolbar.
-
Move the Picture field to the right, and enlarge it to about 1.5 by 1.5 inches (4 by 4 centimeters).
-
In the Object Navigator, navigate to Paper Layout > Main Section > Body, then select the M_G_DEPTNO_GRPFR frame.
-
In the Paper Layout view, click the right edge of the frame and drag it to the right to include the Picture field.
-
Do the same for the R_G_DEPTNO repeating frame.
-
While R_G_DEPTNO is selected, choose Tools > Property Inspector to display the Property Inspector.
-
Under Repeating Frame, set the Maximum Records per Page property to
1.Note:
By setting the maximum records per page to 1, only one state will display per page in your report. -
Save your report as
dynamicgraphics_your initials.rdf.