41.7 Create a Layout
Now that you have a working data model, the steps in this section will help you to create a layout.
-
In the Object Navigator, right-click the report name and choose Report Wizard.
-
In the Report Wizard, on the Report Type page, select Create Paper Layout Only.
-
On the Style page, type
My Employeesin the Title field, select Group Above. -
On the Groups page, click the following fields in the Available Fields list and click Down to specify the Print Direction and move them to the Group Fields list:
-
G_conlabel
-
G_DEPARTMENT_ID
-
G_EMPLOYEE_ID
-
-
On the Fields page, click the following fields and click the right arrow (>) to move them to the Displayed Fields list:
-
DEPARTMENT_NAME
-
EMPLOYEE_ID
-
START_DATE
-
END_DATE
-
JOB_ID
-
CS_port_count
-
-
On the Labels page, change the labels and field widths as follows:
-
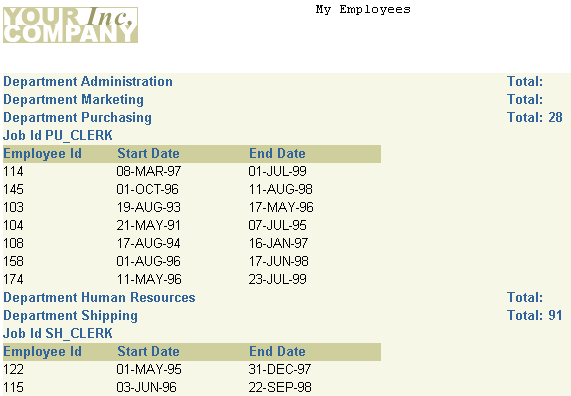
On the Template page, choose Predefined template and click Beige, then click Finish to display your report output in the Paper Design view. It should look something like this:
Figure 41-8 Paper Design view for the REF CURSOR report

Description of "Figure 41-8 Paper Design view for the REF CURSOR report"
Note:
You can open the provided fileref_emp66.rdfand display the Paper Design view to compare your results. -
Save the report as
ref_66_your_initials.rdf.