3 Getting Started with Oracle IRM Desktop
Note:
If you share your machine with other users, please read Section 7.2, "Managing Rights on a Shared Computer".This section describes how to use Oracle IRM Desktop for the following typical tasks:
Microsoft Office integration provides sealing functionality on toolbars within the Microsoft Office applications you select.
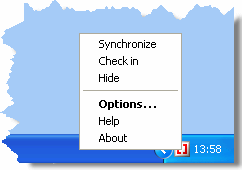
For information about other tasks, see the Oracle IRM Desktop online help. The help is accessible from the Windows Start menu, or from the Oracle IRM Desktop icon in the notification area (system tray).
3.1 Opening Sealed Documents
With Oracle IRM Desktop installed, you can open a sealed document simply by double-clicking it in a document browser (such as Windows Explorer).
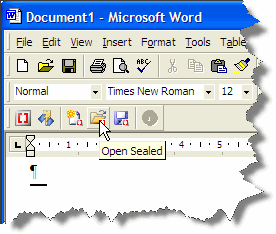
Alternatively, with Microsoft Office integration enabled, you can use the toolbars within Microsoft Office applications.
The first time you open a sealed document, you might be challenged for the username and password of your Oracle IRM Server account, and you might be required to change your password. If you are challenged for a password, you might be offered a Save my password option, which you can use to ensure that you are not challenged next time.
Having authenticated, the Oracle IRM software checks to see whether you have the right to open the sealed document. Typically, the administrator will make sure you have rights for the first document you receive. Once opened, your ability to interact with the document is controlled by your rights, and can range from read-only access, through the ability to add comments or make tracked changes, to full edit rights.
If you do not have the right to open the document, you are redirected to a web page that explains why not.
3.2 Sealing an Existing Document
You can seal an existing document in Windows Explorer as follows. The same procedure can seal Microsoft Word, Excel, Powerpoint, PDF, HTML, and various other document types.
-
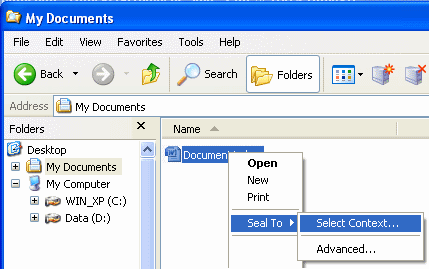
Right-click on the document in Windows Explorer, select Seal To and then Select Context.
A context selection dialog appears:
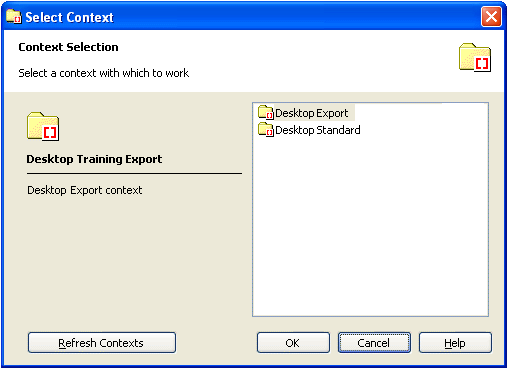
The dialog lists security contexts to which you have the right to seal documents. If you think the list is incomplete, you can use the Refresh Contexts button to update it.
-
Select the context that you want to use and click OK.
A sealed document is created in the same folder as the selected document.
Alternatively, integrated Microsoft Office support provides sealing options within Microsoft Office applications. In each case, the option requires the selection of a context as shown above.
3.3 Creating a New Blank Sealed Microsoft Office Document
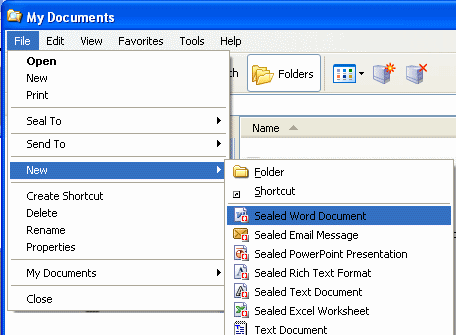
You can create new blank sealed Microsoft Office documents from the Windows Explorer File menu - just as you can create new unsealed documents.
For example, you can create a sealed Microsoft Word document, as follows:
-
In Windows Explorer, select the folder in which you want to create the new sealed document.
-
Select the File menu, then select New, then select Sealed Word Document.
The context selection dialog appears.
-
Select a context for the new sealed Word document and click OK.
-
Use the Save As dialog to name the new document.
The new document is opened immediately for you to start working with.
Alternatively, Microsoft Office integration provides toolbars for creating new sealed documents within the Microsoft Office applications.
3.4 Enabling Microsoft Office Integration
If Microsoft Office integration is enabled, Oracle IRM Desktop supports the creation and editing of sealed Microsoft Office documents, and controls Microsoft Office to ensure that you do not accidentally exceed your rights. Microsoft Office integration might be enabled automatically. If not, you can enable it manually as follows.
-
From the Windows Start menu, select Programs, then Oracle IRM Desktop, then Options.
This opens the Oracle IRM Desktop Options dialog.
Alternatively, you can right-click the Oracle IRM icon in the Windows notification area (system tray) and select Options.

-
Select the General tab.
-
If the Enable Microsoft Office support box is not already checked, check it, then click OK.
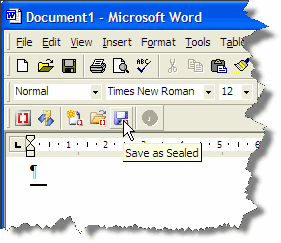
The next time you start a Microsoft Office application, it will show sealing-related options in an Oracle IRM toolbar. For example, you can use the Save As Sealed button on the Oracle IRM toolbar to seal a document:
Similar integrations for email applications are provided on the Email tab of the Oracle IRM Options dialog.