B Oracle Identity and Access Management 11.1.1.5.0 Software Installation Screens
This appendix describes the screens of the Oracle Identity and Access Management 11g software Installation Wizard that enables you to install Oracle Identity Manager, Oracle Access Manager, Oracle Adaptive Access Manager, Oracle Entitlements Server, and Oracle Identity Navigator.
It contains the following topics:
B.1 Welcome
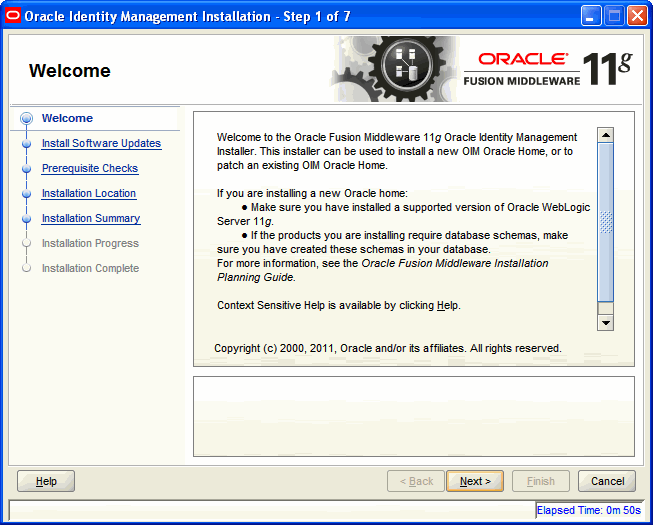
The Welcome screen is displayed each time you start the Oracle Identity and Access Management 11g Installer wizard.
Click Next to continue.
B.2 Install Software Updates
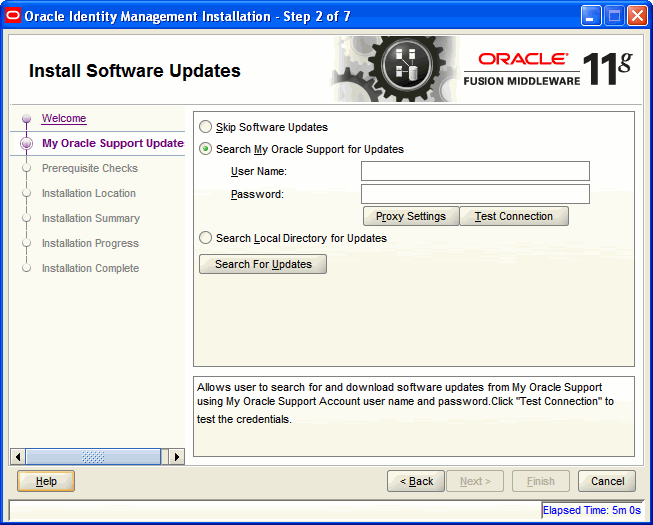
This screen helps to quickly and easily search for the latest software updates, including important security updates, via your My Oracle Support account.
B.3 Prerequisite Checks
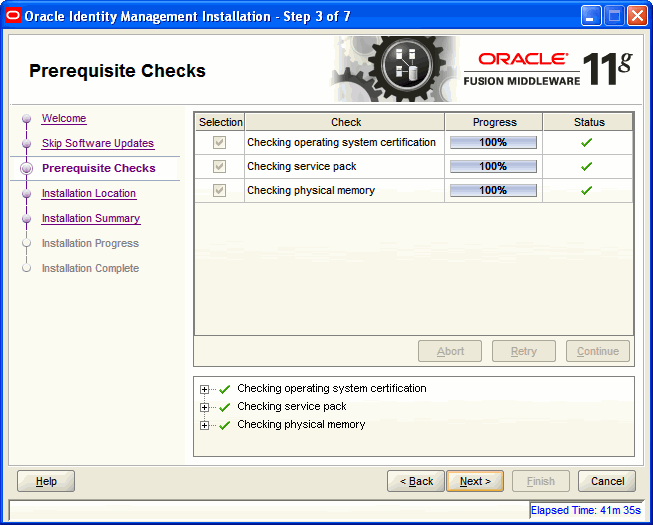
The installation program ensures that you have a certified version, the correct software packages, sufficient space and memory to perform the operations that you have selected. If any issues are detected, errors appear on this page.
The following example screen applies to Windows operating systems only. For more information about prerequisite checks performed by the Installer, see Prerequisite Checks Performed by the Oracle Identity and Access Management Installer.
On this screen, you can select to Abort, Retry, or Continue with the installation.
If all the prerequisite checks pass inspection, click Next to continue.
B.4 Specify Installation Location
In this screen, you enter a location for the new Oracle Identity and Access Management 11g software being installed.
Figure B-4 Specify Installation Location Screen
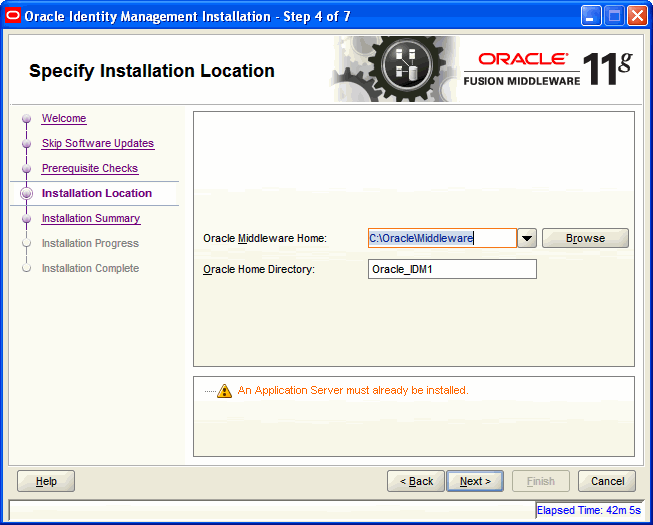
Description of "Figure B-4 Specify Installation Location Screen"
Ensure that Oracle WebLogic Server is already installed on your machine. Navigate to the Oracle Fusion Middleware Home directory by clicking Browse. Enter a name for the new Oracle Home directory for Oracle Identity and Access Management 11g components.
If the Middleware location does not exist, you must install WebLogic Server and create a Middleware Home directory, as described in Installing Oracle WebLogic Server and Creating the Oracle Middleware Home, before running the Oracle Identity and Access Management Installer.
Note:
If you do not specify a valid Middleware Home directory on the Specify Installation Location screen, the Installer displays a message and prompts you to confirm whether you want to proceed with the installation of only Oracle Identity Manager Design Console and Oracle Identity Manager Remote Manager. These two components of Oracle Identity Manager do not require a Middleware Home directory.
If you want to install only Oracle Identity Manager Design Console or Remote Manager, you do not need to install Oracle WebLogic Server or create a Middleware Home directory on the machine where Design Console or Remote Manager is being configured.
Click Next to continue.
B.5 Installation Summary
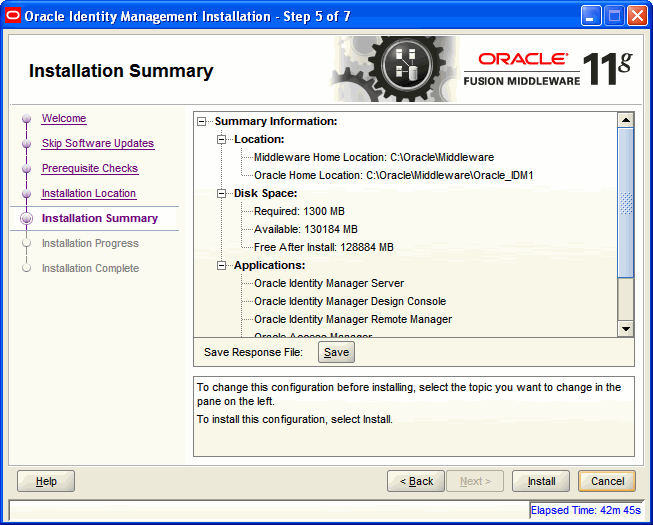
This screen displays a summary of your Oracle Identity and Access Management 11g installation.
Review the contents of this screen, and click Install to start installing the Oracle Identity and Access Management 11g software.
B.6 Installation Progress
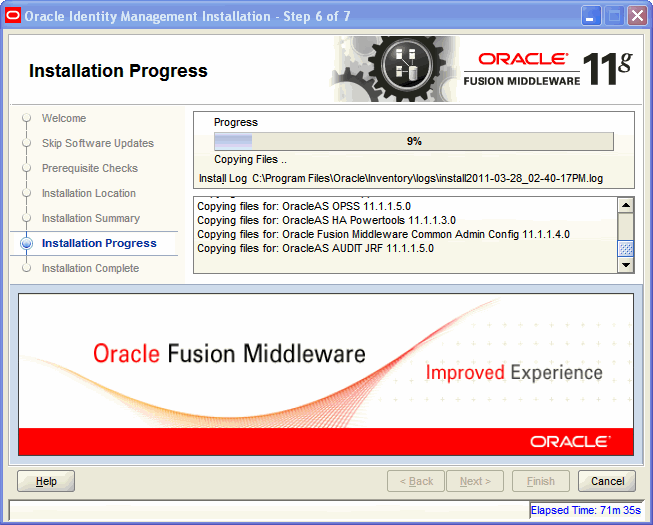
This screen displays the progress of the Oracle Identity and Access Management installation.
If you want to quit before the installation is completed, click Cancel. The installation progress indicator gives a running inventory of the files that are being installed. If you are only installing the software binaries, installation is complete after all of the binaries have been installed.
B.7 Installation Complete
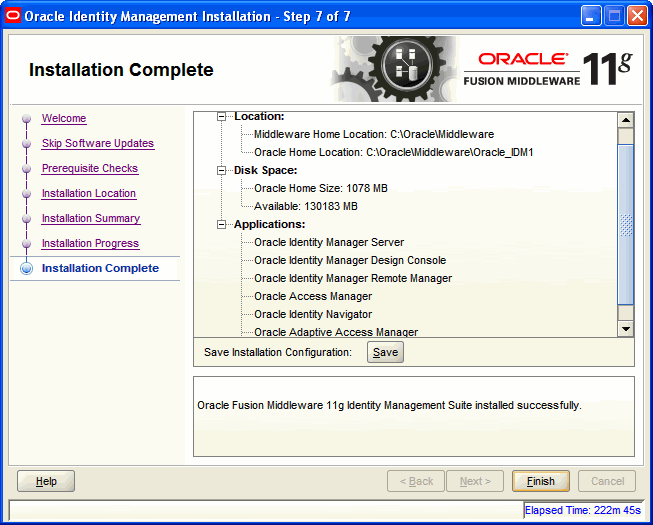
This screen displays a summary of the installation parameters, such as Location, Disk Space, and Applications. To save the installation configuration in a response file, which is used to perform silent installations, click Save.
Click Finish to complete the installation process.
