2 Using the Asset Editor
This chapter describes how to use the Asset Editor in Oracle Enterprise Repository to configure categories, relationships, rejection reasons, repositories, and vendors.
This chapter includes the following sections:
2.1 Overview
The Asset Editor is used to administer assets and to configure assets and types. Categories, relationships, rejection reasons, repositories, and vendors are also configured within the Asset Editor.
The specifics of configuration depend on your organization's guidelines, and may differ slightly from the options discussed here.
2.2 Launching the Asset Editor
This procedure is performed on the Oracle Enterprise Repository Assets screen.
-
Click Edit/Manage Assets. The Asset Editor is displayed, as shown in Figure 2-1.
2.3 Configuring System Options
A number of system options can be configured from the Actions menu in the Asset Editor.
2.3.1 Configure Acceptable Value Lists
Defines/identifies the single- and multiple-selection lists used as metadata elements in asset displays.
-
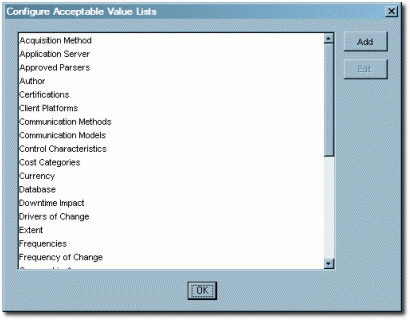
Select Configure Acceptable Value Lists from the Actions menu. The Configure Acceptable Value Lists dialog is displayed, as shown in Figure 2-2.
Figure 2-2 Configure Acceptable Value Lists
Description of "Figure 2-2 Configure Acceptable Value Lists"
-
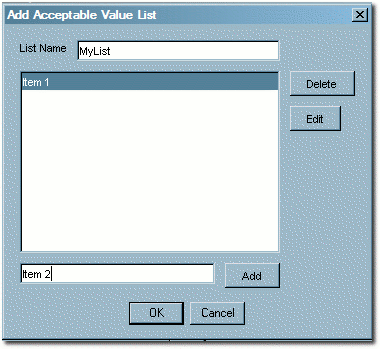
Click Add. The Add Acceptable Value List dialog is displayed, as shown in Figure 2-3.
-
Enter an appropriate name in the List Name text box.
Figure 2-3 Add Acceptable Value List Dialog
Description of "Figure 2-3 Add Acceptable Value List Dialog"
-
Enter an appropriate list item name in the text box next to the Add button.
-
Repeat Steps 4 and 5 as necessary to add additional list items.
-
When finished, click OK. The new list appears in the Configure Acceptable Value Lists window.
-
To edit any Acceptable Value List, select the list from the Configure Acceptable Value Lists window.
-
Click Edit. The Edit Acceptable Value List dialog is displayed. (Same form as the Add Acceptable Value List window.)
-
Make changes as necessary.
-
Click OK.
2.3.2 Configure Artifact Stores
Determines where the files relevant to assets in Oracle Enterprise Repository are stored.
-
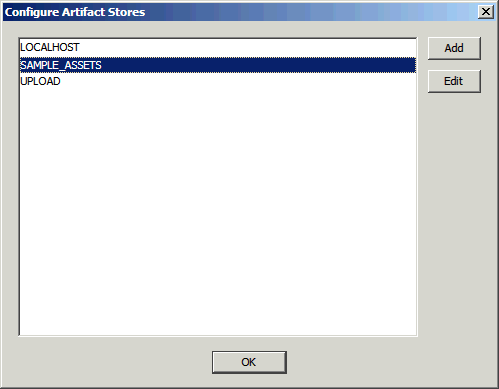
Select Configure Artifact Stores from the Actions menu. The Configure Artifact Stores dialog is displayed, as shown in Figure 2-4.
Figure 2-4 Configure Artifact Stores Dialog
Description of "Figure 2-4 Configure Artifact Stores Dialog"
-
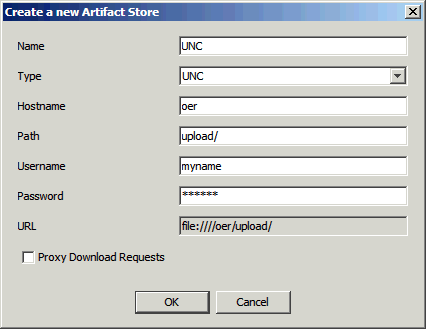
Click Add. The Create a New Artifact Store dialog is displayed, as shown in Figure 2-5.
Figure 2-5 Create a New Artifact Store Dialog
Description of "Figure 2-5 Create a New Artifact Store Dialog"
-
Enter a name for the artifact store.
-
In the Type list, select a type for the artifact store.
-
Default Types:
-
FTP
Accesses files on an FTP server
-
HTTP
Accesses files on a web server
-
HTTPS
Accesses files on a secure web server
-
UNC
Accesses files using a Windows or Samba share
-
Raw URI
Access files through a raw URI.
-
Raw SCM
Access files through a raw SCM. Enables the selection of SCM Types, including CVS, Perforce, and Other. The selected SCM type automatically populates the Download Path URI Suffix field, but the field can be modified however necessary.
-
-
Depending on the integration options included in your installation of Oracle Enterprise Repository, one or more of the following types may be available:
-
Perforce
Accesses the Perforce source control management system
-
PVCS
Accesses the PVCS source control management system
-
ChangeMan DS
Accesses the ChangeMan DS source control management system
-
ClearCase
Accesses the ClearCase source control management system
-
CVS
Accesses the CVS source control management system (requires either ViewCVS or similar product configured)
-
FileStores
Accesses the ClearCase or other SCM control management system
-
ClearQuest
Accesses the ClearQuest defect tracking system
-
-
-
Enter a hostname and path for the server.
-
(Optional) Enter a username and password. Exercising this option enables automatic login.
-
When finished, click OK.
-
To edit any Artifact Store, locate it in the list in the Configure Artifact Stores window.
-
Click Edit. The Edit Artifact Store dialog is displayed. (Same form as the Create a new Artifact Store window.)
-
Make changes as necessary.
-
Click OK.
2.3.3 Configure Categorizations
Categorizations determine how assets are organized and viewed. They can also be applied in a similar fashion to projects.
-
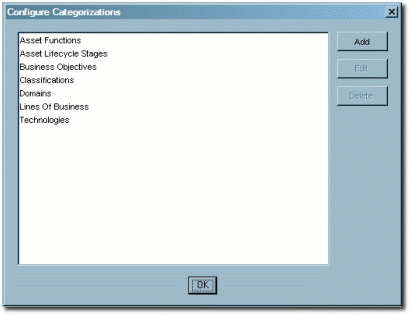
Select Configure Categorizations from the Actions menu. The Configure Categorizations dialog is displayed, as shown in Figure 2-6.
Figure 2-6 Configure Categorizations Dialog
Description of "Figure 2-6 Configure Categorizations Dialog"
-
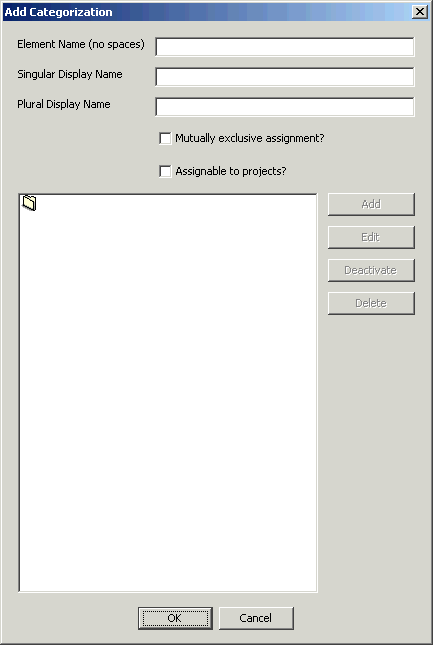
Click Add. The Add Categorizations dialog is displayed, as shown in Figure 2-7.
-
Enter the appropriate information in each of the text boxes.
-
Select the Mutually exclusive assignment? option if assets can be assigned to only one of the categorizations in this categorization type.
-
Select the Assignable to Projects? option (if this option has been enabled by your Oracle Enterprise Repository Administrator) so categorizations can be assigned to projects, and not to assets.
-
If UDDI is enabled for your environment, then Oracle Enterprise Repository automatically creates tModelKeys for categorizations. If required, an administrator can assign specific UDDI Version 2 or Version 3 tModelKeys to any categorization.
-
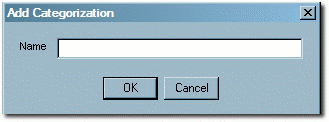
Click Add to add sub-categorizations. The Add Categorizations dialog is displayed, as shown in Figure 2-8.
-
When finished, click OK. The new categorization appears in the Configure Categorizations window.
-
To edit any Categorization, locate it in the list in the Configure Categorizations window.
-
Click Edit. The Edit Categorization dialog is displayed. (Same form as the Add Categorizations window.)
-
Make changes as necessary.
-
Click OK.
2.3.4 Configure Relationships
Relationships define the connection, interaction, or interdependence between assets. If so configured, assets subject to a specific relationship to an asset that has been selected for use (that is, the Use - Download button has been clicked) can also be downloaded.
-
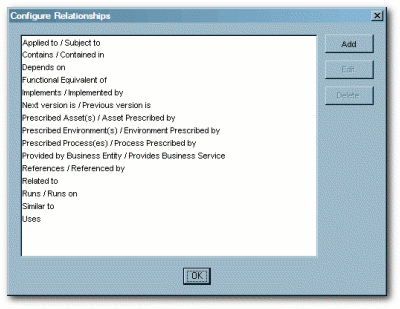
Select Configure Relationships from the Actions menu. The Configure Relationships dialog is displayed, as shown in Figure 2-9.
Figure 2-9 Configure Relationships Dialog
Description of "Figure 2-9 Configure Relationships Dialog"
-
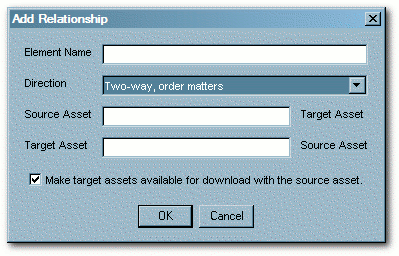
Click Add. The Add Relationships dialog is displayed, as shown in Figure 2-10.
-
Enter the appropriate information in each of the text boxes.
-
Make the appropriate selection in the Direction list.
The selected direction affects the information displayed in the Source Asset and Target Asset text boxes. For example, in a two-way relationship, the target and source are interdependent, whereas Two-way -- order matters can be used to describe the relationship between sequential versions of an asset, for example, the relationship between Asset v0.90 and Asset v1.0.
-
Make the appropriate selection in the Make target assets available for download with the source asset check box.
-
When finished, click OK.
-
To edit any Relationship, locate it in the list in the Configure Relationships window.
-
Click Edit. The Edit Relationships dialog is displayed. (Same form as the Add Relationship window.)
-
Make changes as necessary.
-
Click OK.
2.3.4.1 Configure System-Supplied Relationships
There are also system-supplied relationships in Oracle Enterprise Repository with limited read-only functionality to end users. Unlike standard asset relationships, system-supplied relationships are used in a context that requires their name and direction to be immutable. Therefore, these relationships cannot be added, deleted, or modified by users, except where otherwise noted.
2.3.5 Configure Rejection Reasons
Determines the selection of Rejection Reasons available to users who reject previously used/downloaded assets. Rejection Reasons provide valuable local community feedback on assets.
-
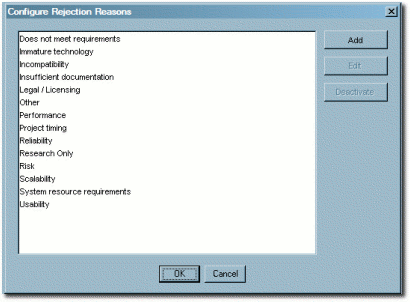
Select Configure Rejection Reasons from the Actions menu. The Configure Rejection Reasons dialog is displayed, as shown in Figure 2-11.
Figure 2-11 Configure Rejection Reasons Dialog
Description of "Figure 2-11 Configure Rejection Reasons Dialog"
-
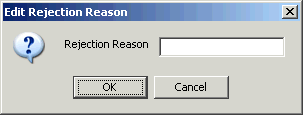
Click Add. The Edit Rejection Reasons dialog is displayed, as shown in Figure 2-12.
-
Enter the appropriate text in the Rejection Reason text box.
-
When finished, click OK.
-
To edit any Rejection Reason, locate it in the list in the Configure Rejection Reasons window.
-
Click Edit. The Edit Rejection Reasons dialog is displayed.
-
Make changes as necessary.
-
Click OK.
2.3.6 Configure Vendors
Defines/identifies vendors providing assets to the repository.
-
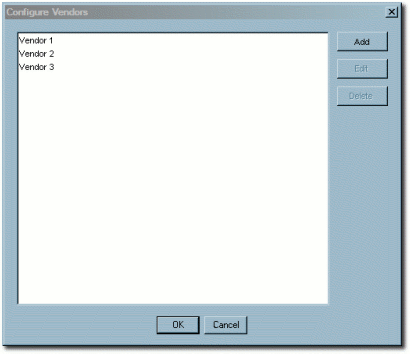
Select Configure Vendors from the Actions menu. The Configure Vendors dialog is displayed, as shown in Figure 2-13.
-
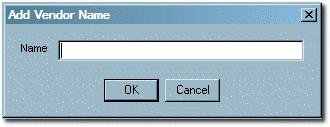
Click Add. The Add Vendor Name dialog is displayed, as shown in Figure 2-14.
-
Enter the appropriate information in the Name text box.
-
When finished, click OK.
-
To edit any Vendor, locate it in the list in the Configure Vendors window.
-
Click Edit. The Edit Vendor Name window opens. (Same form as the Add Vendor Name window.)
-
Make changes as necessary.
-
Click OK.
2.4 Advanced Asset Submission
This function enables a user (with the appropriate privileges) to submit assets through the Asset Editor rather that through the Web Console. This enables the user to enter more asset details upon submission. This procedure is performed in the Asset Editor. (Access to the Asset Editor is determined by the role to which the user is assigned.)
-
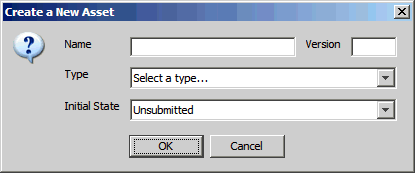
Open the File menu in the Asset Editor and select New. The Create a New Asset dialog is displayed, as shown in Figure 2-15.
-
Enter the appropriate information in the Name and Version text boxes.
-
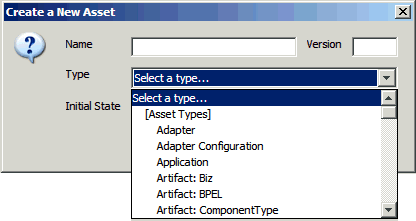
Select the appropriate Type template from the Type list, Figure 2-16.
Figure 2-16 Create a New Asset Dialog - Type List
Description of "Figure 2-16 Create a New Asset Dialog - Type List"
-
Click OK. The new asset appears in the Asset Editor, as shown in Figure 2-17.
The asset is submitted for review and registration.
2.5 Asset/Compliance Template/Policy Migration
Migration refers to the transfer of metadata and files from one asset, compliance template, or Policy to another, usually of the same type. Since it is easier to edit metadata than to recreate it, this function enables users to quickly create different versions of assets, compliance templates, or policies. For example, to create JavaComponent v1.0, one would migrate the metadata and files from JavaComponent v0.90, then make the necessary changes in the metadata for the v1.0 asset. When migrating an asset the new asset must have a different name, version number, or both. Migration does NOT remove the original asset from Oracle Enterprise Repository.
It is also possible to migrate an asset, compliance template, or policy to a different type. However, differing metadata elements does not transfer. For example, if the originating asset type uses a table on one of its tabs and is migrated to an asset type that does not have the same table element, the table and its metadata does not migrate. The table metadata element would have to be created in the new asset type.
2.5.1 Migrating an Asset/Compliance Template/Policy
This procedure is performed in the Asset Editor.
-
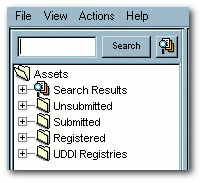
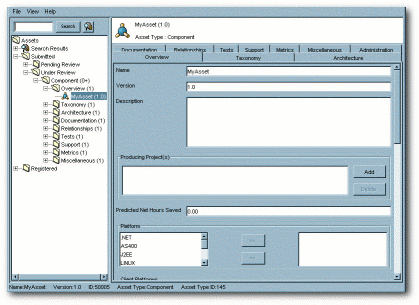
Use Search or browse the Asset Editor file tree to locate the source asset or compliance template to be migrated, as shown in Figure 2-18.
-
Select Copy/Migrate in the File menu.
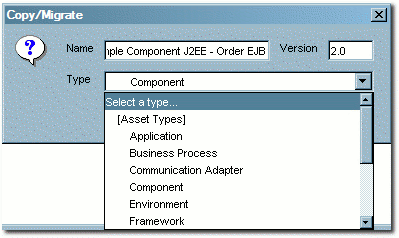
The Copy/Migrate dialog is displayed, as shown in Figure 2-19.
-
Enter the appropriate information in the Name and Version text boxes.
-
Select the destination Type (the type to which the source artifact is to be migrated) in the Type list.
Migrating assets between dissimilar types affects the display of asset information in the asset detail and in the Asset Editor.
-
When finished, click OK.
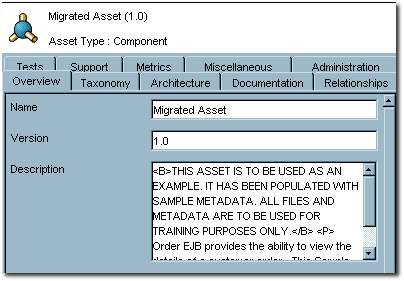
The migrated asset appears in the Asset Editor, as shown in Figure 2-20.
-
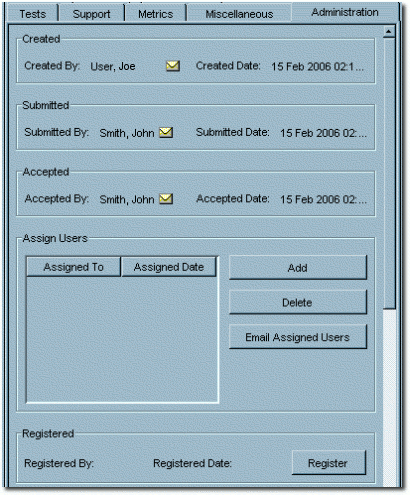
Click the new asset's Administration tab, as shown in Figure 2-21.
-
Register the new asset or assign it to another user for registration.
2.6 Asset Registration Status
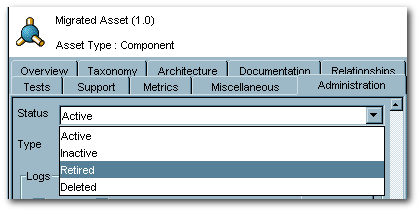
The registrar can assign a status to the asset using the Administration tab in the Asset Editor.
-
Active
The status assigned to any asset that is available for use.
-
Inactive
The status assigned to any asset in the repository but unavailable for general use. An inactive asset can be re-activated or retired. Inactive assets show up in a search, but cannot be selected for use (the Use - Download button is not displayed).
-
Retired
The status assigned to any asset in the repository that is retired from general use. A retired asset can be re-activated or made inactive. Retired assets cannot be selected for use (the Use - Download button is not displayed), nor do they show up in a search; however, they would be available as related assets to active or inactive assets in the repository.
-
Deleted
The status assigned to any asset that is removed from the repository. Deleted assets cannot be recovered or have their status reassigned.
2.6.1 Assigning or Changing an Asset's Status
This procedure is performed in the Asset Editor. Any changes to an asset's status are automatically saved by the Asset Editor.
-
Use Search or browse the Asset Editor file tree to locate the source asset or compliance template to be modified.
-
Click the Administration tab.
-
In the Status list, select the status to be assigned to the asset, as shown in Figure 2-22.
Note:
Depending on the assigned status, the asset may disappear from the tree (Deleted) or be unavailable for user searches (Retired).
