16 Updating Cloud Control
The Self Update feature allows you to expand Enterprise Manager's capabilities by updating Enterprise Manager components whenever new or updated features become available. Updated plug-ins are made available via the Enterprise Manager Store, an external site that is periodically checked by Enterprise Manager Cloud Control to obtain information about updates ready for download.
This chapter contains the following sections:
16.1 Using Self Update
The Self Update feature is accessed via the Self Update home page, a common dashboard used to obtain information about new updates and a common workflow to review, download and apply the updates. The Self Update console frees you from having to monitor multiple channels to get informed about new updates that are available from Oracle. The Self Update console automatically informs you whenever new updates are made available by Oracle. Only those updates that are applicable to your site are shown, eliminating the need to wade through unrelated updates.
16.1.1 What Can Be Updated?
Specific updates authored by Oracle that are usually bundled with specific Cloud Control releases can be updated via Self Update. Some examples are Oracle authored Management Plug-ins or Deployment Procedures. In general, Oracle-supplied entities are read-only. You can create a copy and customize the copy as per your needs but you cannot modify the original Oracle-supplied entity.
These entities can also be published on Oracle Web sites such as Oracle Technology Network (OTN) and My Oracle Support (MOS). You can download and import the entity archive into their Cloud Control deployment using specific import features provided by the updatable entity.
Entity Types That Can Be Updated
Examples of updatable entity types are:
-
Management Agents
-
Management Plug-ins
-
Management Connectors
-
Database Profiles and Gold Images
-
Application Server Profiles and Gold Images
-
Provisioning Bundles
-
Enterprise Manager Deployment Prerequisite Checks
-
Compliance Content
-
Diagnostic Checks
16.2 Setting Up Self Update
Before you can use the Self Update feature, you must satisfy these prerequisites:
-
My Oracle Support credentials have been set up using the SYSMAN user. This is required to enable entities to be downloaded from the My Oracle Support site.
-
The Software Library (also known as the local store) has been configured. Updates are downloaded to this local store before being deployed into Cloud Control.
Review the following sections for instructions on setting up Self Update:
16.2.1 Setting Up Enterprise Manager Self Update Mode
In order to set up or modify the Enterprise Manager Self Update feature, you must have Enterprise Manager Super Administrator privileges.
-
Log in to Enterprise Manager as an administrator with Super Administrator privileges.
-
From the Setup menu, select Extensibility, then select Self Update. The Self Update console appears with the default setup displayed.
-
From the General status area, click the Connection Mode status to set either offline or online mode. Enterprise Manager takes you to the Patching Setup page to specify online and offline settings.
Important:
When Cloud Control runs in Online mode, it does not upload any data to MOS. It only uses MOS to download the latest updates. -
Once the desired connection mode has been selected, return to the Self Update console.
From here you can select entity types and schedule updates from the Enterprise Manager Update Store.
16.2.2 Assigning Self Update Privileges to Users
Enterprise Manager administrators must have the requisite privileges to use the Self Update feature. The Enterprise Manager Super Administrator must assign the following Self Update roles/privileges to these administrators:
-
View any Enterprise Manager Update–User can view the Self Update console and can monitor the status of download and apply jobs.
-
Self Update Administrator–User can schedule download and apply jobs. User can also suppress/unsuppress updates. This privilege implicitly contains the View any Enterprise Manager Update privilege.
-
EM_INFRASTRUCTURE_ADMIN–User can perform all self update operations. This role implicitly contains the Self Update Administrator privilege.
By default, the Super Administrator will be granted EM_INFRASTRUCTURE_ADMIN privilege.
To assign Self Update privileges to regular Enterprise Manager administrators:
-
From the Setup menu, select Security, then select Administrators.
-
Select an administrator and click Edit.
-
From the Roles page, assign the appropriate Self Update roles.
16.2.3 Setting Up the Software Library
The Software Library is a repository that stores software entities such as software patches, virtual appliance images, reference gold images, application software, and their associated directive scripts. In addition to storing them, it also enables you to maintain versions, maturity levels, and states of these software entities. In the context of applying updates, it is the "local store" that entities are downloaded to before deployment.
If the Software Library is not already set up in your environment, see Chapter 8, "Configuring Software Library," for instructions on the various ways you can configure the Software Library.
16.2.4 Setting My Oracle Support Preferred Credentials
To set the preferred credentials that must be used by the OMS to connect to My Oracle Support (MOS), follow these steps:
-
From the Setup menu, select My Oracle Support, then select Set Credentials.
-
Specify the user name and the password.
-
Click Apply.
16.2.5 Registering the Proxy Details for My Oracle Support
Cloud Control uses the Internet connectivity you have on the OMS host to connect to My Oracle Support. However, if you have a proxy server set up in your environment, then you must register the proxy details. You can register the proxy details for My Oracle Support using the My Oracle Support Proxy Settings page.
Note:
Beginning with Enterprise Manager Cloud Control 12c Release 3 (12.1.0.3), My Oracle Support accesses support.oracle.com directly. This means that you must provide network access to this URL, or grant proxy access to it from any client that will access My Oracle Support.To register the proxy details for My Oracle Support (MOS), follow these steps:
-
From the Setup menu, select Proxy Settings, then select My Oracle Support.
-
If you want the OMS to connect to MOS directly, without using a proxy server, follow these steps:
-
Select No Proxy.
-
Click Test to test if the OMS can connect to MOS directly.
-
If the connection is successful, click Apply to save the proxy settings to the repository.
-
-
If you want the OMS to connect to MOS using a proxy server, follow these steps:
-
Select Manual proxy configuration.
-
Specify the proxy server host name for HTTPS and an appropriate port value for Port.
-
If the specified proxy server has been configured using a security realm, login credentials, or both, select Password/Advanced Setup, then provide values for Realm, User Name, and Password.
-
Click Test to test if the OMS can connect to MOS using the specified proxy server.
-
If the connection is successful, click Apply to save the proxy settings to the repository.
-
Note:
-
If you are using a proxy server in your setup, ensure that it allows connectivity to aru-akam.oracle.com, ccr.oracle.com, login.oracle.com, support.oracle.com, and updates.oracle.com.
NTLM (NT LAN Manager) based Microsoft proxy servers are not supported. If you are using an NTLM based Microsoft proxy server, to enable access to the above sites, add the above URLs to the Unauthenticated Sites Properties of the proxy server.
-
The MOS proxy server details specified on the MOS Proxy Settings page apply to all OMSes in a multi-OMS environment.
16.2.6 Setting Up the EM CLI Utility (Optional)
If you plan to apply software updates in offline mode, you will need to use the Enterprise Manager Command Line Utility, or EM CLI, to import entity archives for deployment to Enterprise Manager.
EM CLI is set up on OMS out-of-box. If you need to set up EM CLI on another machine managed by Enterprise Manager, a page is provided in the Cloud Control console with instructions on setting up EM CLI. Access the page by appending /console/emcli/download to the URL used to access the Cloud Control console:
https://emcc_host:emcc_port/em
For example:
https://emcc_host:emcc_port/em/console/emcli/download
16.3 Applying an Update
The process for applying updates is essentially as follows:
-
Check for the latest updates available from Oracle.
-
Download the updates you want to apply to the Software Library.
-
Apply the update.
Review the following sections to learn how to apply an update:
16.3.1 Applying an Update in Online Mode
Updates must be downloaded to the Software Library (the local store) before they can be applied. You can review the latest available updates from the Self Update console.
Note that Enterprise Manager must have access to the Enterprise Manager Store via the Internet to download available updates. If this access is not possible, you can download entities in offline mode. See Section 16.3.2, "Applying an Update in Offline Mode" for details.
-
From the Setup menu, select Extensibility, then select Self Update.
-
Click Check Updates to submit a job to check for new updates from Oracle. Click OK to close the confirmation message.
-
When the job completes, select the desired entity type, then select Open from the Actions menu. The entity type page appears.
-
Select an update from the list of available updates.
-
Click Download. The Schedule Download dialog appears.
-
Select when to download the update. Note that multiple downloads can be scheduled simultaneously.
The following options are available:
-
Immediately
-
Later (specified time)
-
Whether or not to send a notification when the download is complete
-
-
Click Select. An Enterprise Manager job is created to download the update to the Software Library.
Enterprise Manager starts downloading the archive from the Oracle Enterprise Manager store. Wait for the download to complete. (When in offline mode the system starts reading from the specified location.)
When the download is complete, Enterprise Manager displays the Confirmation page.
Note:
The page is not refreshed automatically. Click the refresh icon to view the updated download status. -
Once an entity has been downloaded to the Software Library, it is ready to be applied to your installation. Select an update from the list whose status is Downloaded, then click Apply.
Note that the application process varies according to the entity type:
-
For connectors, diagnostic checks, and compliance content, clicking Apply will install the update to Enterprise Manager. No further action is required.
-
For plug-ins, you will be redirected to the plug-in deployment page.
-
For provisioning bundles, you will need to exit the Enterprise Manager console, run Opatch and other commands via a terminal, and then restart the OMS.
-
16.3.2 Applying an Update in Offline Mode
Under certain circumstances, such as in high security environments, an active Internet connection between Enterprise Manager and the Enterprise Manager Update Store may not be available. In such situations, the Self Update feature can be used in offline mode.
The update process still requires that a computer exist at your site that has Internet access, as a connection to the Enterprise Manager Update Store is still required to obtain the updates. Update files from this computer can then be transferred to a computer behind your firewall.
The generic offline mode update procedure is as follows:
-
Ensure that Cloud Control is set to offline mode. From the Setup menu, select Provisioning and Patching, then select Offline Patching.
-
Change the setting for Connection to Offline.
-
Click Check Updates on the Self Update home page. A message is displayed that contains the URL to be accessed to download a catalog of all updates.
-
From an Internet-enabled computer, download the catalog file using the aforementioned URL.
-
Copy the downloaded file to the Oracle Management Service host or the Management Agent host you will deploy the update to.
-
Run the
emcli import_update_catalogcommand to import the file into the Oracle Management Service instance or the Management Agent you want to update. -
Review the update from Self Update Home and click Download in the Actions menu. A message displays with a URL and instructions.
-
Click Apply in the Actions menu to apply the update.
16.4 Accessing Informational Updates
The Self Update feature also serves as a news feed, providing new product announcements, news stories, industry updates, and any number of other items of interest to the Oracle community. These informational updates occur on an ad hoc basis and typically include useful links where you can obtain additional information and download items.
-
From the Setup menu, select Extensibility, then select Self Update.
-
On the Self Update page, click the Informational Updates link at the top-right corner, as shown in Figure 16-1. The link includes the number of new updates. A number appears only if there are new (unread) updates.
The Informational Updates dialog opens.
-
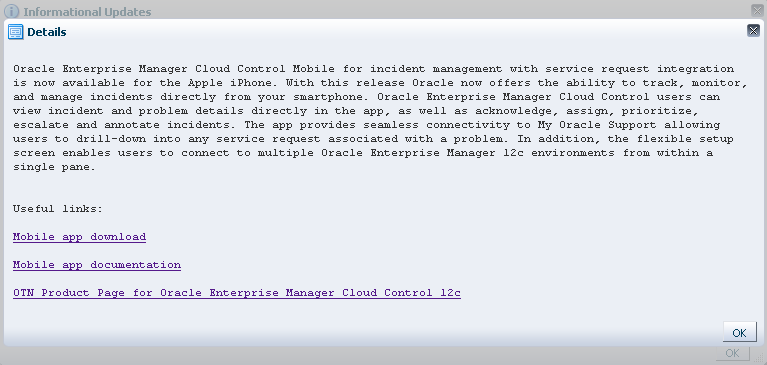
Select an update notification in the table and click Details.
A popup appears describing the new product and listing applicable links.
Figure 16-2 shows the informational update announcing availability of Enterprise Manager Cloud Control Mobile, a new iPhone app that enables you to connect to Enterprise Manager remotely. Notice in this case that the announcement includes a link to iTunes where you can go to download the app.
-
Click OK to close the details display and return to the table of announcements.
By default, the table displays only unread announcements. You can choose to display all or only read announcements. You can also toggle selected items between read and unread states. Note that if you mark an item as read, you are doing so for all users. A warning to this effect appears.

16.5 Acquiring or Updating Management Agent Software
Management Agent software for the various platforms (operating systems) supported by Enterprise Manager Cloud Control can be downloaded to the Software Library using the Self Update console. Once a Management Agent is persisted to the Software Library, it can be installed on host machines that you want to bring under Cloud Control management using the Add Host Targets wizard.
For instructions on obtaining Management Agent software in both online and offline modes, see the section "Meeting Management Agent Software Prerequisites" in the Oracle® Enterprise Manager Cloud Control Basic Installation Guide.