5 Understanding Collaborative Portal Installation
The following administrative tasks are covered in this chapter:
After you install IBM WebSphere Portal v7.0 and related software, you need to install Collaborative Portal (CP). After installation, you can create your own portlets or run JD Edwards EnterpriseOne portlets in your portal.
5.1 Prerequisites for Collaborative Portal
This section covers the steps that must be completed before the installation can be performed. For EnterpriseOne Tools Release 9.1, consult the JD Edwards EnterpriseOne Tools 9.1 IBM WebSphere Portal v7.0 Installation Guides to complete the WPS 7.0 installation successfully.
5.1.1 Gathering Information
Gather the following information before starting the installation:
| Data | Record Your Values |
|---|---|
| WebSphere Application Server administrator user ID and password (security is enabled by default) | |
| WebSphere Portal administrator user ID and password | |
| WebSphere Application Server node name for the WebSphere Portal (located in the WebSphere Administrative Console under Servers-Application Servers - typically the machine name of the server that is running WebSphere) | |
| WebSphere Application Server cell name (this is usually the node name unless your portal is in a clustered environment) | |
| WebSphere Portal Application Server name (the default value is WebSphere_Portal) | |
| WebSphere Portal Virtual Host name (the default value is default_host) | |
| WebSphere AppServer installation directory | |
| WebSphere Portal Server installation directory |
5.1.2 Verifying a Managed Instance Exists for WAS in the Management Console
The Collaborative Portal must be installed using the EnterpriseOne Server Manager Console. Before the installation can be started, the WebSphere Application Server must be registered as a managed instance of the Server Manager Console and the status of server1 and WebSphere_Portal servers should be recognized correctly by Server Manager. Using a browser, open Server Manager for JD Edwards EnterpriseOne URL. Verify that the WebSphere managed instance has been created. If it does not exist, create it now.
5.1.3 Ensuring the WebSphere Portal Server is Installed and Operating Properly
To ensuring the WebSphere Portal Server is installed and operating properly:
-
Verify that you can successfully sign in using your WebSphere Portal administrator user ID and password.
-
Ensure that you can connect to the WebSphere Application Server through the WebSphere Administration Console.
5.1.4 Configuring the DummyClientTrustFile.jks and DummyClientKeyFile.jks for Server Manager
To configure the .jks files for Server Manager:
-
Refer to Solution ID E1: SVM: WebSphere 7.0.0.11 Secure Profile, Server Manager Unable to Detect Status of Servers Correctly (Doc ID 1262748.1) on Oracle Support portal and implement the steps on configuring soap.client.props file and replacing the Server manager JDK with the IBM WAS7 JDK before proceeding further.
-
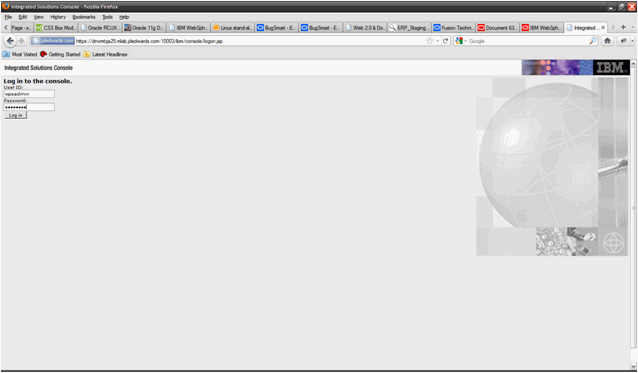
Login into the WPS7 Admin Server url (i.e https://dnvmtqa25.mlab.jdedwards.com:10003/ibm/console/logon.jsp wpsadmin/wpsadmin).
-
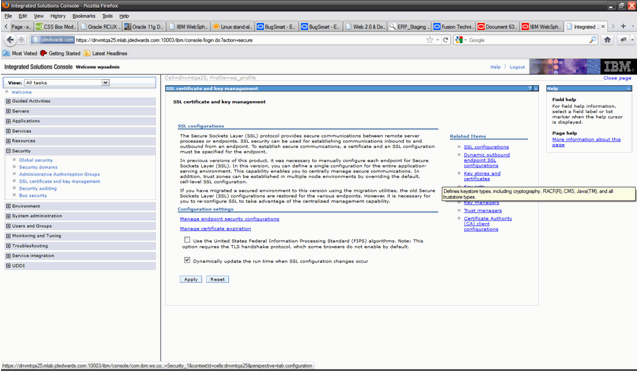
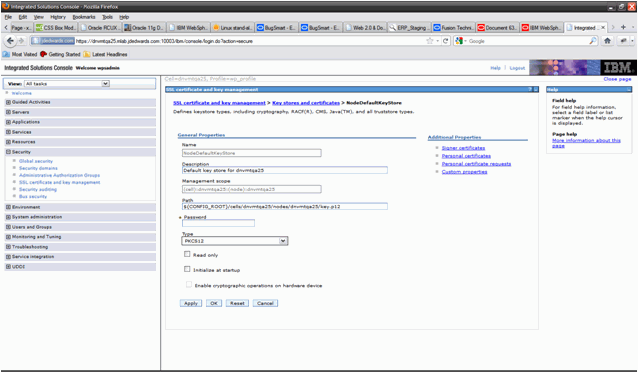
Go to Security-> SSL Certificate and Key Management
-
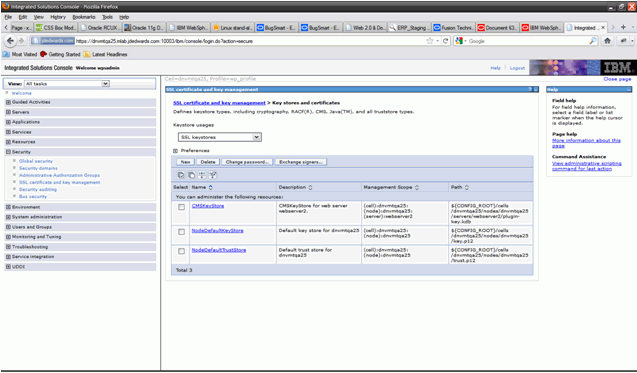
Click on Key stores and certificates.
-
Click on NodeDefaultKeyStore link:
-
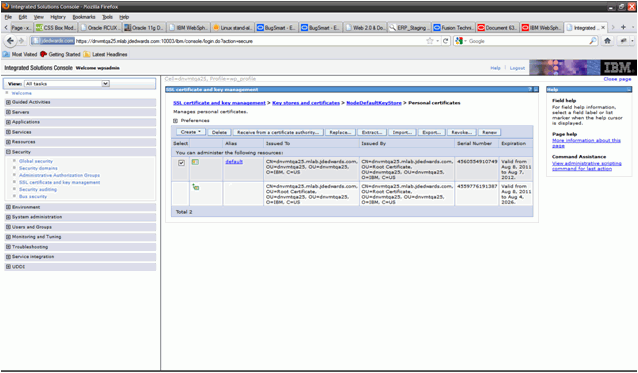
Click on Personal certificates:
-
Select checkbox and click the extract button.
-
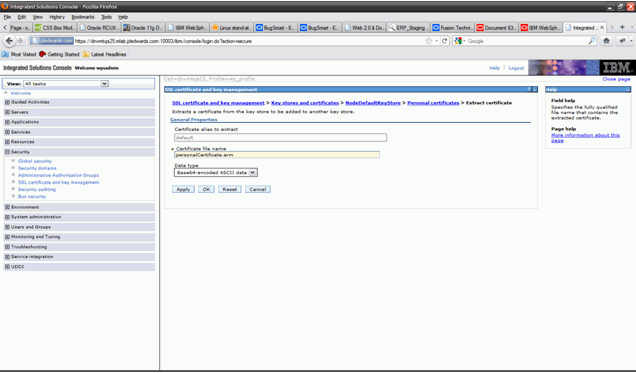
Provide the name of the file as personalCertificate.arm, and then click Ok.
-
Click on the Key stores and certificates link again.
-
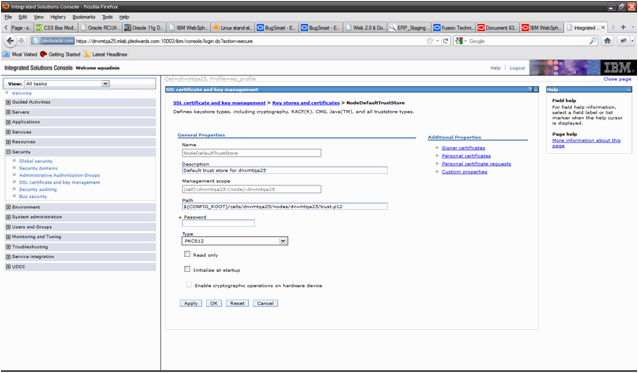
Click on NodeDefaultTrustStore link.
-
Click Signer certificate link.
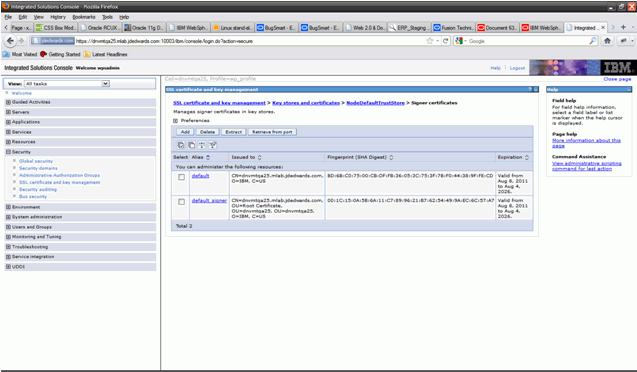
-
Extract the default and default_signer certificates one at a time by providing the names default.arm and default_signer.arm respectively.
-
Select checkbox next to default and click extract.
-
Provide the name as default.arm and click Ok button.
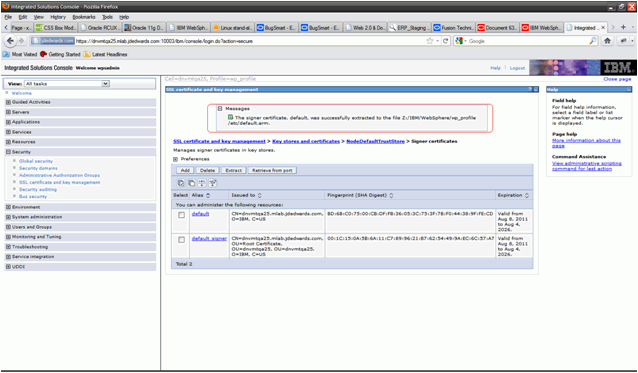
-
Note the location of the file in the area highlighted in red above.
-
Similarly click the checkbox next to default_signer and click extract.
-
Provide the name as default_signer.arm and click Ok button.
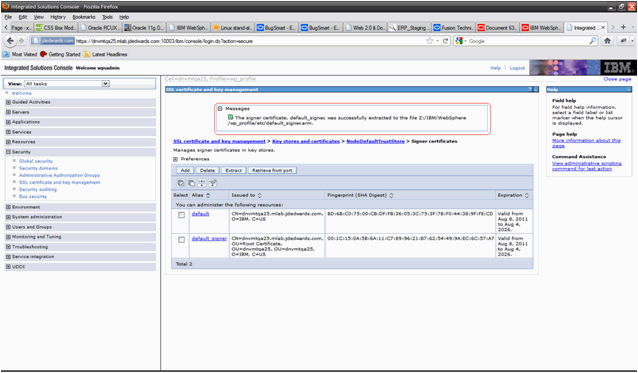
-
Note the location of the file in the area highlighted in red above.
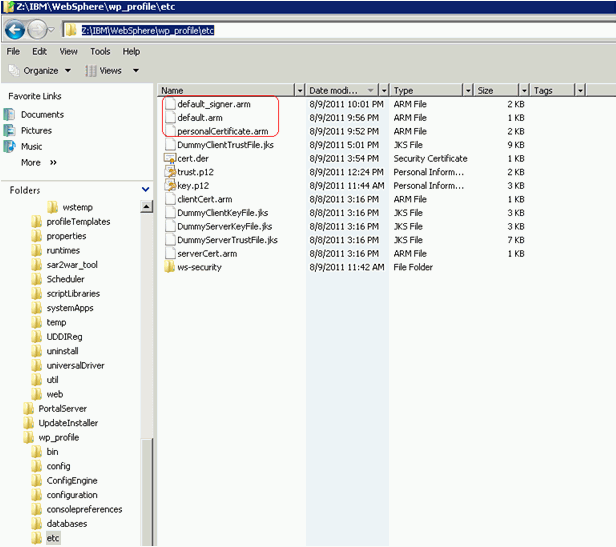
-
On the WPS7 machine, note the existence of the newly extracted certificate files, typically located at Z:\IBM\WebSphere\wp_profile\etc location.
-
Create a backup of the Z:\IBM\WebSphere\wp_profile\etc by copying etc directory to etc_backup before proceeding further.
-
Server Manager uses DummyClientTrustFile.jks and DummyClientKeyFile.jks to communicate with Secure WebSphere profiles (wp_profile portal server profile is ALWAYS a secure profile), hence it is necessary to import the extracted signer certificates into these files.
-
Go to the Z:\IBM\WebSphere\wp_profile\bin and launch ikeyman.bat using (Run as Administrator option).

-
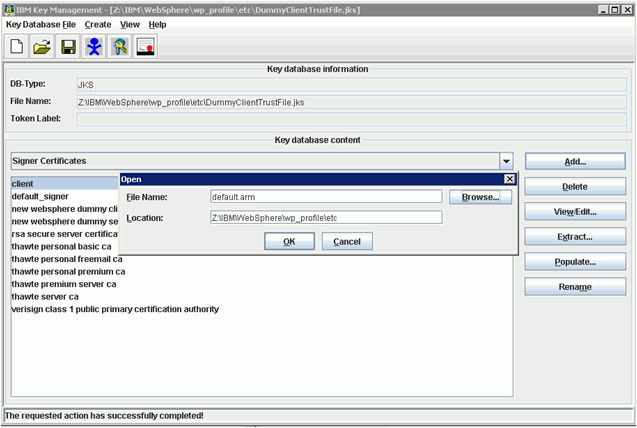
In ikeyman.bat utility go to Key Database file -> Open.
-
Select Type as JKS and file as DummyClientTrustFile.jks located at Z:\IBM\WebSphere\wp_profile\etc directory, the password is WebAS (default).
-
In the dropdown select Signer Certificate, click Add.
-
Select default.arm from Z:\IBM\WebSphere\wp_profile\etc that we just extracted and click Ok button.
-
Provide the label as default and click Ok.
-
You will note that the default Signer Certificate is now visible in the list of signer certificates.
-
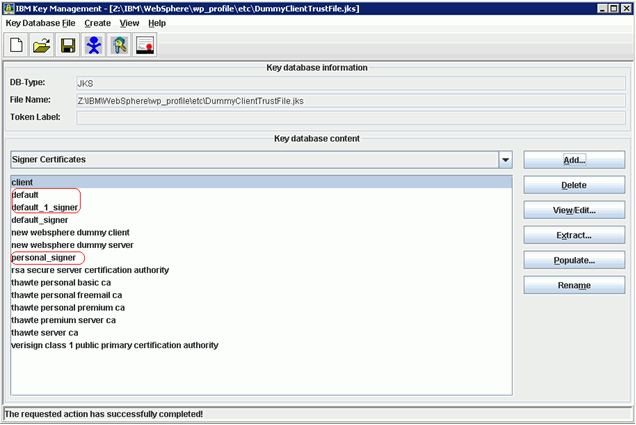
Now similarly import the extracted default_signer.arm (provide label as default_1_signer) and personalCertificate.arm (provide label as personal_signer).
-
After these steps all three signer certificates should be available as shown below.
-
Go to Key Database file -> Close to close the DummyClientTrustFile.jks
-
Open the DummyClientKeyFile.jks and repeat the above steps.
-
After importing all three signer certificates the certificate list for DummyClientKeyFile.jks should look like below.

-
Go to Key Database file -> Close the close the file.
-
Exit from ikeyman.bat utility.
-
Stop the Server Manager Agent, Clear the logs (from Z:\JDEdwards\jde_home_wps\SCFHA\logs dir).
-
Start the Server Manager Agent.
-
Stop server1 and clear the logs (from Z:\IBM\WebSphere\wp_profile\logs\server1 dir)
-
Start server1 from Windows Services or command line.
-
Stop WebSphere_Portal and clear the logs (from Z:\IBM\WebSphere\wp_profile\logs\WebSphere_Portal dir).
-
Start WebSphere_Portal from Windows Services or command line.
-
Similar steps need to be followed for UNIX and IBM i based platforms. For IBM i platform, the iKeyman utility is unavailable and hence it is required to perform these operations remotely from a Windows machine.
-
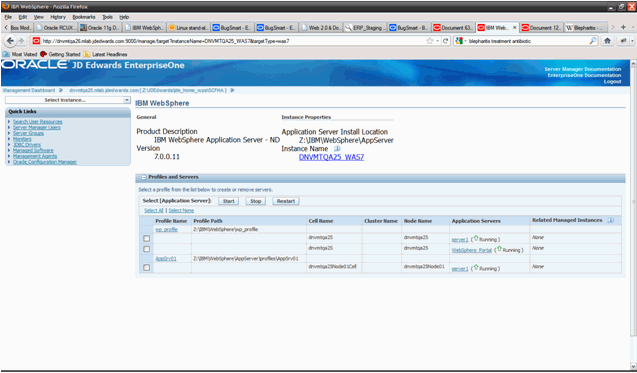
After restart, navigate to the Server Manager list of WebSphere profiles screen you will note Server Manager is now able to recognize and display the correct status of the WPS7 servers (server1 and WebSphere_Portal), you can now proceed with the Collaborative Portal installation.
-
This completes the configuration of the DummyClientTrustFile.jks and DummyClientKeyFile.jks for managing IBM WebSphere Portal Server v7.0 via Server Manager.
5.2 Installing the Collaborative Portal
The section covers the installation of the Collaborative Portal.
To install Collaborative Portal
Follow the steps below to install the JD Edwards EnterpriseOne Collaborative Portal.
-
Obtain the proper release level of the Collaborative Portal software from the Update Center and copy it to the Management Console machine. Refer to the MTRs for specific release level information for your installation.

-
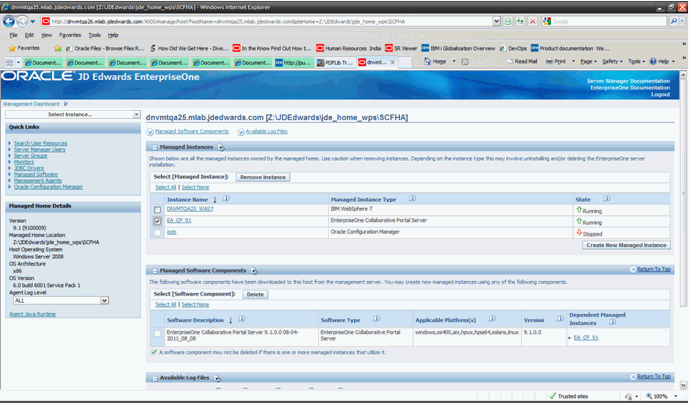
From within the Management Console, upload the Collaborative Portal software to the console. This is done from the Managed Software Components page shown above.
-
From within the Management Console, distribute the software component to the target system. This is done from the Managed Software Components page shown above.
-
On Upload Software Components, mark the check box next to the Collaborative Portal software you wish to distribute.
-
Click the Distribute button.
Note:
The Managed Software Components screen will show all the servers. Servers eligible for the distribution will have a check box next to them. -
Check the box of the servers to receive the software.
Note:
If the software has already been distributed to the machine, the check box will be inactive for that server. -
After reviewing the components to distribute, click the Distribute Software button.
-
Within the Managed Homewhere you want to install the Collaborative Portal, click the Create New Managed Instance button.
-
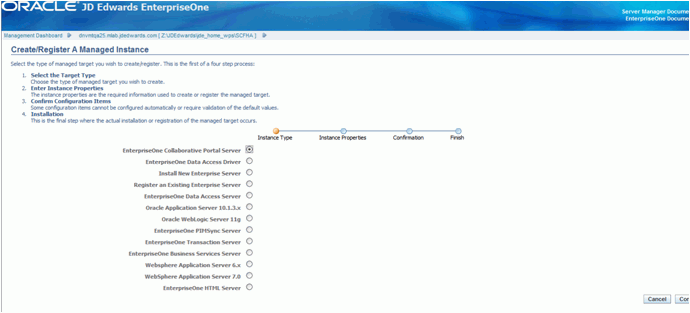
On Create/Register A Managed Instance - Instance Type, select EnterpriseOne Collaborative Portal Server.
-
Click Continue.
-
On Create/Register A Managed Instance - Instance Properties, enter an Instance Namefor the Collaborative Portal. Ensure the WebSphere_Portal server is listed in the available J2EE Containers list. Ensure the Collaborative Portal software component is listed in the dropdown.
The other values on this screen will default. You should verify these default values are correct.
-
Click Continue.
-
The other values on this screen will default. You should verify these default values are correct.
-
Click Continue.
-
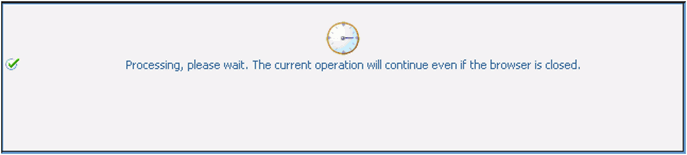
On Create/Register A Managed Instance - Instance - Finish, review the Warning and click the Create Instance button.
The actual creation process should run for 10 to 20 minutes during which time the following dialog is displayed in the Server Manager browser window. DO NOT attempt to refresh the browser or carry out any other operations till this is complete.
-
It is NOT REQUIRED to configure any of the INI settings for the newly created EnterpriseOne Collaborative Portal Server managed instance, these are only displayed but are never used. It is also not required to install the JDBC Driver for the Collaborative Portal instance.
-
From a browser, type in the portal URL.
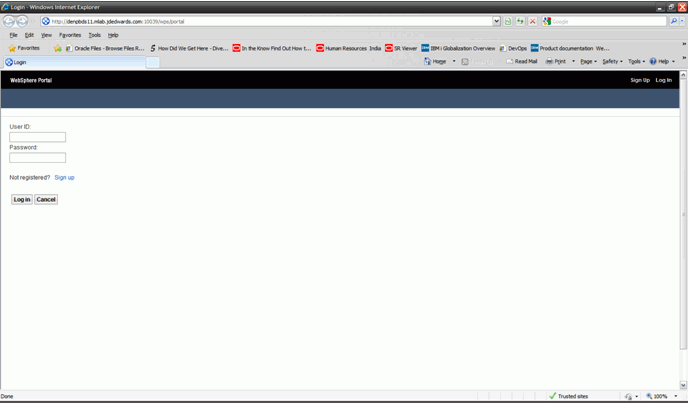
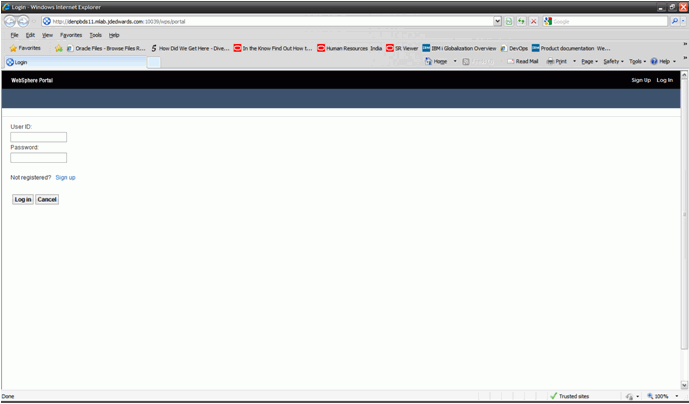
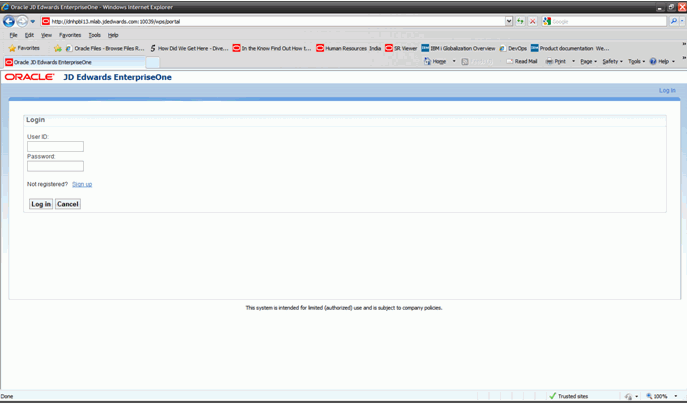
The Sample 1 below is a screen capture of the Collaborative Portal prior to rebranding, while Sample 2 shows the rebranded Collaborative Portal as a result of this installation process.
Note that the user interface is changed so both the title bar of the browser window and the tab within it reads JD Edwards EnterpriseOne (not IBM WebSphere Portal).
Sample 1. Browser Interface Prior to Collaborative Portal Rebranding
Sample 2. Browser Interface After Collaborative Portal Rebranding
After the Collaborative Portal Installation complete, a readme file is created in the Collaborative Portal Target directory under the Server Manager Agent installation directory.
Sample locations on all platforms:
-
Windows platform - C:\JDEdwards\jde_home_wps\SCFHA\targets\EA_CP_91\Readme_wps70.txt
-
UNIX Platform - /u01/JDEdwards/jde_home_wps/SCFHA/targets/EA_CP_91/Readme_wps70.txt
-
IBM i Platform - /JDEdwards/jde_home_wps/SCFHA/targets/EA_CP_91/Readme_wps70.txt of IFS.
Follow the instructions in this file to install the Oracle Re-Branded Page Build2 based Theme.
The removal of this theme can be carried out by following the steps in the Readme_wps70.txt file.
5.3 Uninstalling the Collaborative Portal
To uninstall the Collaborative Portal:
-
Open the Server Manager and click on the server where the Collaborative Portal is installed.
-
Select the portal server instance to be removed and click Remove Instance.
-
The window below will appear. Click OK.

The Server Manager will uninstall the Collaborative Portal. This will typically take around the same time as the install process.
-
From a browser, type in the portal URL.
Sample 1 below is a screen capture of the WebSphere Portal Server v7.0 after un-installation of Collaborative Portal software.
Sample 1. Browser Interface Prior to Collaborative Portal Rebranding: