9 Building Portal Pages for WebSphere
This chapter contains the following topics:
IBM® WebSphere® Portal consists of middleware applications (called portlets), mashups, and development tools for building and managing secure business-to-business (B2B), business-to-consumer (B2C), and business-to-employee (B2E) portals. Web portals allow partners, employees and customers to choose their user experience, with personalized applications based on role, context, actions, location, preferences and team collaboration needs.
A portal is a Web site that provides users with a single point of access to Web-based resources by aggregating those resources in one place and by requiring that users log in only to the portal itself, and not to each portlet they use. WebSphere Portal can also deliver Web content to WAP-enabled devices, i-Mode phones, Smart phones, and to various Web browsers.
As an administrator, you can customize WebSphere Portal to meet the needs of your organization, users, and user groups. You can adapt the look and feel of the portal to fit the standards of your organization and to customize page content for users and groups in accordance with business rules and user profiles. Users, such as business partners, customers, or employees, can further customize their own views of the portal. Users can add portlets to pages and arrange them as they want and control portlet color schemes. By aggregating portlets in one place and giving users the power to customize their own desktops, WebSphere Portal gives users a means for doing business efficiently and with high satisfaction.
Portlets are central to WebSphere Portal. WebSphere Portal ships a rich set of standard portlets, including portlets for displaying syndicated content, transforming XML, and accessing search engines and Web pages.
EnterpriseOne provides FDA portlets and Configurable HTML portlets. Configurable portlets enable you to initialize a portlet to an existing portlet type or create a new portlet definition. In addition, when you initialize a configurable portlet, you define permissions to determine the type of access users have to the configurable portlet. You can grant either View or View, Config access. View permissions allow users to use a configurable portlet, but prevent them from modifying the definition of the portlet. View, Config permissions allow users to modify the definition and the permissions of a portlet. A user who has View, Config permissions basically has the same permissions of a system administrator. Therefore, you should carefully consider the users to which you grant View, Config permissions.
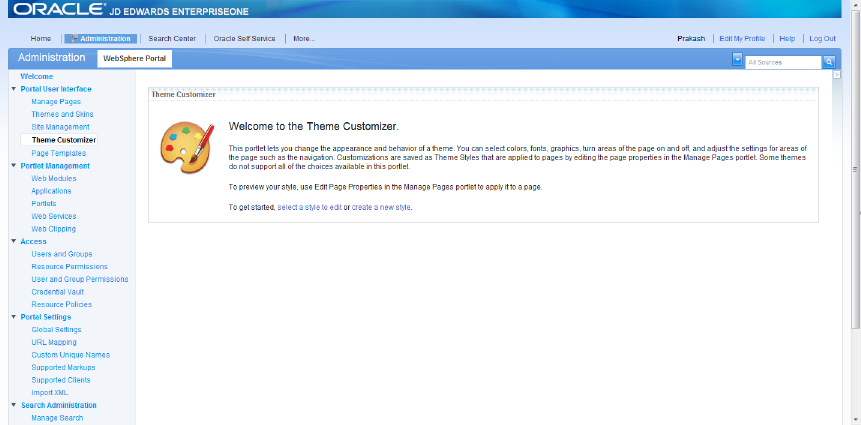
9.1 Creating and Customizing a Theme
A selection of themes are available to enhance the user experience.
To create a theme:
Description of the illustration tws001.png
-
Select Theme Customizer and click the "create a new style" link.

Description of the illustration tws002.png
-
Provide a new style name and click the OK button.
Description of the illustration tws003.png
-
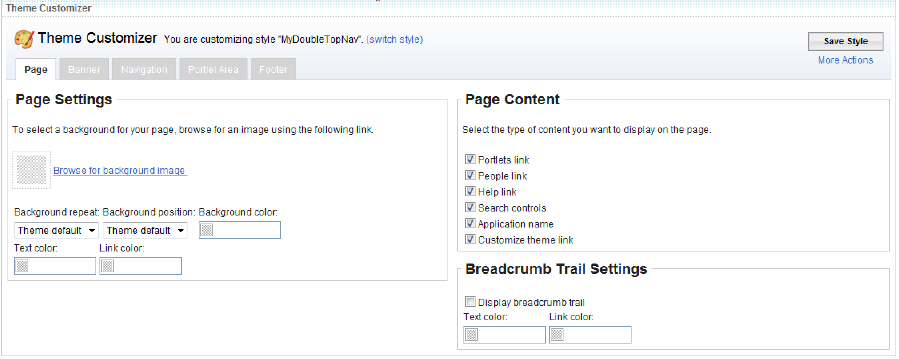
Customize the theme for the Page Setting.
Description of the illustration tws004.png
-
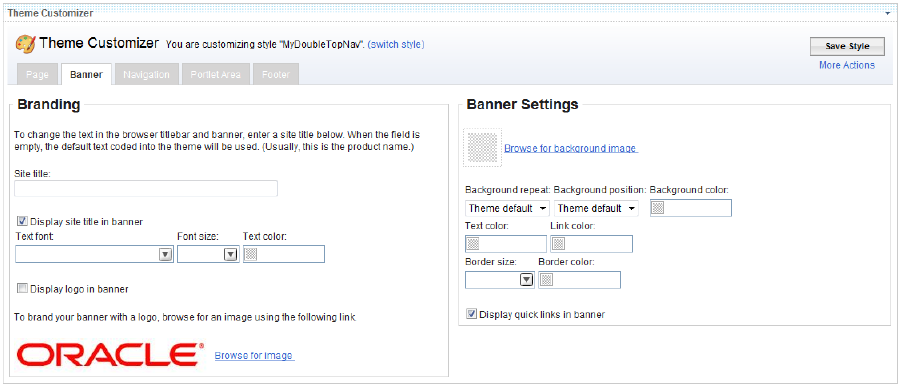
Customize the theme for the Banner Setting.

Description of the illustration tws005.png
-
Customize the theme for the Navigation Setting.
Description of the illustration tws006.png
-
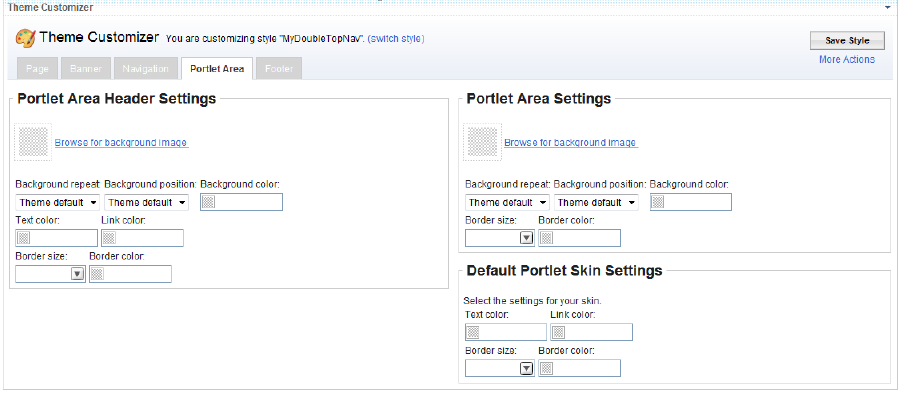
Customize the theme for the Portlet Area setting.
Description of the illustration tws007.png
-
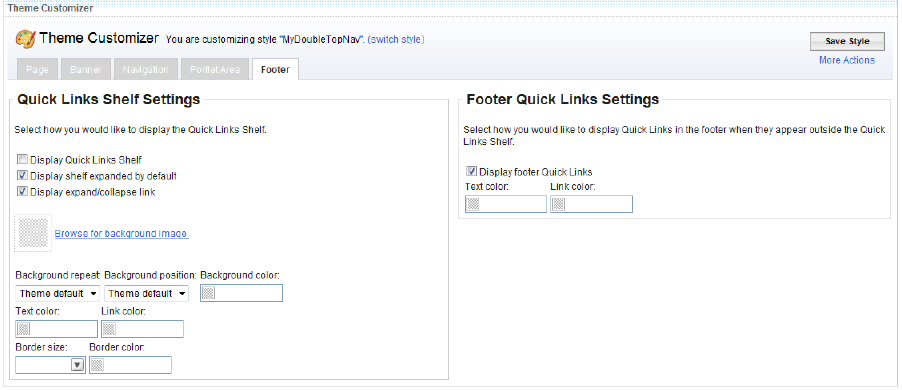
Customize the theme for the Footer Setting.
-
Click the Save Style button to save the style.
9.2 Creating a Buyer Self-Service Page
Below is the Buyer Workspace portal page that will be created in this section.
Description of the illustration bws001.png
Follow these steps to create the Buyer Workspace page:
-
Login into the Collaborative Portal using the user name and password provided to you. If you do not have a user name and password, then you will need to register yourself.
Your user name for the portal you are using must match the user name for the E1 environment that the portlets are running on.
E.g. User name and password for PY900 is AB1234 so the portal user name and password for the WebCenter/Collaborative Portal running PY900 portlets must be AB1234.
Description of the illustration bws002.png
-
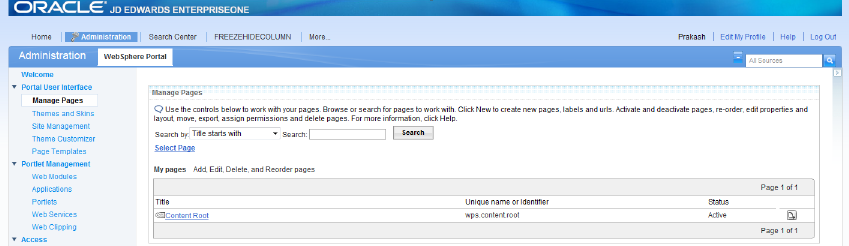
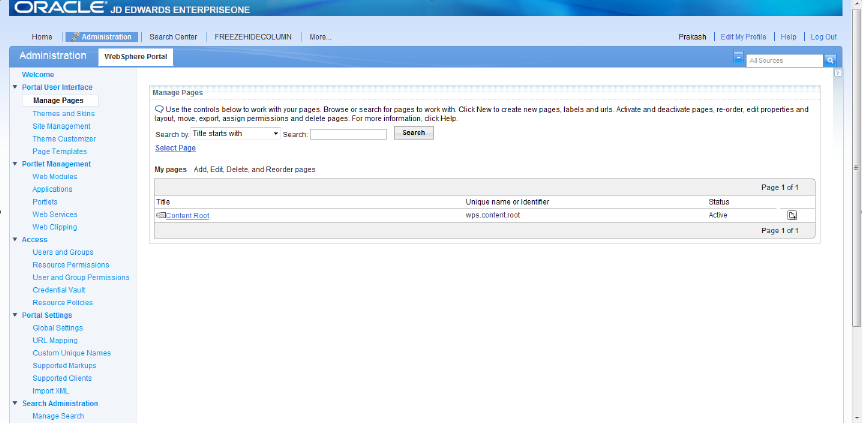
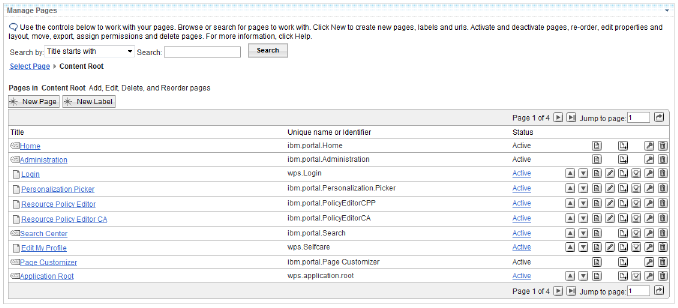
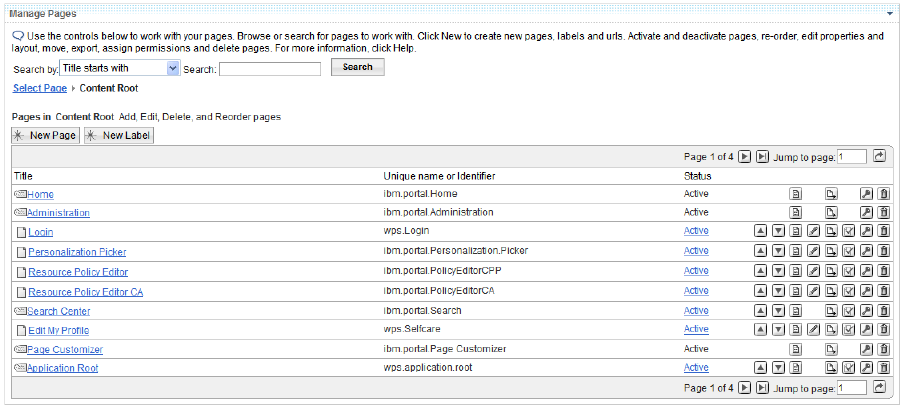
Select "Content Root” from Manage Pages present under Administration tab.
Description of the illustration bws003.png
-
Click the “New Label” button.
Description of the illustration bws004.png
-
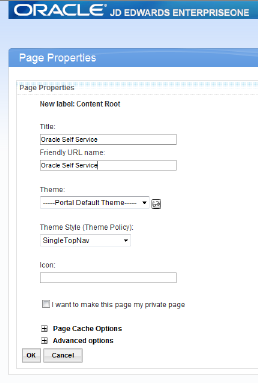
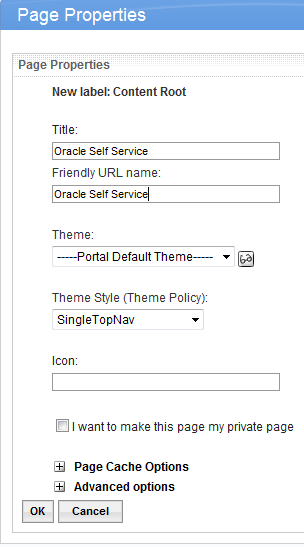
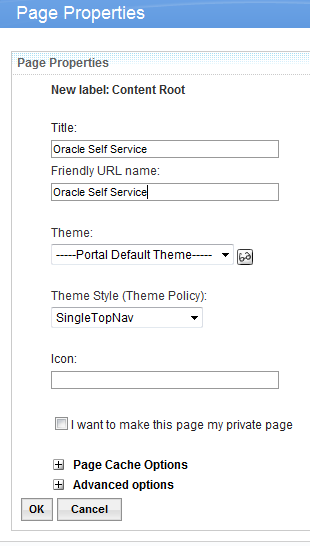
Fill out the Page Properties and click the “OK” button.
Description of the illustration bws005.png
Description of the illustration bws006.png
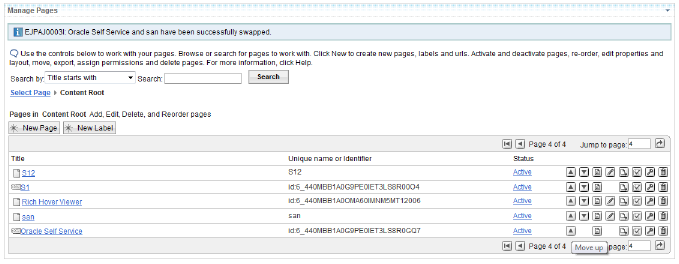
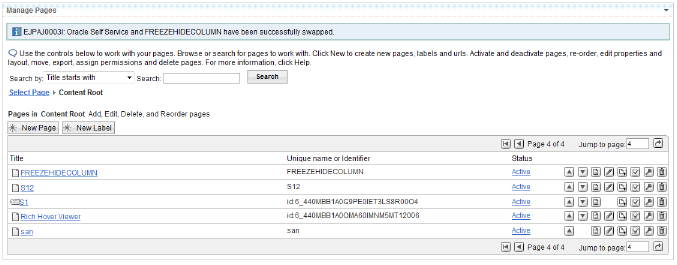
-
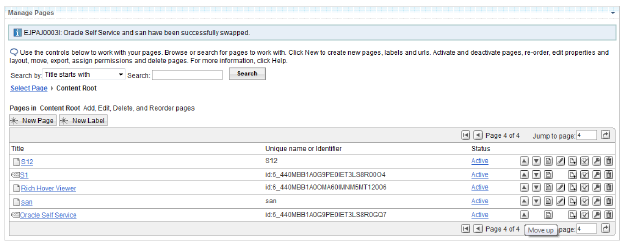
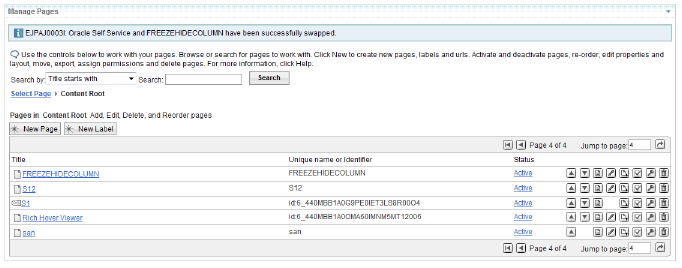
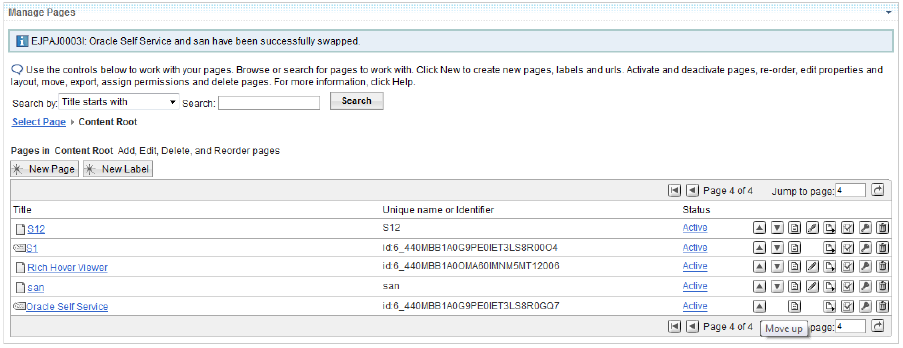
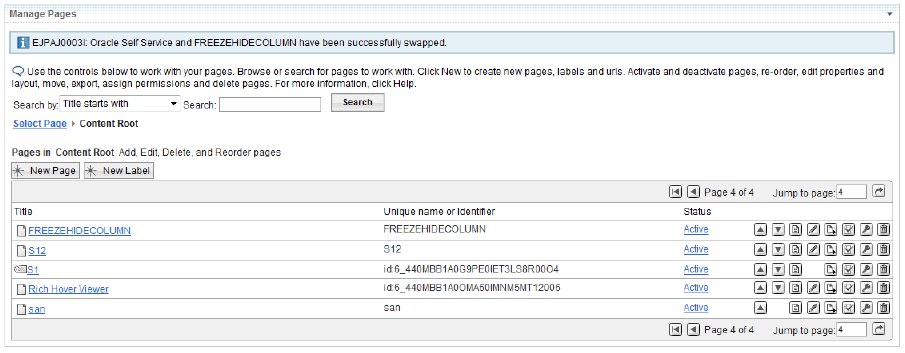
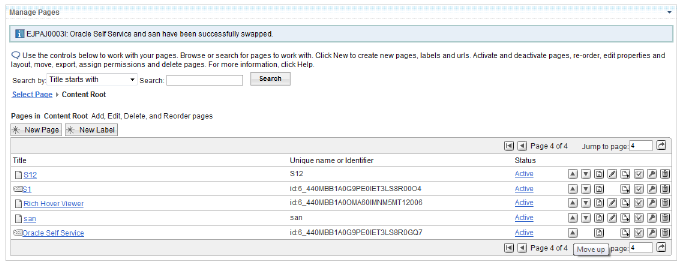
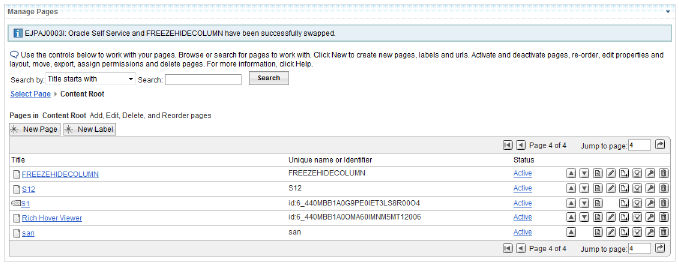
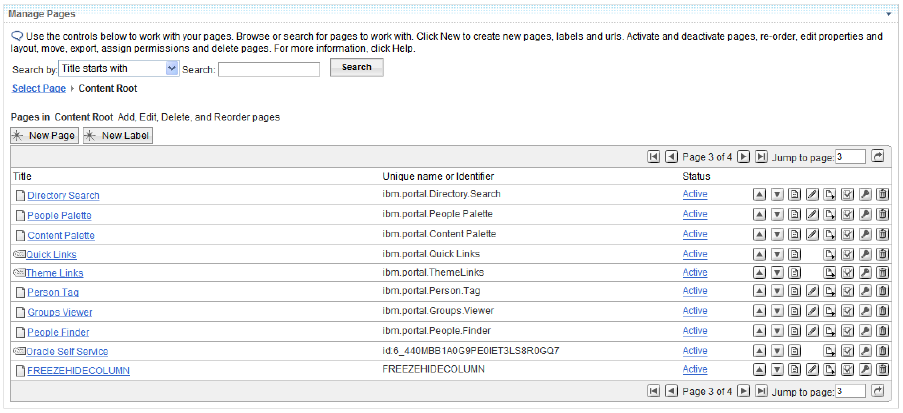
If the new label created is not visible in the tabs, the user can make it visible by moving the page created up to the queue so that the created label will be visible in the tabs.
Description of the illustration bws007.png
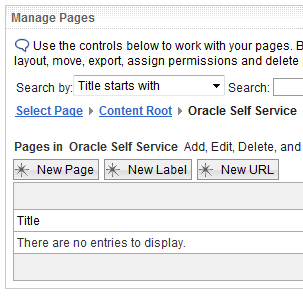
-
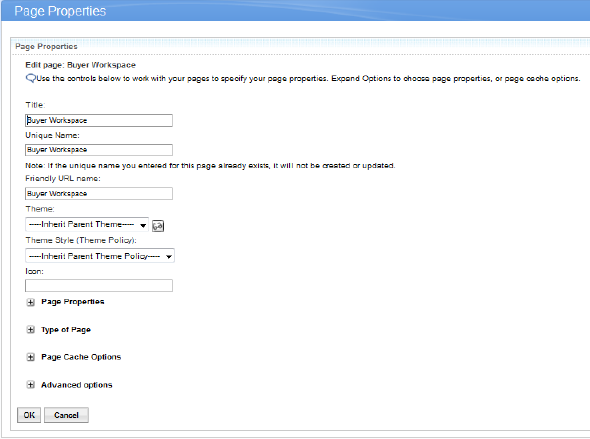
Click the “New Page” button and fill in the Page Properties, and then click the OK button.

Description of the illustration bws008.png
-
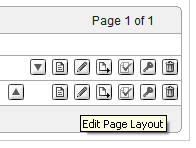
Click the “Edit Page Layout” button.
Description of the illustration bws009.png
-
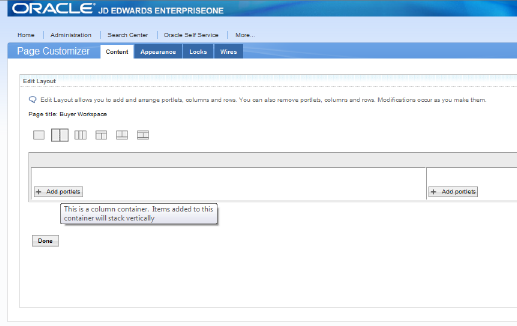
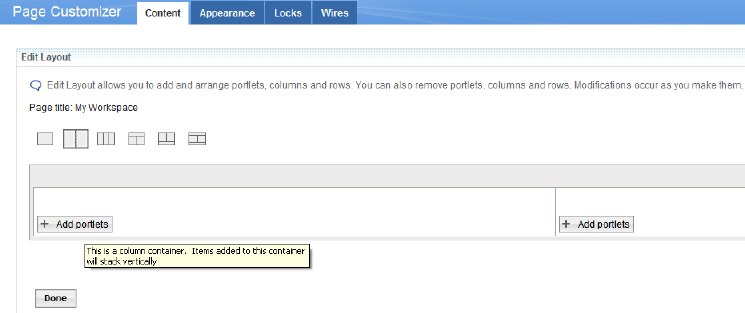
Select the second layout and click the “Add Portlets” button on the left pane.
Description of the illustration bws010.png
-
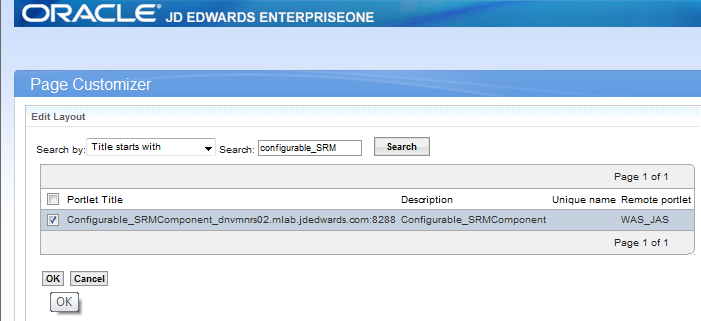
To add the Configurable_SRMComponent portlet to the left pane, search for the string “Configurable_SRMComponent” to find the list of Configurable_SRMComponent portlets available, then select it and click the OK button.
Description of the illustration bws011.png
-
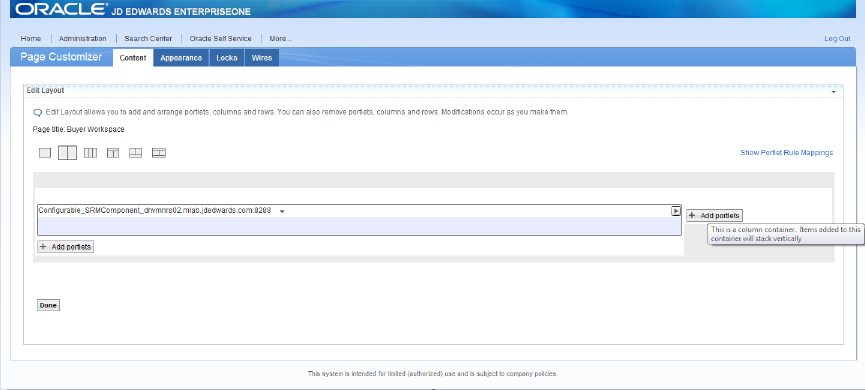
Click the “Add Portlets” button on the right pane.
Description of the illustration bws012.png
-
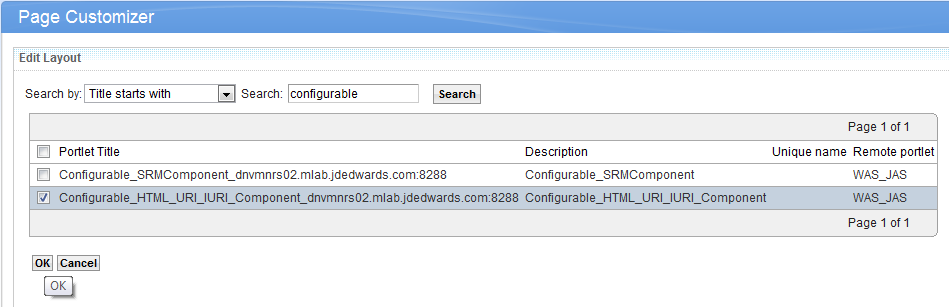
To add the Configurable_HTML_URI_IURI_Component portlet to the right pane search for the string “Configurable_HTML_URI_IURI_Component” to find the list of Configurable_HTML_URI_IURI_Component portlets available, select it and click OK button.
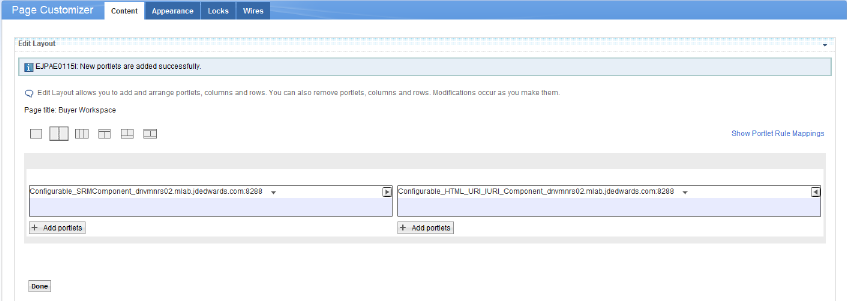
Description of the illustration bws013.png
This screen is presented after clicking Done:
Description of the illustration bws014.png
-
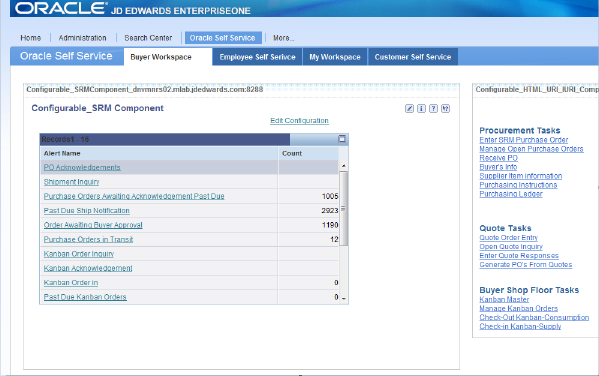
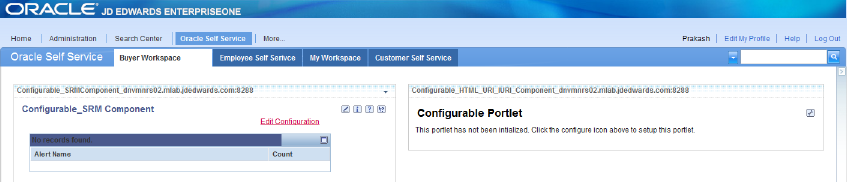
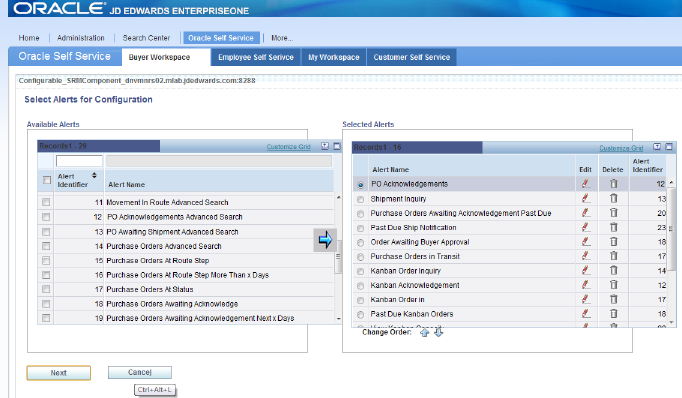
Click the “Done” button after adding the two portlets and select Buyer Workspace tab from Oracle Self Service and click the Edit Configuration link.
Description of the illustration bws016.png
Description of the illustration bws015.png
-
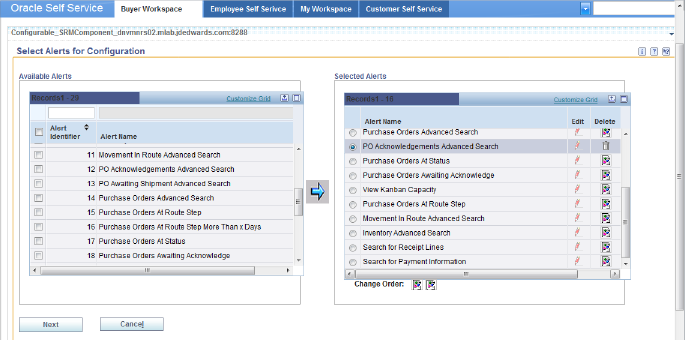
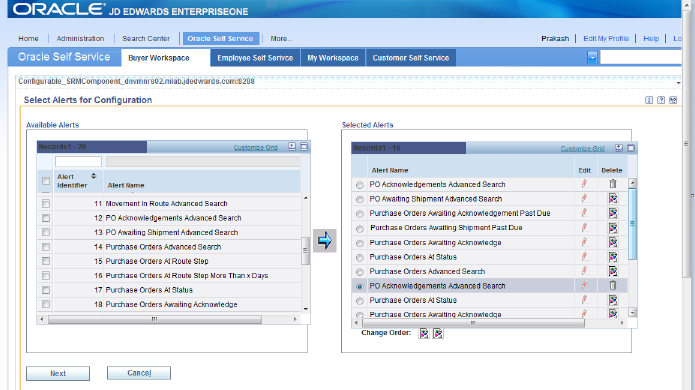
Add the alerts from the Available Alerts grid to the Selected Alerts grid.
-
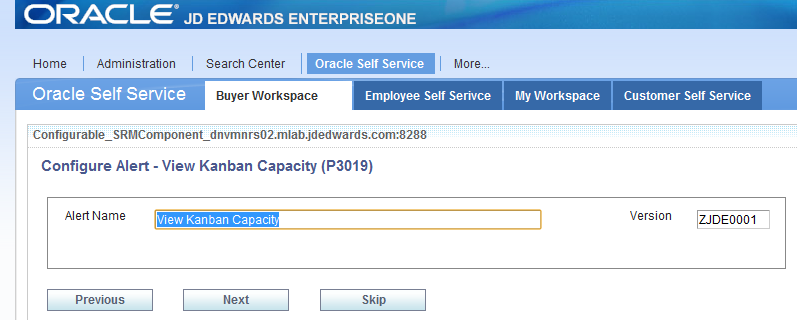
Click on “Next”. as shown in the images below. This will allow the user to override all the alert names as desired.
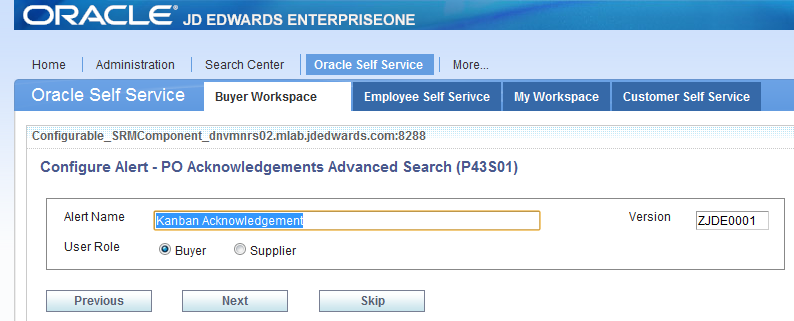
The images below display the alert name overrides.
Figure 9-1 PO Acknowledgements Advanced Search Alert

Description of "Figure 9-1 PO Acknowledgements Advanced Search Alert"
Figure 9-2 PO Awaiting Shipment Advanced Search Alert
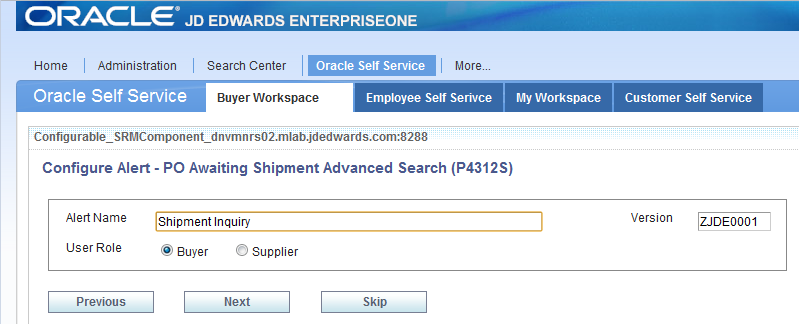
Description of "Figure 9-2 PO Awaiting Shipment Advanced Search Alert"
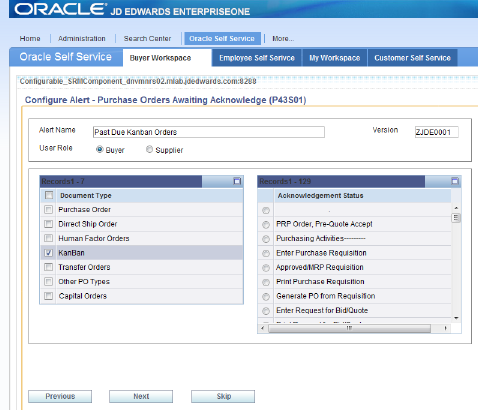
Figure 9-3 Purchase Orders Awaiting Acknowledgement Past Due Alert
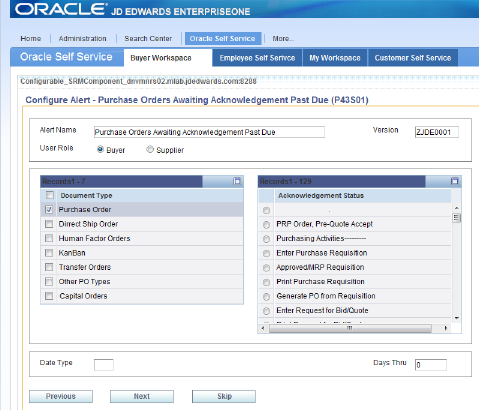
Description of "Figure 9-3 Purchase Orders Awaiting Acknowledgement Past Due Alert"
Figure 9-4 Purchase Orders Awaiting Shipment Past Due Alert
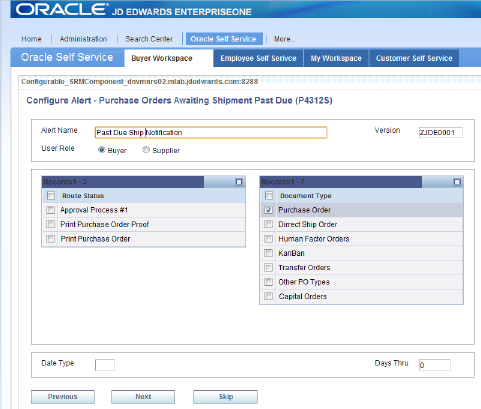
Description of "Figure 9-4 Purchase Orders Awaiting Shipment Past Due Alert"
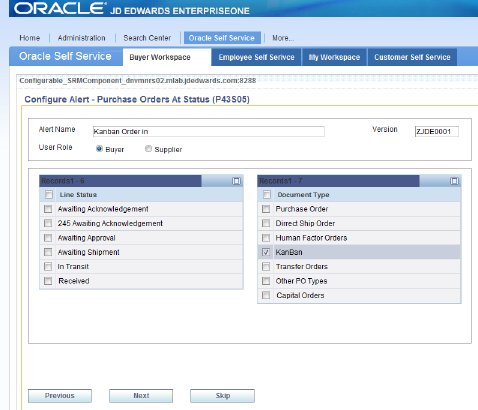
Figure 9-5 Purchase Orders At Status Alert
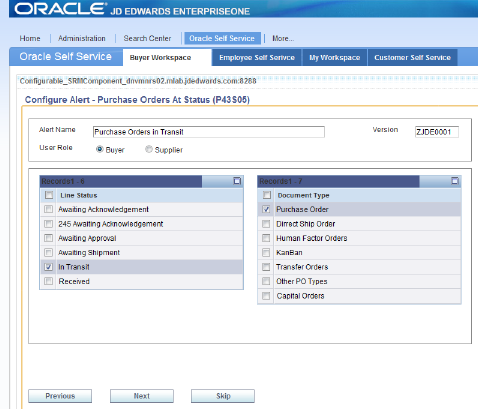
Description of "Figure 9-5 Purchase Orders At Status Alert"
Figure 9-6 Purchase Orders Advanced Search Alert

Description of "Figure 9-6 Purchase Orders Advanced Search Alert"
Figure 9-7 PO Acknowledgements Advanced Search Alert
Description of "Figure 9-7 PO Acknowledgements Advanced Search Alert"
Figure 9-8 Purchase Orders At Status Alert
Description of "Figure 9-8 Purchase Orders At Status Alert"
Figure 9-9 Purchase Orders Awaiting Acknowledge Alert
Description of "Figure 9-9 Purchase Orders Awaiting Acknowledge Alert"
Figure 9-11 Purchase Orders At Route Step Alert
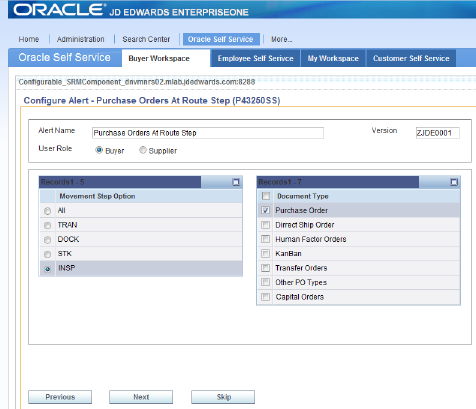
Description of "Figure 9-11 Purchase Orders At Route Step Alert"
Figure 9-12 Movement in Route Advanced Search Alert
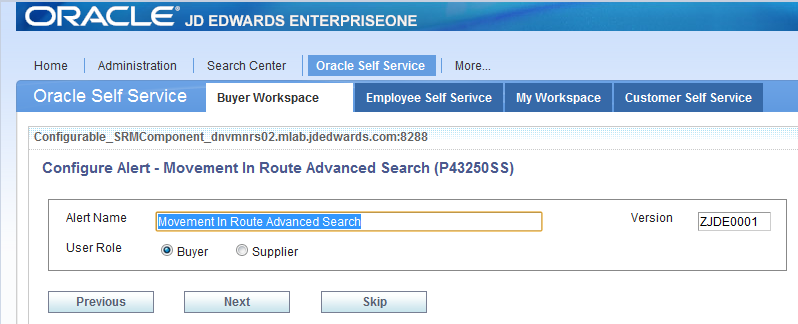
Description of "Figure 9-12 Movement in Route Advanced Search Alert"
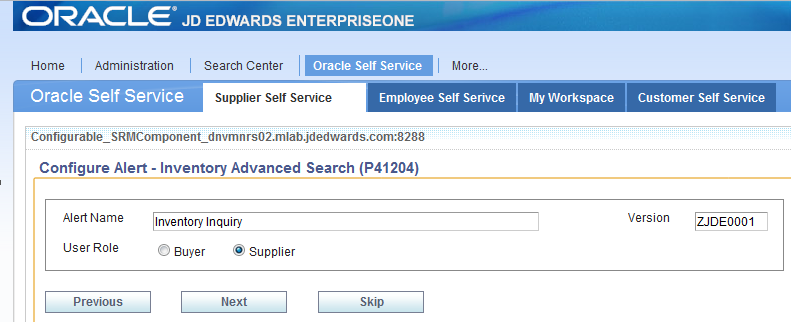
Figure 9-13 Inventory Advanced Search Alert
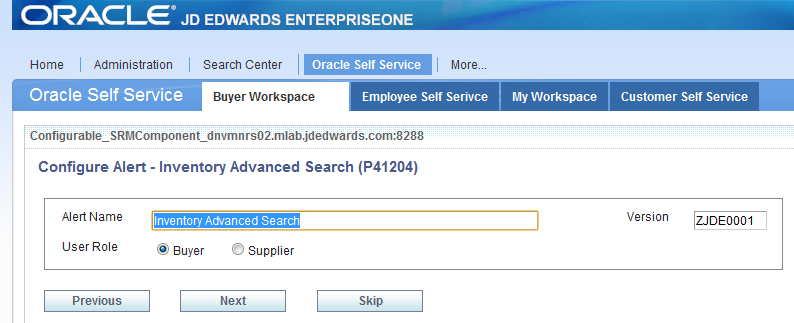
Description of "Figure 9-13 Inventory Advanced Search Alert"
Figure 9-14 search for Receipt Lines Alert
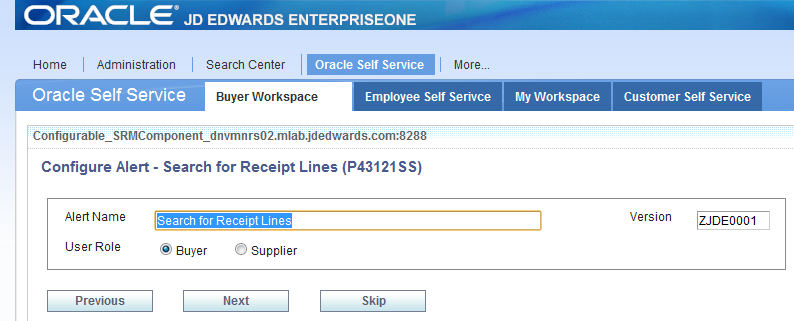
Description of "Figure 9-14 search for Receipt Lines Alert"
Figure 9-15 Search for Payment Information Alert
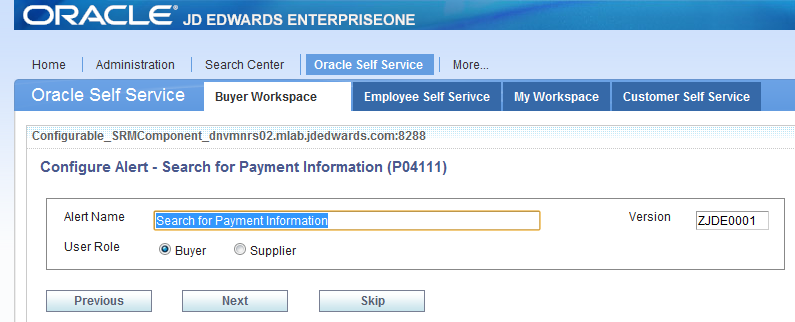
Description of "Figure 9-15 Search for Payment Information Alert"
Description of "Figure 9-15 Search for Payment Information Alert"
-
Click “Cancel” button provided to exit from the configuration screen.
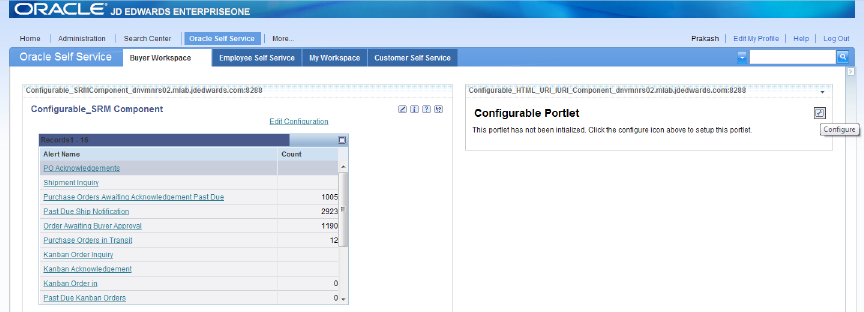
Description of the illustration bws034.png
-
Click the “Configure” icon on the configurable portlet.
Description of the illustration bws035.png
-
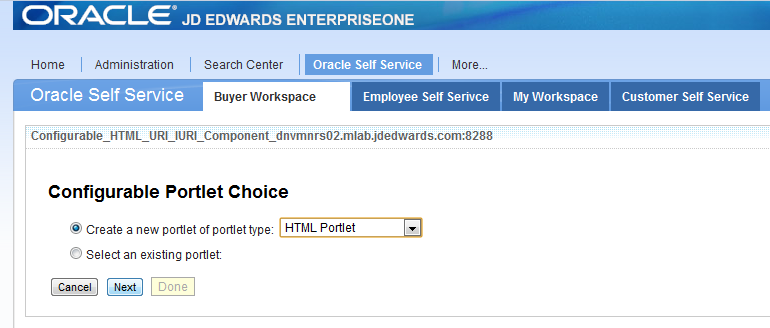
Select HTML Portlet from the available list and click “Next”.
Description of the illustration bws036.png
-
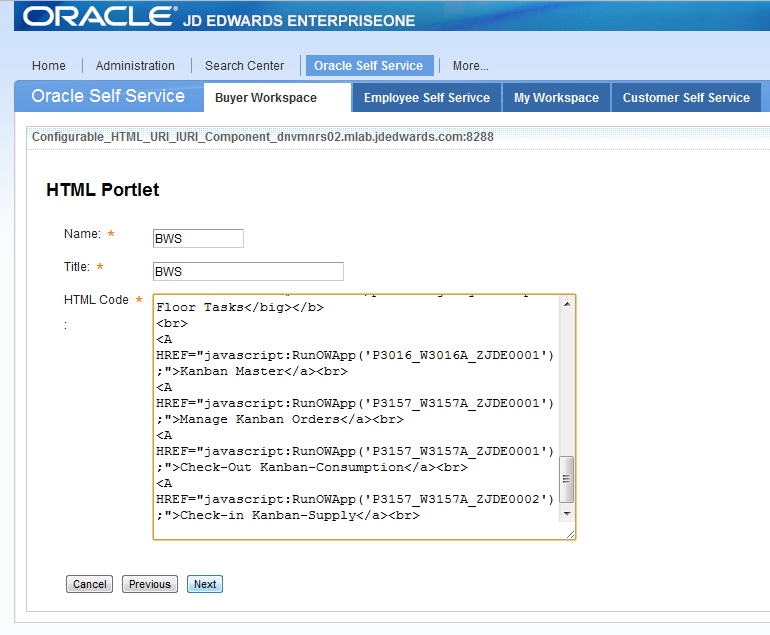
Enter the Name as “BSS” and Title as “BSS” and paste following text in “HTML Code” text area and click “NEXT” button.
<P><Font Color="#336699"></p><b><big>Procurement Tasks</big></b><br>
<A HREF="javascript:RunOWApp('P4310_W4310I_ZJDE0001');">Enter SRM Purchase Order</a><br>
<A HREF="javascript:RunOWApp('P4310_W4310G_ZJDE0001');">Manage Open Purchase Orders</a><br>
<A HREF="javascript:RunOWApp('P4310_W4310I_ZJDE0003');">Receive PO</a><br>
<A HREF="javascript:RunOWApp('P01012_W01012A_ZJDE0005');">Buyer's Info</a><br>
<A HREF="javascript:RunOWApp('P43090_W43090A_ZJDE0001');">Supplier Item information</a><br>
<A HREF="javascript:RunOWApp('P04012_W04012D_ZJDE0002');">Purchasing Instructions</a><br>
<A HREF="javascript:RunOWApp('P43041_W43041A_ZJDE0001');">Purchasing Ledger</a><br><br>

<br>
<P><Font Color="#336699"></p><b><big>Quote Tasks</big></b>
<br>
<A HREF="javascript:RunOWApp('P4310_W4310I_ZJDE0002');">Quote Order Entry</a><br>
<A HREF="javascript:RunOWApp('P4310_W4310G_ZJDE0002');">Open Quote Inquiry</a><br>
<A HREF="javascript:RunOWApp('P4334_W4334B_ZJDE0001');">Enter Quote Responses</a><br>
<A HREF="javascript:RunOWApp('P43360_W43360H_ZJDE0001');">Generate PO's From Quotes</a><br>

<br>
<P><Font Color="#336699"></p><b><big>Buyer Shop Floor Tasks</big></b>
<br>
<A HREF="javascript:RunOWApp('P3016_W3016A_ZJDE0001');">Kanban Master</a><br>
<A HREF="javascript:RunOWApp('P3157_W3157A_ZJDE0001');">Manage Kanban Orders</a><br>
<A HREF="javascript:RunOWApp('P3157_W3157A_ZJDE0001');">Check-Out Kanban-Consumption</a><br>
<A HREF="javascript:RunOWApp('P3157_W3157A_ZJDE0002');">Check-in Kanban-Supply</a><br>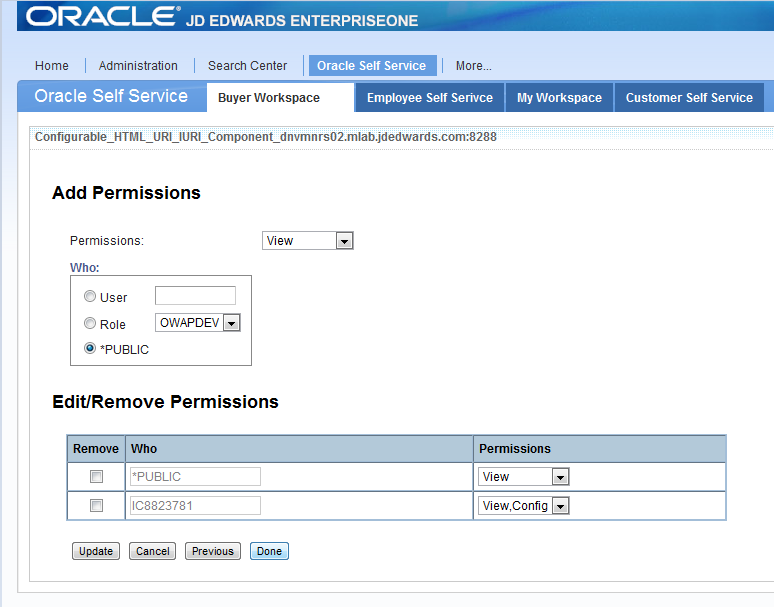
Description of the illustration bws037.png
-
Set the required permissions and click “Done”.
9.3 Creating a Customer Self-Service Page
In this section we will create a Customer Self-Service page. The Customer Self- Service portal page is created using eight EnterpriseOne FDA portlets. These three images comprise the Customer Self Service portal:
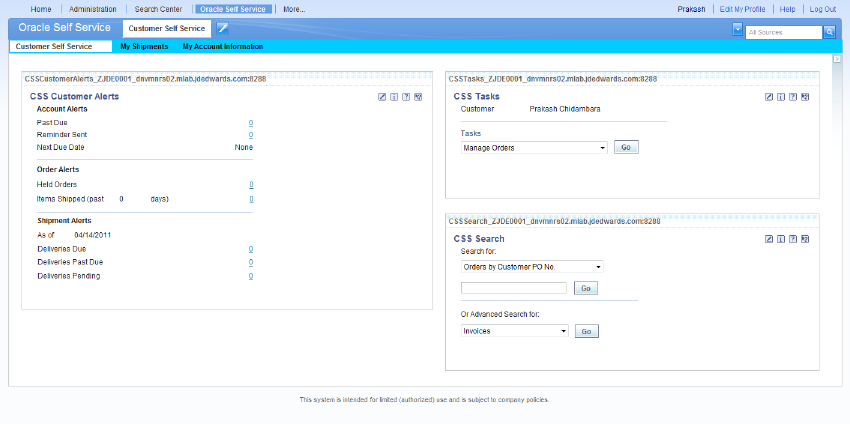
Description of the illustration cws001.png
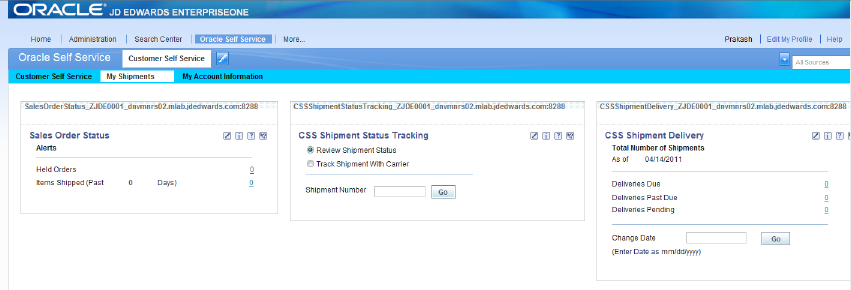
Description of the illustration cws002.png
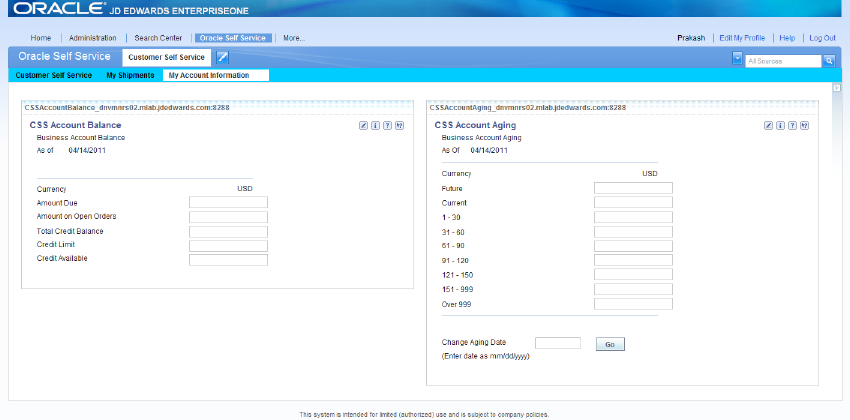
Description of the illustration cws003.png
To create a Customer Self-Service page:
-
Login into the Collaborative Portal using the user name and password provided to you. If you do not have user name and password, register yourself.
The user name for the portal you are using must match the user name for the EnterpriseOne environment that the portlets are running on.
E.g. If the user name and password for PY900 is AB1234, then the portal user name and password for the WebCenter/Collaborative Portal running PY900 portlets must be AB1234.
Description of the illustration cws004.png
-
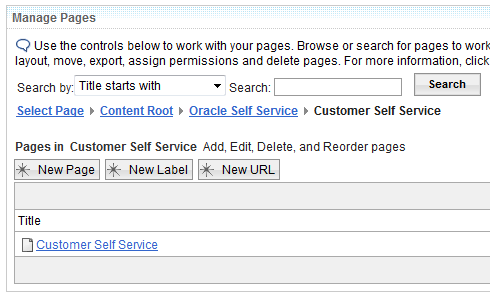
Select "Content Root" from Manage Pages present under Administration tab.
Description of the illustration cws005.png
-
Click the "New Label" button.
Description of the illustration cws006.png
-
Fill the Page Properties and click the "OK" button.
Description of the illustration cws007.png
Description of the illustration cws008.png
-
If the new label created is not visible in the tabs, the user can make it visible by moving the page created up to the queue so that the created label will be visible in the tabs.
Description of the illustration cws009.png
-
Select the "Oracle Self Service" label created and click on new label.

Description of the illustration cws010.png
-
Fill in the Page Properties and click the "OK" button.
Description of the illustration cws011.png
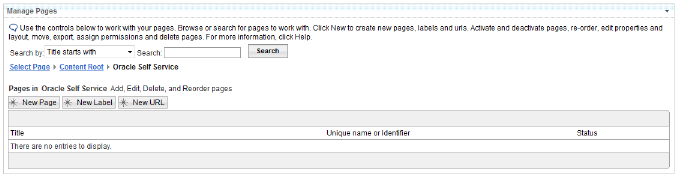
-
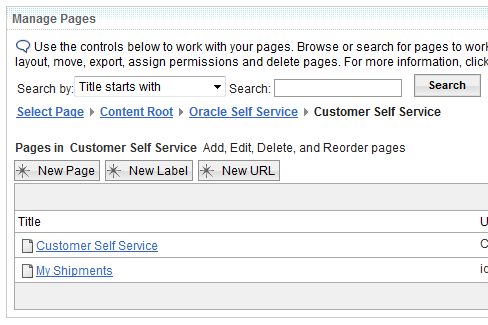
Select the created Customer Self Service label.
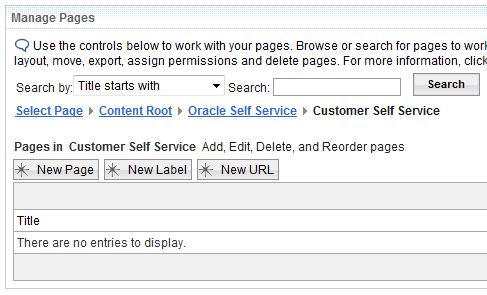
Description of the illustration cws012.png
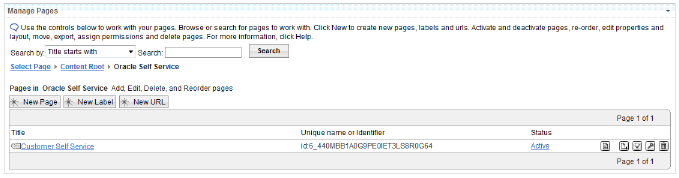
-
Click the "New Page" button.
Description of the illustration cws013.png
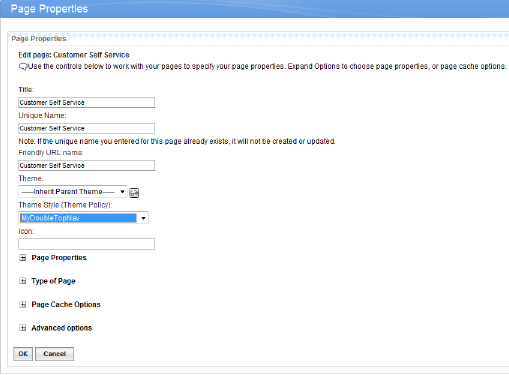
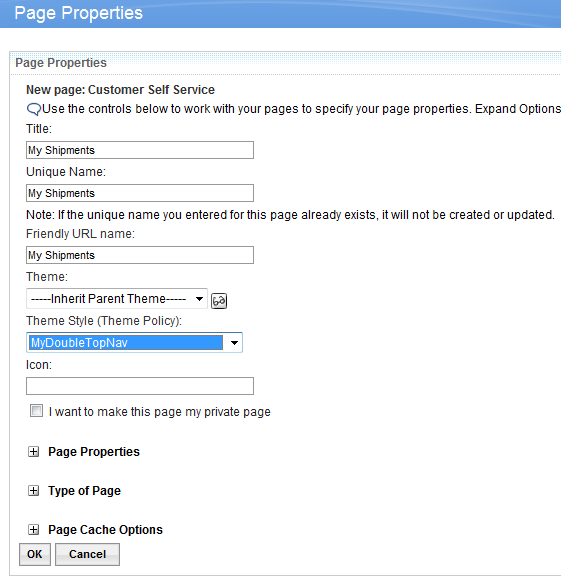
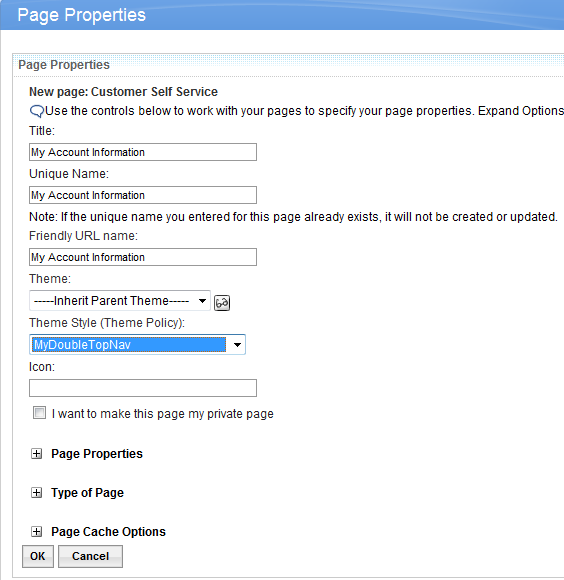
-
Fill in the Page Properties and click the "OK" button.

Description of the illustration cws014.png
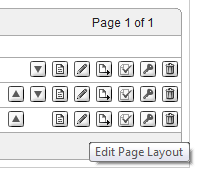
-
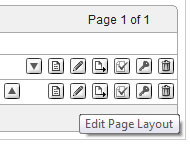
Click the "Edit Page Layout" button.
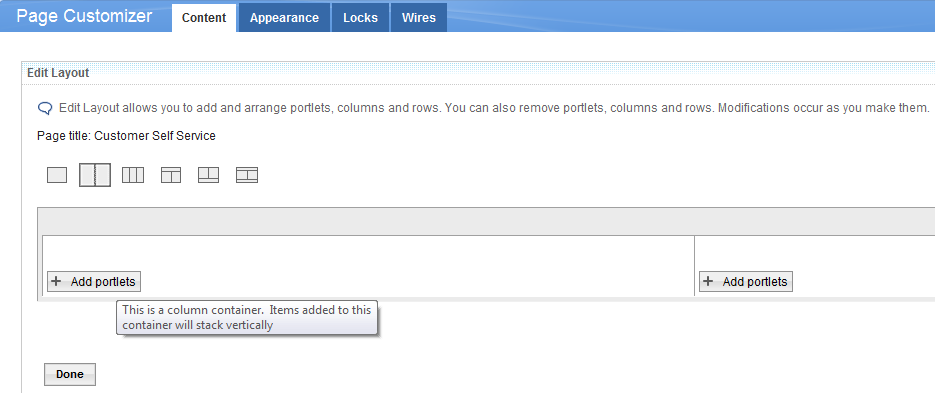
Description of the illustration cws015.png
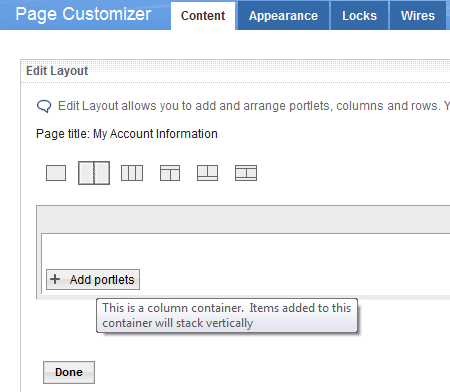
-
Select the second layout and click the "Add Portlets" button on the left pane.
Description of the illustration cws016.png
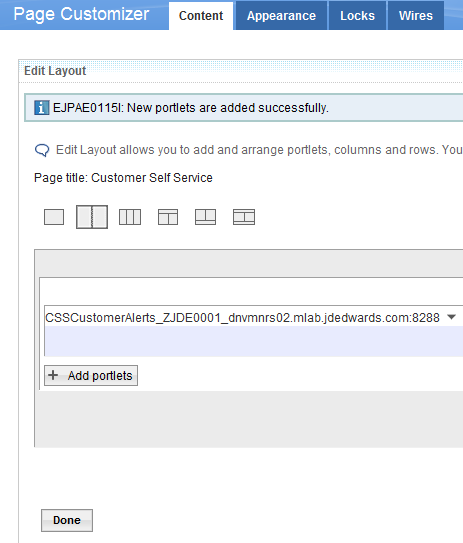
-
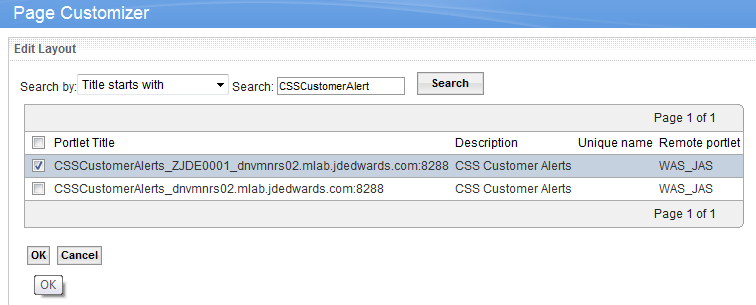
To add the CSSCustomerAlerts portlet to the left pane, search for the string "CSSCustomerAlerts" to find the list of CSSCustomerAlerts portlets available, select one and click OK button.
Description of the illustration cws017.png
-
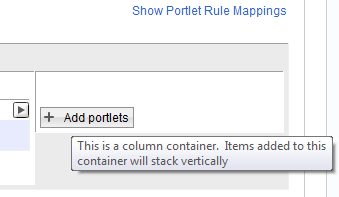
Click the "Add Portlets" button on the right pane.
Description of the illustration cws018.png
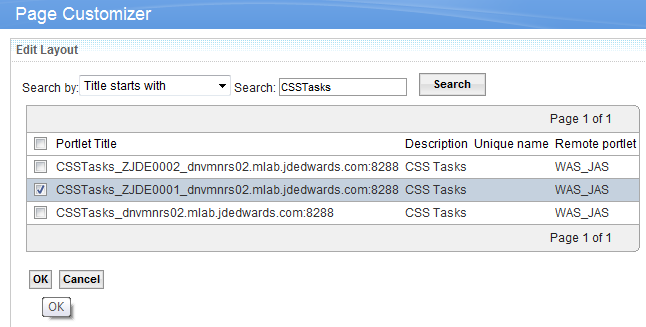
-
To add the CSS Tasks portlet to the right pane, search for the string "CSS Tasks" to find the list of CSS Tasks portlets available, select one and click OK button.
Description of the illustration cws019.png
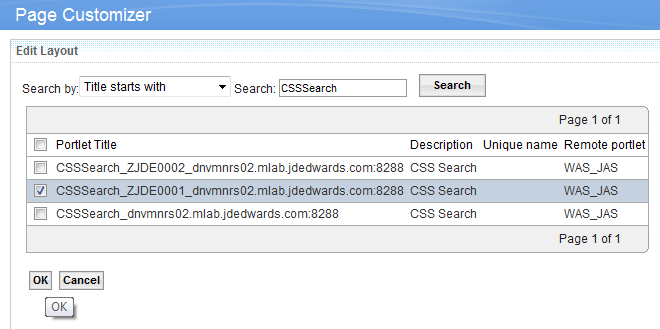
-
Click the "Add Portlets" button on the right pane and to add the CSS Search portlet to the right pane, search for the string "CSS Search" to find the list of CSS Search portlets available, select one and click OK button.
Description of the illustration cws020.png
-
Click the "Done" button after adding all the three portlets.
Description of the illustration cws021.png
-
Click the "New Page" button.
Description of the illustration cws022.png
-
Fill in the Page Properties and click the "OK" button.
Description of the illustration cws023.png
-
Click the "Edit Page Layout" button for the new page created.

Description of the illustration cws024.png
-
Select the third layout and click the "Add Portlets" button on the left pane.
Description of the illustration cws025.png
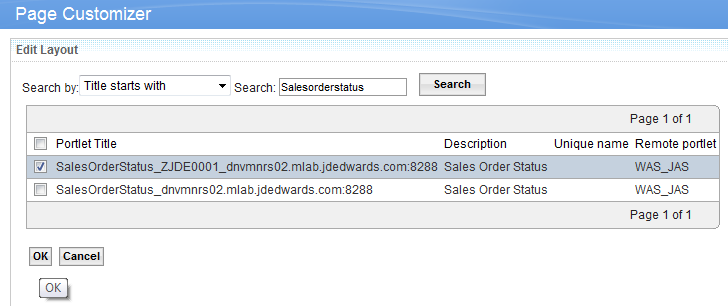
-
To add the Sales Order Status portlet to the left pane, search for the string "SalesOrderStatus" to find the list of Sales Order Status portlets available, select one and click OK button.
Description of the illustration cws026.png
-
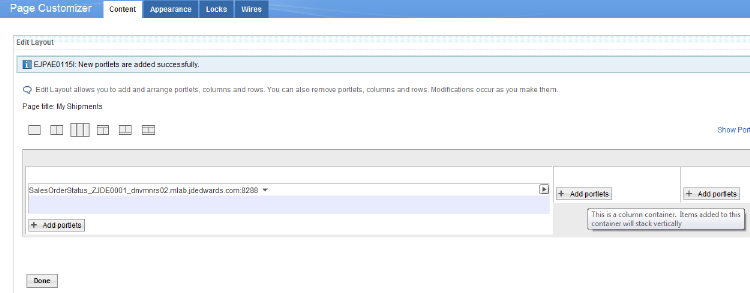
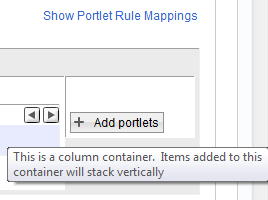
Click the "Add Portlets" button on the center pane.
Description of the illustration cws027.png
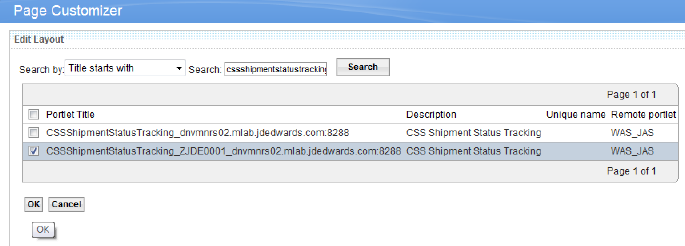
-
To add the CSS Shipment Status Tracking portlet to the center pane, search for the string "CSSShipmentStatusTracking" to find the list of CSS Shipment Status Tracking portlets available, select one and click OK button.
Description of the illustration cws028.png
-
Click the "Add Portlets" button on the right pane.
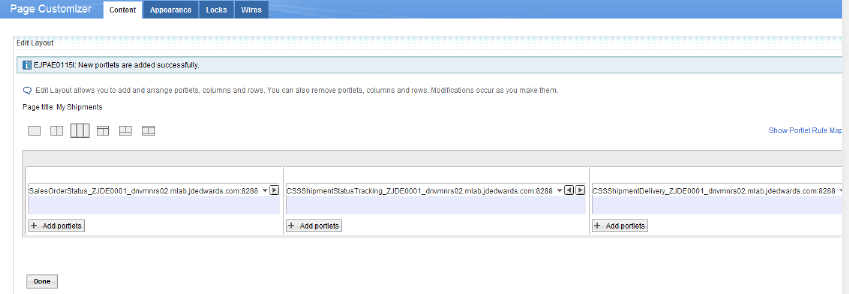
Description of the illustration cws029.png
-
To add the CSS Shipment Delivery portlet to the center pane, search for the string "CSSShipmentDelivery" to find the list of CSS Shipment Delivery portlets available, select one and click OK button. Click the "Done" button after adding all the three portlets.
Description of the illustration cws030.png
-
Click the "New Page" button.
Description of the illustration cws031.png
-
Fill in the Page Properties and click the "OK" button.
Description of the illustration cws032.png
-
Click the "Edit Page Layout" button for the new page created.
Description of the illustration cws033.png
-
Select the second layout and click the "Add Portlets" button on the left pane.
Description of the illustration cws034.png
-
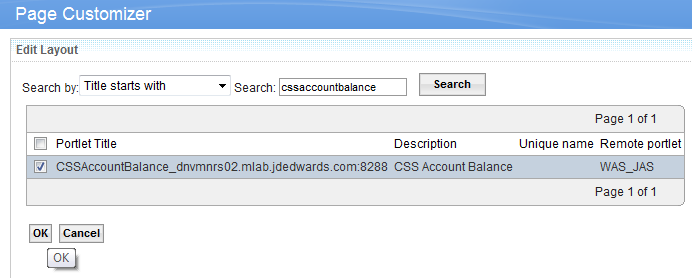
Add the CSS Account Balance portlet to the left pane, search for the string "CSSAccountBalance" to find the list of CSS Account Balance portlets available, select one and click OK button.
Description of the illustration cws035.png
-
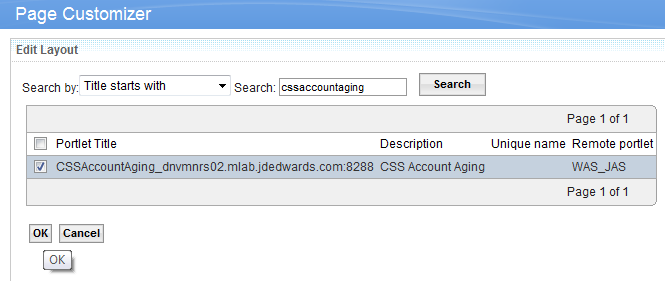
Click the "Add Portlets" button on the right pane and to add the CSS Account Aging portlet to the right pane, search for the string "CSSAccountAging" to find the list of CSS Account Aging portlets available, select one and click OK button.
Description of the illustration cws036.png
-
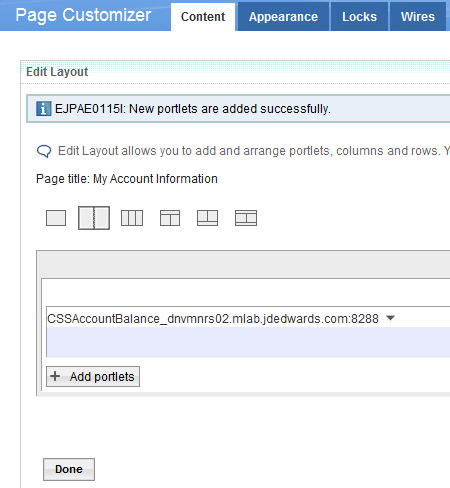
Click the "Done" button after adding all the two portlets.
9.4 Creating an Employee Self-Service Portal Page
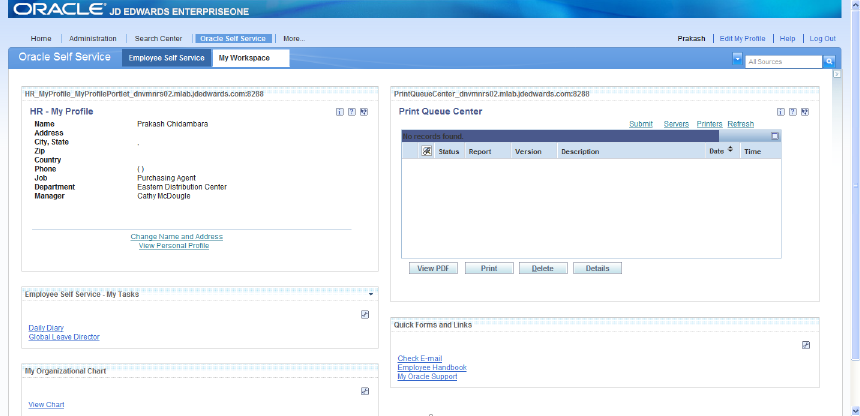
This section provides the steps to create two sample HCM portal pages, the portal pages are the Employee Self Service Page and the My Workspaces page.
The Employee Self Service portal page is created using nine EnterpriseOne FDA portlets. These two screens represent the Employee Self Service portal page.

Description of the illustration ews001.png
Description of the illustration ews002.png
Follow these steps to create "Employee Self Service" Portal Page.
-
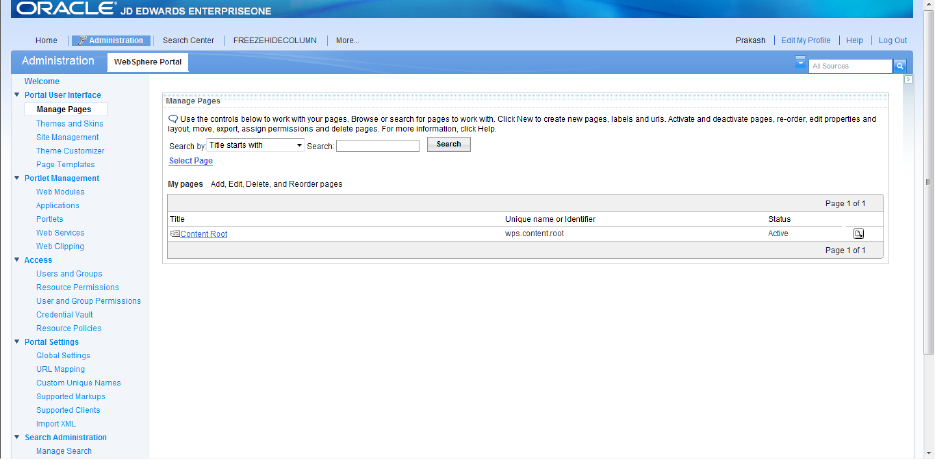
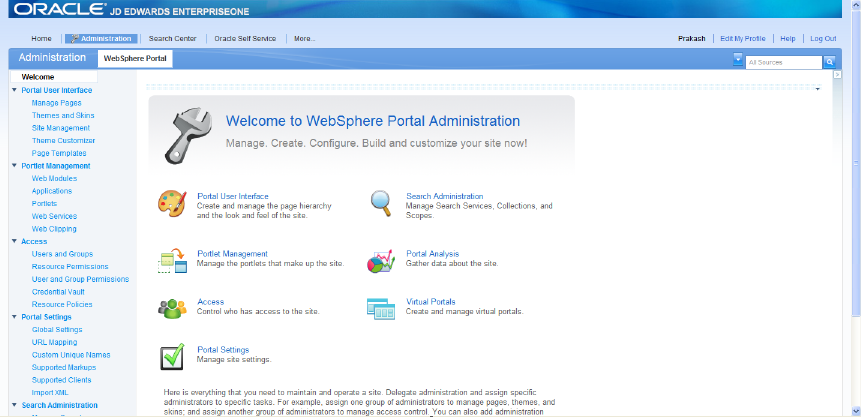
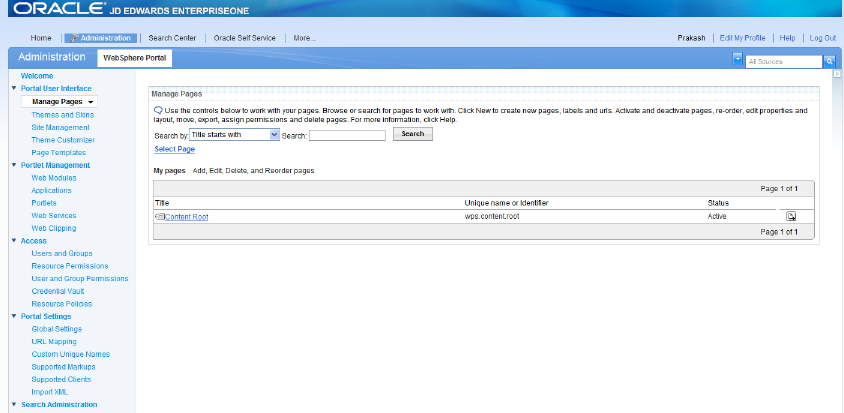
Choose the "Administration" tab and select "Manage Pages" under "Portal User Interface" on the left pane.

Description of the illustration ews003.png
-
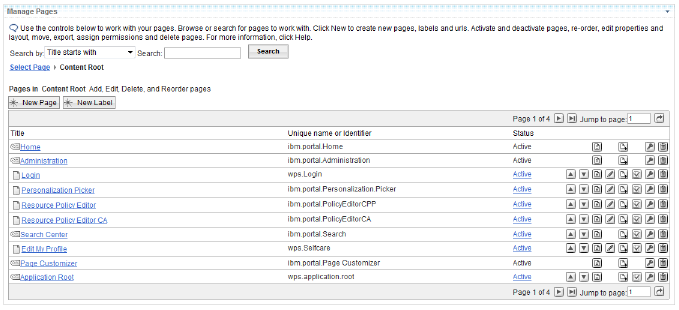
Select "Content Root" Link.

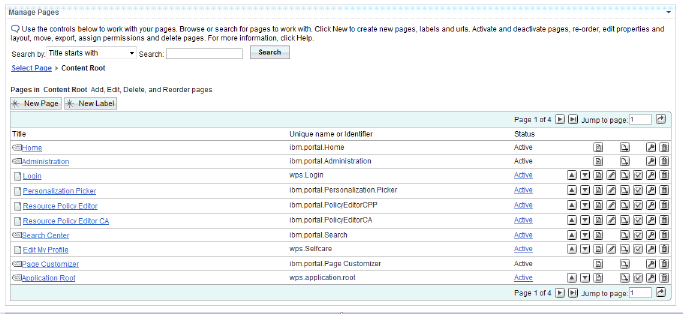
Description of the illustration ews004.png
-
Click the "New Label" button.
Description of the illustration ews005.png
-
Enter Title and Friendly URL name as "Employee Self Service", let the Theme and the Theme Style be default. Click "OK".
Description of the illustration ews006.png
-
If the label "Oracle Self Service" created is in the "More" tab and if it needs to be made visible in the tabs, user can make it visible by moving the page created up to the queue so that the created label will be visible in the tabs.
Description of the illustration ews007.png
Description of the illustration ews008.png
-
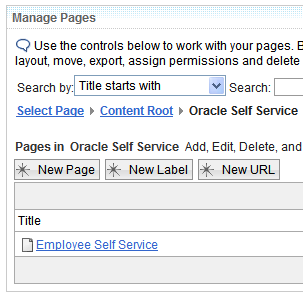
Select the "Oracle Self Service" label created and click on "New Page".
Description of the illustration ews009.png
-
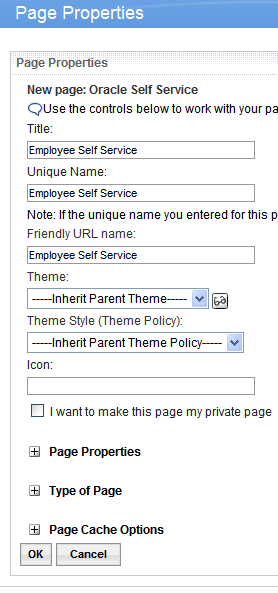
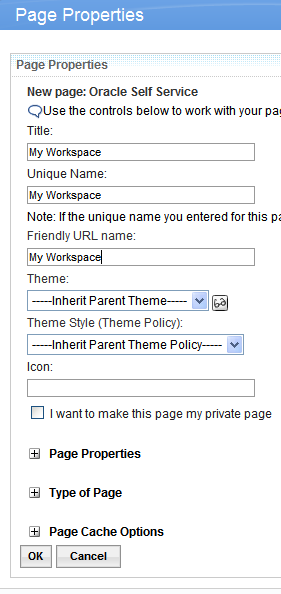
Enter Title, Unique Name and Friendly URL name as "Employee Self Service", let the theme and the Theme Style be default. Click "OK".
Description of the illustration ews010.png
-
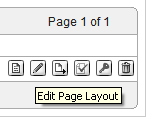
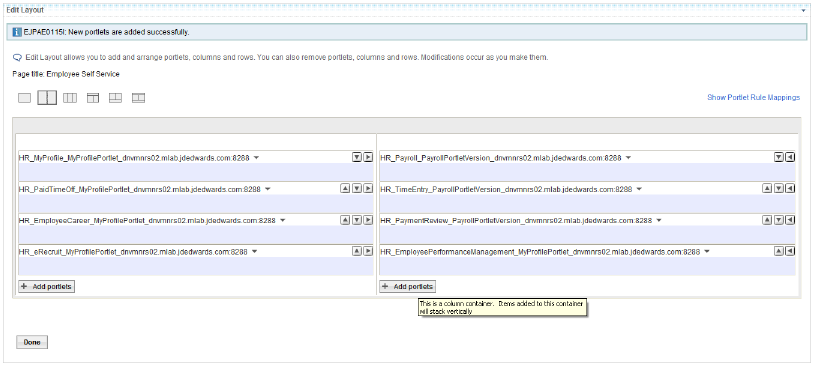
To add portlets to Employee Self Service page click "Edit Page Layout" button.
Description of the illustration ews011.png
-
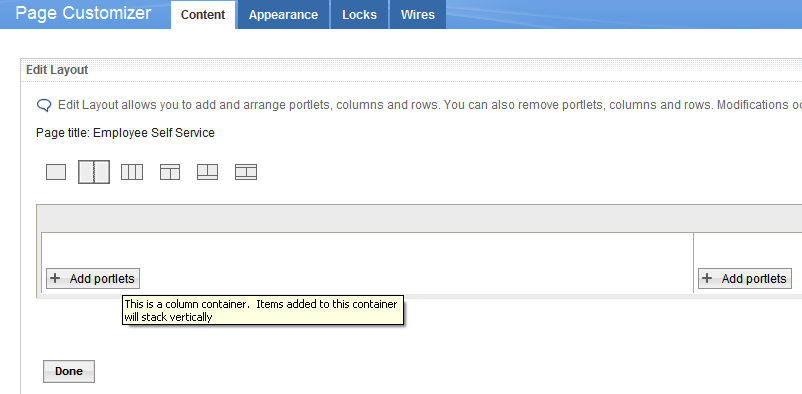
To add portlets to the left pane click the "Add portlets" button.
Note:
All the portlets required for creating the portal page can be added to portal page one at a time and arranged as required. Clicking on "Add portlets" button will list all the portlets available on the collaborative portal, select the required portlets and click "OK". The portlets can also be searched one by one and added to the portal page in required order.The following steps show how to add portlets to the page one by one:

Description of the illustration ews012.png
-
To add HR_MyProfile, search for HR_MyProfile.
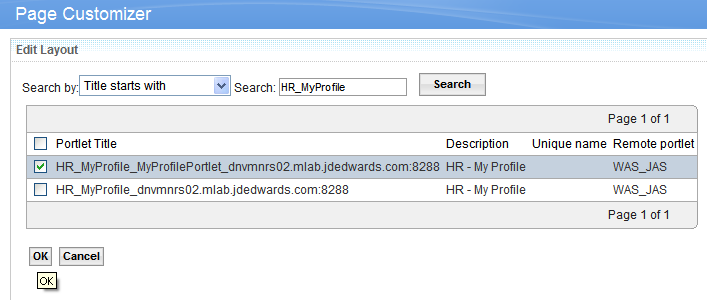
Description of the illustration ews013.png
-
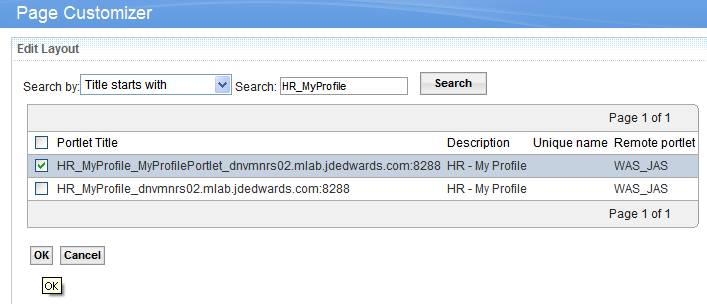
Select the required "HR_MyProfile" portlet from the list and click "OK".
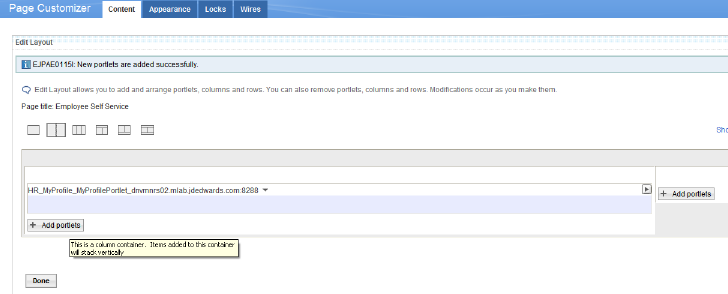
Description of the illustration ews014.png
-
To add the "HR_PaidTimeOff" portlet, click the "Add portlets" button.
Description of the illustration ews015.png
-
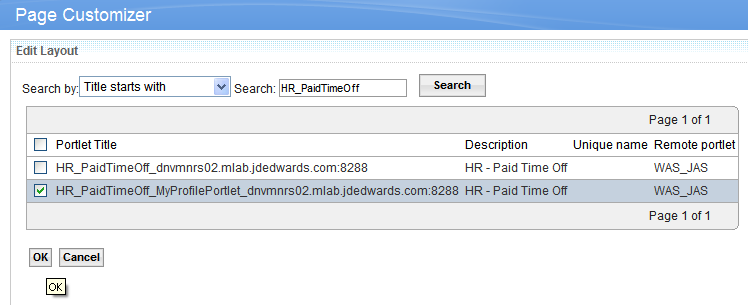
Search for "HR_PaidTimeOff", select the required "HR_PaidTimeOff"portlet from the list and click "OK".
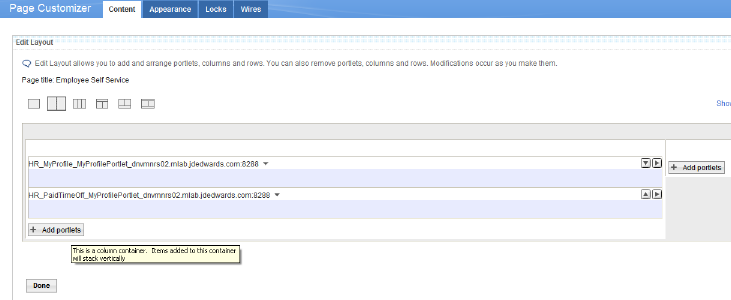
Description of the illustration ews016.png
-
To add "HR_ EmployeeCareer" portlet click "Add portlets" button.
Description of the illustration ews017.png
-
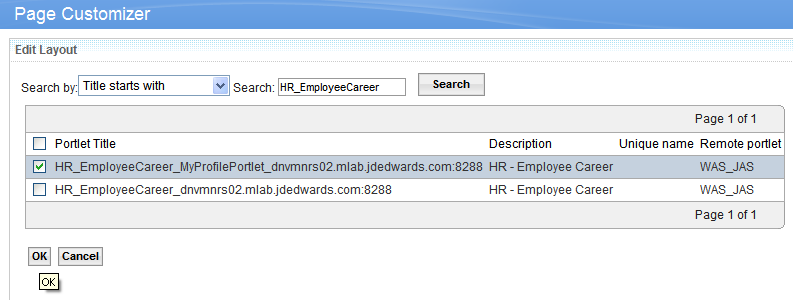
Search for "HR_EmployeeCareer", and then select the required "HR_ EmployeeCareer" portlet from the list and click "OK".
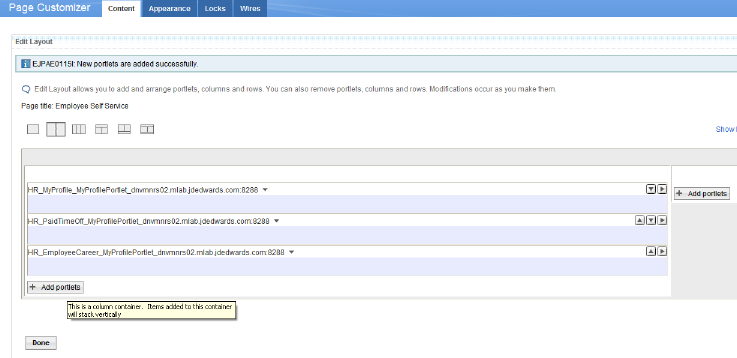
Description of the illustration ews018.png
-
To add "HR_eRecruit" portlet, click "Add portlets" button.
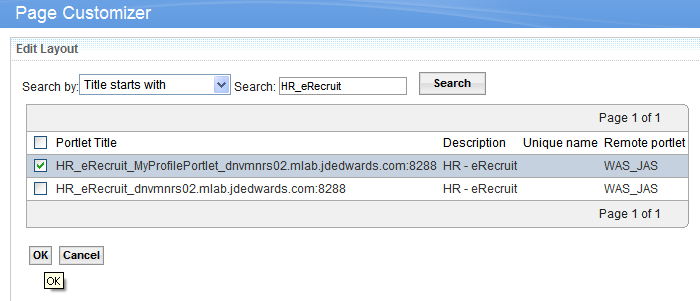
Description of the illustration ews019.png
-
Search for "HR_eRecruit", and then select the required "HR_ eRecruit" portlet from the list and click "OK".
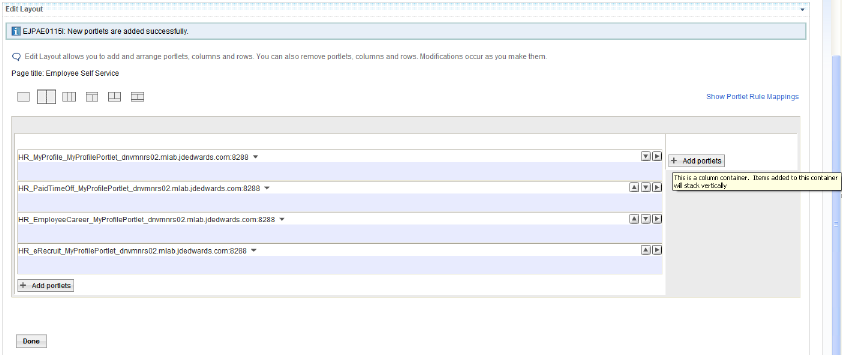
-
To add portlets to the right pane, click "Add portlets" on the right pane.
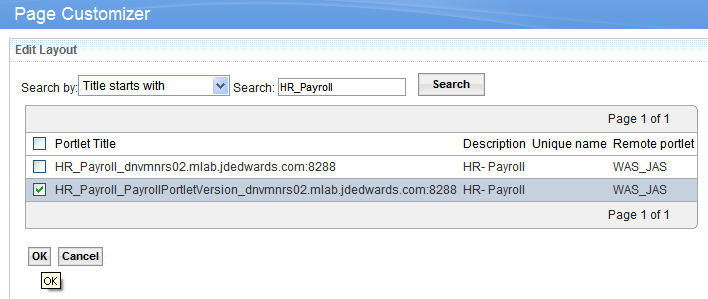
Description of the illustration ews021.png
-
Search for "HR_Payroll", and then select the required "HR_ Payroll" portlet from the list and click "OK".

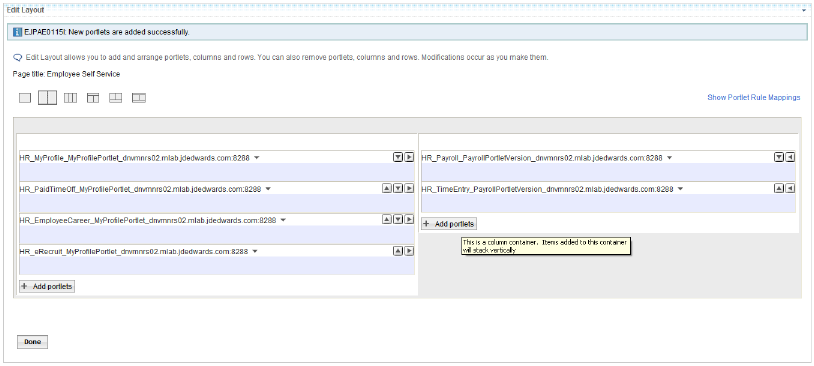
Description of the illustration ews022.png
-
To add the "HR_ TimeEntry" portlet, click the "Add portlets" button.
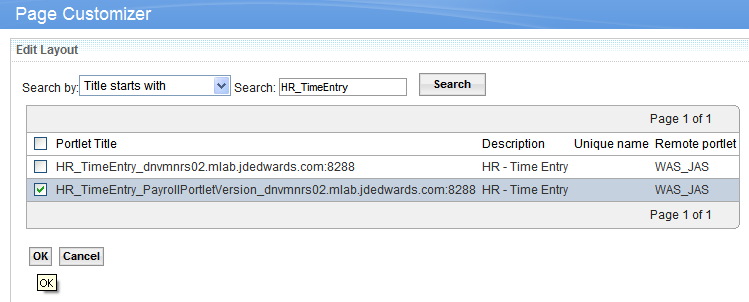
Description of the illustration ews023.png
-
Search for "HR_ TimeEntry", and then select the required "HR_ TimeEntry" portlet from the list and click "OK".
Description of the illustration ews024.png
-
To add the "HR_ PaymentReview" portlet, click the "Add Portlets" button.
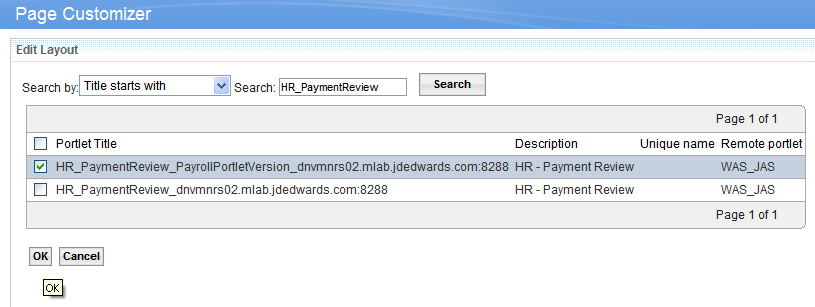
Description of the illustration ews025.png
-
Search for "HR_ PaymentReview", and then select the required "HR_ PaymentReview" portlet from the list and click "OK".
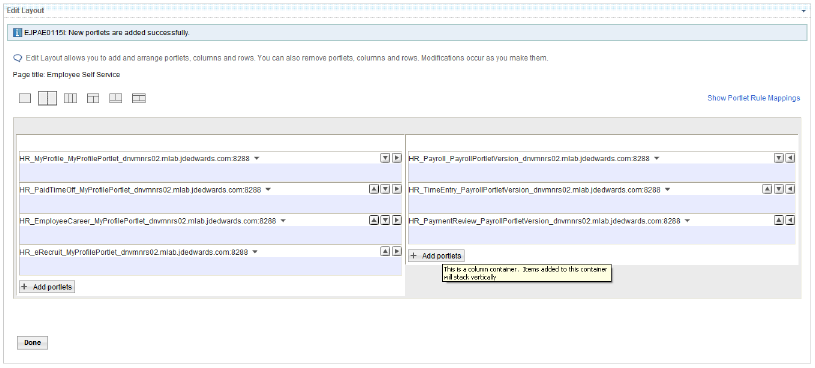
Description of the illustration ews026.png
-
To add "HR_ EmployeePerformanceManagement" portlet click the "Add portlets" button.
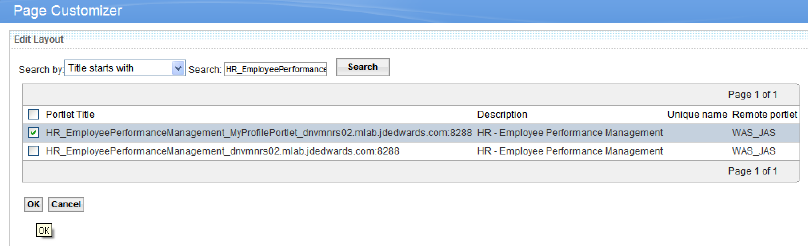
Description of the illustration ews027.png
-
Search for "HR_ EmployeePerformance", and then select the required "HR_EmployeePerformanceManagement" portlet from the list and click "OK".
Description of the illustration ews028.png
-
To add "HR_ EnhancedEmployeeSelfService" portlet, click the "Add portlets" button.
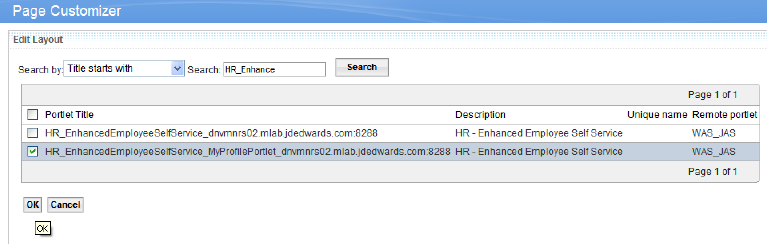
Description of the illustration ews029.png
-
Search for "HR_ Enhance", and then select the required "HR_EnhancedEmployeeSelfService" portlet from the list and click "OK".
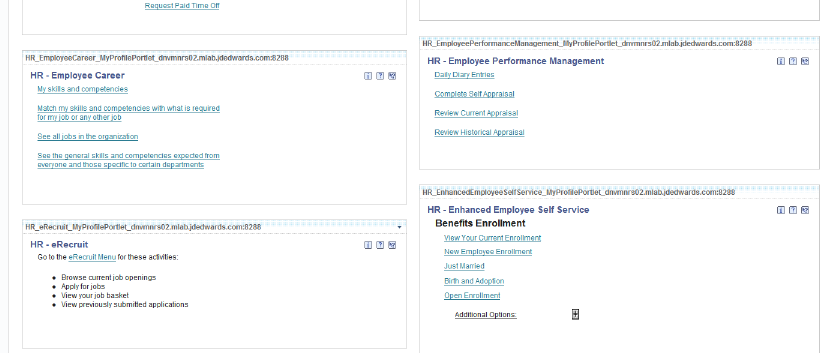
Description of the illustration ews001.png
Description of the illustration ews002.png
-
Above are the Employee Self-Service portlets.
9.5 Creating a Supplier Self-Service Page
In this section we will create a Supplier Self Service portal page.
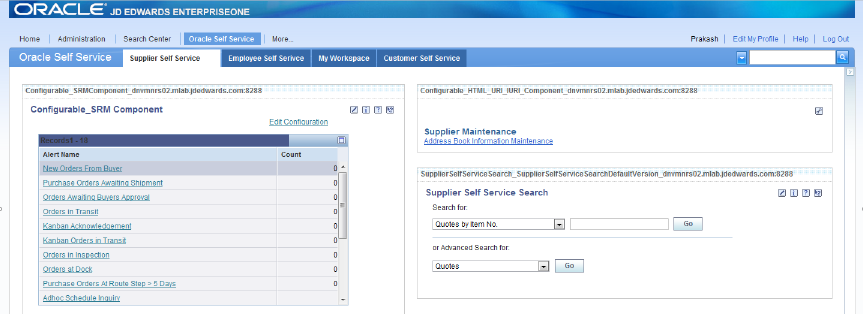
Description of the illustration sws001.png
Follow these steps to create the Supplier Self Service page:
-
Login into Collaborative Portal using the user name and password provided to you. If you do not have user name and password, register yourself.
Your user name for the portal you are using must match the user name for the E1 environment that the portlets are running on.
E.g. User name and password for PY900 is AB232323 so the portal user name and password for the WebCenter/Collaborative Portal running PY900 portlets must be AB232323.
Description of the illustration sws002.png
-
Select “Content Root” from Manage Pages present under the Administration tab.
Description of the illustration sws003.png
-
Click the “New Label” button.

Description of the illustration sws004.png
-
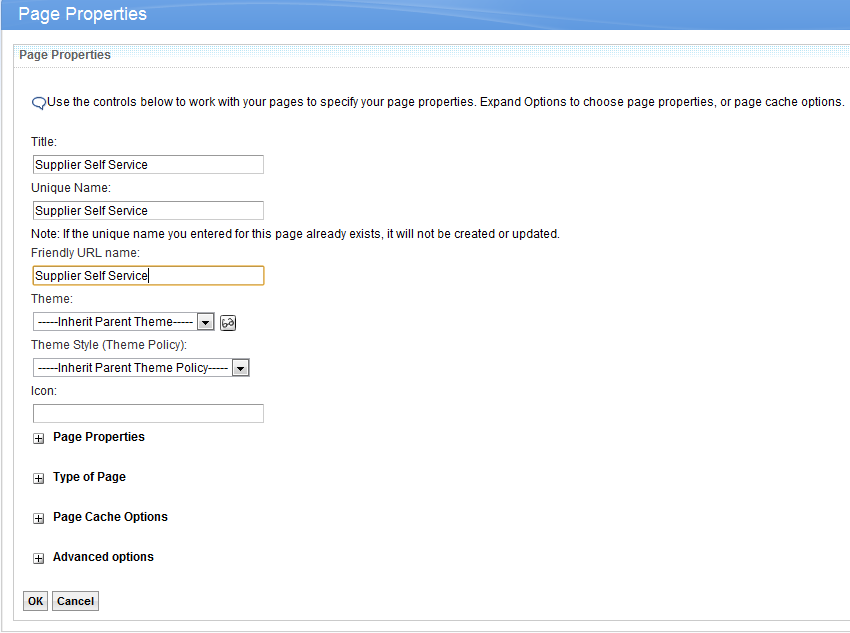
Fill in the Page Properties and click the “OK” button.
Description of the illustration sws005.png
Description of the illustration sws006.png
-
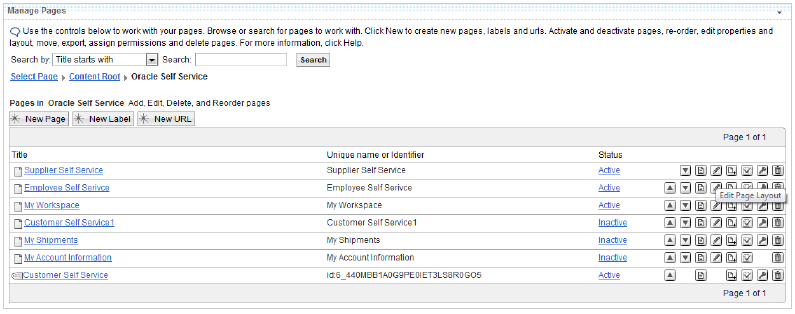
If the new label created is not visible in the tabs, the user can make it visible by moving the page created up to the queue so that the created label will be visible in the tabs.
Description of the illustration sws007.png
-
Click the “New Page” button and fill in the Page Properties and click the “OK” button.
Description of the illustration sws008.png
-
Click the “Edit Page Layout” button.
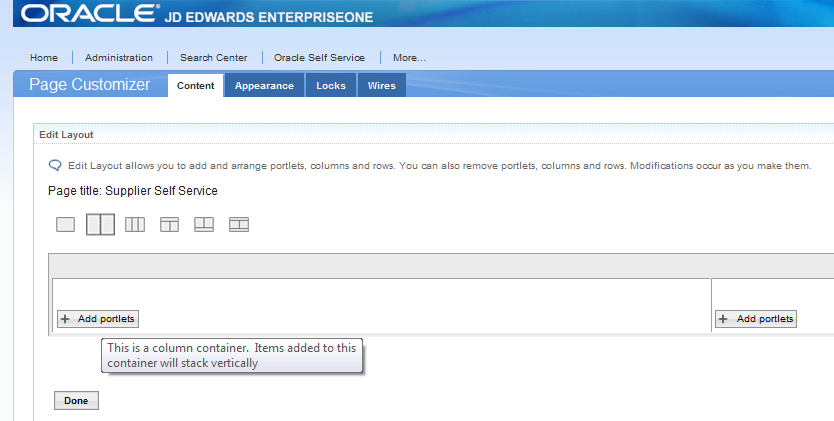
Description of the illustration sws009.png
-
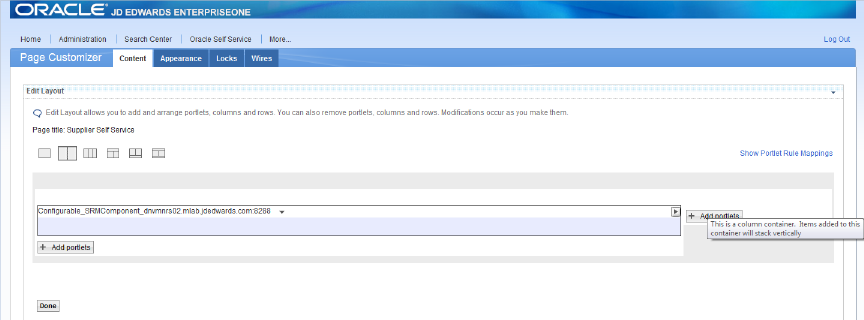
Select the second layout and click the “Add portlets” button on the left pane.
Description of the illustration sws010.png
-
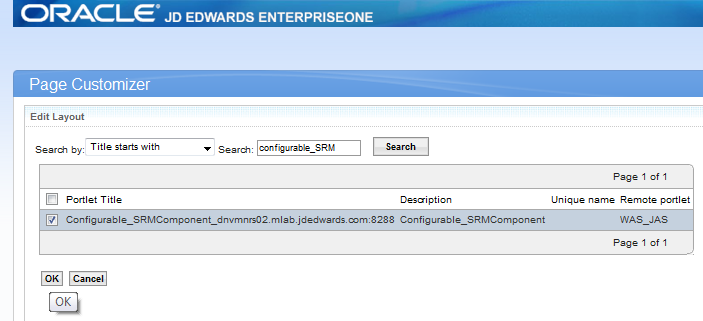
To add the Configurable_SRMComponent portlet to the left pane, search for the string “Configurable_SRMComponent” in order to find the list of Configurable_SRMComponent portlets available. Then select the portlet and click the OK button.
Description of the illustration sws011.png
-
Click the “Add Portlets” button on the right pane.
Description of the illustration sws012.png
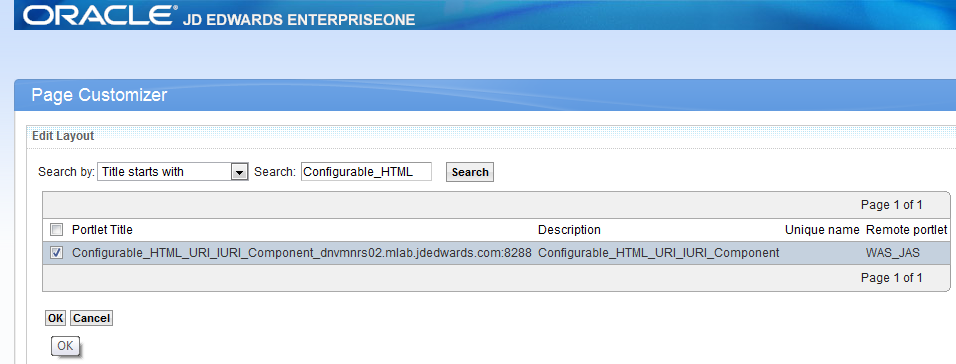
-
To add the Configurable_HTML_URI_IURI_Component portlet to the right pane, search for the string “Configurable_HTML_URI_IURI_Component” to find the list of Configurable_HTML_URI_IURI_Component portlets available. Then select and click the OK button.

Description of the illustration sws013.png
-
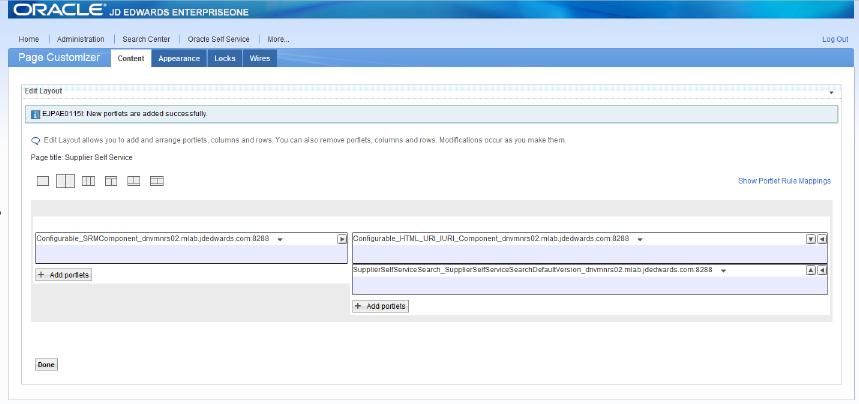
Click the “Add Portlets” button on the right pane.
Description of the illustration sws014.png
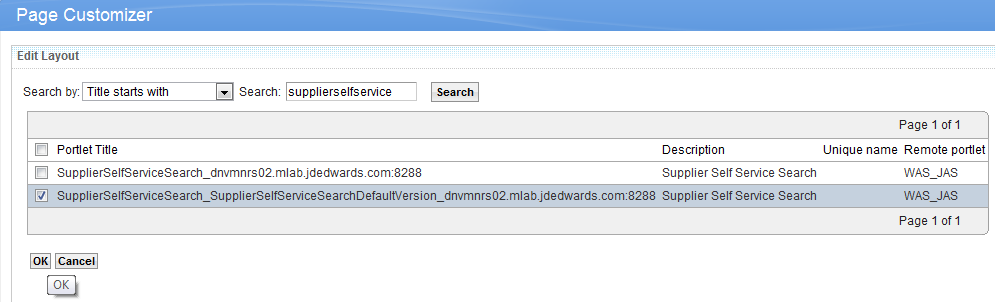
-
To add the Supplier Self Service Search portlet to the right pane, search for the string “Supplier Self Service Search” to find the list of Supplier Self Service Search portlets available. Then select and click the OK button.
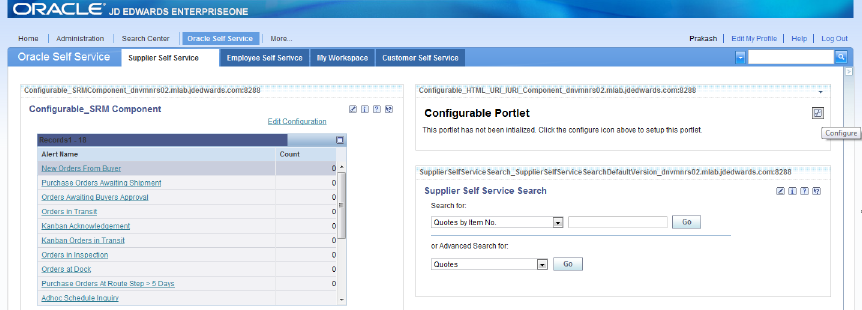
Description of the illustration sws015.png
-
Click the “Done” button after adding all the three portlets.
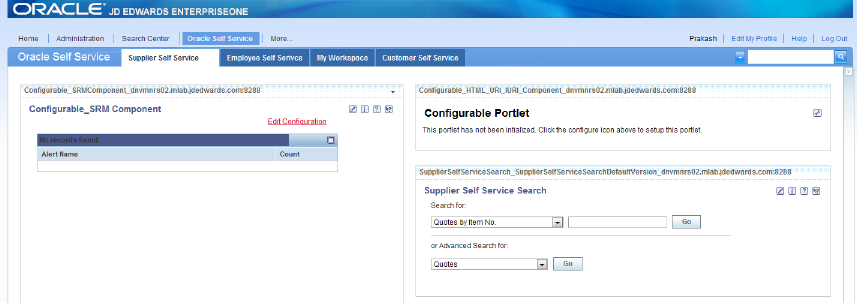
Description of the illustration sws016.png
-
Select the Supplier Self Service tab from Oracle Self Service and click the Edit Configuration link.
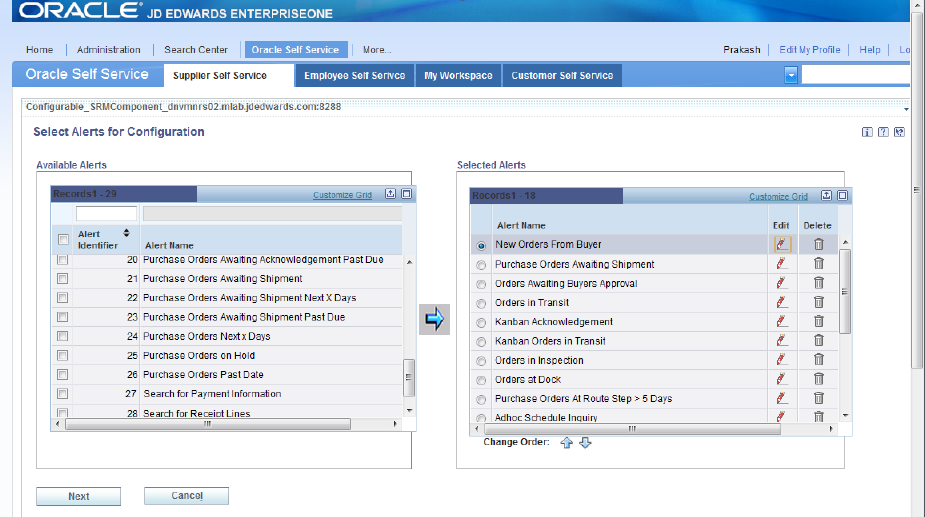
Description of the illustration sws017.png
Description of the illustration sws018.png
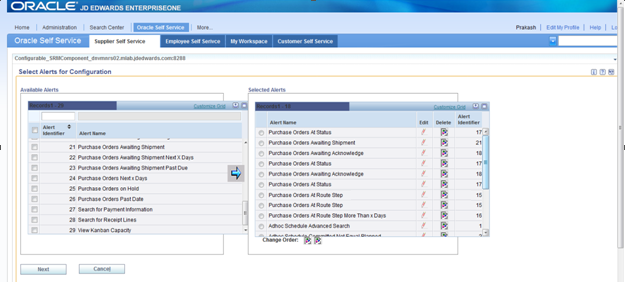
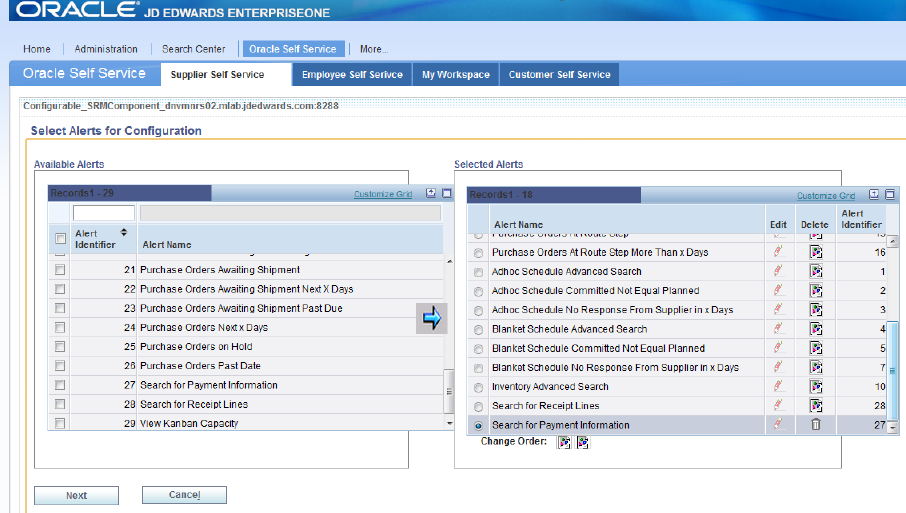
-
Add the alerts from the Available Alerts grid to the Selected Alerts grid.
Description of the illustration sws019.png
-
Click on “Next”. This will allow the user to override all of the alert names as desired.
The follow images display the alert name overrides.
Figure 9-16 Purchase Orders Awaiting Shipment Alert
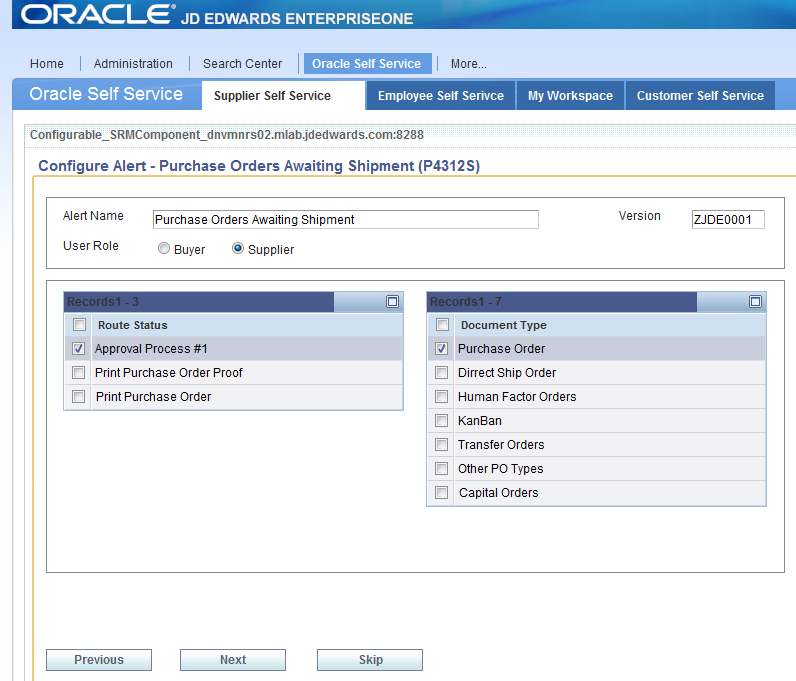
Description of "Figure 9-16 Purchase Orders Awaiting Shipment Alert"
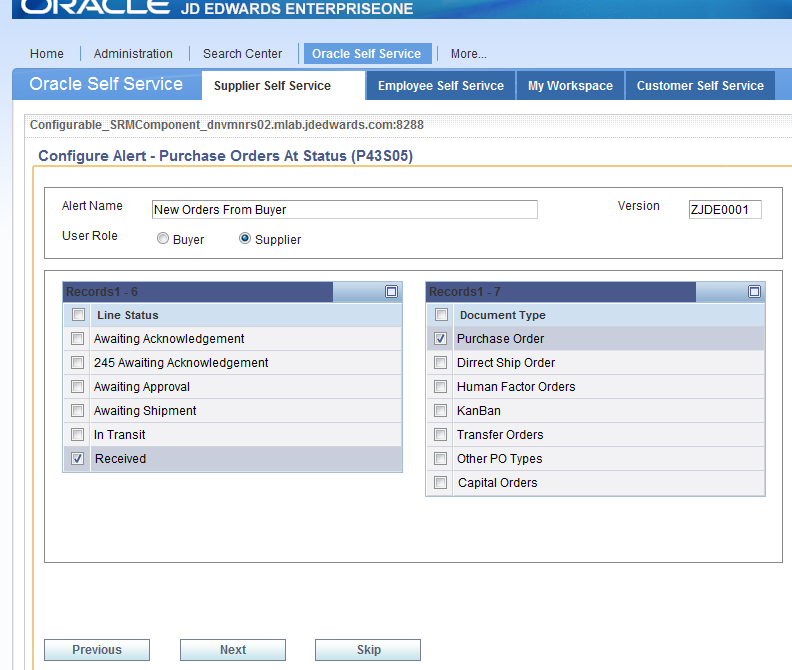
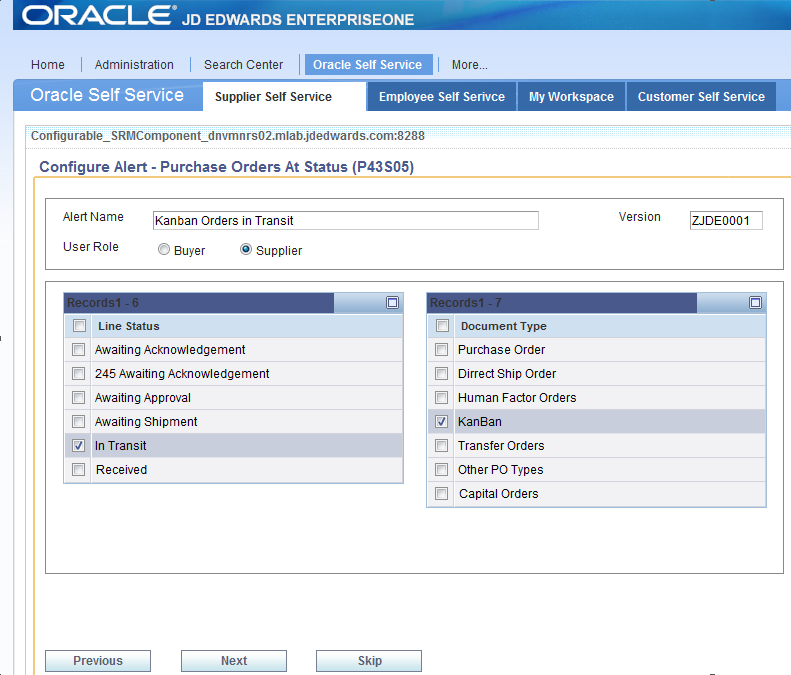
Figure 9-17 Purchase Orders At Status Alert
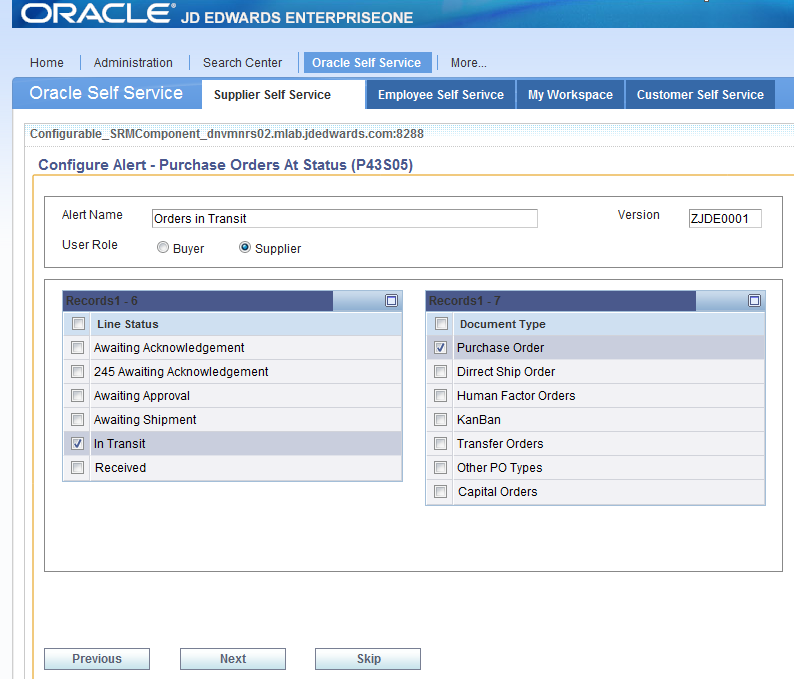
Description of "Figure 9-17 Purchase Orders At Status Alert"
Figure 9-18 Purchase Orders Awaiting Acknowledge Alert
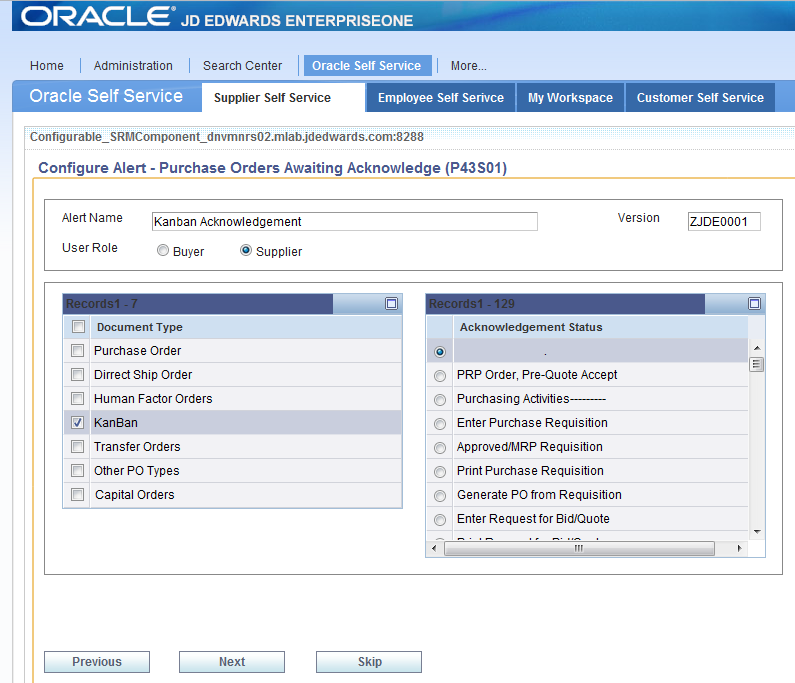
Description of "Figure 9-18 Purchase Orders Awaiting Acknowledge Alert"
Figure 9-20 Purchase Orders At Route Step Alert
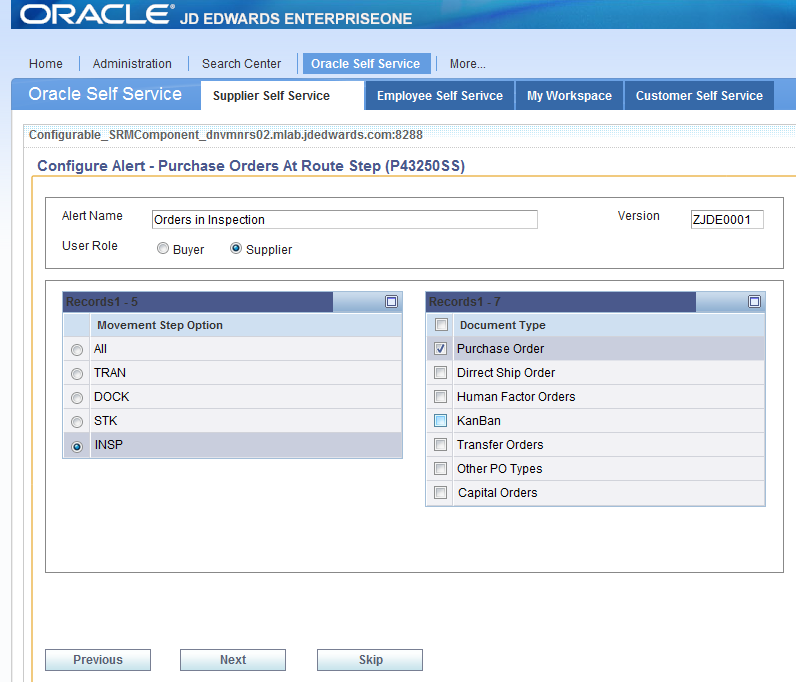
Description of "Figure 9-20 Purchase Orders At Route Step Alert"
Figure 9-21 Purchase Orders At Route Step Alert
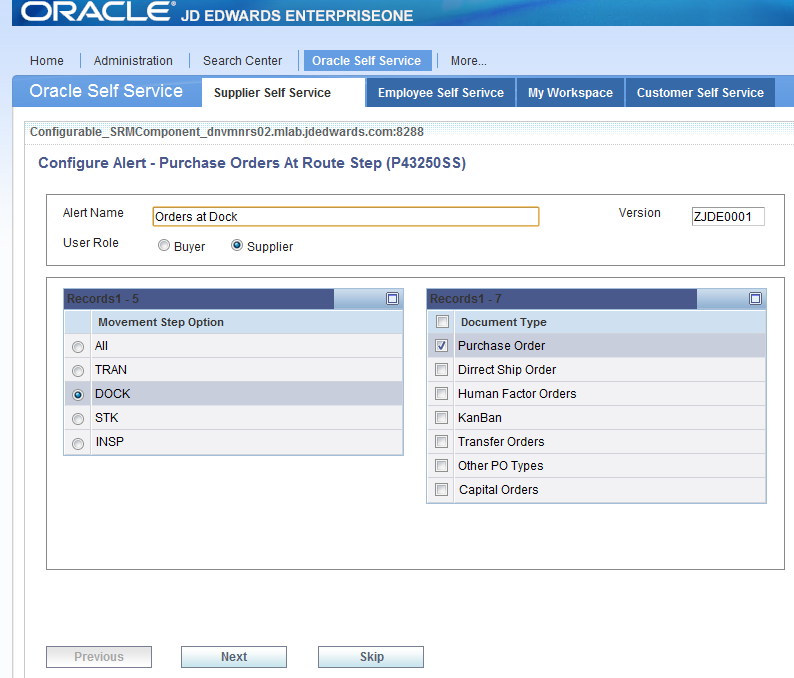
Description of "Figure 9-21 Purchase Orders At Route Step Alert"
Figure 9-22 Purchase Orders At Route Step More Than X Days Alert
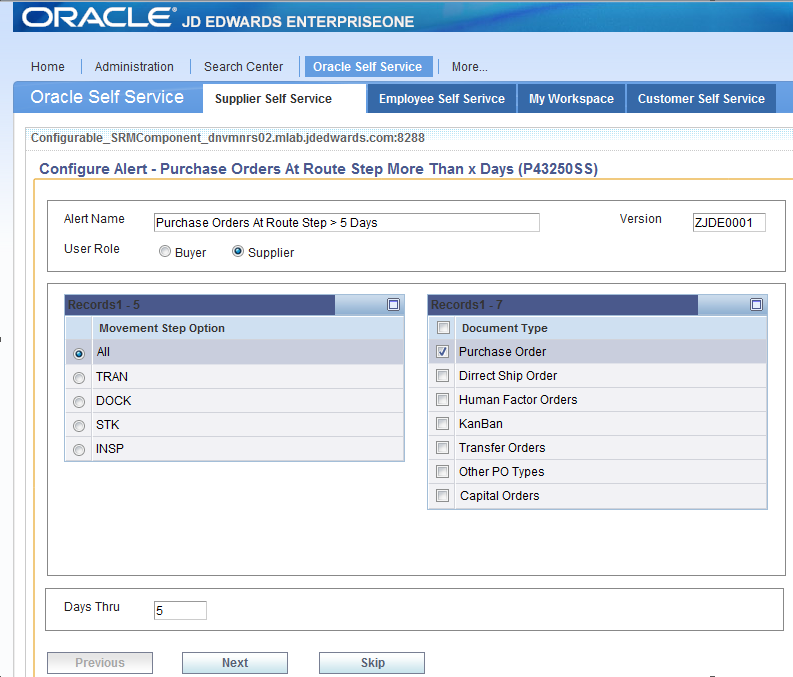
Description of "Figure 9-22 Purchase Orders At Route Step More Than X Days Alert"
Figure 9-23 Adhoc Schedule Advanced Search Alert
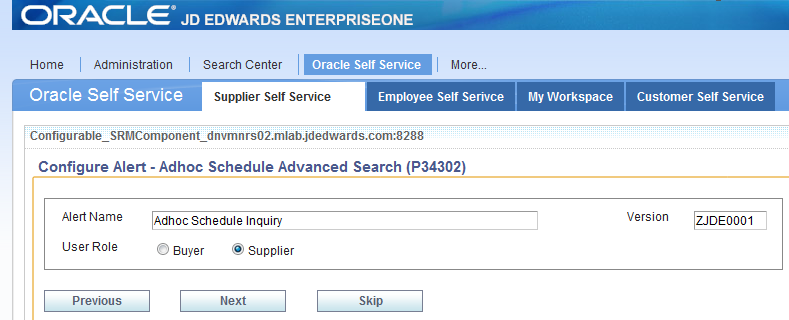
Description of "Figure 9-23 Adhoc Schedule Advanced Search Alert"
Figure 9-24 Adhoc Schedule Committed Note Equal Planned Alert
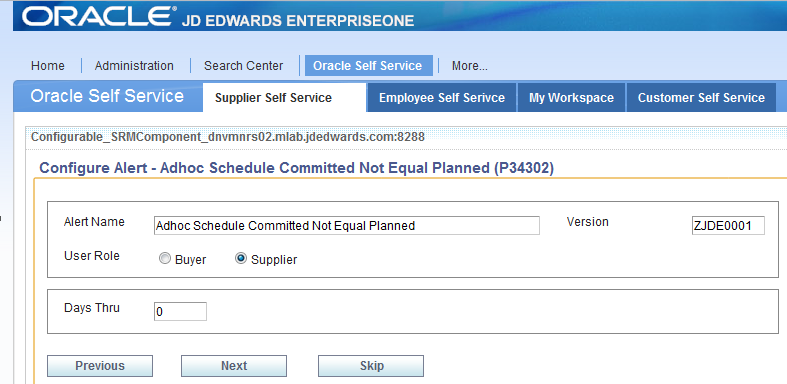
Description of "Figure 9-24 Adhoc Schedule Committed Note Equal Planned Alert"
Figure 9-25 Adhoc Schedule No Response From Supplier in X Days Alert
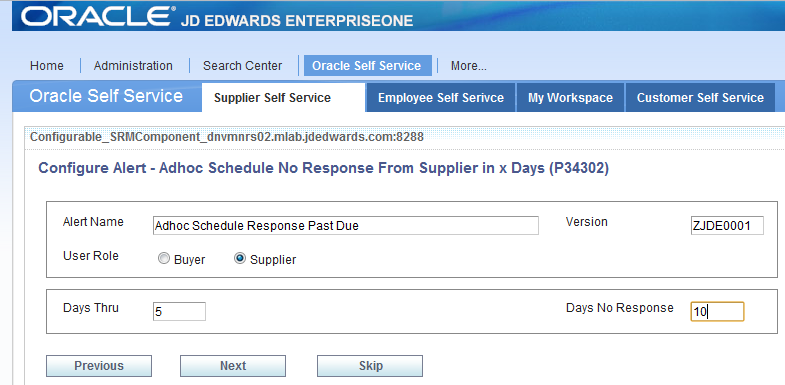
Description of "Figure 9-25 Adhoc Schedule No Response From Supplier in X Days Alert"
Figure 9-26 Blanket Schedule Advanced Search Alert
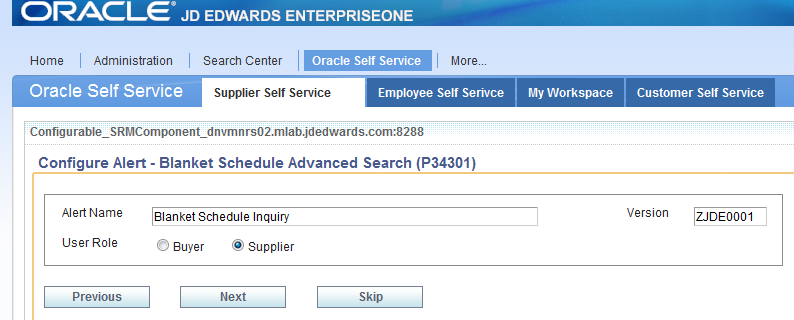
Description of "Figure 9-26 Blanket Schedule Advanced Search Alert"
Figure 9-27 Blanket Schedule Committed Not Equal Planned Alert
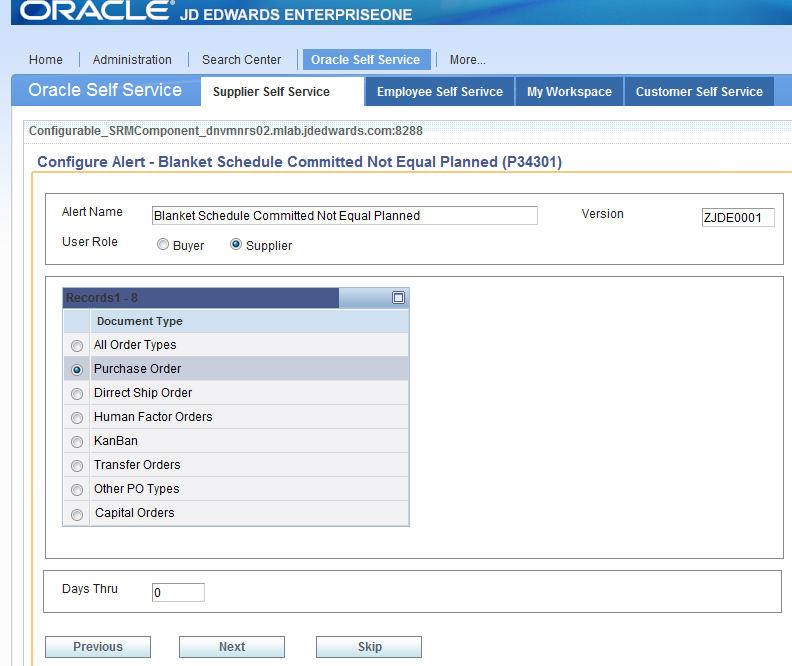
Description of "Figure 9-27 Blanket Schedule Committed Not Equal Planned Alert"
Figure 9-28 Blanket Schedule No Response From Supplier in X Days Alert
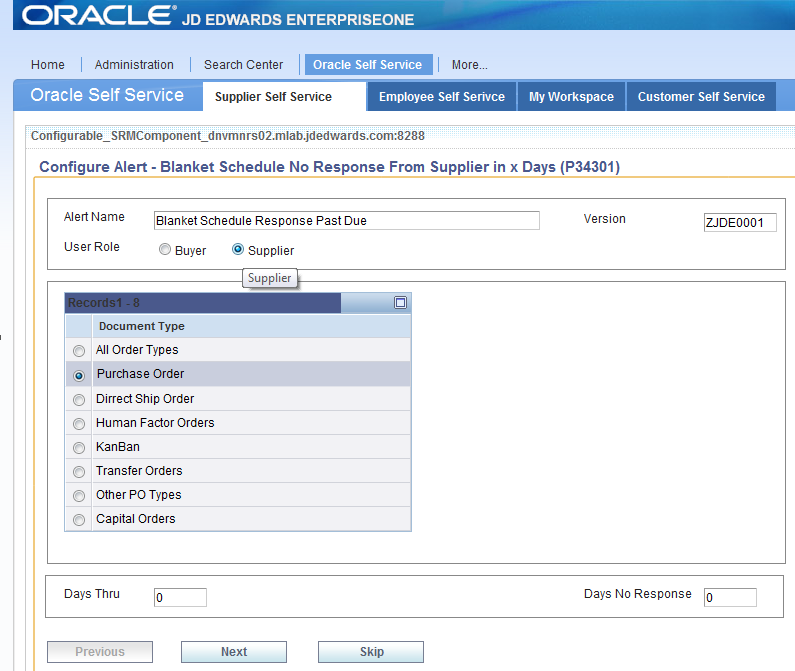
Description of "Figure 9-28 Blanket Schedule No Response From Supplier in X Days Alert"
Figure 9-30 Search for Receipt Lines Alert
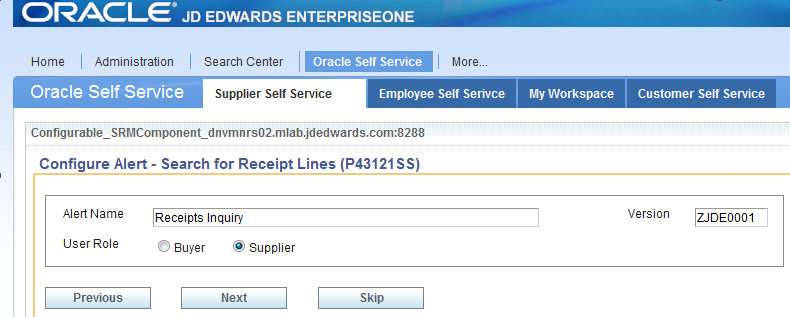
Description of "Figure 9-30 Search for Receipt Lines Alert"
Figure 9-31 Search for Payment Information Alert
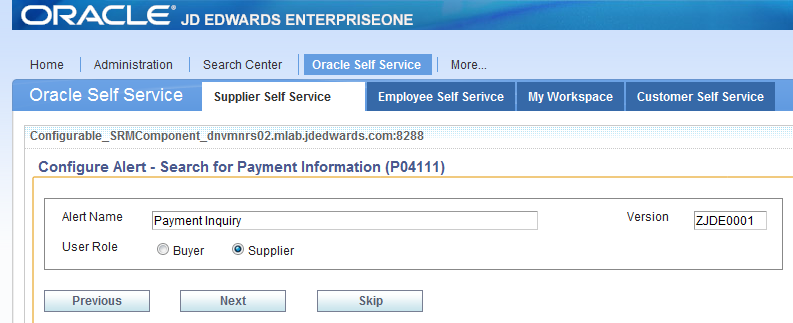
Description of "Figure 9-31 Search for Payment Information Alert"
Description of the illustration sws036.png
-
Click the “Cancel” button provided to exit the configuration screen.
Description of the illustration sws037.png
-
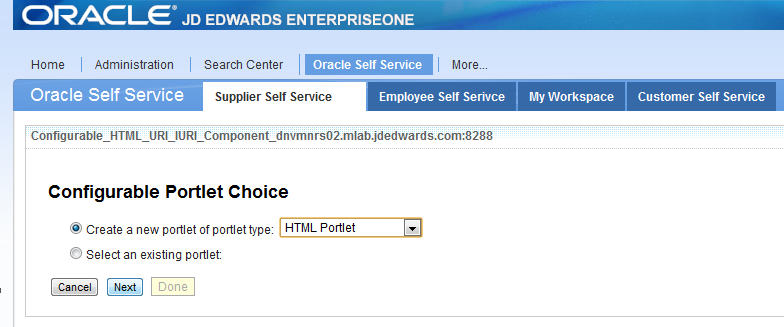
Click the “Configure” Icon on the configurable portlet.
Description of the illustration sws038.png
-
Select HTML Portlet from the available list and click “Next”.
Description of the illustration sws039.png
-
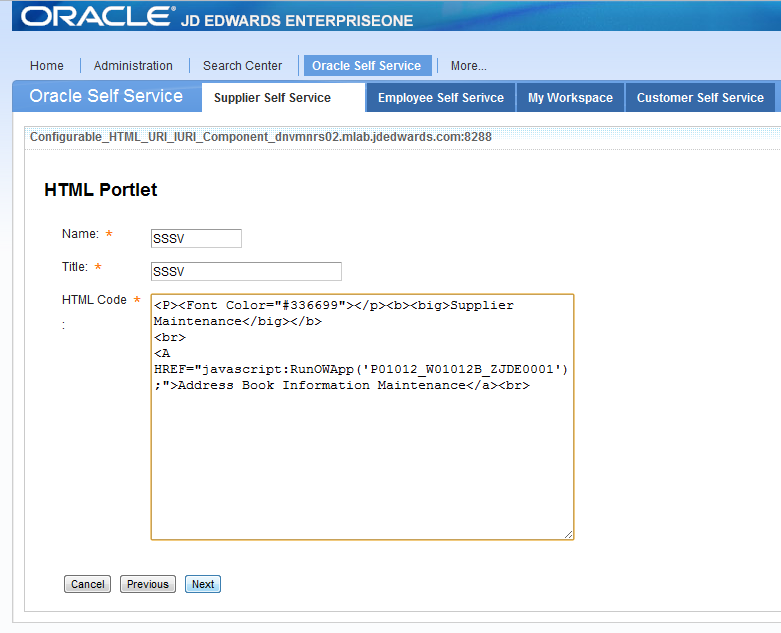
Enter the Name as “SSSV” and Title as “SSSV” and paste following text in “HTML Code” text area and click “NEXT” button.
<P><Font Color="#336699"></p><b><big>Supplier Maintenance</big></b>
<br>
<A HREF="javascript:RunOWApp('P01012_W01012B_ZJDE0001');">Address Book Information Maintenance</a><br>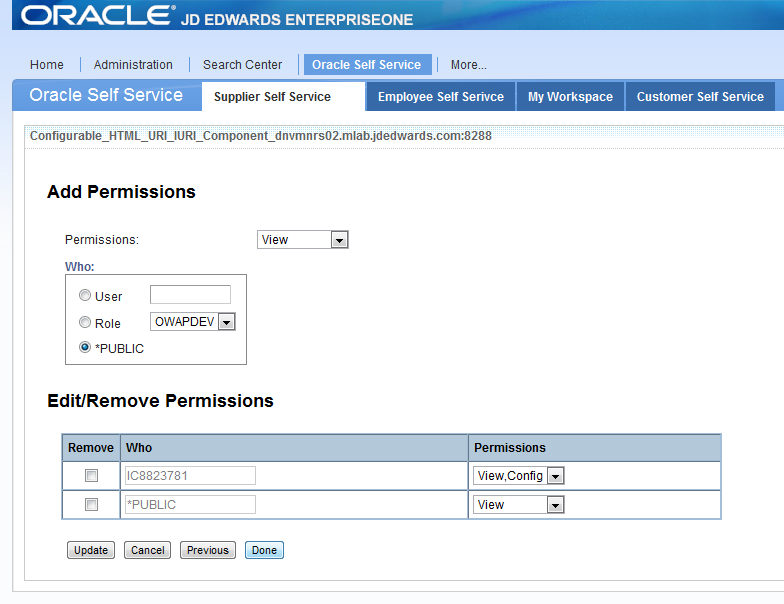
Description of the illustration sws040.png
-
Set the required permissions and click “Done”.
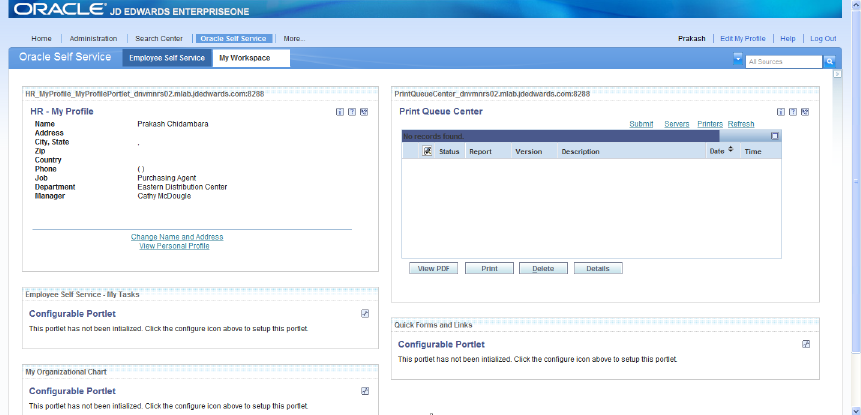
9.6 Creating a My Workspace Portal Page
In this section we will build a My Workspace portal page. The sample My Workspace portal page layout has portlets arranged in two columns. The page has two EnterpriseOne FDA portlets and three Configurable HTML portlets.
Description of the illustration wws001.png
To add the "My Workspace" portal page to Oracle Self Service follow these steps:
-
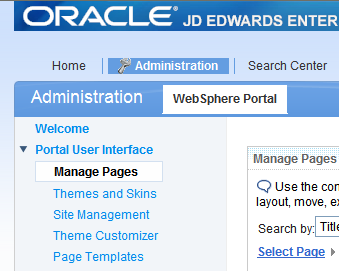
Choose "Administration".
Description of the illustration wws002.png
-
On the left pane choose "Manage Pages" under "Portal User Interface".
Description of the illustration wws003.png
-
Click on "Content Root" link.
Description of the illustration wws004.png
-
Look for the "Oracle Self Service" label created already.
Description of the illustration wws005.png
-
Click on the "Oracle Self Service" link.
Description of the illustration wws006.png
-
Click the "New Page" button.
Description of the illustration wws007.png
-
Enter Title, Unique Name and Friendly URL name as "My Workspace". Take the default settings for the theme and the Theme Style. Click "OK".
Description of the illustration wws008.png
-
To add portlets to My Workspace page, click "Edit Page Layout" button.
Description of the illustration wws009.png
-
To add portlets to the left pane click the "Add portlets" button.

Description of the illustration wws010.png
-
To add HR_MyProfile, search for HR_MyProfile.
Description of the illustration wws011.png
-
Select the required "HR_MyProfile" portlet from the list and click "OK".
Description of the illustration wws012.png
-
"My Workspace" portal page has three "Configurable HTML" portlets. Each portlet has its own header. Follow the steps to create three copies of configurable HTML so that each can have its own header and configuration:
Description of the illustration wws013.png
-
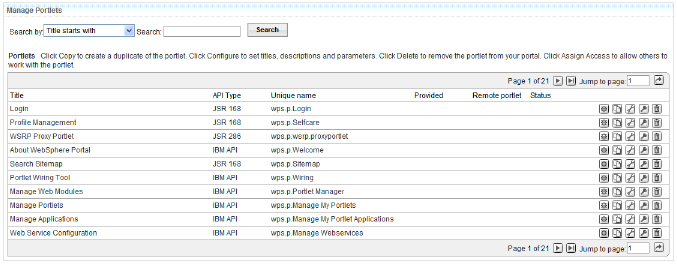
On the left pane click "the Portlets" link under "Portlet Management".
Description of the illustration wws014.png
-
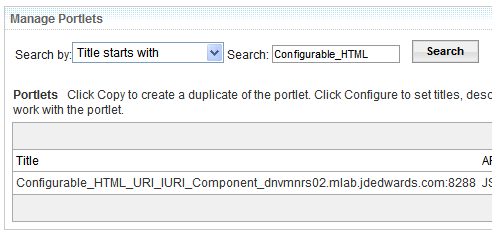
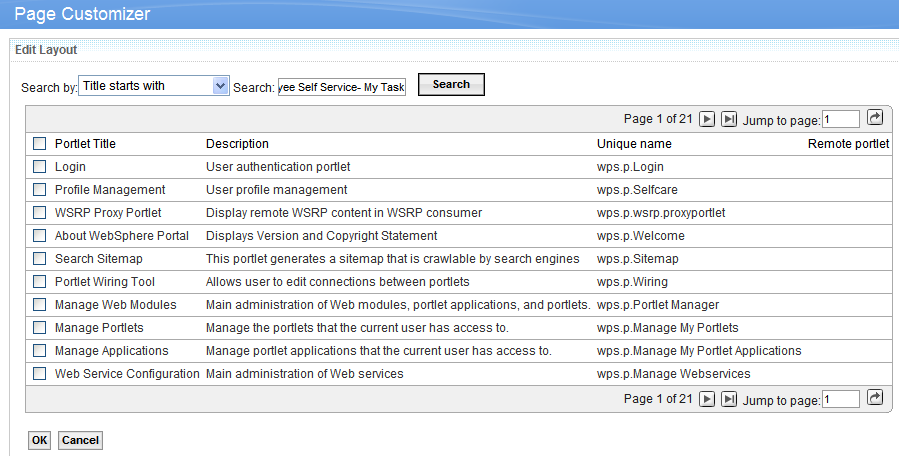
Search for "Configurable_HTML_URI_IURI_Component".
Description of the illustration wws015.png
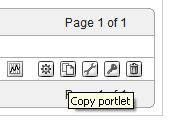
-
Click the "Copy portlet" button of the "Configurable_HTML_URI_IURI_Component" portlet.
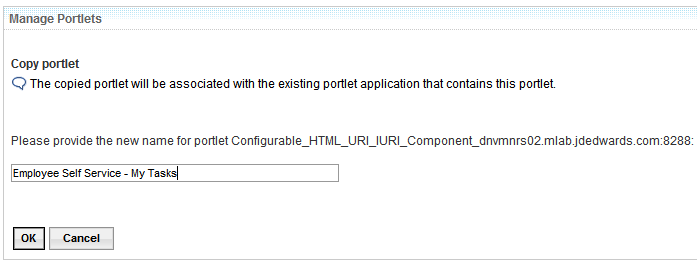
Description of the illustration wws016.png
-
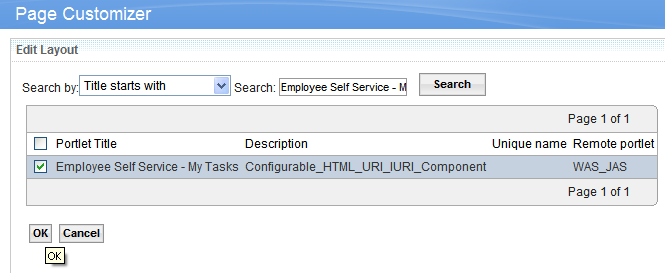
Use "Employee Self Service - My Task" as the new name and click "OK".
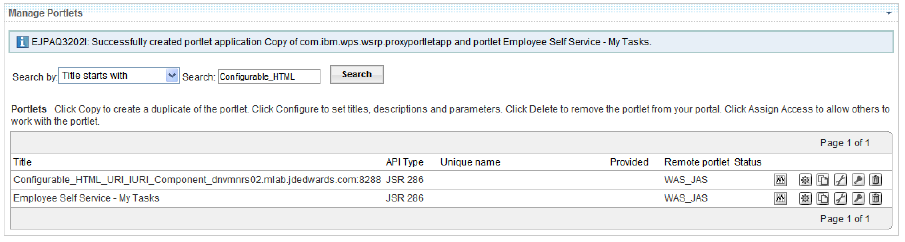
Description of the illustration wws017.png
-
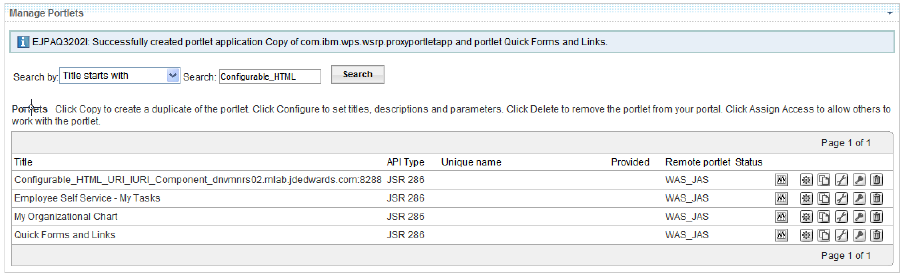
Follow steps c and d to create two more copies of "Configurable_HTML_URI_IURI_Component"more portlets named: My Organizational Chart and Quick Forms and Links.
Description of the illustration wws018.png
-
This image shows all four available Configurable HTML portlets.
Description of the illustration wws019.png
-
-
To add portlets to the "My Workspace" portal page, choose "Manage Pages" under "Portal User Interface".

Description of the illustration wws020.png
-
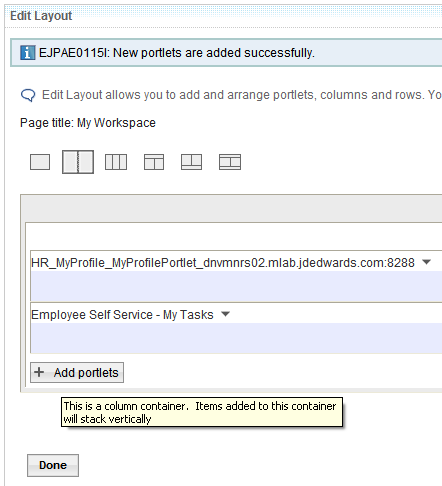
To add portlets to the "My Workspace" portal page, click the "Edit Page Layout" button.
Description of the illustration wws021.png
-
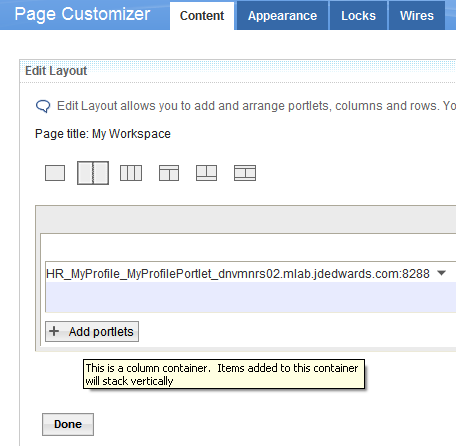
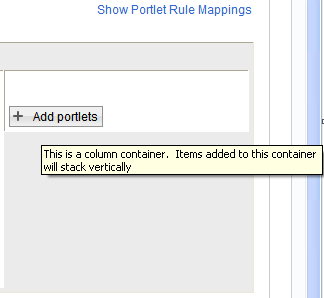
To add portlets to the left pane, click the "Add portlets" button.
Description of the illustration wws022.png
-
To add the "Employee Self Service - My Task" that we created in step 12, search for "Employee Self Service - My Task".
Description of the illustration wws023.png
-
Select the "Employee Self Service - My Task" portlet from the list and click "OK".
Description of the illustration wws024.png
-
To add the "My Organizational Chart" portlet, click the "Add Portlets" button.
Description of the illustration wws025.png
-
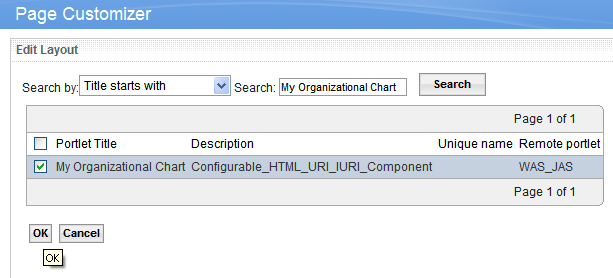
Search for "My Organizational Chart", select the required "My Organizational Chart" portlet from the list, and click "OK".
Description of the illustration wws026.png
-
To add portlets to right pane, click "Add Portlets" on the right pane.
Description of the illustration wws027.png
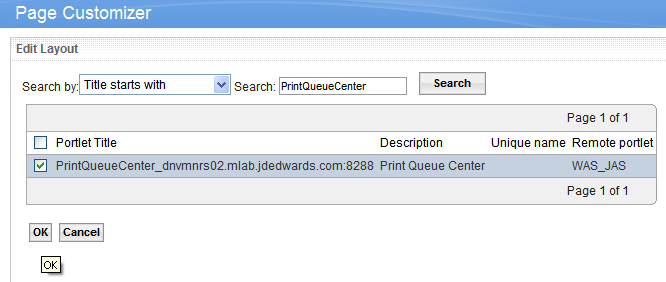
-
Search for "PrintQueueCenter", select the required "PrintQueueCenter" portlet from the list and click "OK".
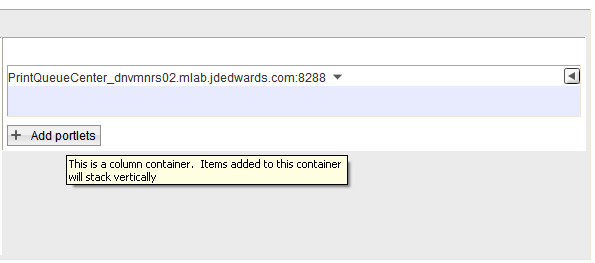
Description of the illustration wws028.png
-
To add the "Quick Forms and Links" portlet, click the "Add portlets" button.
Description of the illustration wws029.png
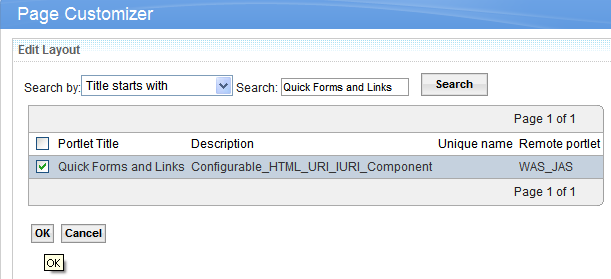
-
Search for "Quick Forms and Links", select the required "Quick Forms and Links" portlet from the list, and click "OK".
Description of the illustration wws030.png
-
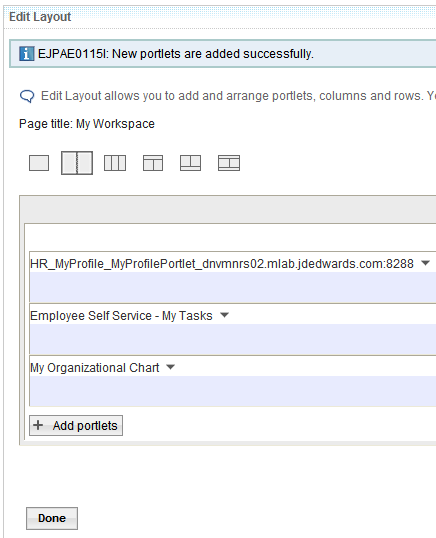
Click "Done".
Description of the illustration wws031.png
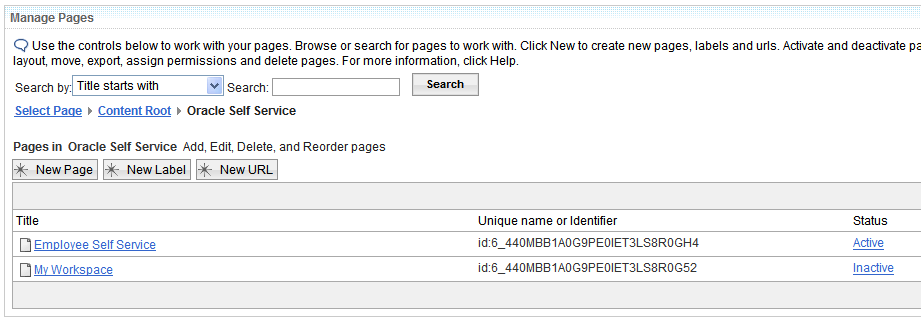
-
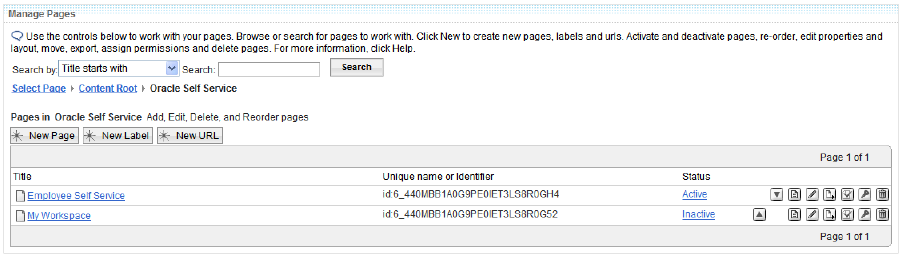
The status of the portal page should be active for the portal page to be available to the user. If any of the portal pages are inactive, then activate the portal page by clicking on the "inactive" link. In this image, "My Workspace" is inactive. Activate by clicking on the "inactive" link.
Description of the illustration wws032.png
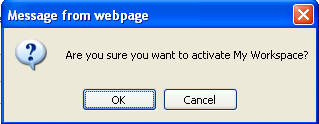
-
Click "OK".
Description of the illustration wws033.png
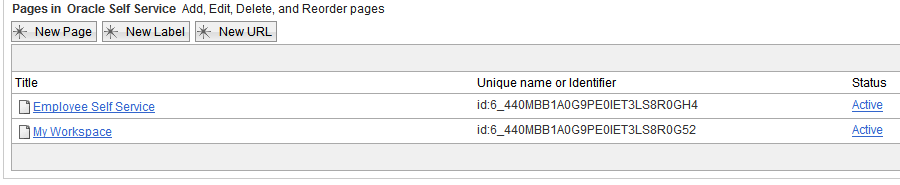
-
Make sure that "My Workspace" is active.
Description of the illustration wws034.png
-
To view the "My Workspace" portal page created, select Oracle Self Service, My Workspace.
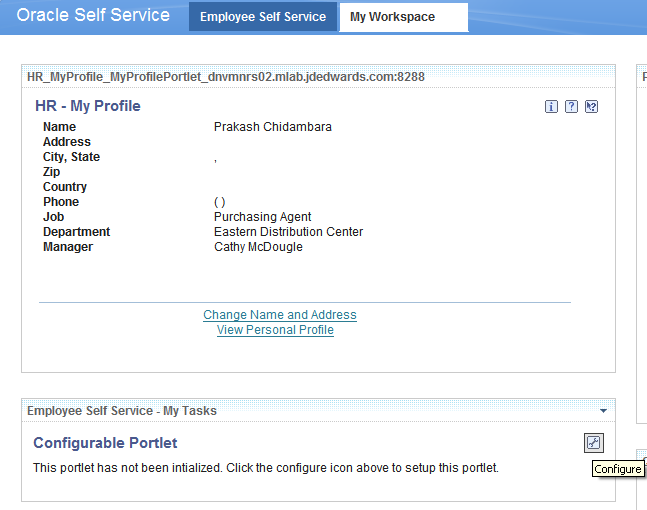
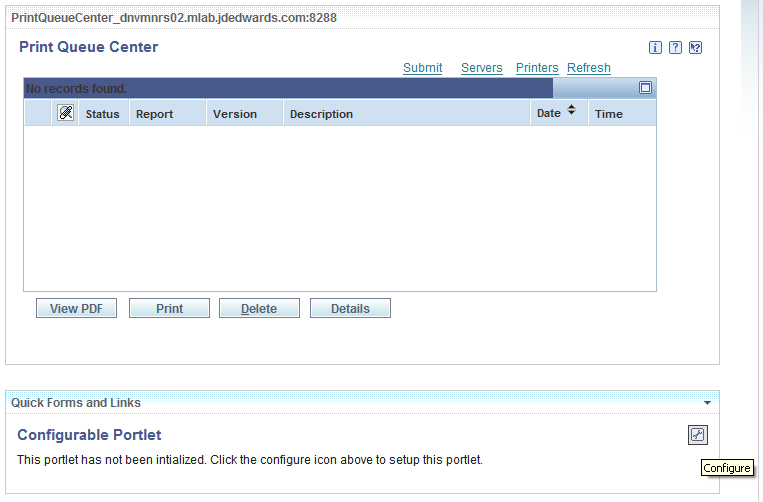
Description of the illustration wws035.png
-
To configure the "Employee Self Service - My Tasks" portlet, click the Configure icon on the portlet.

Description of the illustration wws036.png
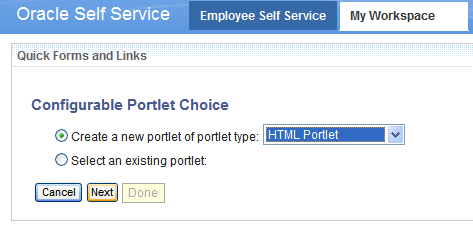
-
Make sure that the "Create a new portlet of portlet type" radio button is selected and then select "HTML Portlet" from the list.
Description of the illustration wws037.png
-
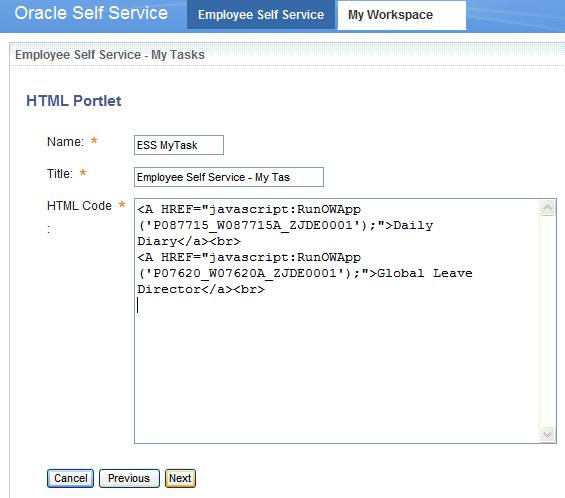
Enter the Name as "ESS MyTask" and Title as "Employee Self Service - My Task" and paste following text in the "HTML Code" text area and click next.
<A HREF="javascript:RunOWApp('P087715_W087715A_ZJDE0001');">Daily Diary</a><br>
<A HREF="javascript:RunOWApp('P07620_W07620A_ZJDE0001');">Global Leave Director</a><br>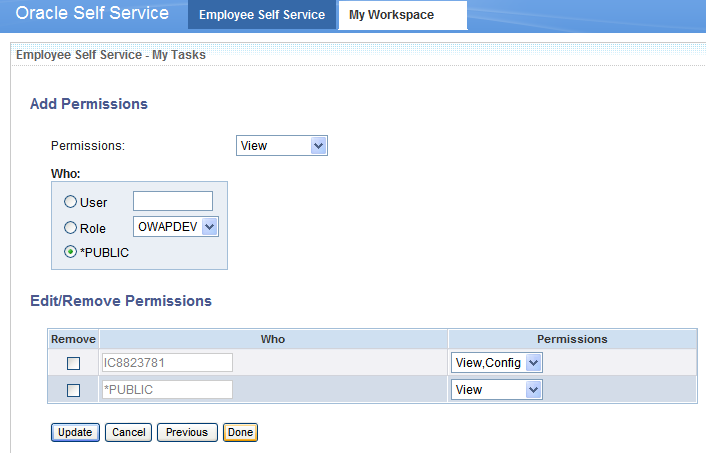
Description of the illustration wws038.png
-
Set required permissions and click "Done".

Description of the illustration wws039.png
-
To configure the "My Organizational Chart" portlet, click the Configure icon on the portlet.

Description of the illustration wws040.png
-
Make sure that the "Create a new portlet of portlet type" radio button is selected and then select "HTML Portlet" from the list.

Description of the illustration wws041.png
-
Enter the Name as "My Org Chart" and Title as "My Organizational Chart" and paste following text in "HTML Code" text area and click next.
<A HREF="javascript:RunOWApp('P08713W_W08713WB_ZJDE0001');">View Chart</a><br>
Description of the illustration wws042.png
-
Set required permissions and click "Done".
Description of the illustration wws043.png
-
To configure the "Employee Self Service - My Tasks" portlet, click the Configure icon on the portlet.
Description of the illustration wws044.png
-
Make sure that the "Create a new portlet of portlet type" radio button is selected and then select "HTML Portlet" from the list.
Description of the illustration wws045.png
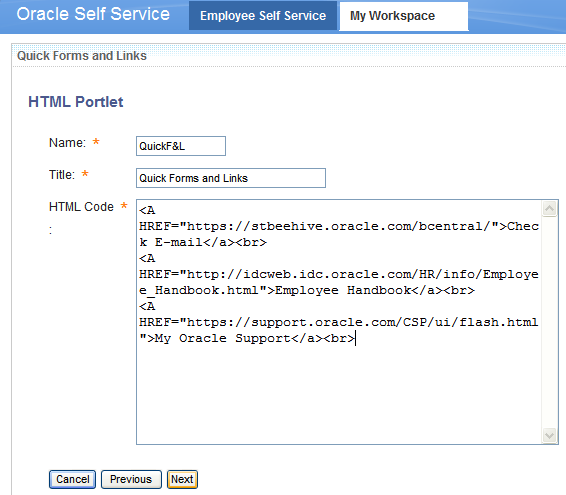
-
Enter the Name as "QuickF&L" and Title as "Quick Forms and Links" and paste the following text in the "HTML Code" text area. Click next.
<A HREF="https://stbeehive.oracle.com/bcentral/">Check E-mail</a><br>
<A HREF="https://idcweb.idc.oracle.com/HR/infor/Employee_Handbook.html">Employee Handbook</a><br>
<A HREF="https://support.oracle.com/CSP/ui/flash.html/">My Oracle Support</a><br>
Description of the illustration wws046.png
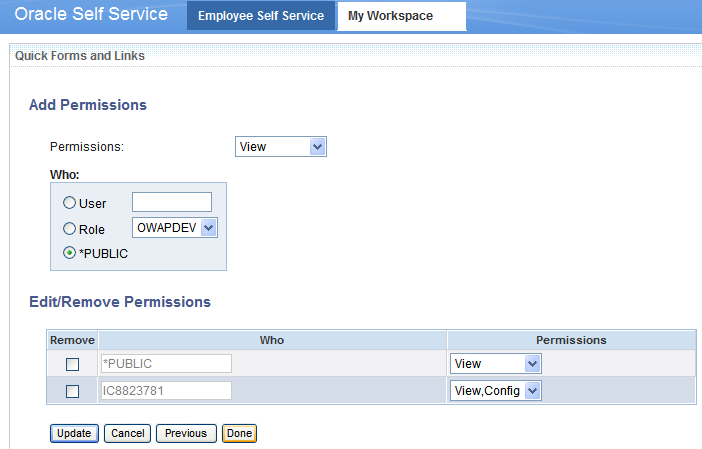
-
Set the required permissions and click "Done".
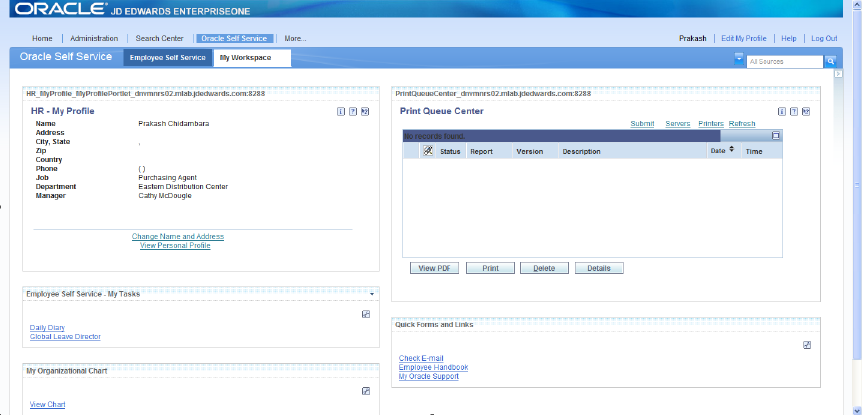
Description of the illustration wws047.png
-
The above image displays the completed My Workspace page.