2 Working with Forms
This chapter contains the following topics:
2.1 Understanding Forms
Use Oracle's JD Edwards EnterpriseOne Tools Form Design Aid (FDA) to create one or more forms for an application. A form is a graphical user interface where users interact with the system. A form can be used to search and display data, as well as enter new data and modify existing data.
A single application can contain one or more forms. Usually, a find/browse form is the first form that appears in the application. It enables the user to locate a specific record with which to work. Upon selecting a record, a subsequent form such as a fix/inspect form can be used to provide details of the record. With the introduction of power forms, applications can use one single power form to locate a specific record and display its detail records on one form.
A form has these elements:
-
Form type
The form type establishes the basic purpose of a form. Each form type has default controls and processes.
-
Business view
In an application, a business view (BV) links forms and tables efficiently by providing access only to that data required by the application. For example, if you have two tables with twenty columns each and the application only needs to access one column from one table and two columns from the other, you can make a BV that contains only those three columns. the application is more efficient because searches are limited only to those three columns, but the application still updates the actual tables when necessary. You must associate all forms, except the message form, with a BV.
-
Controls
All objects on a form are controls. Controls include grids, check boxes, radio buttons, push buttons, subforms, and more.
-
Properties
Properties define the appearance and function of the application, the forms in the application, and each control on each form.
-
Data structure
A data structure defines the data that can be passed between forms. Data in the form data structure can be passed in or out of the form.
-
Event rules
Event rules (ER) can contain processing instructions for specific events. Events are actions that occur on a form, such as clicking a button or using the Tab key to move out of a field. Use ER to attach business logic to any event. Events are triggered either as a result of user interaction with a control, such as clicking a button, or as a result of a system-controlled process, such as loading a grid.
See JD Edwards EnterpriseOne Tools Event Rules Guide.
JD Edwards ER Compare tool provides a side-by-side, visual comparison of an application's event rules, and another version of the event rules in another location. For example, ER Compare lets you compare a modified application to the original version of that application on the server or in an ESU.
See "JD Edwards EnterpriseOne ER Compare" in the JD Edwards EnterpriseOne Tools Software Updates Guide.
2.2 Understanding Form Interconnections
You can call a form from a form. This kind of form interconnection falls into two categories, modal and modeless:
-
Modal interconnections enable the user to view only one form at a time. After the child form begins, the user cannot access the parent form until the child form is closed.
Additionally, the data connection between the parent and child is usually static. Input data structure items are populated when the child form is launched, and output data structure items are populated when the child form closes. Parent form ER that follows a modal form interconnection call executes after the child form is closed.
In addition to static data connections, you can create dynamic form interconnections. A dynamic form interconnection enables you to call a form by passing the application and form ID. A dynamic form interconnection is always modal.
-
Modeless interconnections enable the user to view multiple forms at the same time. After the child form is started, users can switch back and forth between the parent form and the child form. Additionally, data changes on a parent or child form are immediately reflected in all other open forms in the connection.
Modal is the default interconnection type. Modal interconnections are appropriate when you want to lead the user through a particular process in which a number of values must be input in a specific order. In this case, you want the user to completely fill out each form before moving on to the next one. Add and copy functions also lend themselves to modal processing because you want the user to complete the function before going on to others.
Modeless interconnections are valuable when the user needs to view or update a series of data records. Avoid using modeless form interconnections if both the parent and child forms should be presented to the user at the same time. A power form is more appropriate in this case.
The parent form in a modeless interconnect must be a find/browse form. The child form type can be fix/inspect or transaction forms (header and headerless detail). When the user updates a record on the transaction form, the parent find/browse form automatically reflects the change.
When the user closes the parent form, the system closes all its modeless children forms.
Parent form ER that follow a modeless form interconnection call execute immediately instead of waiting for the child form to return.
2.3 Configuring Forms at Design Time
The property settings for a form control its appearance, how it displays errors, and how it interacts with its underlying business views. When you first create a form, the system prompts you to configure its properties. You can change the properties of a form later in the design process.
Some property values are common to all form types, although many are shared by just a few. This table lists the property values for all form types. The descriptions given in some cases are for general use only. If a particular property significantly impacts a given form type, then those impacts are discussed in detail in the section devoted to that form type.
2.4 Creating Forms
This section provides an overview of form creation and discusses how to:
-
Create a form.
-
Create a modal form interconnection.
-
Create a Dynamic Modal Form Interconnection.
-
Create a modeless form interconnection.
2.4.1 Understanding Form Creation
Use FDA to create one or more forms that appear in an application. These forms are the visual interface for the end user of the application and enable that user to view, add, or modify data that is stored in one or more tables.
After you create the form, you can modify the system data for the form, such as its metadata, Help ID, and so forth.
2.4.1.1 Recommended FDA Configuration
FDA offers a variety of tool bars and panes that you can place on the desktop while you work. This list provides recommendations for using these objects:
-
Display the Main Toolbar, Layout, and Insert Controls tool bars at all times.
-
Use the Insert Controls tool bar to insert controls on a form.
-
Display the Application Tree View whenever possible.
The pane helps you keep the entire application in mind, and it provides an easy way to open other objects in the application.
-
Display the Property Browser at all times and use it to set the properties for all objects.
-
Display the Tab Sequence Toolbar when working with power forms and subforms.
This table lists the objects, why you would use them, and how to display them:
2.4.2 Creating a Form
This task provides a general overview of the typical form creation process. Many of the steps in this task are described in greater detail in other topics.
To create a form:
-
In Oracle's JD Edwards EnterpriseOne Object Management Workbench (OMW), create an application or open an existing one, and then start FDA.
-
On Form Design Aid, select the type of form you want to create.
-
Configure the form properties as appropriate.
-
If required, attach one or more BVs to the form by selecting Form, Business View, Add Business View.
Headerless detail forms permit you to attach two BVs to them; all other forms, except for message forms, permit you to attach only one. You cannot attach a BV to a message form.
-
Add and configure controls, as required.
Set the Data Item Information property for a control to attach DD items or BV columns to it. To attach ER to a control, right-click the control and select Event Rules. To set text variables for a control, right-click the control and select Text Variables.
-
Arrange the controls on the form so that they line up and are equally spaced, and then resize the form to fit.
-
Add menu and tool bar exits to the form.
-
Save and test the form.
2.4.3 Creating a Modal Form Interconnection
To create a modal form interconnection:
-
On Event Rules Design, select an event.
-
Click the Form Interconnect button.
-
On Work with Applications, select the application to which you are connecting.
Work with Forms displays available forms for the chosen application.
-
Select the form to which you want to connect (the target).
-
Select the version of the form to which you want to connect.
The Data Item column displays data items in the data structure of the target form. The keys in the primary unique index for the primary table of the BV are automatically set up as the data structure.
-
In the Available Objects column, select the object that you want to pass and move it to the Data Structure-Value Column.
-
Indicate the direction of data flow between Value and Data Items.
As you click the direction arrow, it toggles through these options:
-
Data flows from the source to the target.
-
Data flows from the target to the source.
-
Data flows from the source to the target and, upon exiting the target, data flows back to the source.
-
Upon exiting the target, data flows back to the source.
-
No data flows either way.
-
-
Select the Include in Transaction option to include this interconnection for transaction processing.
This option is available for entry only if you are calling from a fix/inspect, header detail, or headerless detail form.
-
Click one of these buttons to add notes:
-
Structure Notes
-
Parameter Notes
-
-
After the data structure is defined, click the OK button.
Event Rules Design displays the form interconnect with this statement:
Call (Application <name> Form <name>)
2.4.4 Creating a Dynamic Modal Form Interconnection
To create a dynamic form interconnection:
-
On Event Rules Design, select an event.
-
Click the System Function button.
-
Select the General folder.
-
Select Dynamic Form Interconnect (Web Only).
-
Assign event rules to the input values Application ID, Form ID (both are required),Version, and DSValue (both are optional).
If you are not using either Version or DSValue, you must include the pipes around the null values.
-
Click OK to save the interconnection.
2.4.5 Creating a Modeless Form Interconnection
To create a modeless form interconnection:
-
On Event Rules Design for the find/browse form that you want to use (the source), select an event.
-
Click the Form Interconnect button.
-
On Work with Applications, select the application to which you are connecting.
Work with Forms displays available forms for the chosen application.
-
Select the form to which you want to connect (the target).
The Form Interconnect - Values to Pass window displays the data structure for the target form.
-
Select the version of the fix/inspect form to which you want to connect.
The Data Item column displays data items in the data structure of the target form. The keys in the primary unique index, for the primary table of the BV, are automatically set up as the data structure.
-
Select the Modeless option.
-
In the Available Objects column, select objects that you want to pass and move them to the Data Structure-Value column.
-
Indicate the direction of data flow between Value and Data Items.
As you click the direction arrow, it toggles through these options:
-
Data flows from the source to the target.
-
Data flows from the target to the source.
-
Data flows from the source to the target and, upon exiting the target, data flows back to the source.
-
No data flow.
-
-
Click one of these buttons to add notes:
-
Structure Notes
-
Parameter Notes
-
-
After you define the data structure, click the OK button.
Event Rules Design displays the form interconnect with this statement:
Call http://ple-mbarrera:8080/PSOL/e1tools896pbr0/eng/psbooks/index.htm
(Application <name> Form <name>)
2.5 Working with the Accessibility Violation Check Feature
This chapter provides an overview of the accessibility violation check feature and discusses how to:
-
Enable the Accessibility Violation Check feature.
-
Identify empty tooltips using the Accessibility Violation Check feature.
2.5.1 Understanding Accessibility Violation Check Feature
Accessibility Violation Check enables the EnterpriseOne application to capture the Accessibility violations at design time. It provides a way in the Form Design Aid (FDA) to implement empty tooltip validation on image controls. Accessibility Violation Check is developed in FDA wherein the EnterpriseOne application generates a warning report for all the image controls that have an empty tooltip.
The Accessibility Violation Check feature is available in 8.98 tools release only with JD Edwards EnterpriseOne 9.0 Apps release and above.
2.5.2 Enabling the Accessibility Violation Check Feature
You must enable the Accessibility Violation Check in EnterpriseOne in order to access it. To enable the Accessibility Violation Check feature:
-
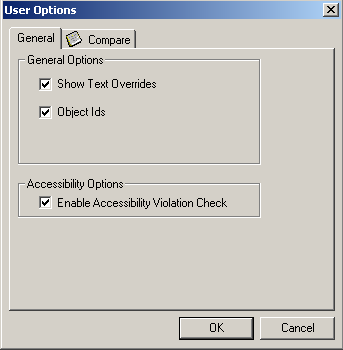
In FDA, click the View menu, and then select User Options.
-
On User Options, click the General tab.
-
Select the Enable Accessibility Violation Check option, as shown in this example:
-
Click OK.
The check box for the Enable Accessibility Violation Check is selected by default. If you want to disable the feature, you must clear the Enable Accessibility Violation Check option.
2.5.3 Identifying Empty Tooltips Using Accessibility Violation Check Feature
To ensure that all the applications developed in EnterpriseOne have tooltips inserted on image controls, perform the following steps:
-
Verify that the Accessibility Violation Check option is selected on the User Options screen.
-
Click File, and then select Check Accessibility Violation Check.
-
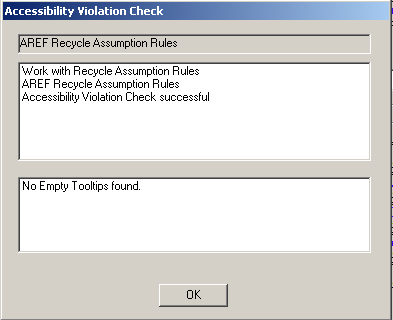
EnterpriseOne performs a violation check for all the image controls that have an empty tooltip and generates the Accessibility Violation Check screen.
-
If all the image controls have tooltips inserted, EnterpriseOne displays the No Empty Tooltips found message, as shown in this example:
Note:
If the image controls have empty tooltips, EnterpriseOne displays details of the warnings and the location of the log file. -
Click Yes on the Accessibility Violation Check screen to view the log files for the warnings generated.
The log file generated provides information about:
-
Application Name
-
Application Title
-
Form Name
-
Warning Description
-
Bitmap Control ID
-
Bitmap ER Title
Note:
If you close any given EnterpriseOne application with empty tooltips, then the system displays an error message. Click Yes to exit the application, click No to remain in the application.
2.6 Working with Quick Form
This section discusses how to use Quick Form. By default, a form is opened in update mode. This means the system will only update existing data records. If a form is launched by a form interconnect statement in the Add button, then the form will be opened in add mode. This means the system will add new data into a business view when the form is closed.
2.6.1 Prerequisite
Attach a BV to the form.
2.6.2 Using Quick Form
Quick Form enables you to place multiple database fields on a form faster than choosing each data item individually. Select one or more data items, and Quick Form automatically places the fields on the new form simultaneously.
Depending on the number of selected fields, you might need to resize the form or move and align fields to achieve the desired layout.
To use Quick Form:
-
On Form Design Aid, select Form, Quick Form.
-
On Quick Form layout, select the number of columns of controls you want on the form and whether you want the columns arranged horizontally or vertically.
-
Select the data items from the BV that you want to display and move them to the columns in the form pane.
-
Use the buttons under the columns in the form pane to order the data items.
-
Click the OK button to place the fields on the form.
Quick Form remains open so that you can adjust the arrangement by changing the columns per row and the vertical and horizontal placement.