4 Configuring IBM WebSphere Portal Server v7.0 to use Oracle Database
This chapter discusses configuring the Oracle database for the IBM Websphere portal server v7.0. It contains the following topics:
-
Section 4.3, "Creating the Oracle Database for IBM WebSphere Portal Server v7.0"
-
Section 4.4, "Using ConfigEngine Task to Automatically Set Up the Database"
-
Section 4.5, "Manually Transferring Data from the Default Database to the Oracle Database"
4.1 Before You Begin
Before beginning the database configuration, verify that a supported version of Oracle Database software is installed. Refer to the Minimum Technical Requirements for this information. In addition, it is strongly recommend that you visit the IBM WebSphere Portal Version v7.0 Information Center and review the "Configuring WebSphere Portal to use a database" section:
For advanced configurations, refer to the IBM WebSphere Portal Version v7.0 Information Center.
4.2 Working with Properties Files
You must modify the appropriate properties files before transferring your data from the default database to the Oracle or Oracle RAC database.
-
Multiple databases can be used to hold information for applications such as Feedback and LikeMinds. For example, you could use the following property values:
-
release.DbName=reldb
-
jcr.DbName=jcrdb
-
feedback.DbName=fdbkdb
-
likeminds.DbName=lmdb
-
community.DbName=commdb
-
customization.DbName=custdb
-
-
If you are using a remote database, enter the values for the remote server.
-
Regardless of the operating system, use a forward slash (/) instead of a backslash (\) in the property files for file system paths.
-
There might be additional database properties other than those listed here. Only change the properties within this task and skip all other properties.
-
The recommended value listed for each property represents the specific information that is required to configure WebSphere Portal to your target database.
-
Depending on which database domain has to be configured, replace dbdomain with:
-
release
-
customization
-
community
-
jcr
-
feedback
-
likeminds
-
-
The values for at least one of the following properties must be unique for the release, customization, community, and JCR domains:
-
dbdomain.DbName
-
dbdomain.DbUrl
-
dbdomain.DbSchema
-
-
If you use the same values for all three properties across the release, customization, community, and JCR domains, the database-transfer task fails due to ambiguous database object names.
-
If DbUser, DbUrl, and DbPassword are not the same across domains, the value for DataSourceName must differ from the DataSourceName of the other domains. In other words, this value must be unique for the database domain.
When doing a single database, single user, and multi schema database transfer, there can be only one user for each domain (release, community, customization, JCR, Feedback, and LikeMinds), and the schema for each database must be different. The user must be a superuser or DBA and must have authority over all other schemas for the transfer to work.
-
Locate the following files and create a backup copy of each before changing any values:
-
wp_profile_root/ConfigEngine/properties/wkplc.properties
-
wp_profile_root/ConfigEngine/properties/wkplc_dbdomain.properties
-
wp_profile_root/ConfigEngine/properties/wkplc_dbtype.properties
Default values are listed in these files. Unless otherwise noted, all values are of type alphanumeric text string. Print out the steps below for reference before modifying the properties files. Make sure to enter the appropriate values for each instance of each property. In wkplc_dbdomain.properties, most properties are repeated for each domain.
-
-
Use a text editor to open the properties file wkplc_dbdomain.properties and modify the values to correspond to your environment.
-
For dbdomain.DbType, type oracle.
-
For dbdomain.DbName, type the name of the WebSphere Portal domain database.
Note:
This value is also the database element in the dbdomain.DbUrl property. -
For dbdomain.DbSchema, type the schema name of the database domain.
Note:
Review your target database management system documentation to define a valid schema name. Some database management systems have schema name restrictions that you need to understand. -
For dbdomain.DataSourceName, type the name of the data source that WebSphere Portal uses to communicate with its databases.
Do not use the following reserved words:
-
releaseDS
-
communityDS
-
customizationDS
-
jcrDS
-
lmdbDS
-
feedback
-
-
For dbdomain.DbUrl, type the database URL used to access the WebSphere Portal database with JDBC. The value must conform to the JDBC URL syntax specified by the database.
Note:
The database element of this value should match the value of DbName. -
For dbdomain.DbUser, type the user ID for the database configuration user.
-
For dbdomain.DbPassword, type the password for the database configuration user.
-
For dbdomain.DbConfigRoleName, type the name of the group for database configuration users. Database rights are granted to this group instead of individuals. The user specified for dbdomain.DbUser must be assigned to this group.
-
Optional: For dbdomain.DbRuntimeUser, type the user ID of the database user that should be used by WebSphere Portal to connect to the database at runtime. If no value is specified for this setting, the database configuration user will be used to connect to the databases at runtime.
If dbdomain.DbRuntimeUser is specified, you must set dbdomain.DbRuntimePassword to be the password of the runtime database user.
-
For dbdomain.DbRuntimeRoleName, type the name of the group for database runtime users. Database rights are granted to this group instead of individuals. The user specified for dbdomain.DbRuntimeUser must be assigned to this group.
-
Optional: For dbdomain.DBA.DbUser, type the database administrator user ID for privileged access operations during database creation. If you do not need this parameter, you can either accept the default value or leave blank.
-
Optional: For dbdomain.DBA.DbPassword, type the database administrator password for privileged access operations during database creation. If you do not need this parameter, you can either accept the default value or leave blank.
-
For dbdomain.DbHome, type the root location for the database.
Note:
This value is used to specify the location to create the tablespaces.
-
-
Save and close the file.
-
Update the following properties in the file wkplc_dbtype.properties.
-
For oracle.DbDriver, type the name of the Oracle JDBC driver class.
-
For oracle.DbLibrary, type the directory and name of the .jar file that contains the JDBC driver class.
-
For oracle.JdbcProviderName, type the name of the JDBC provider that WebSphere Portal uses to communicate with its databases.
-
-
Save and close the file.
-
Update the WasPassword value in the wkplc.properties file. This value is the password for the WebSphere Application Server security authentication used in your environment.
-
Save and close the file.
4.3 Creating the Oracle Database for IBM WebSphere Portal Server v7.0
To create the Oracle database for IBM WebSphere Portal Server v7.0:
-
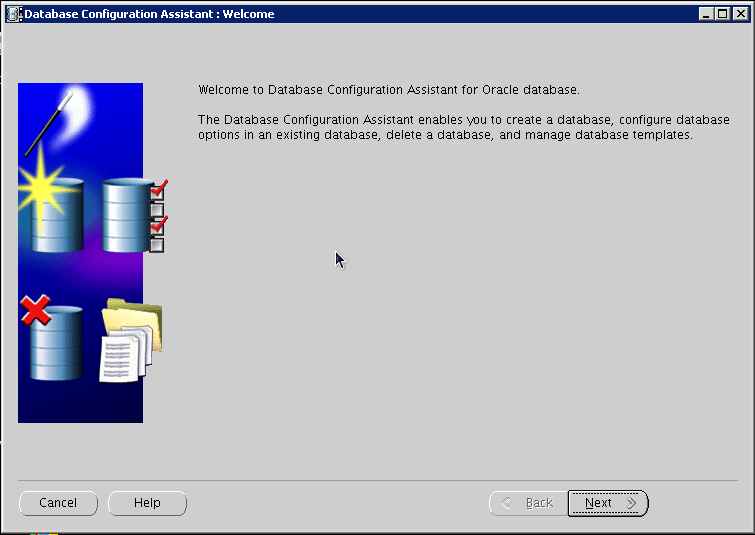
Launch Database Configuration Assistant (dbca), and then click Next on the following screen:
Description of the illustration image030.png
-
Select Create a Database, and click Next:

Description of the illustration image032.png
-
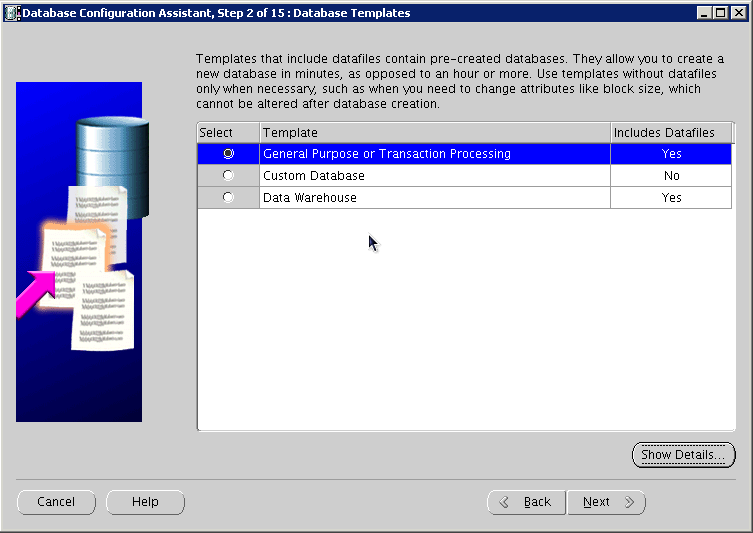
Select the "General Purpose or Transaction Processing" option, and click Next:
Description of the illustration image034.png
-
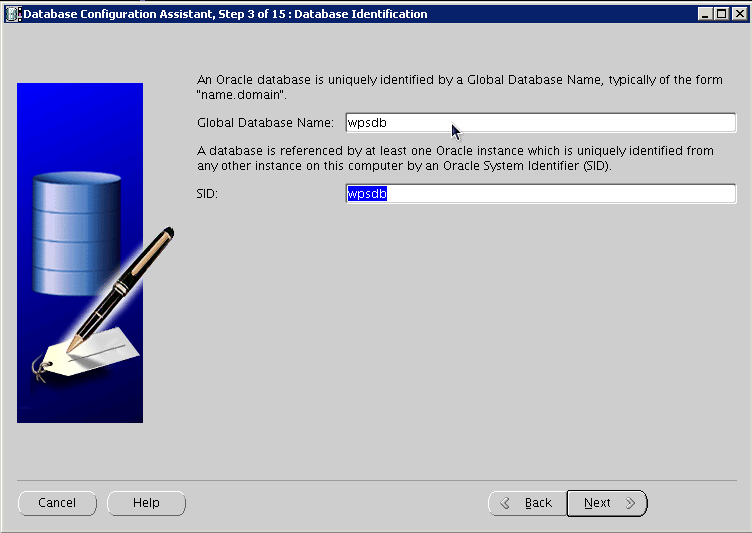
Provide the SID, and click Next:
Description of the illustration image036.png
-
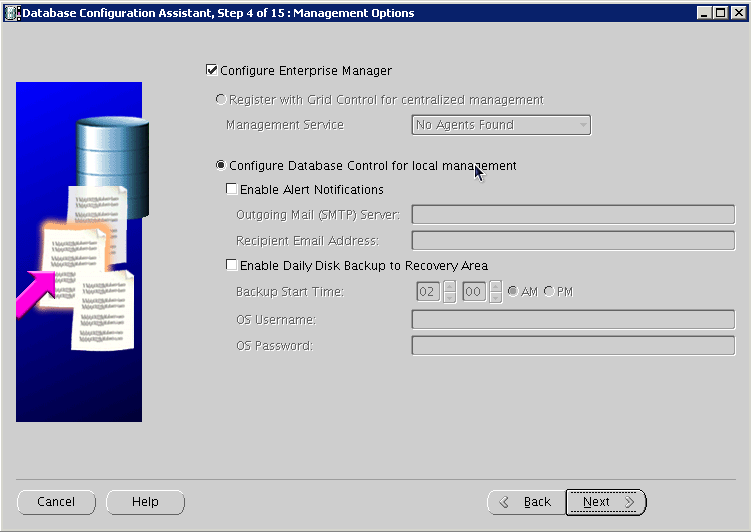
Select Configure with EnterpriseManager, and click Next:
Description of the illustration image038.png
-
Provide account and password details, and click Next:
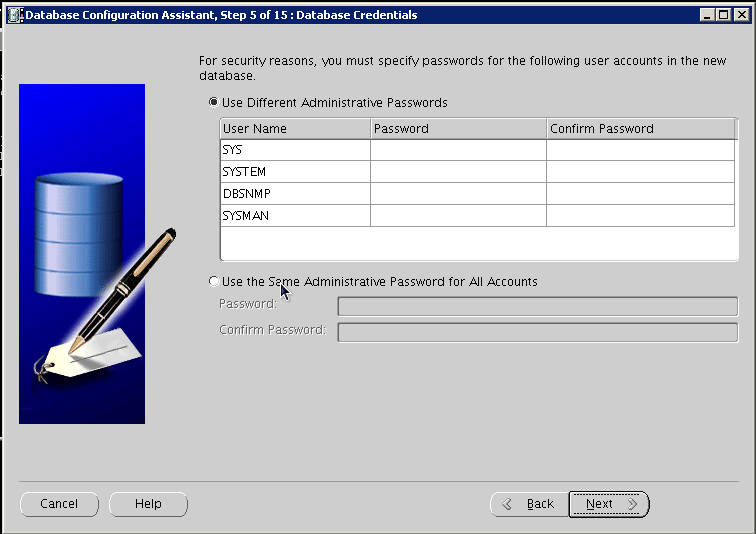
Description of the illustration image040.png
-
Configure storage options, and click Next:
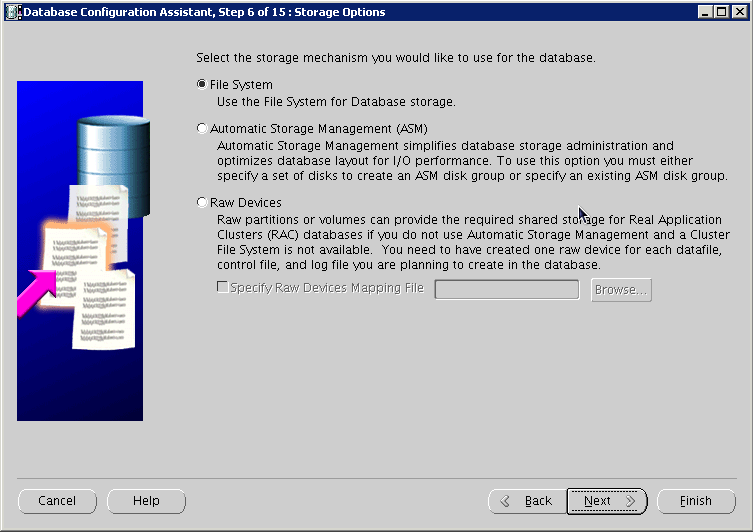
Description of the illustration image042.png
-
Configure file locations, and then click Next:
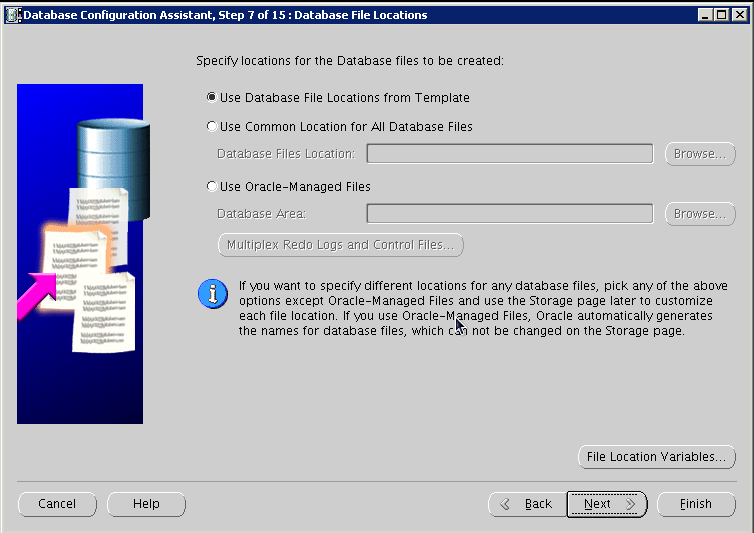
Description of the illustration image044.png
-
Configure recovery options, and click Next:
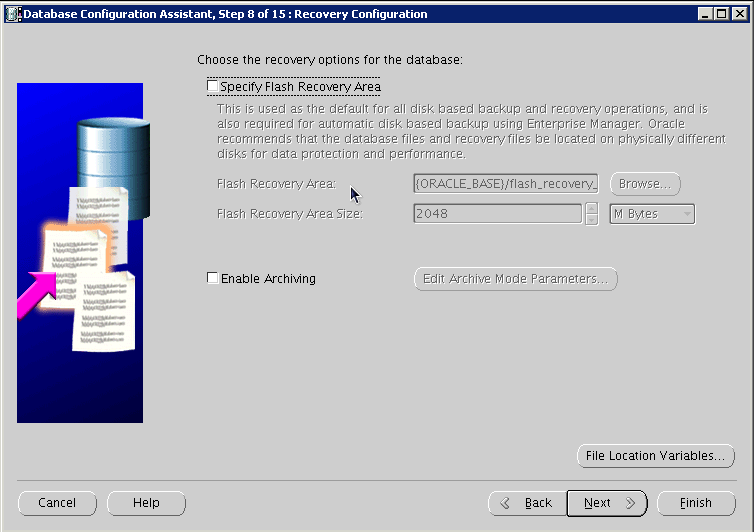
Description of the illustration image046.png
-
Do Not install sample schemas, and click Next:
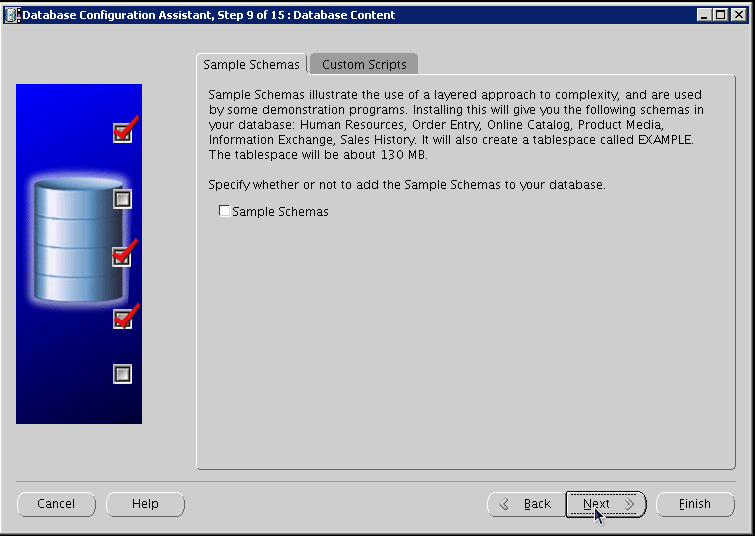
Description of the illustration image048.png
-
Configure UNICODE Character Set:

Description of the illustration image050.png
-
Configure Connection Mode, and click Next:
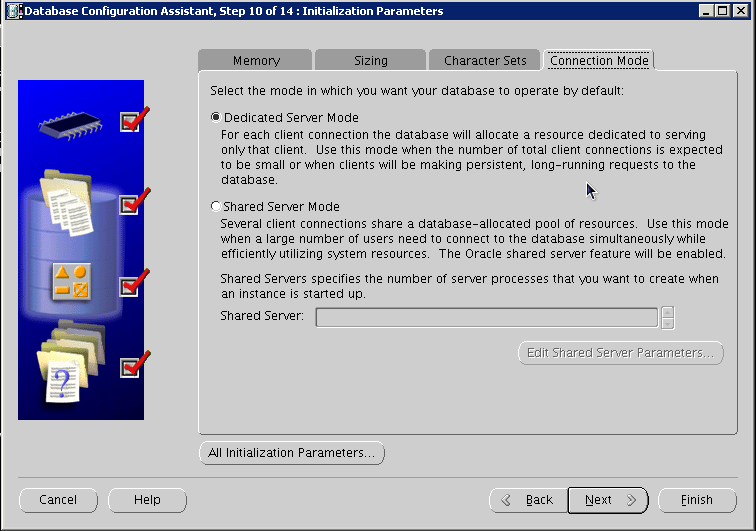
Description of the illustration image052.png
-
Configure Security settings, and click Next:

Description of the illustration image054.png
-
Configure maintenance task, and then click Next:
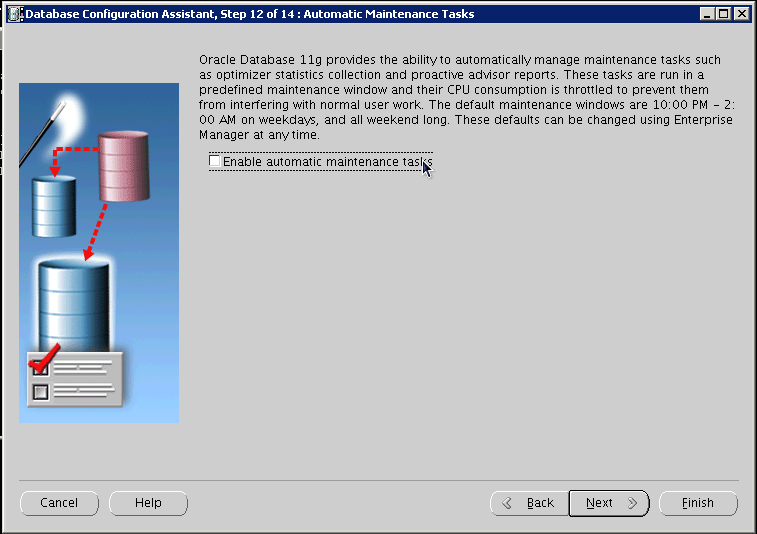
Description of the illustration image056.png
-
Review storage information, and click Next:
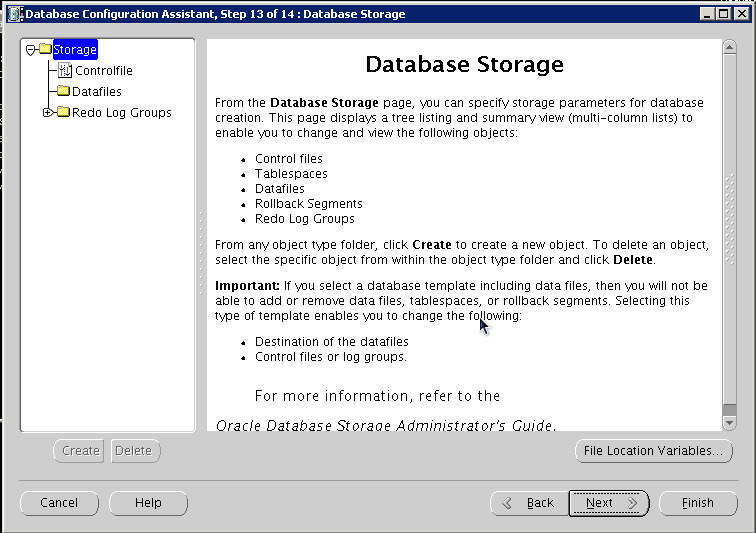
Description of the illustration image058.png
-
Review information, and click Finish:
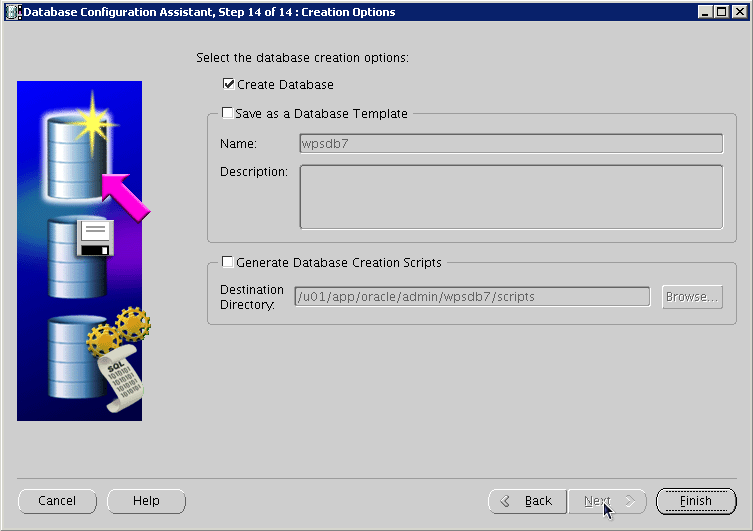
Description of the illustration image060.png
-
Once the installation completes review the installation summary information:
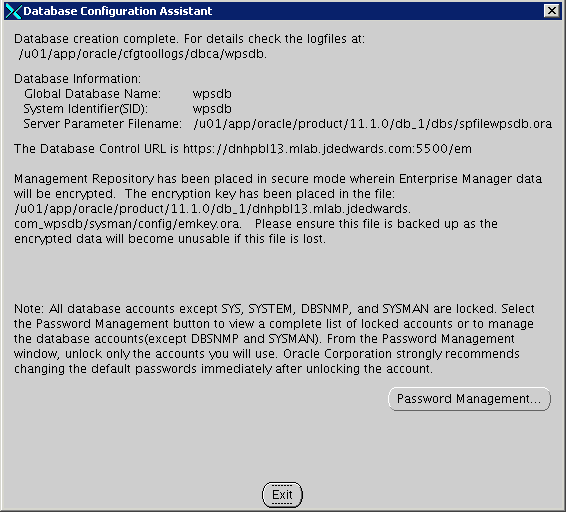
Description of the illustration image062.png
-
From sqlplus command line, perform the following select query:
SQL> select * from NLS_DATABASE_PARAMETERS;The following image is provided for reference:
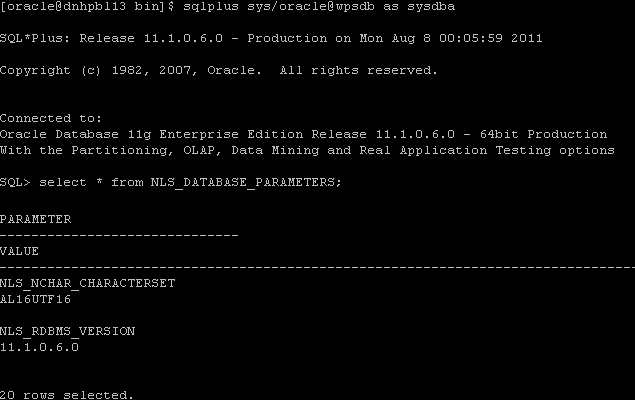
Description of the illustration image064.png
Listed below are some important considerations before setting up Oracle databases to work with WebSphere Portal.
For information about creating databases, refer to the Oracle product documentation. For information on the recommended database architecture and the databases you will need to create, see the Planning for Oracle topic. Be sure that all databases to be used with WebSphere Portal are created as UNICODE character set databases.
If you are using Oracle 10g databases, you must also obtain a copy of the ojdbc6.jar file from the Oracle JDBC driver download site, copy it to the WebSphere Portal machine, and update the wkplc_dbtype.properties file with oracle.DbLibrary=(the path to the local ojdbc6.jar). If you are using Oracle 11g databases, you must also copy the ojdbc6.jar file from the Oracle server to the WebSphere Portal machine and update the wkplc_dbtype.properties file with oracle.DbLibrary=(the path to the local ojdbc6.jar). The typical location is the oracle_home/sqldeveloper/jdbc/lib directory. Record the copy location on your local machine for future reference.
When creating Oracle databases for use with WebSphere Portal, you should consider the following information:
-
The Oracle databases must be created manually before configuring WebSphere Portal.
-
All databases must be created using UNICODE Database and National character sets such as UTF8, AL32UTF8, or AL16UTF16.
-
It is recommended that all databases to be used with WebSphere Portal are configured in Dedicated Server Mode.
-
Determine if your Oracle server will be remote or local to the WebSphere Portal installation.
-
After installing the database software for WebSphere Portal, you will need to set the buffer pools allocated to the Oracle database in order for WebSphere Portal to communicate with the Java Content Repository database. Use the following recommended values as a guide. Refer to the Oracle product documentation for information on how to set the buffer pools. Recommended initial buffer pool sizes:
db_block_size = 8192 bytes
db_cache_size = 307,200 bytes
db_files = 1024 files
log_buffer = 65536 bytes
open_cursors = 1500 cursors
pga_aggregate_target = 204,800 bytes
pre_page_sga = true
processes = 300 processes
shared_pool_size = 204,800 bytes
Note:
If you are using IBM Java Content Repository, the open_cursors value may need to be increased based on the table count in the Java Content Repository schema. -
Raise the number of parallel servers as appropriate. For example, if you have more than 875 parallel servers, you should set the parallel_max_serversto 1200.
-
The Oracle parameter CURSOR_SHARING allows similar SQL Statements to be shared when possible, which prevents parsing and establishing a new execution plan. The execution plan is used by Oracle to gather the data needed to satisfy a request. There are two options for CURSOR_SHARING, which are as follows:
-
FORCE
When you select this option, Oracle uses the same execution plan for all SQLs that are similar in value even if the values are different. When you use this option, the execution plan may not provide optimum performance. For example, similar SQLs with different values may behave differently when executed running the same plan.
-
EXACT
When you select this option, Oracle only shares the same execution plan for SQLs that are identical and use the same values. This option removes the risk of a SQL statement being executed when optimum performance conditions do not exist.
-
-
WebSphere Portal supports both options. Regardless of the option selected, portlet applications should not be affected. Contact your database administrator for further assistance on these options.
Refer to the following instructions for creating tablespaces:
-
In the database directory, create the data directory data and the index directoryindex.
-
Create tablespaces using the following commands as examples:
-
Substitute the values of your environment for the following variables:
-
&jcrdb. is the name of the database you created to store user data.
-
&dbpath. is the directory where you created the database; the default path is /oracle/oradata.
-
-
Ensure that the '.' is included in the variables when you substitute the values of your environment with these variables.
Important:
You must use the same table space names listed in the commands. The table space names cannot be customized or modified.create tablespace ICMLFQ32 datafile '&dbpath./&jcrdb./data/&jcrdb._ICMLFQ32_01.dbf' size 300M reuse autoextend on next 10M maxsizeUNLIMITED extent management local autoallocate; create tablespace ICMLNF32 datafile '&dbpath./&jcrdb./data/&jcrdb._ICMLNF32_01.dbf' size 25M reuse autoextend on next 10M maxsizeUNLIMITED extent management local autoallocate; create tablespace ICMVFQ04 datafile '&dbpath./&jcrdb./data/&jcrdb._ICMVFQ04_01.dbf' size 25M reuse autoextend on next 10M maxsizeUNLIMITED extent management local autoallocate; create tablespace ICMSFQ04 datafile '&dbpath./&jcrdb./data/&jcrdb._ICMSFQ04_01.dbf' size 150M reuse autoextend on next 10M maxsizeUNLIMITED extent management local autoallocate; create tablespace ICMLSNDX datafile '&dbpath./&jcrdb./index/&jcrdb._ICMLSNDX_01.dbf' size 10M reuse autoextend on next 10M maxsizeUNLIMITED extent management local autoallocate;
-
Set the size, autoextend, and maxsize values according to your environment. For example, you may want to change the maxsize to a set value rather than UNLIMITED.
-
Consult your Database Administrator for specific guidance about creating tablespaces for your environment.
-
Refer to the Oracle command reference for more information about using the create tablespaces command.
-
4.4 Using ConfigEngine Task to Automatically Set Up the Database
This topic provides instructions on automatically setting up your database using the ConfigEngine task to create users, grant permissions, and create Java Content Repository table spaces.
-
On the database server, make sure the subfolders your_oracle_instance/data and your_oracle_instance/index exist. If this folder hierarchy does not exist, create it manually before you run the setup-database task.
The setup-database task requires these folders to create table spaces. If these folders do not exist, the setup-database task will fail. Note: The setup-database task creates the table spaces, index spaces, and the database users as specified in the properties files.
-
Change to the directory wp_profile_root/ConfigEngine
-
To create the database users, type the following command:
Note:
The task setup-database assigns the minimum database privileges to the database configuration and runtime database users../ConfigEngine.sh setup-database -DWasPassword=password
4.5 Manually Transferring Data from the Default Database to the Oracle Database
This section provides information on how to manually transfer data from the default database to the Oracle database you have installed and set up. Follow these steps to transfer WebSphere Portal, and Java Content Repository databases to Oracle. As an alternative to the manual database transfer procedure described here, you can use the configuration wizard to complete the database transfer task.
Before you begin, ensure that the following prerequisites are met:
-
Supported database software is installed.
-
Databases and users are set up.
-
Property files are modified.
Tips:
If you are transferring from Oracle or Oracle RAC, the open_cursors setting should be set to 1500 by default. However, you might need to increase this value based on the table count in the Java Content Repository schema.When doing a single database, single user, and multi schema database transfer, there can be only one user for each domain (release, community, customization, JCR, Feedback, and LikeMinds), and the schema for each database must be different. The user must be a superuser or DBA and must have authority over all other schemas for the transfer to work.
-
Open a command prompt and change to the directory wp_profile_root\\ConfigEngine.
-
Enter the ./ConfigEngine.sh validate-database -DWasPassword=password command to validate configuration properties.
Tip:
Add the -DTransferDomainList parameter to the above validating task to specify the domains you want to validate; for example: -DTransferDomainList=jcr. If you want to validate all domains, you do not need to specify this parameter on the command line. -
From the same command prompt as the previous steps, change to the directory wp_profile_root\\bin.
-
Stop both the server1 and WebSphere_Portal servers:
-
./stopServer.bat server1 -username admin_userid -password admin_password -
./stopServer.bat WebSphere_Portal -username admin_userid -password admin_password
-
-
Transfer the database:
-
Change to the directory wp_profile_root\\ConfigEngine.
-
Enter the following command:
./ConfigEngine.sh database-transfer -DWasPassword=passwordNote:
To select specific database domains to transfer, modify the -DTransferDomainList specified in the command to include only the domains that you want to transfer. For example, to transfer only the JCR domain you can enter the following command:./ConfigEngine.sh database-transfer -DTransferDomainList=jcr -DWasPassword=password -
After running the task, a message is added to the following log file for you to verify the task ran successfully: wp_profile_root\\ConfigEngine\\log\\ConfigTrace.log
-
If the configuration fails, verify the values in the wkplc.properties, wkplc_dbdomain.properties, and wkplc_dbtype.properties files and then repeat this step.
-
-
Optional: If you specified a runtime database user for the dbdomain.DbRuntimeUser parameter, that user must have sufficient database user privileges. To grant the database user privileges, choose either the manual steps or the command line steps:
-
Complete these steps to manually grant database user privileges:
-
Copy the appropriate template files to a work directory. Choose one of the following template files:
-
createRuntimeRoleForDifferentSchema.sql if the name of the database user and the schema name are not the same.
-
createRuntimeRoleForSameSchema.sql if the name of the database user and the schema name are the same.
-
JCR database domain: For the JCR database domain, you must also copy grantExtendedPermissionsToRuntimeRole.sql.
-
-
Locate these files in the following directories:
PortalServer_root\\base\\wp.db.impl\\config\\templates\\setupdb\\dbms\\domain PortalServer_root\\pzn\\prereq.pzn\\config\\templates\\setupdb\\dbms\\domain
-
Replace all placeholder values with the values as defined in wkplc_dbdomain.properties. Placeholder values are surrounded by the character @.
-
Run these statements.
Complete these steps to grant database user privileges with the ConfigEngine task:
Ensure the database administrator user ID is specified for domain.DBA.DbUser in wp_profile_root\\ConfigEngine\\properties\\wkplc_dbdomain.properties. For example, domain.DBA.DbUser=dbadmin.
-
Run the following task: ./ConfigEngine.sh grant-runtime-db-user-privileges -DTransferDomainList=comma_separated_list_of_domains
-
-
After transferring the database tables, run the dbms_stats.gather_schema_stats command to update the database statistics.
For example:
SQL> execute dbms_stats.gather_schema_stats(ownname=> 'jcr', cascade=> TRUE); -
Run the ./ConfigEngine.sh create-jcr-jms-resources-post-dbxfer -DWasPassword=password command to create JMS resources in the new database.
Note:
Regardless of the method used to transfer data (configuration wizard or the steps in this topic), you must run this task to create JMS resources. -
Change to the directory wp_profile_root\\bin.
-
Start the Administrative server (server1) and WebSphere Portal server.