4 Working with the Platform Pack
This chapter discusses:
-
Section 4.4, "Configuring the Enterprise Server Prior to Installing the Platform Pack"
-
Section 4.6, "Manually Running the Database Creation Scripts - Windows with SQL"
-
Section 4.8, "Rerunning the JD Edwards EnterpriseOne Platform Pack Installer"
4.1 Understanding the Platform Pack
The Platform Pack installs these major components:
-
JD Edwards EnterpriseOne Server code
-
JD Edwards EnterpriseOne database files
Note:
Assuming the installation programs are run on different machines, you can concurrently install these JD Edwards EnterpriseOne servers:-
Deployment Server
-
Platform Pack on Enterprise Server and/or Database Server
-
HTML Server
This can decrease the overall time it takes to complete the installation.
Note:
To reinstall any Enterprise Server components, refer to Section 4.8, "Rerunning the JD Edwards EnterpriseOne Platform Pack Installer".This table lists the mandatory and optional components of the Platform Pack installation:
| Server | Mandatory Component | Optional Components |
|---|---|---|
| Enterprise Server | JD Edwards EnterpriseOne Foundation | ES Production
ES Prototype ES Development ES Pristine |
| Database Server | System Database | Production Databases
Prototype Databases Development Databases Pristine Databases |
Note:
Microsoft Windows Considerations. Microsoft clustering is supported for system failover protection.As detailed in the Minimum Technical Requirements, install any Microsoft Windows server upgrades that are required to support Release 9.1.
Before you install Release 9.1 software on the Microsoft Windows Enterprise Server, you must create the Release 9.1 administrator user, verify disk space, and set up and verify the hosts file.
4.2 Platform Pack Process Flow
The Platform Pack installation process installs Release 9.1 system and path code files.
The diagram below illustrates the process flow for the Oracle Universal Installer for the JD Edwards EnterpriseOne Platform Pack.
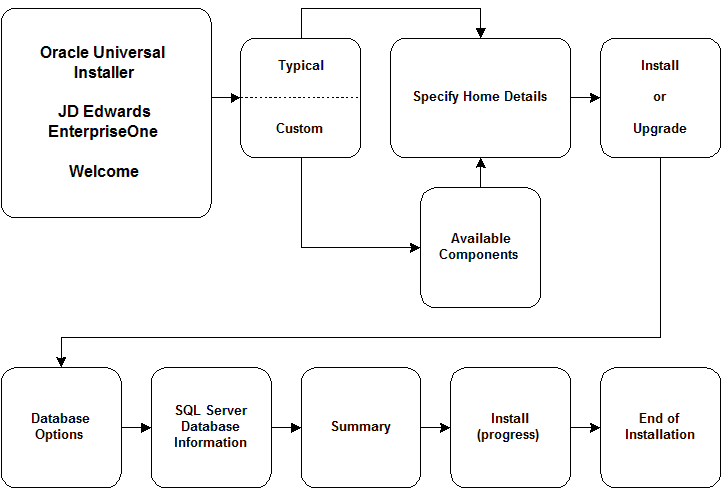
/usr/lib/sysctl.d/00-system.conf
4.3 Preparing the SQL Server Database
This chapter discusses:
4.3.1 General Considerations
System administrators, database administrators, and system implementation personnel should read this chapter in preparation for installing the enterprise or deployment relational database management systems (RDBMS).
The database administrator must install the RDBMS before the software implementation team arrives.
Caution:
If cluster software is used in conjunction with a DBMS additional considerations exist. You should consult cluster installation documentation for the specific DBMS before beginning the Enterprise Server installation.A qualified database administrator should be present when the databases are installed, loaded, configured, and maintained for use with Release 9.1. The database administrator must understand how to maintain the Release 9.1 database. This guide does not discuss RDBMS installation details.
Prior to using the JD Edwards EnterpriseOne Platform Pack Installer to load any databases, you must already have a DBMS installed on the target machine.
4.3.2 Verifying code page settings for SQL Server
The procedure in this section outlines the minimum requirements of a SQL Server environment to run Release 9.1. After completing this procedure, the database might still require significant modifications, such as tuning the system, creating backup or recovery procedures and jobs, and maintaining or expanding the database system.
Note:
When installing or upgrading an alternate language, the correct code page settings must be in your database. When installing or upgrading the database, set up the code page for the language before loading your language specification objects for Release 9.1. Review the LocalCodeSet and code page settings for your database machine environment.From an ISQL window, enter this command:
sp_helpsort
Caution:
If the character set is incorrect, recreate the database with the correct character set.See Also
Refer to the Section 1.6, "Language Process Overview" for the National Language Support tables and other information related to multilingual installations.
4.4 Configuring the Enterprise Server Prior to Installing the Platform Pack
This section discusses:
See Also
Section 2.1, "Verifying Software and Hardware Requirements" for more information about software requirements.
Microsoft Cluster Administrator Guide or Microsoft Windows Server 4 Second Edition for more information on using cluster software.
Release 9.1 on a Cluster section in JD Edwards EnterpriseOne Tools Server and Workstation Administration Guide for more information about clustering.
4.4.1 Setting Up and Verifying the Hosts File
If you use the Domain Naming Service (DNS) or the Microsoft Windows Internet Naming Service (WINS), you do not need to set up and verify the hosts file.
To set up and verify the Hosts file:
-
Using Microsoft Windows Explorer, access this directory:
\Windows\System32\Drivers\Etc\Hosts -
For each Enterprise Server on your network, you will need a machine IP address, and a machine name.
-
Verify that the address and name are each on a separate line, and that there is a return character at the end of each line.
A pound sign (#) marks the start of a comment, and the end-of-line (return) character marks the end of a comment.
-
If clustering is being used, verify that the cluster name is used as the machine name, not one of the server names.
4.5 Installing the Platform Pack
This section discusses:
4.5.1 Running the JD Edwards EnterpriseOne Platform Pack Installer
Caution:
If you are installing the Enterprise Server and the Database Server on different machines, you cannot run the installer on the Enterprise Server and install the Database Server remotely. You must copy the installer images to the Database Server and run the installer on that machine. For the Enterprise Server only, you will need the image for disk1. For a Database Server, you will need the disk1 image plus the database disk images.To run the JD Edwards EnterpriseOne Platform Pack Installer:
-
Log on to the Enterprise Server as a user with Administrative rights.
Caution:
Ensure that the Administrator account name that you use does not contain any special characters. -
Create a folder into which you will copy the .zip file of the Platform Pack image. In addition to the Platform Package image, you will copy two .zip file images for the SQL Server database into this same directory. The directory can be any name but cannot contain spaces or special characters in the directory path. For example, the folder might be named:
c:\WinPPackCaution:
Do not extract the database files into a directory other than the same base directory for the Platform Pack installation. You cannot end up with a functional installation with a structure such as:c:\WinPPack\mssql\mssql -
Extract the three zip files within the root of the folder created above. Using the example in this guide, a correctly extracted structure is:
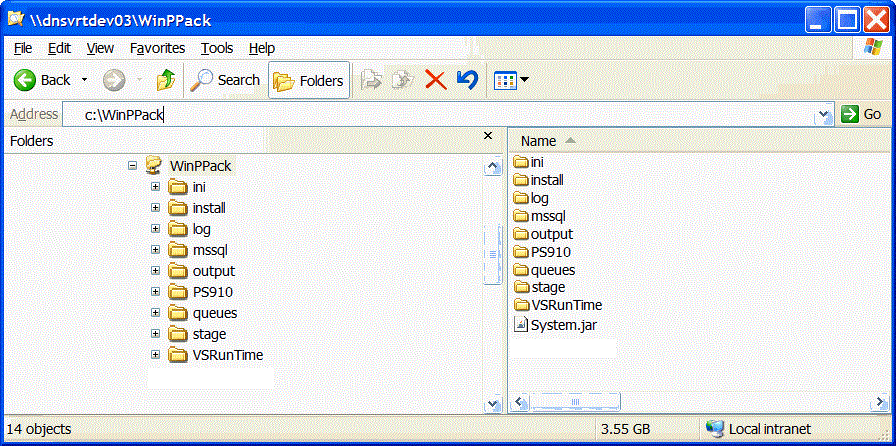
-
In the above extracted structure, locate the
setup.exefile under the\installsubdirectory, right-click on it, and select Run as Administrator.Note:
The Oracle Universal Installer takes a few minutes to start up.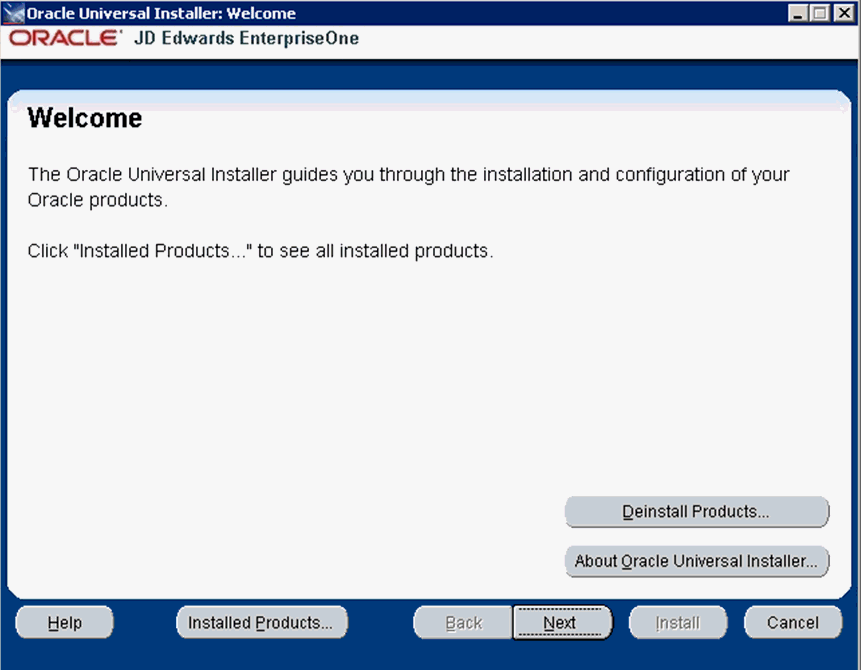
-
On Welcome, click the Next button.
-
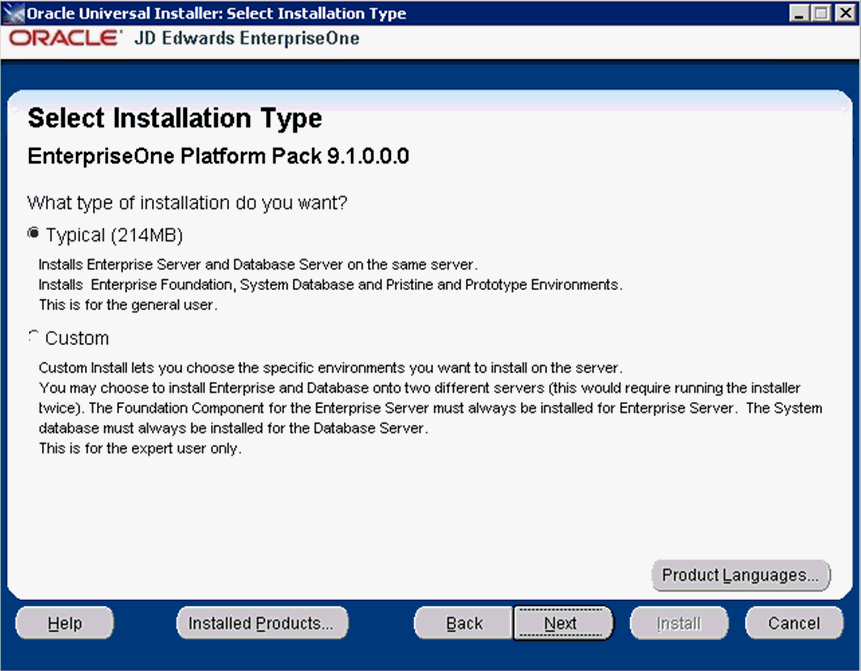
On Select Installation Type, choose your installation type:
-
Typical
Choose this setup type if you wish to complete the Platform Pack installation with no further specifications. This installation option is recommended for most users and includes the required logic and database components for the Foundation (System) and the Prototype and Pristine environments.
-
Custom
This mode is recommended for experienced users, choose this setup type if you wish to complete the Platform Pack installation by specifying the installation of a subset of pre-defined environments.
-
-
Click the Next button.
-
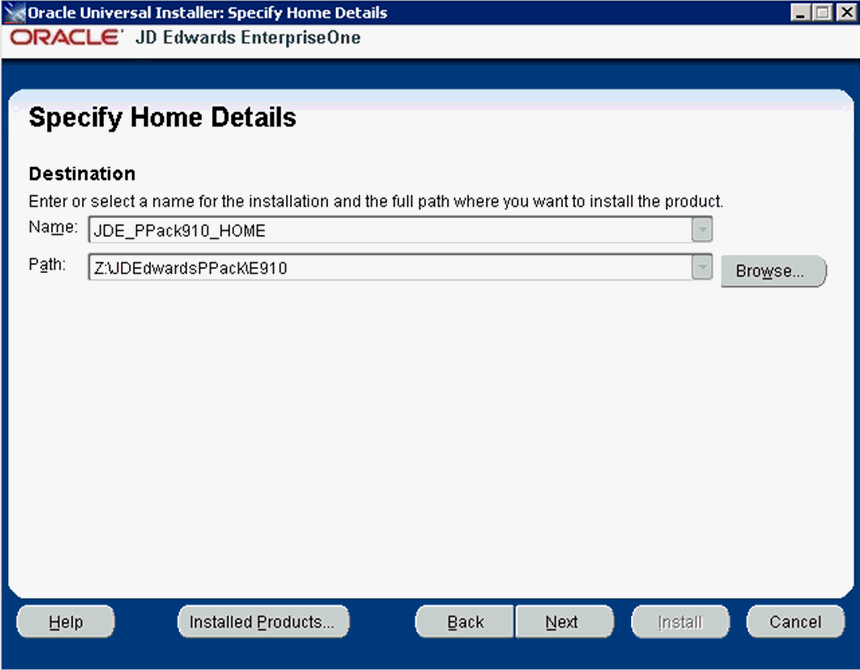
On Specify Home Details, complete these fields:
-
Name
Caution:
Do not accept the default value for this field. If any Oracle product is already installed, the installer automatically populates this field with the existing ORACLE_HOME values, which will be incorrect for JD Edwards EnterpriseOne.Enter a unique name for the JD Edwards EnterpriseOne Platform Pack installation. For example:
JDE_PPack_910_HOME
Caution:
Due to Java file and directory naming conventions, the directory name you specify here cannot contain special characters or blank (space) characters. -
Path
Caution:
Do not accept the default value for this field. If any Oracle product is already installed the installer automatically populates this field with the value corresponding to the home for the ORACLE_HOME of the installed product, which will be incorrect for JD Edwards EnterpriseOne.Enter the drive and directory where you want the files installed on your Enterprise Server. For example:
Z:\JDEdwardsPPack\E910If you are rerunning the JD Edwards EnterpriseOne Platform Pack Installer, refer to Section 4.8, "Rerunning the JD Edwards EnterpriseOne Platform Pack Installer".
-
-
Click the Next button.
If you chose the Typical installation type, the Available Products screen will not display; you can skip to the Step 11.
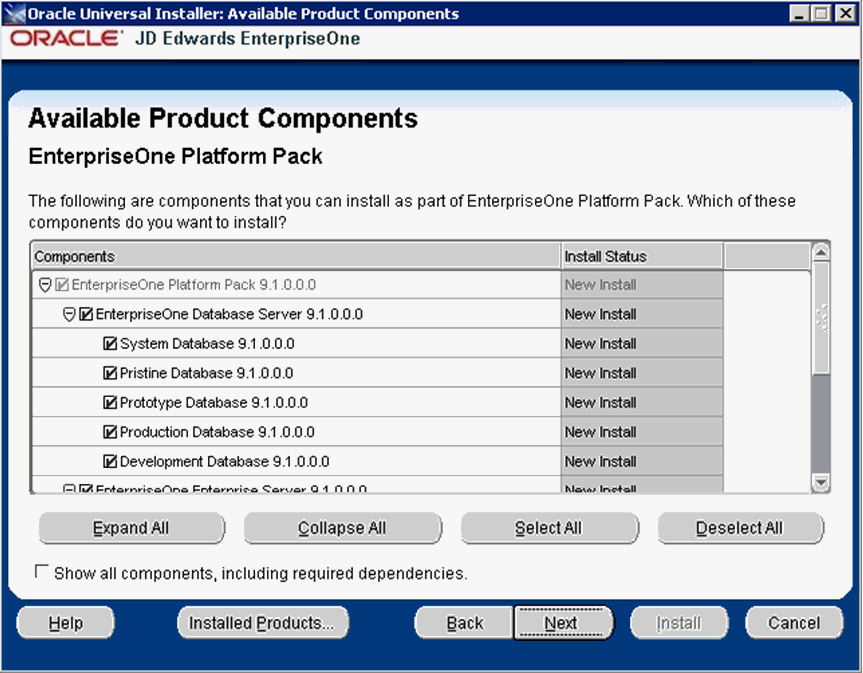
If you chose the Custom installation type, the Oracle Universal Installer displays a list of available JD Edwards EnterpriseOne product components, as shown in the example below:
Tip:
Use the scroll bar to on the right hand side of the screen to view the complete list of available components.On Available Product Components, select from these choices:
JD Edwards EnterpriseOne Database Server
-
System Database
Note:
This selection includes mandatory system tables. If you do not select this box and the OUI installer does not detect that the component was previously installed, it selects this component automatically. Likewise, if you rerun the JD Edwards EnterpriseOne Platform Pack Installer to add an environment it will check to ensure that this component has already been installed and you will not be given an option to install the environment on a machine, drive, or directory that is different from that which contains the JD Edwards EnterpriseOne System Database. -
Production Databases
-
Prototype Databases
-
Development Databases
-
Pristine Databases
JD Edwards EnterpriseOne Enterprise Server
-
JD Edwards EnterpriseOne Foundation
Note:
This selection includes system files. You must choose this feature for all initial installations of the Enterprise Server. If you do not select this feature, the JD Edwards EnterpriseOne Platform Pack Installer automatically selects it for installation. -
ES Production
-
ES Prototype
-
ES Development
-
ES Pristine
-
-
After you have verified your selection of components, click the Next button.
-
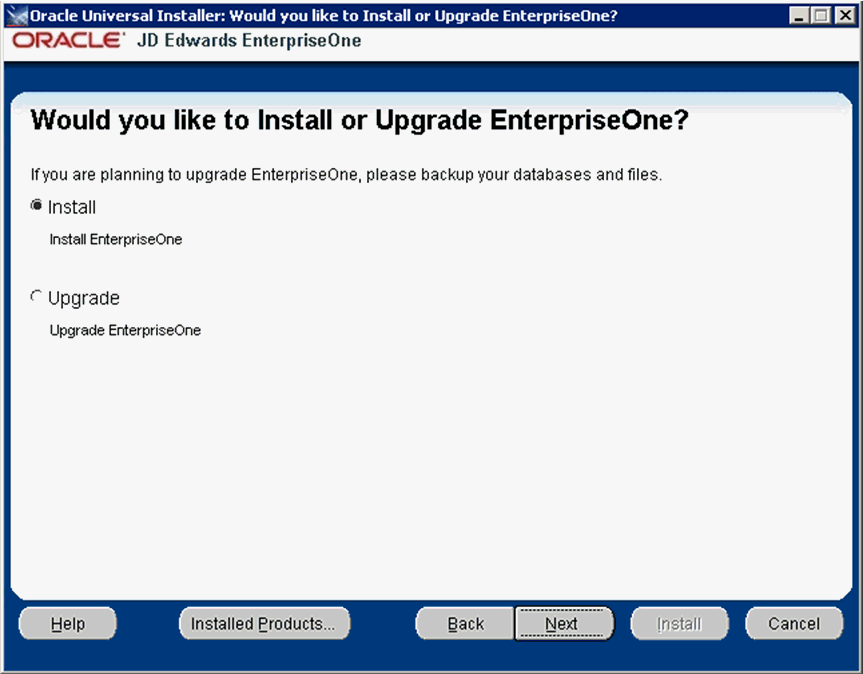
On Would you like to Install or Upgrade EnterpriseOne?, choose whether you want to install or upgrade JD Edwards EnterpriseOne. The list below describes each run mode.
-
Install (Install EnterpriseOne)
In this mode, the JD Edwards EnterpriseOne Platform Pack Installer checks for the existence of JD Edwards EnterpriseOne business data and control tables; if either exists, the JD Edwards EnterpriseOne Platform Pack Installer aborts. This prevents the inadvertent overwriting of existing critical business data and control tables. If the JD Edwards EnterpriseOne Platform Pack Installer does not detect pre-existing JD Edwards EnterpriseOne data or control tables, the installation process continues normally.
Caution:
You should always back up all databases that you want to preserve. -
Upgrade (Upgrade EnterpriseOne)
In this mode, the JD Edwards EnterpriseOne Platform Pack Installer checks for the existence of JD Edwards EnterpriseOne business data and control tables which are prerequisites to an upgrade of JD Edwards EnterpriseOne.
Caution:
You should always back up all databases that you want to preserve.
-
-
Click the Next button.
-
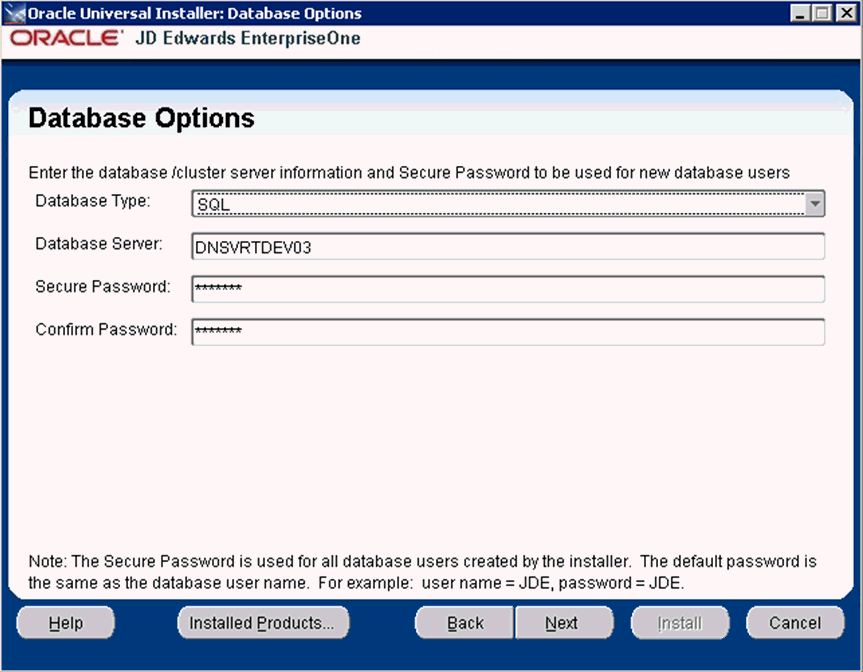
On Database Options, complete these fields:
-
Database Type
Use the pulldown to choose SQL.
-
Database Server
By default, the JD Edwards EnterpriseOne Platform Pack Installer automatically detects and populates this field with the machine name on which it is running. The JD Edwards EnterpriseOne Platform Pack Installer validates the Database Server name and compares it against the name of the local computer. If these values are different (for example, if you manually change the value of this field), the JD Edwards EnterpriseOne Platform Pack Installer assumes the Database Server is either a clustered or remote server. If you have selected to install databases, and the database server name that you entered cannot be validated, an error dialog is displayed with resolution instructions. Refer to the section of this chapter entitled: Section 4.7.3, "Warning - Database Server Name Does Not Match".
For additional details on all Platform Pack error conditions, refer to the section of this guide entitled: Section 4.7, "Troubleshooting Platform Pack Installation".
Caution:
If you are installing the Enterprise Server and the Database Server on different machines, you cannot run the installer on the Enterprise Server and install the Database Server remotely. You must copy the installer images to the Database Server and run the installer on that machine. For the Enterprise Server only, you will need the image for disk1. For a Database Server, you will need the disk1 image plus the database disk images. -
Secure Password
If you wish to change the default password that the JD Edwards EnterpriseOne installer uses to connect to your SQL Server database, you can enter a secure password. The maximum length of the password is 10 characters.
Caution:
The non-encrypted value for the Secure Password is stored in the SQL_set.bat file. This password is used to load the database components. Oracle strongly recommends that you erase this value once the database scripts have run successfully.Note: If you subsequently add an additional database component, you must set the value in the set script back to the Secure Password before running the scripts or the OUI installer (which calls the scripts) for the additional components.
Note:
If you do not change the default value (DEFAULT), the system creates a password for each user where the password is the same as their user ID. For example, if a user ID is JDE, then by default the system creates a corresponding password of JDE for that user.Caution:
If you change the default password in the Platform Pack installation for your Enterprise Server, you must also manually change the[DSPWD]section in thejde.inion the Deployment Server and specify the new secure password that you are using. If you fail to synchronize these database password settings, the various Installation Workbenches will not be able to connect to the database. -
Confirm Password
Re-enter the password.
-
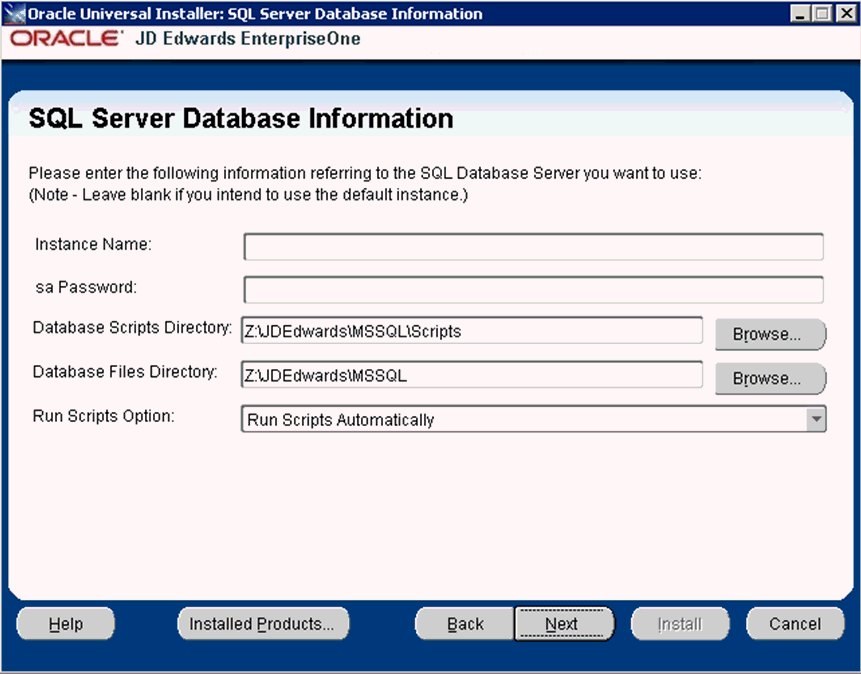
On SQL Server Information, complete these fields referring to the SQL Database Server that you want to use:
-
Instance Name
You can leave this field blank if you want to use the default instance. Otherwise, enter an instance name.
-
sa Password
For the selected instance, enter a valid password for the system administrator of your SQL Server database.
Caution:
The non-encrypted value for the sa Password is stored in theSQL_set.batfile. This password is used to load the database components. Oracle strongly recommends that you erase this value once the database scripts have run successfully.Note: If you subsequently add an additional database component, you must set the value in the set script back to the sa Password before running the scripts or the OUI installer (which calls the scripts) for the additional components.
-
Database Scripts Directory
Enter the directory in which you want to put your database scripts. For example:
Z:\JDEdwards\MSSQL\Scripts -
Database Files Directory
Enter the directory in which you want to put your database files. For example:
Z:\JDEdwards\MSSQL -
Run Scripts Options
Use this pulldown to choose:
Run Scripts Automatically
The Installer configures and runs the database scripts. This is the default selection.
Run Scripts Manually Later
The Installer edits and deploys the scripts and dump files, but does not run them. Choose this option if:
-
You want to manually run the scripts at a later time.
-
You want to use ASM for your tablespaces.
-
You want to spread your tablespaces over multiple drives.
-
-
-
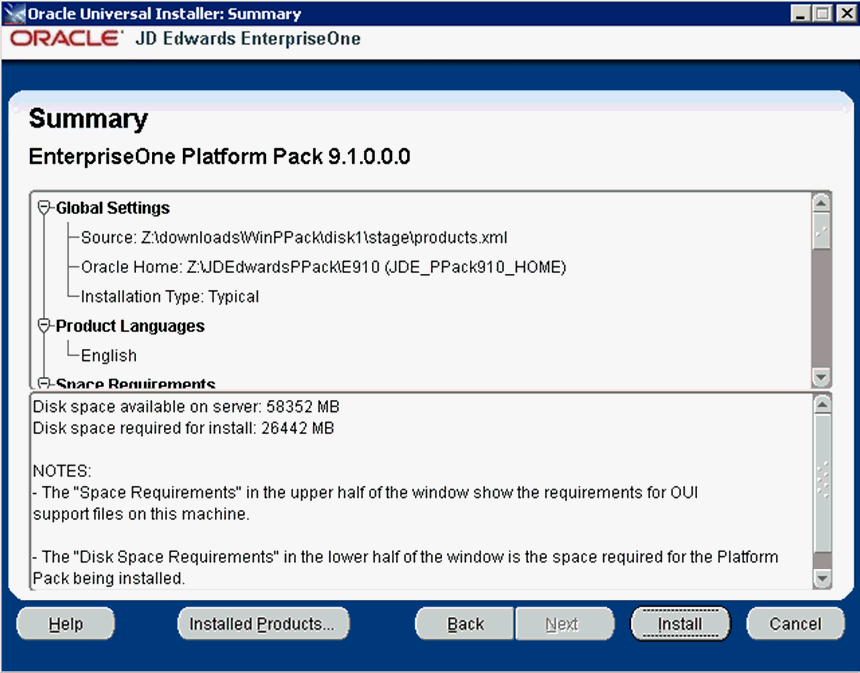
On Summary, in the top half of the screen, review your selections and in the bottom half of the screen review the NOTES, which detail the disk space requirements for OUI support files and also for the Platform Pack being installed on this machine.
-
Click the Install button.
As the installer runs it displays the Install progress, as shown in the following example.
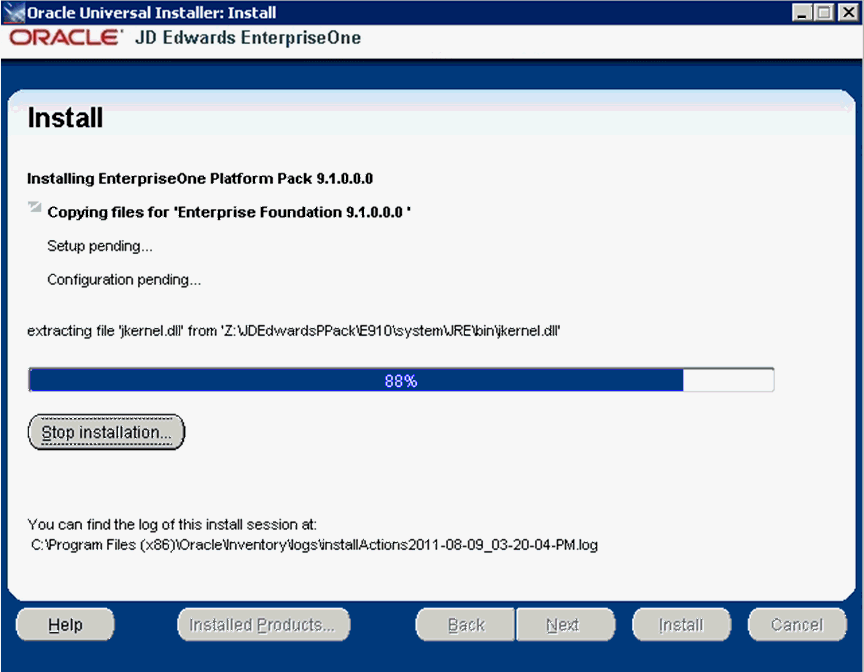
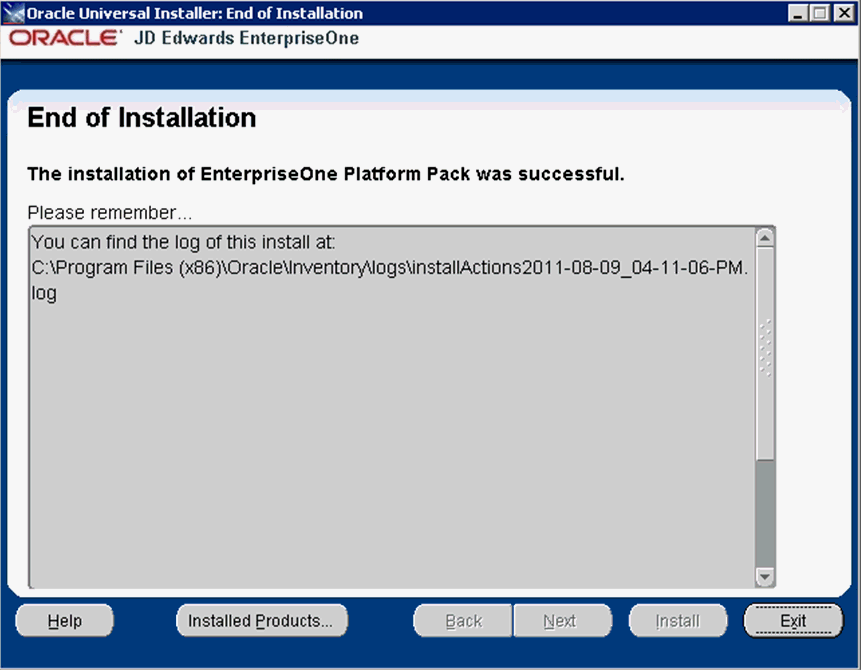
After the installation is complete, the following End of Installation screen is displayed.
-
On End of Installation, verify the installation of the EnterpriseOne Platform Pack was successful.
Review the Please remember ... portion for the installer log file location. The log file name is specified with the date and stamp when the installer ran. For example:
c:\Program Files (x86)\Oracle\Inventory\logs\installActions2011-08-09_04-11-06-PM.log -
Click the Exit button to exit OUI.
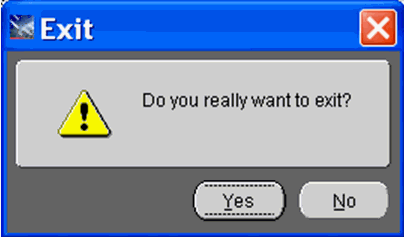
-
On Exit, click the Yes button.
4.5.2 Verifying the Platform Pack Log File
You can verify that the Platform Pack Installer ran properly by viewing the log file. The log file name is specified with the date and stamp when the installer ran. For example:
c:\Program Files (x86)\Oracle\Inventory\logs\installActions2011-08-09_04-11-06-PM.log
4.6 Manually Running the Database Creation Scripts - Windows with SQL
Once the Platform Pack install has successfully completed on the Windows-based Enterprise Server, the SQL database creation scripts and dump files are located on the same disk as the EnterpriseOne install location on the Enterprise Server. For example:
Z:\JDEdwards\MSSQL\scripts
As it runs, the Platform Pack installer edits the script that sets the environment variables. You can review this script for accuracy:
SQL_set.bat
To manually run the SQL database installation scripts:
-
Sign on to the Enterprise Server as a Windows account that is part of the SQLServerxxx groups (there are 3 groups).
-
Start the
cmdwindow with Run As Administrator. -
Navigate to the MSSQL\scripts folder as described in the example above.
-
Verify that
DATA_PATH in SQL_set.batis set to the parent of the current directory:DATA_PATH=z:\JDEdwards\MSSQL -
Run the
InstallSQLDatabase.batscript specifying the password for the sa user as an argument. For example id the sa password were abc123XXX, the command would be:InstallSQLDatabase.bat abc123XX -
Check the logs in the logs directory.
4.7 Troubleshooting Platform Pack Installation
This section discusses these potential error or warning conditions and their probable causes and resolutions when running the JD Edwards EnterpriseOne Platform Pack Installer:
-
Section 4.7.1, "Error: Prototype Environment Already Exists"
-
Section 4.7.3, "Warning - Database Server Name Does Not Match"
4.7.1 Error: Prototype Environment Already Exists
This Error occurs if you have selected to install the Prototype Database, but the Prototype database already exists:
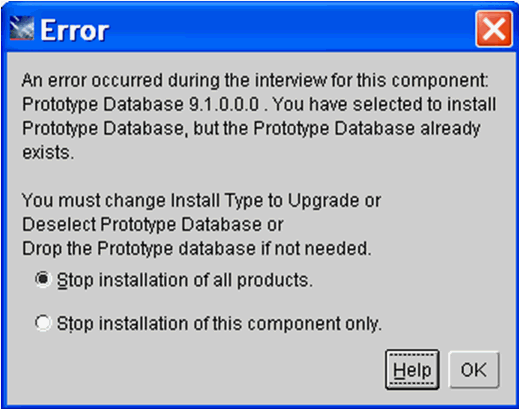
-
To remedy, your options are:
-
If your Install type is Install, you can change it to Upgrade.
-
If you are using the Custom install, you can deselect the Prototype Database.
-
If you do not need the Prototype database, you can skip the installation of it on this screen and manually drop the database later.
-
-
In order for the installer to proceed or abort, you must choose one of these radio buttons:
-
Stop installation of all products.
Choose this option if you want to exit the installer in order to make changes and then rerun the installer at a later time.
-
Stop the installation of this component only.
Choose this option if you want to skip the installation of the Prototype database and continue running the installer.
-
-
Click the OK button to close the error dialog.
4.7.2 Development Environment Warning
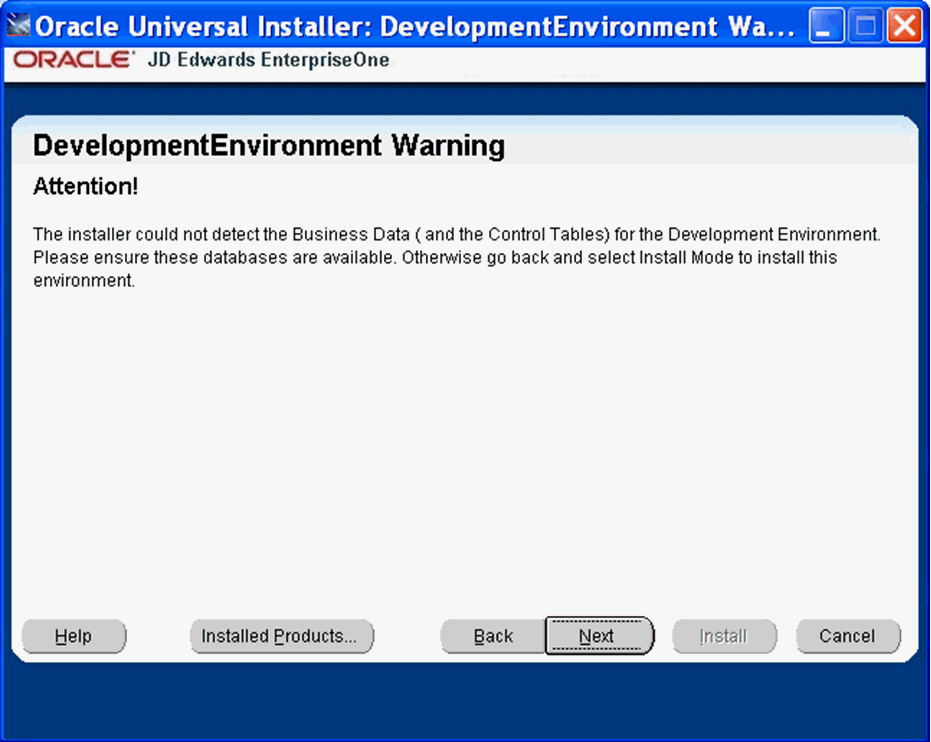
This Warning indicates the installer could not detect Business Data (and the Control Tables) for the Development Environment and you have chosen the Upgrade option. If you do not want the Installer to create the Business Data and Control Tables, you can click on Next and ignore this error. Otherwise go back and change your options to use the Installer in Install and Custom mode to select and install it.
4.7.3 Warning - Database Server Name Does Not Match
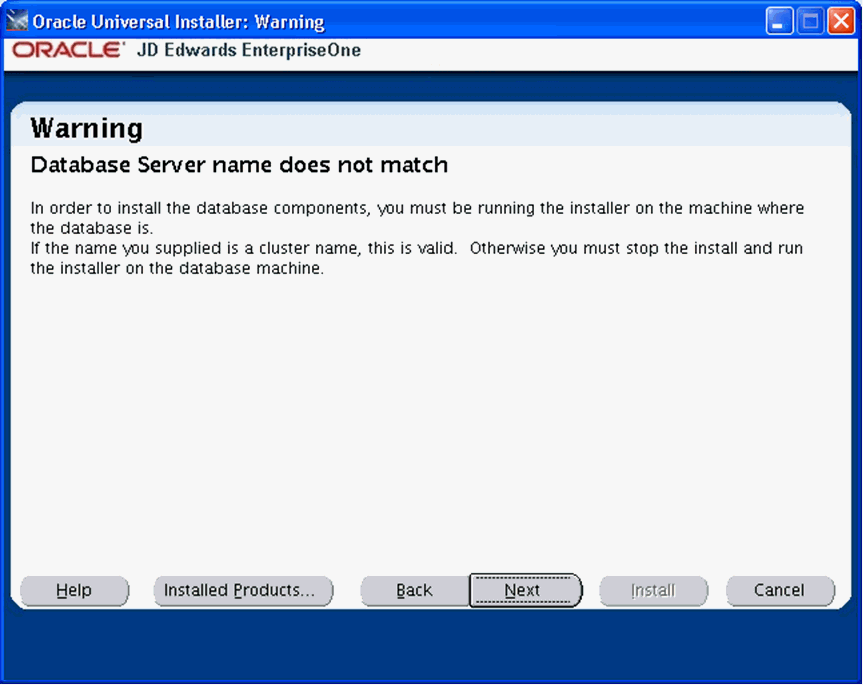
The Platform Pack installer displays the following error message if the machine name you specified on Database Options does not match the machine name on which the installer is being run. In order to install the database components, you must run the Platform Pack installer on the machine on which the database resides. Unless the machine name you specified is a known-good cluster name, you must cancel the installation and run the installer on the database machine.
4.8 Rerunning the JD Edwards EnterpriseOne Platform Pack Installer
You must rerun the JD Edwards EnterpriseOne Platform Pack Installer to support these scenarios:
-
You want to install the Enterprise Server and the Database Server on physically different machines.
-
You want to add an Enterprise Server environment to the Enterprise Server.
-
You want to add a Database Server database to the Database Server.
-
You want to reinstall the JD Edwards EnterpriseOne Foundation on the Enterprise Server.
-
You want to reinstall the System Database on the Database Server.
You should never reinstall any optional components without first deinstalling the components. If you select to deinstall the mandatory components you must also select to deinstall or have already deinstalled all related optional components. This table lists the mandatory and related optional components:
| Server | Mandatory Component | Optional Components |
|---|---|---|
| Enterprise Server | JD Edwards EnterpriseOne Foundation | ES Production
ES Prototype ES Development ES Pristine |
| Database Server | System Database | Production Databases
Prototype Databases Development Databases Pristine Databases |
4.9 Installing the Latest Tools Release and Latest Tools Release Patch to the Enterprise Server
Caution:
The Tools Release level must match what was installed on the Deployment Server.For instructions on installing the tools release on the Deployment Server, refer to the JD Edwards EnterpriseOne Deployment Server Reference Guide.
To install the latest tools release and latest tools release patch:
-
From the Update Center homepage, download the latest Tools Release Patch (for example, 9.1.1.0) and Tools Release documentation.
-
Using Server Manager, install the Tools Release Patch to the Enterprise Server.
4.10 Working with Database Security
In order to maximize your database security, you should change the passwords on all table owners created during the Platform Pack installation; these are created with the user and password equal to the same value. Such a user and password relationship could expose you to worms and viruses aimed at gaining access to your database. Consult with your DBA for advice on changing passwords to meet the security requirements of your database installation.
The Installation Workbench assumes that the table owner 's password is the same as the table owner, unless it finds this override in the jde.ini file on the Deployment Server. Once the database passwords have been changed, you will need to add this section to the jde.ini file:
[DSPWD]
Datasource_owner=new_password
Note:
Microsoft Windows 2008. For a Deployment Server running on a Microsoft Windows 2008 platform, navigate toNOTEPAD.EXE in c:\WINDOWS directory. Right click on the executable and select "Run as Administrator". Then click on File and open this file for editing:
c:\WINDOWS\JDE.INI
For example, if you changed the passwords for PRODDTA and PRODCTL to alaska5 and nevada6 your section would look like this:
[DSPWD]
PRODDTA=alaska5
PRODCTL=nevada6
The Installation Workbench assumes that the database user is JDE and that the password is the same, unless it finds this override in the jde.ini file on the Deployment Server. As a security precaution, you should also change the password on the JDE user and add an override in the [DSPWD] section of the jde.ini file. Once the database passwords have been changed, you will need to add this section to the jde.ini file:
[DSPWD]
JDE=new_password
For example, if you are changing the JDE user's password to apples, your section would look like this:
[DSPWD]
JDE=apples
Note:
You must also logon to JDEPLAN using the changed password, otherwise database connections will fail. Using the above example of a changed password, you would logon using these credentials:User = JDE
Password = apples
Environment = JDEPLAN
Caution:
The Installation Workbench can only process passwords equal to or less than 10 characters in length. Therefore, you cannot use passwords greater than 10 characters even if your RDBMS allows it.After you change the [DSPWD] section of the jde.ini file, logon to OneWorld in the JDEPLAN environment on the Deployment Server with the new password in the correct case.
Whenever you change the password on your database, as recommended for security purposes, you must also ensure that your security settings in the Enterprise Server jde.ini file match that of your database. Refer to Chapter 11, "Working With Signon Security" in this guide for applicable instructions.
You should secure the jde.ini file on the Deployment Server to prevent unauthorized access.
You should delete the [DSPWD] section once the install or upgrade is complete.
Note:
If you are upgrading from JD Edwards EnterpriseOne Releases 8.10 or 8.11, you should consider disabling the legacy user, which is PSFT.