4 Installing and Configuring WebSphere 7.0
This chapter describes how to install and configure WebSphere 7.0. It contains the following topics:
-
Section 4.4, "Installing IBM HTTP Server Plug-ins for WebSphere Application Server"
-
Section 4.8, "Installing the WebSphere 7.0 Plug-ins Fix Pack"
-
Section 4.9, "Verifying the Versions of Installed WebSphere Products"
-
Section 4.12, "Determining the Name and Status of the WebSphere Application Server"
-
Section 4.15, "Accessing the WebSphere Administration Console"
-
Section 4.16, "Testing the WebSphere and IBM HTTP Server Installation"
-
Section 4.17, "Generating and Propagating WebSphere Plug-ins (optional)"
-
Section 4.18, "Creating a New Application Server Profile (optional)"
-
Section 4.20, "Adding a New Web Server for a New Profile (optional)"
4.1 Performing the Pre-installation Procedure
Before you install WebSphere, you must first set up a local user account that is in the Administrative group and has these advanced user rights:
-
Act as part of operating system
-
Create a token object.
-
Log on as a service
-
Replace a process level token
To set up a local user account with the above user rights, navigate to:
Control Panel > Administrative Tools > Local Security Policy > Local Policies > Users Rights Assignment
On User Rights Assignment, double-click one of the user rights, click Add, select a local user account from the list, and click OK. Repeat this process for the remaining user rights.
4.2 Installing WebSphere Application Server 7.0 (Using Network Deployment CD or Downloaded Image)
Note:
It is important to follow the exact sequence of steps in this procedure.Complete these steps to install the WebSphere Application Server version 7.0, and then install the EnterpriseOne Web Server to that installation. The WebSphere 7.0 Network Deployment CD may be used to install WebSphere Application Server for a base or standalone configuration.
Note:
The typical IBM WebSphere installation includes the Application Server itself, HTTP Server, and the Plug-in components. You must install all these components to ensure WebSphere Application Server 7.0 is functioning correctly. For any additional requirements and Fix Packs once the basic install is completed, review the minimum technical requirements (MTRs) as described in Accessing Certifications (formerly Minimum Technical Requirements) in this document.-
Insert the WebSphere Application Server Network Deployment CD, Version 7.0 (32-bit) or extract the downloaded image into a temporary location.
-
Run the launchpad executable from the extracted directory:
cd x:\dump\was7_windows\cd1x:\dump\was7_windows\cd1 > launchpad.exewhere
x:is the drive on which you downloaded the WebSphere 7.0 image.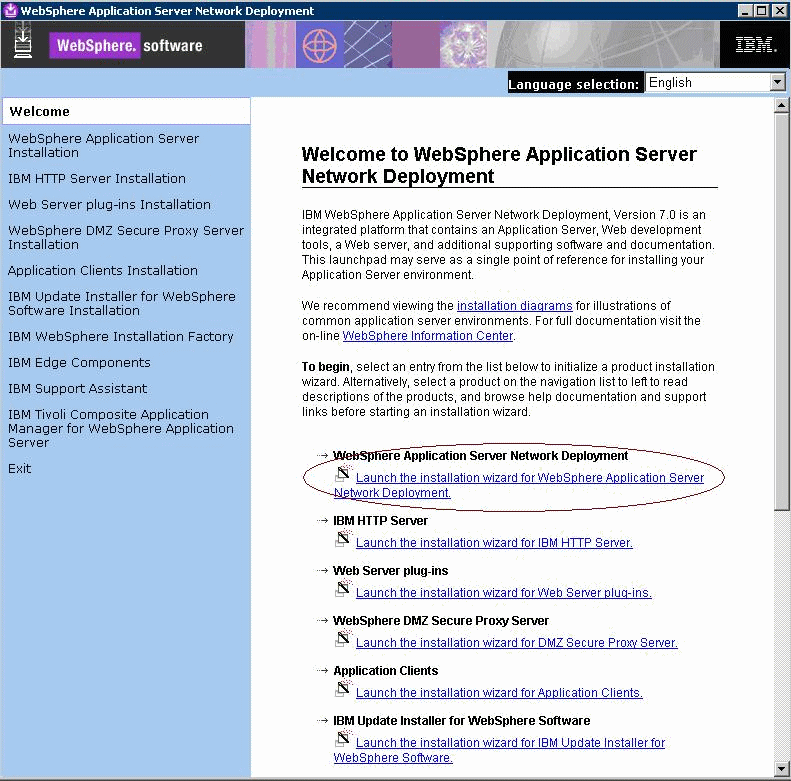
-
From that launchpad window, select the first link on the right panel:
Launch the installation wizard for WebSphere Application Server Network Deployment
-
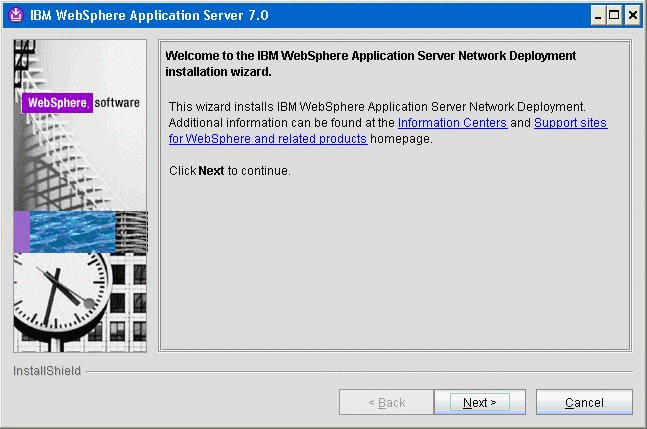
On the Welcome panel, click the Next button to continue.
-
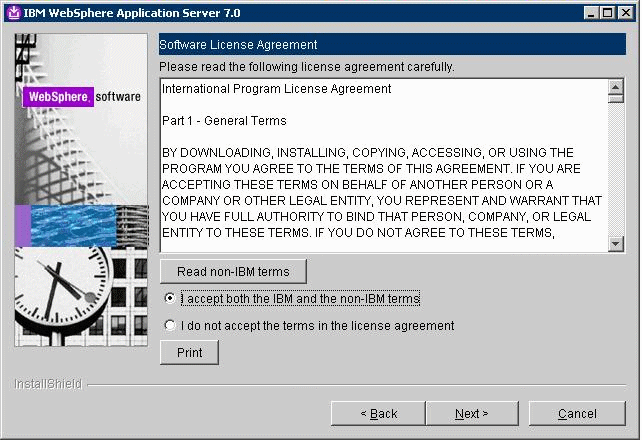
On Software License Agreement, review the License Agreement and select a radio button to accept or decline.
If you chose to accept, click the Next button to continue.
If you do not accept the terms of the license agreement, you cannot continue with the installation.
-
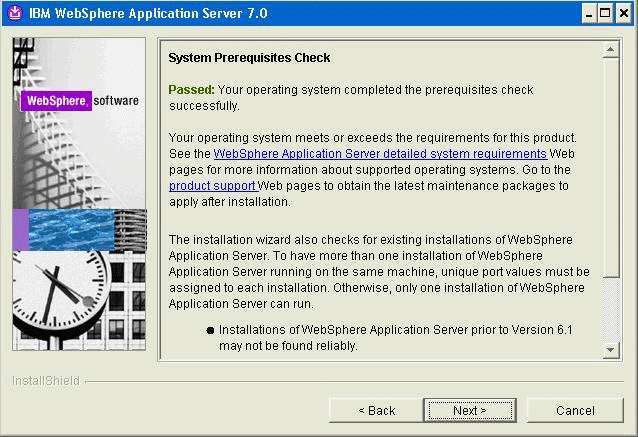
On System Prerequisites Check, the installer performs a quick system requirements check on the server. Once the check is complete and successful, click the Next button to continue.
-
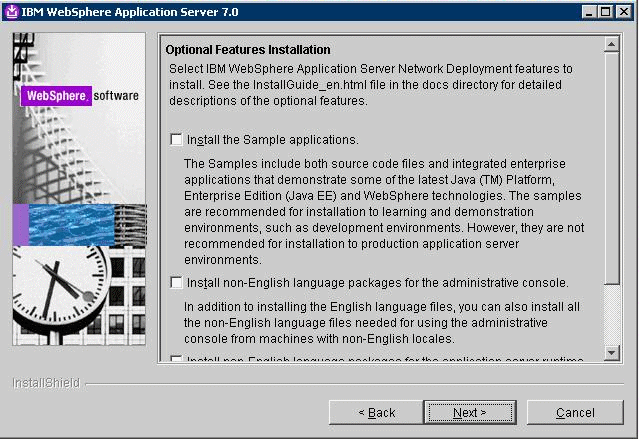
On the Optional Features Installation screen, click the Next button to continue.
Tip:
For production environments, it is recommended that you not enable the Install the Sample application check box.You should enable the check box for non-English support for the WebSphere Administrative Console if applicable to your installation.
-
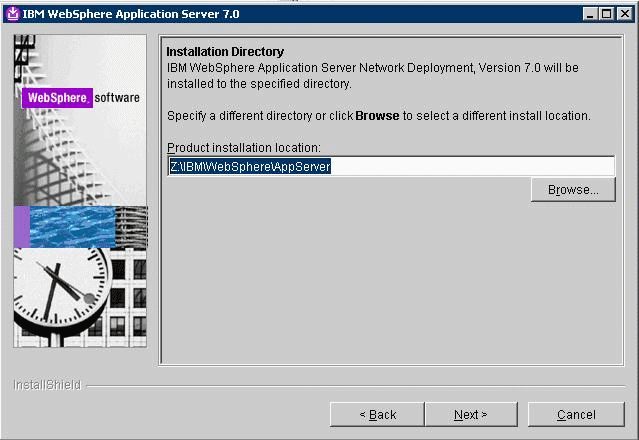
On Installation Directory, enter or browse to a valid location where you want to install WebSphere Application Server Network Deployment. For example:
z:\IBM\WebSphere\AppServer -
Click the Next button to continue.
-
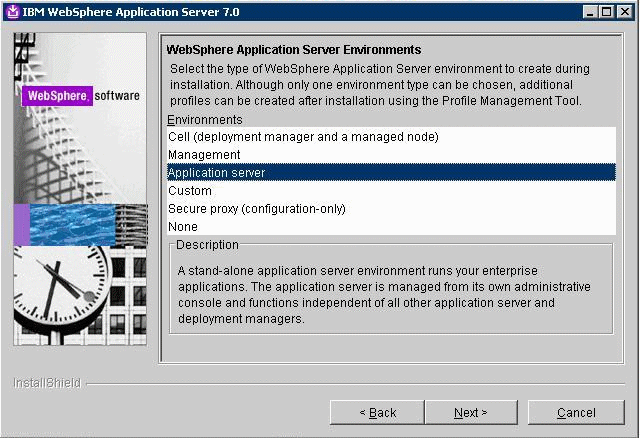
On WebSphere Application Server Environments, select Application Server to create a standalone application server profile and then click the Next button to continue.
Note:
The Application Server environment will create a default stand-alone application server called AppSrv01 during the installation. To use federated nodes configuration, select Cell environment to create a deployment manger (such as Dmgr01) and a managed node (for example, AppSrv01) during the installation.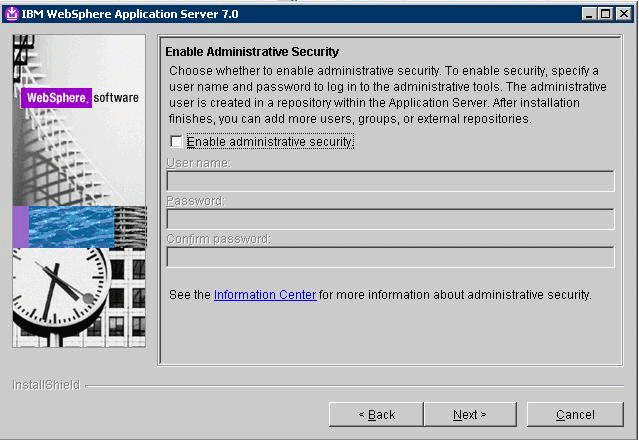
-
On Enable Administrative Security, the check box for the application server profile is checked by default. You can choose either to:
-
Clear the check box for Enable administrative security to disable server administrative security, or
-
If the check box is enabled for Enable administrative security, server administration security will be enabled and you must enter the User ID and Password
When you enable the check box the fields on this screen are enabled and you must enter valid credentials for the WebSphere administrator for this installation.
Tip:
JD Edwards EnterpriseOne Business Services Server. If you are using these instructions to install a JD Edwards EnterpriseOne Business Services Server into this WebSphere instance, you must enable administrative security. -
-
Click the Next button to continue.
-
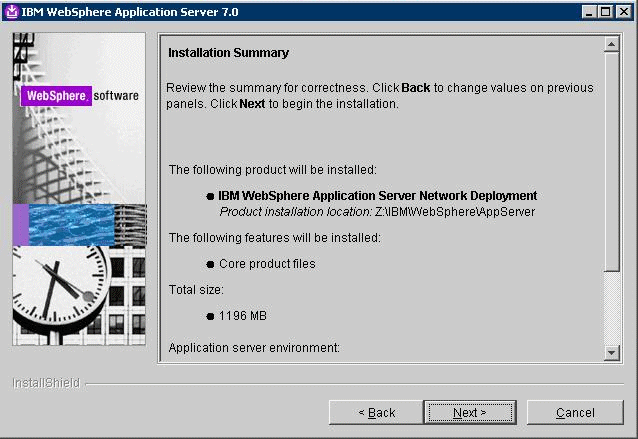
On Installation Summary, review the information and click the Next button to begin the installation of WebSphere Application Server Network Deployment.
Note:
You should enable the check box for Verify my permissions to perform the installation in order for the installer to validate the permissions required for installation of the product.
Note:
On Installation Results, you can click on the AboutThisProfile.txt link to see the port assignment for this profile. Note the Administrative console port on which AppSrv01 will be running (for example, 9060). You can use Profile Management Tool to create as many profiles as you like. Each profile is a separate instance of the WebSphere running on a different set of ports.A sample of the contents of the
AboutThisProfile.txtfile is shown below: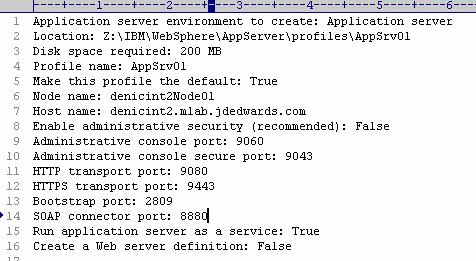
-
On Installation Results, click Finish.
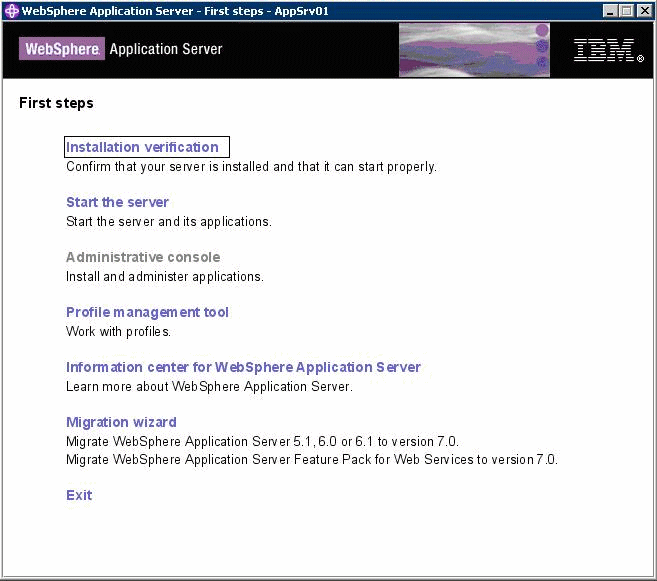
The First steps menu is launched.
-
On the First steps menu, click Installation verification to verify the installation.
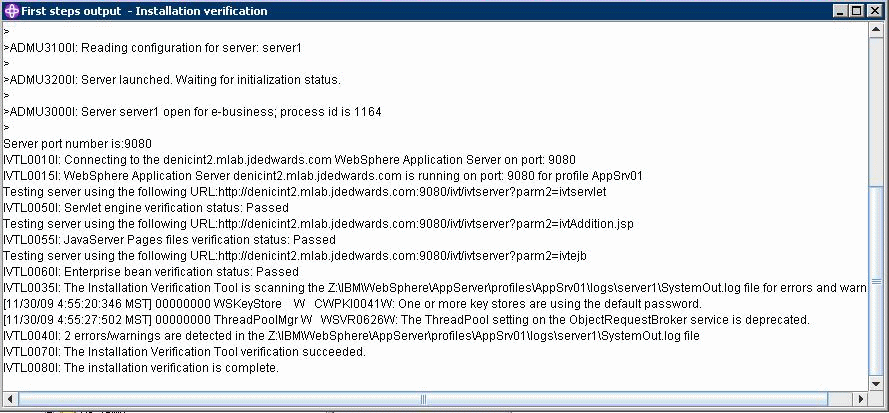
After you click Installation verification, you can verify the success of the installation by reviewing the contents of the resulting display. For example:
-
Ensure that the Installation Verification utility completes with a success message.
-
Close the First steps output and click Exit on the First steps screen.
This completes the profile creation activity.
4.3 Installing the IBM HTTP Server 7.0
Note:
If you are planning to use Microsoft Internet Information Services (IIS), you can skip this section and continue to Installing IBM HTTP Server Plug-ins for WebSphere Application Server.Note:
Although the IBM HTTP Server is integrated into the WebSphere Application Server, the installation is a separate process.To install the IBM HTTP Server:
-
Insert the WebSphere Application Server Supplement CD, Version 7.0 (32-bit) or extract the downloaded image (if you haven't done so already).
-
Run the install executable that is located in the IHS directory from the extracted location by typically using these commands:
cd x:\dump\was7_windows\sup1\IHSx:\dump\was7_windows\sup1\IHS > install.exewhere
x:is the drive on which you downloaded the WebSphere 7.0 image.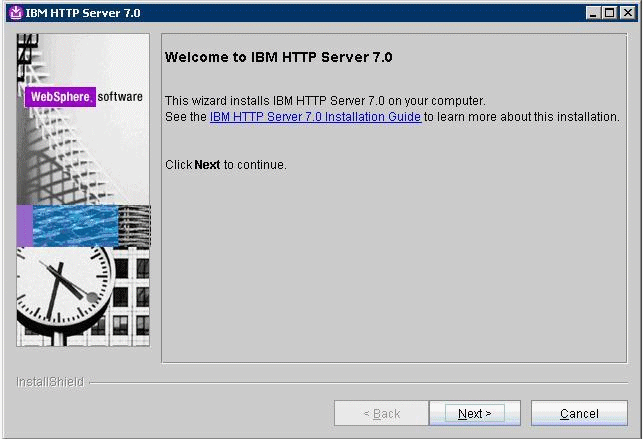
-
On Welcome, click the Next button to continue.
-
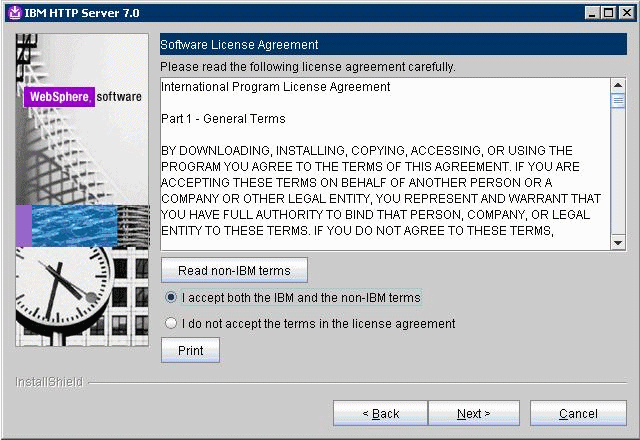
On Software License Agreement, review the License Agreement and choose an option to accept or decline.
-
Click the Next button to continue.
-
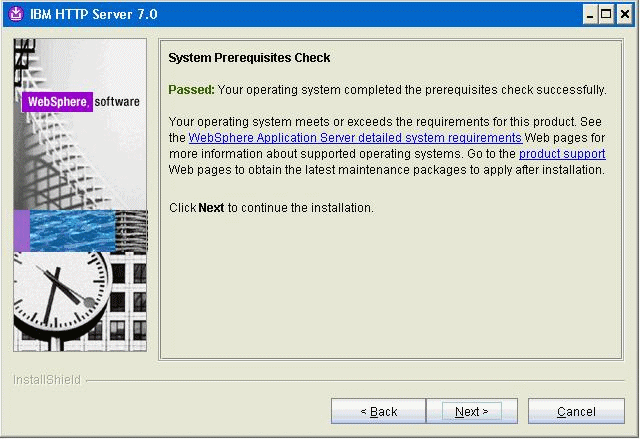
On System Prerequisites Check, the installer performs a quick system requirements check on the server. Once the check is complete and successful, click the Next button to continue.
-
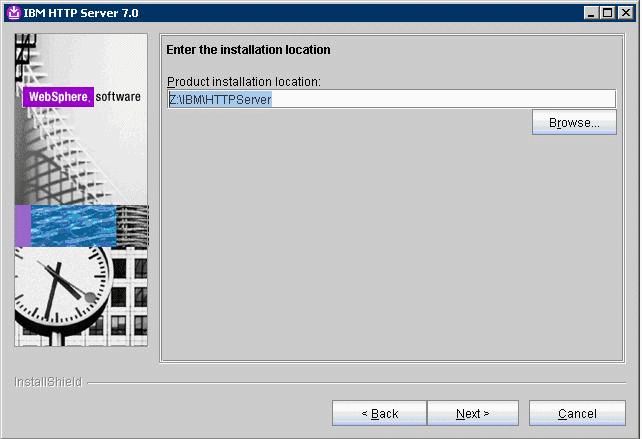
For the install location, enter a valid value for your IBM HTTP Server installation directory. Use a value such as:
z:\IBM\HTTPServer -
Click the Next button to continue.
-
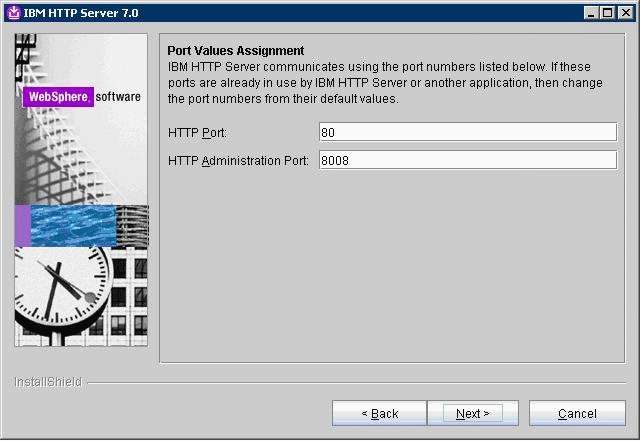
On Port Values Assignment, use the default port or enter different ports.
-
Click the Next button to continue.
-
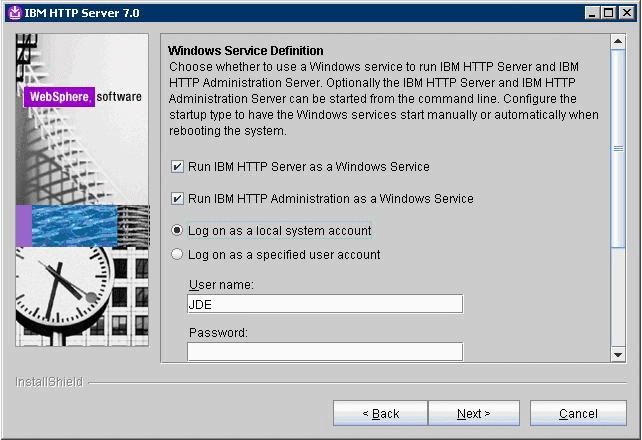
On Windows Service, complete these fields:
Field Value Run IBM HTTP Server as a Windows Service Checked Run the Application Server process as a Windows Service Checked Log on as a local system account Selected Startup Type Use the pull-down to choose either manual or automatic. -
Click the Next button to continue.
-
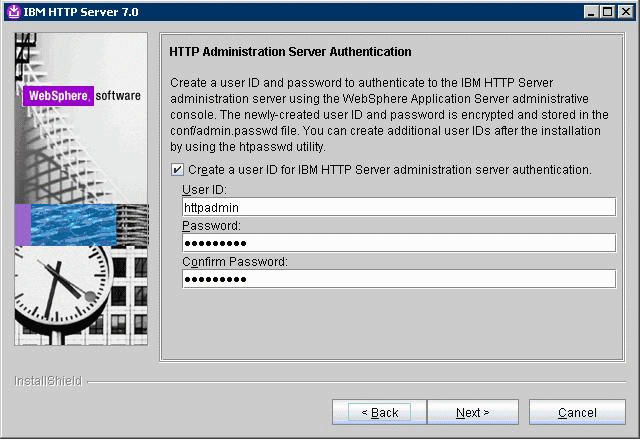
On HTTP Administration Server Authentication, the check box enabling HTTP server administration security is checked by default. You can choose either to:
-
Clear the check box for Create a user ID for IBM HTTP administration server authentication to disable HTTP server administration security, or
-
If the check box is enabled for Create a user ID for IBM HTTP administration server authentication, HTTP server administration security will be enabled and you must enter the User ID and Password
-
-
Click the Next button to continue.
-
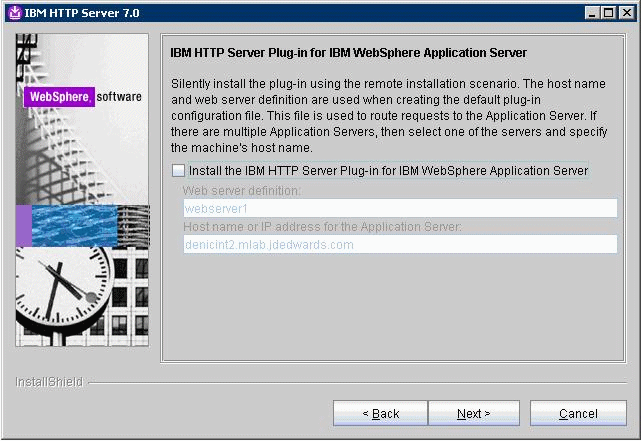
On IBM HTTP Administration Server Plug-in For IBM WebSphere Application Server, clear the check box for Install the IBM HTTP Server Plug-in for IBM WebSphere Application Server to disable the silent install of the plug-in at this time. The installation of IBM HTTP Server Plug-in for IBM WebSphere Application Server will be described in the section Installing IBM HTTP Server Plug-ins for WebSphere Application Server.
-
Click the Next button to continue.
-
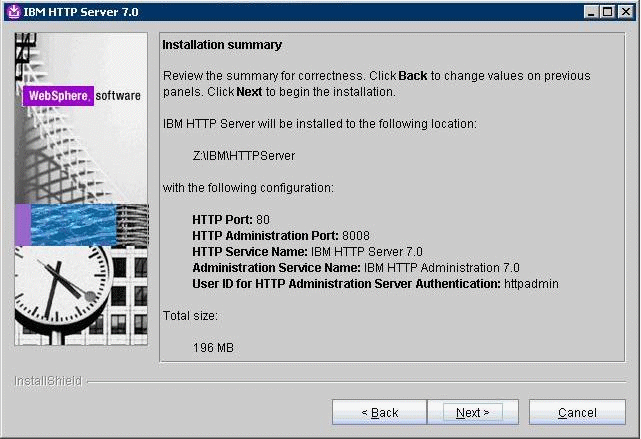
On the summary screen, click the Next button to begin the installation.
-
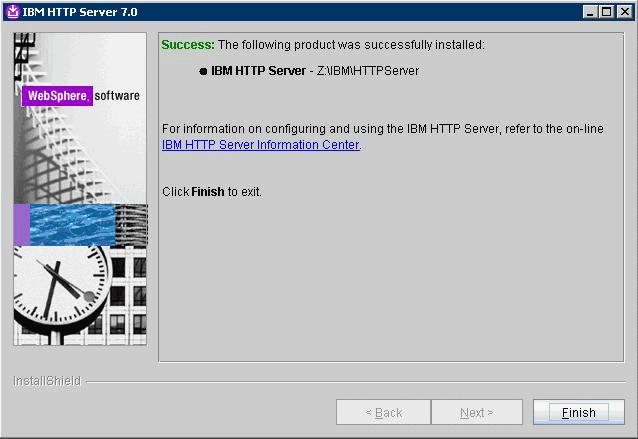
On the successfully installed screen, click Finish.
4.4 Installing IBM HTTP Server Plug-ins for WebSphere Application Server
With the IBM HTTP Server or Microsoft Internet Information Services (IIS) successfully installed, the final portion of the WebSphere Application Server installation is to install WebSphere Plug-ins.
Prior to installing WebSphere Plug-ins, it is recommended to ensure the IBM HTTP Server services (Apache) or Microsoft IIS services are not already running.
To install WebSphere Plug-ins:
-
Insert the WebSphere Application Server Supplement CD, Version 7.0
(32-bit)or extract the downloaded image (if you haven't done so already). -
Run the install executable in the plugin directory. For example:
cd Z:\dump\was7_windows\sup1\plugin
Z:\dump\was7_windows\sup1\plugin > install.exe
Note:
The syntax of the mount command can vary by platform, and is not required for Sun platforms.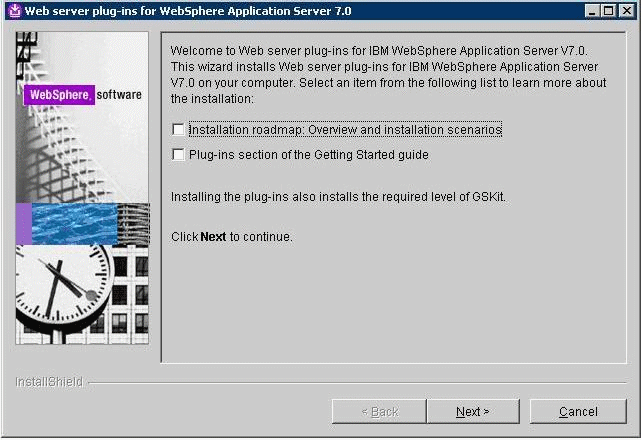
-
On the Welcome screen, you can deselect all "learning" options and click the Next button to begin the wizard.
-
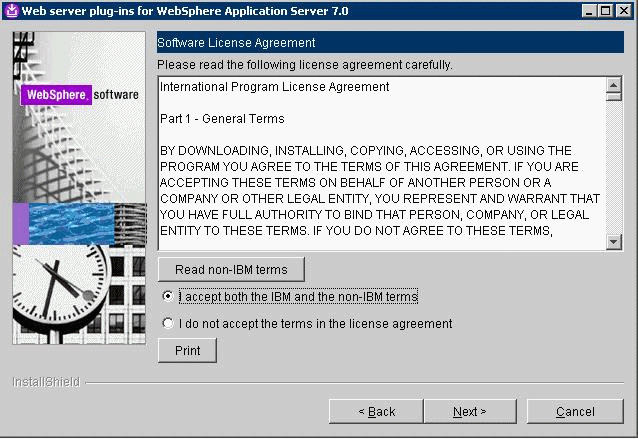
On Software License Agreement, review the License Agreement and choose an option to accept or decline.
-
Click the Next button to continue (not available if license agreement is not accepted).
-
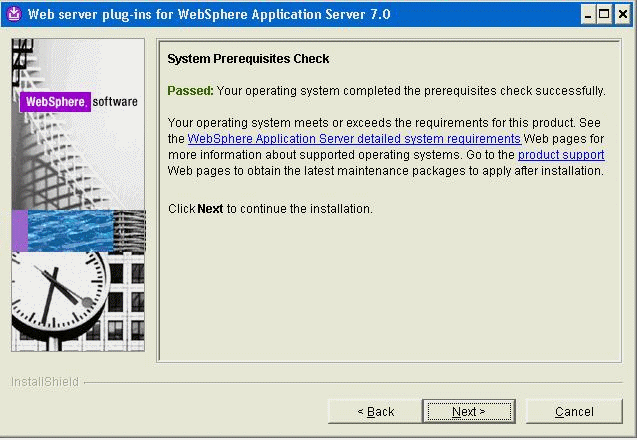
On System Prerequisites Check, the installer performs a verification of system requirements.
After the installer indicates the check was successful, click the Next button to continue.
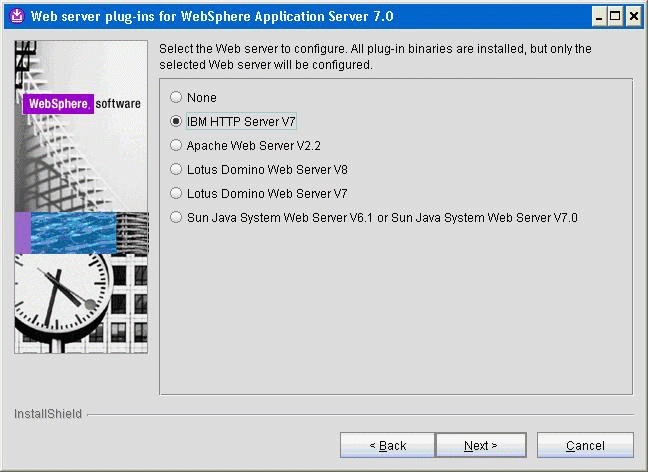
-
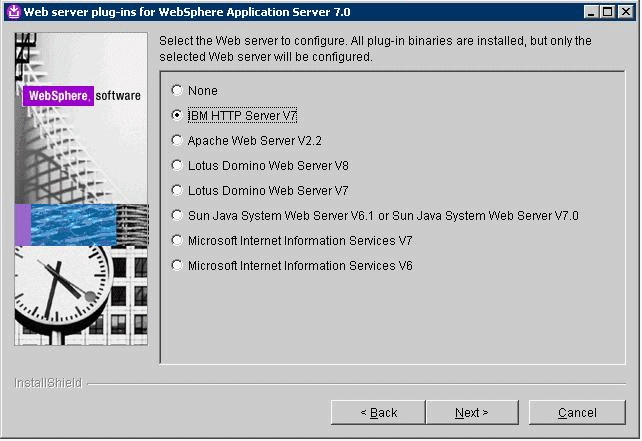
On Select the Web server to configure, select only one of the following radio buttons:
IBM HTTP Server V7
Miscrosoft Internet Information Service V7
Miscrosoft Internet Information Service V6
Note:
All plug-in binaries are installed, but only the selected Web server will be configured. -
Click the Next button to continue.
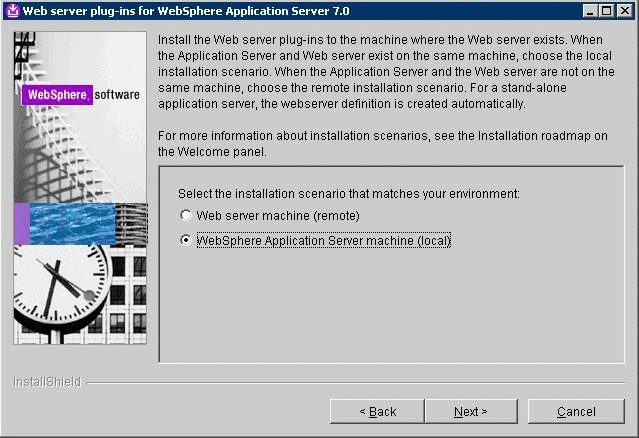
-
On Select installation scenario, if your WAS server is located on the same machine on which you are installing, select this radio button:
WebSphere Application Server machine (local)
If your WAS server is located on a different machine than the one on which you are running the installer, select this radio button:
Web server machine (remote)
-
Click the Next button to continue.
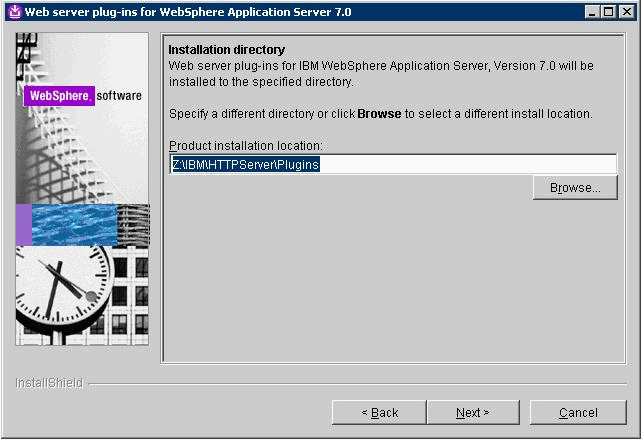
-
On Web server plug-ins installation location, enter a directory. The default directory is:
z:\IBM\HTTPServer\Plugins -
Click the Next button to continue.
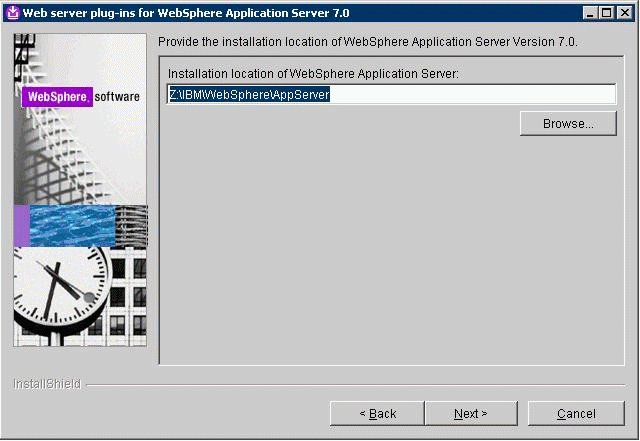
-
On Installation location of WebSphere Application Server V7.0, enter a directory. For example:
z:\IBM\WebSphere\AppServer -
Click the Next button to continue.
-
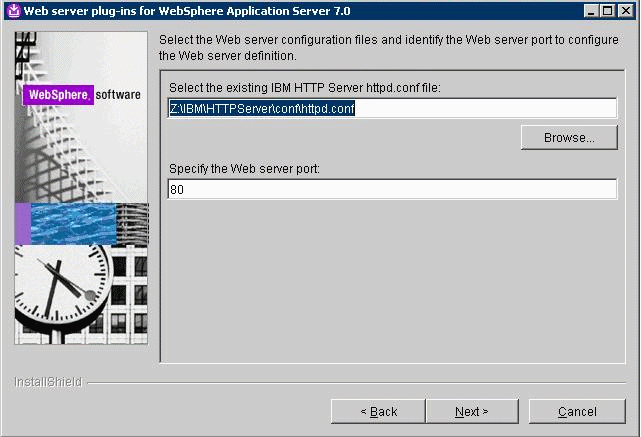
On Select the existing IBM HTTP Server httpd.conf file, enter a directory path. For example:
z:\IBM\HTTPServer\conf\httpd.confNote:
This field is not available for IIS.You must also specify the Web Server port. Typically you can accept the default value of 80 for the both the IBM HTTP and Microsoft IIS servers.
Note:
The plug-ins installer directly modifies the IBM HTTP Server configuration file with the information you specify on this screen. -
Click the Next button to continue.
-
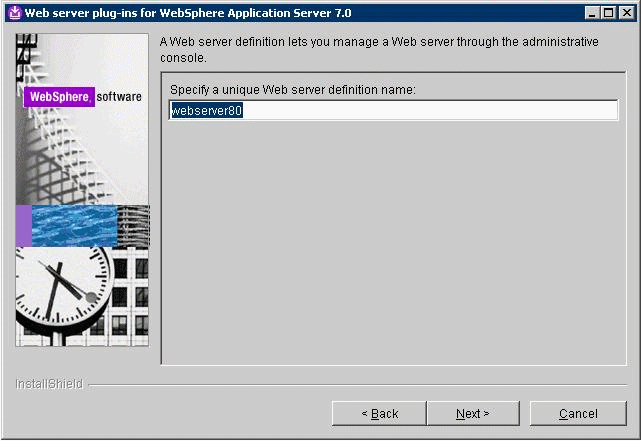
On Specify a unique Web Server definition name, enter the name of your IBM HTTP or Microsoft IIS Server to allow the WebSphere Administration Console to administer the IBM HTTP or Microsoft IIS Server configuration and status.
Tip:
In order to avoid confusion in installations with multiple web servers on multiple ports, it is good practice to use the following naming convention:webserver<port_number>For example, the name
webserver80indicates the webserver is on port 80. -
Click the Next button to continue.
-
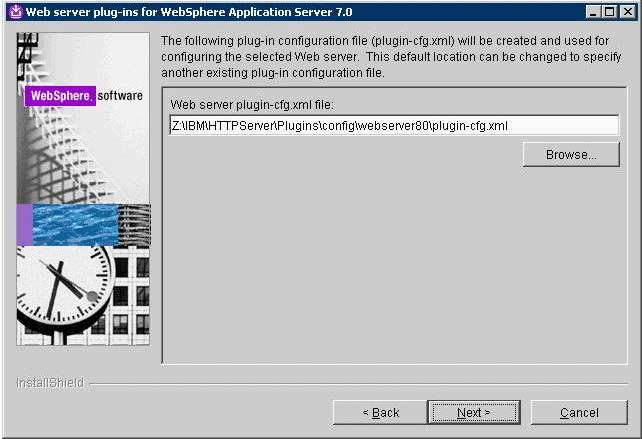
On Web Server plugin-cfg.xml file, you can accept the default location for the
plugin-cfg.xmlfile. -
Click the Next button to continue.
-
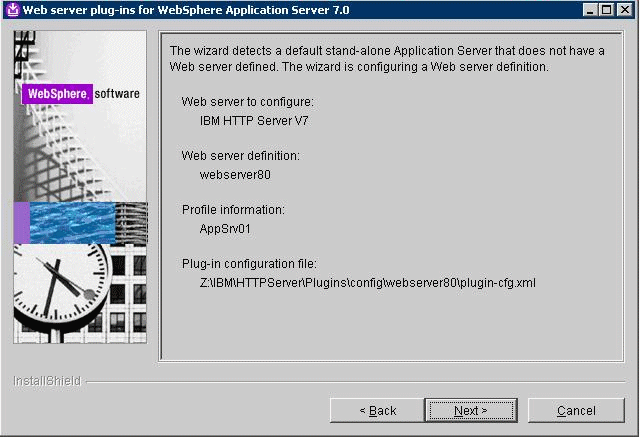
The installation wizard detects the default profile (such as AppSrv01) that does not have a Web server defined. Click the Next button to continue.
-
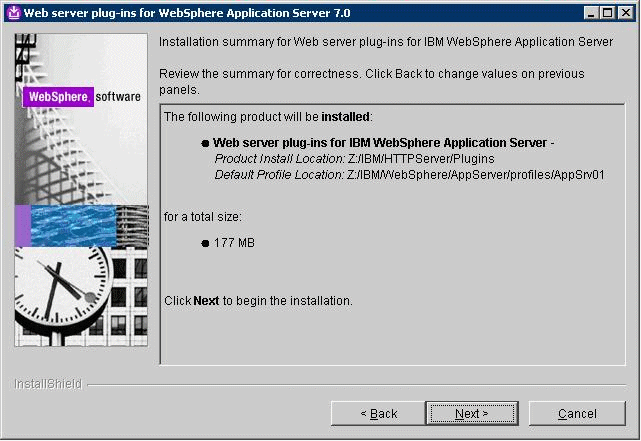
On the Summary screen, click the Next button to begin the installation.
-
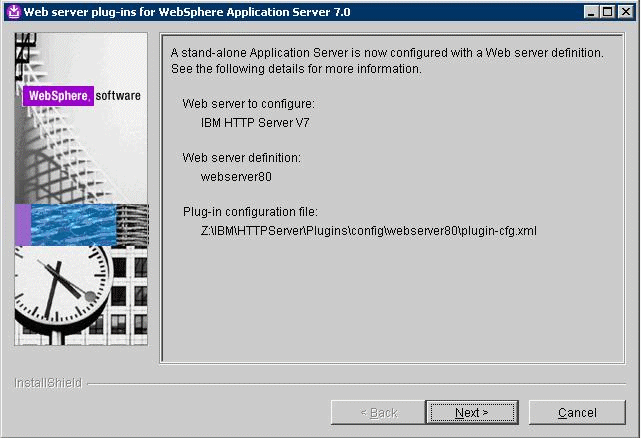
The installation wizard shows that a Web server definition is created for the default Application server profile (such as AppSrv01).
-
Click the Next button to proceed.
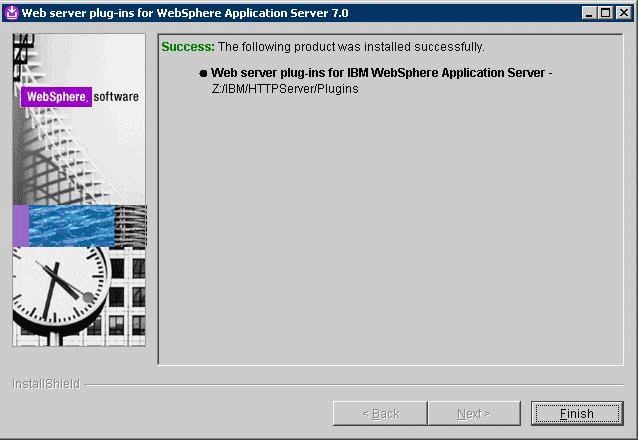
The installation wizard launches a web browser with more detailed information about the Plug-ins road map. You can close the browser at any time or return to the installation wizard.
-
On the completion screen, click Finish to exit the WebSphere Plug-ins installation wizard.
4.5 Installing the WebSphere Update Installer
The Update Installer for WebSphere Software includes a new installation program for IBM WebSphere Version 7.0, Installation Wizard starting with Fix Pack 7. The Update Installer is backwards compatible. You should download the Update Installer that match with your WebSphere product. You can use a single installation of the Update Installer to install maintenance packs on all the WebSphere software products such as WebSphere Application Server, Java SDK, IBM HTTP Server, and Web server plug-ins.
Before you can install Refresh or Fix pack for WebSphere software, you need to install the Update Installer engine as described in this procedure.
Note:
Make sure all WebSphere processes including IBM HTTP Server V7 are not running before starting Update Installer installation.This document uses Fix Pack 29 (7.0.0.29) to describe the process of installing WebSphere Fix Pack. Check the Certification for the latest supported WebSphere Fix Pack for the JD Edwards EnterpriseOne HTML Web Server (refer to Chapter 1, "Accessing Certifications (formerly Minimum Technical Requirements)").
To install the WebSphere update installer:
-
Download the Update Installer software from IBM web site.
-
Extract the downloaded image.
-
From the downloaded image run the install executable using these commands:
cd x:\dump\was7_windows\sup1\UpdateInstallerx:\dump\was7_windows\sup1\UpdateInstaller > install.exewhere
x:is the drive where you downloaded the Update Installer.
-
On the Welcome screen, click the Next button to begin the wizard.
-
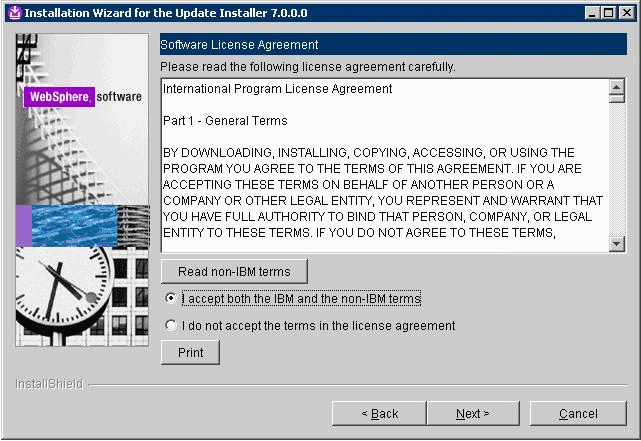
On Software License Agreement, review the License Agreement and choose an option to accept or decline.
-
Click the Next button to continue.
-
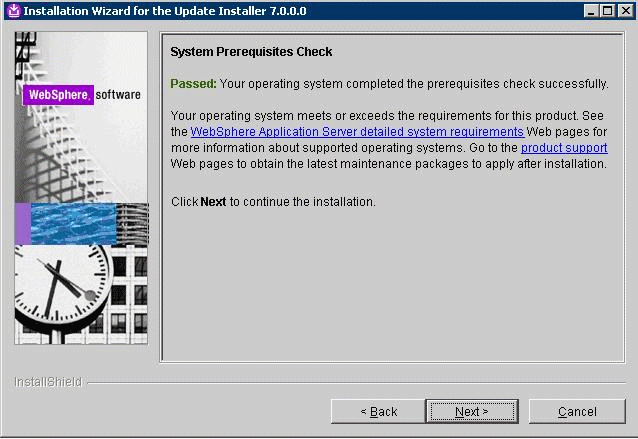
On System Prerequisites Check, the Installer performs a verification of system requirements.
-
After the Installer indicates the check was successful, click the Next button to continue.
-
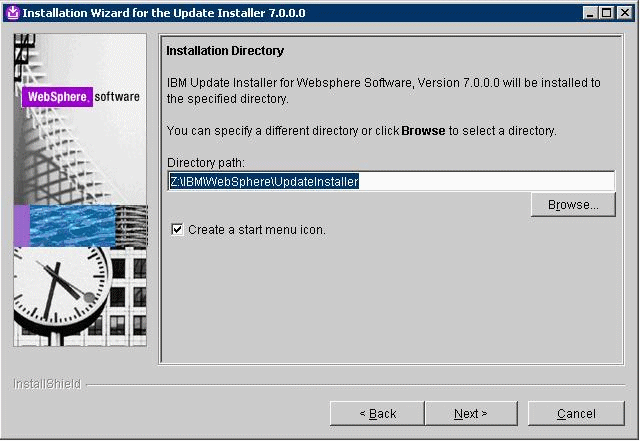
On Directory Name, enter a valid value for the Update Installer installation directory. For example:
z:\IBM\WebSphere\UpdateInstallerNote:
To facilitate maintenance, it is recommended that you install the Update Installer under the WebSphere root directory. For example:z:\IBM\WebSphere\UpdateInstaller -
Click the Next button to continue.
-
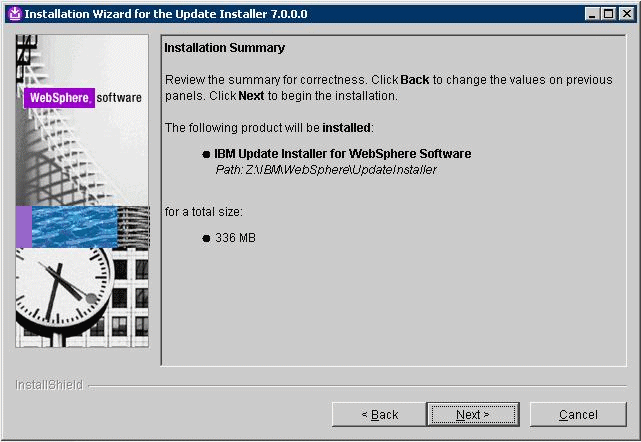
On Installation Summary, click the Next button to begin the installation.
-
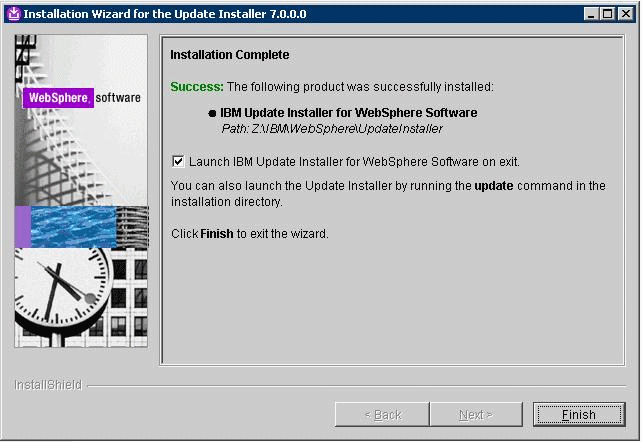
On Installation Complete, deselect the check box for Launch IBM Update Installer for WebSphere software on exit.
-
Click the Finish button.
4.6 Installing WebSphere 7.0 Fix Pack 29
Note:
This document uses Fix Pack 29 (7.0.0.29) to describe the process of installing WebSphere Fix Pack. Check the Certification for the latest supported WebSphere Fix Pack for the JD Edwards EnterpriseOne HTML Web Server (refer to Chapter 1, "Accessing Certifications (formerly Minimum Technical Requirements)").To install the WebSphere 7.0 Fix Pack:
-
Ensure that all WebSphere and HTTP Services are stopped prior to updating the software.
-
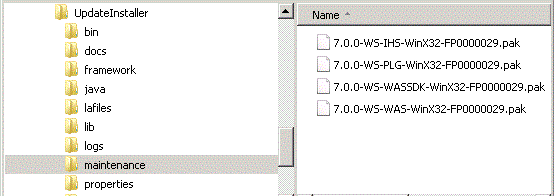
Download all the fix pack files to the "maintenance" directory under the installation directory of the Update Installer, such as:
Z:\IBM\WebSphere\UpdateInstaller\maintenanceThe complete list of WebSphere 7.0 Fix Pack 29 (7.0.0.29) files is shown in the screen sample below:
Note:
You do not need to uncompress these files, just put them in the "maintenance" directory. -
Run the
updateexecutable from theUpdateInstallerdirectory using these commands:cd x:\IBM\WebSphere\UpdateInstallerx:\IBM\WebSphere\UpdateInstaller > update.exewhere
x:is the drive on which you downloaded the Update Installer.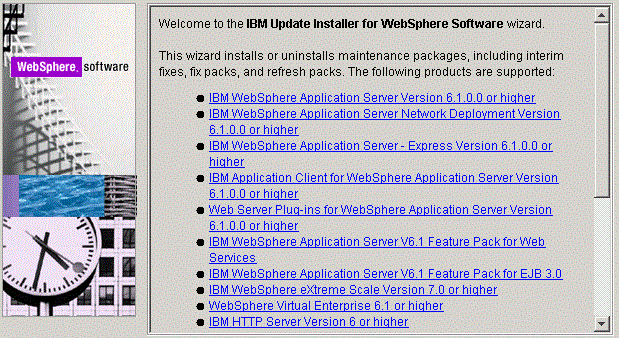
-
Click the Next button to continue.
-
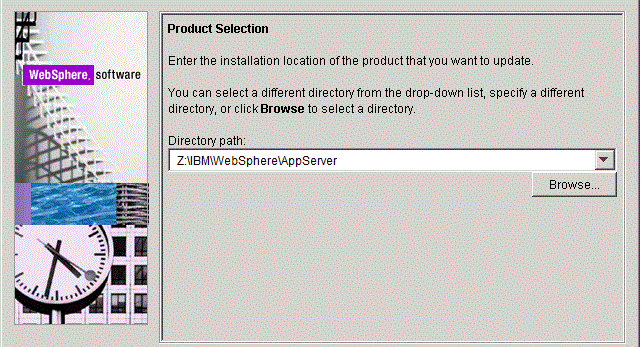
On the Product selection screen, use the drop down to select the installation location of the WebSphere Application Server. For example:
Z:\IBM\WebSphere\AppServer -
Click the Next button to continue.
-
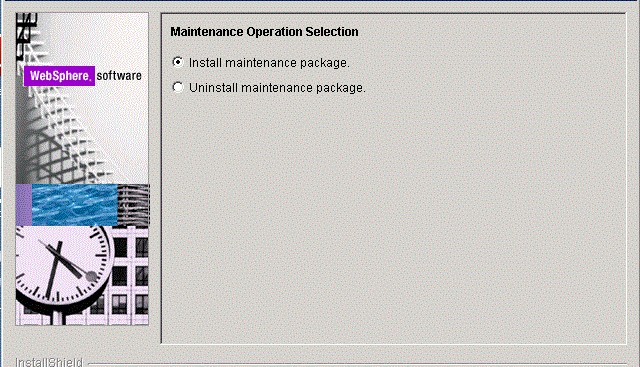
On Maintenance Operation Selection, select the following radio button:
Install maintenance package
-
Click the Next button to continue.
The installer inspects the
UpdateInstallerdirectory for maintenance packages (.pak files); specifically in themaintenancesub-directory.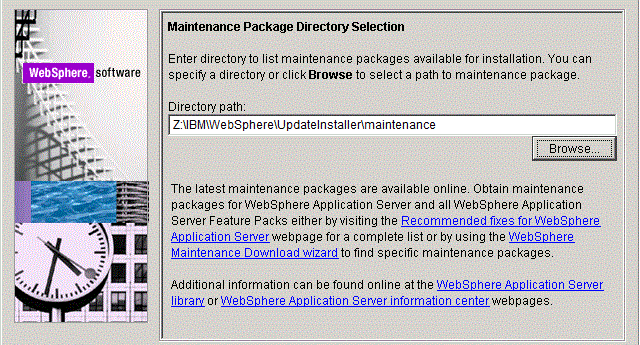
-
On Maintenance Package Selection, validate the directory name that was located by the Installer wizard.
-
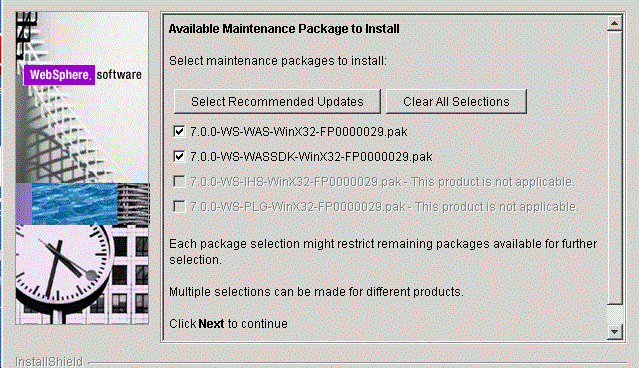
On Available Maintenance Package to Install, check the WAS and WASSDK fix pack files since the WebSphere Application Server components are being updated.
-
Click the Next button to continue.
-
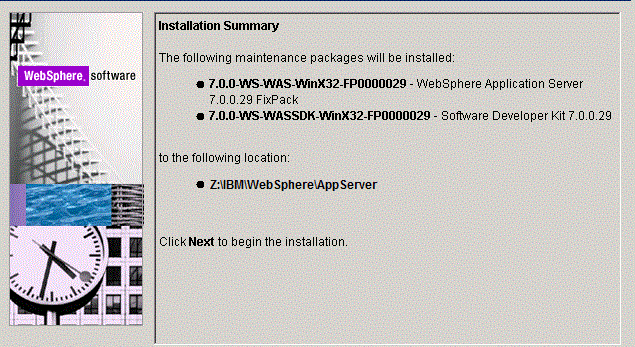
On Installation Summary, review the information and click the Next button to begin the installation.
-
Click the Next button to continue.
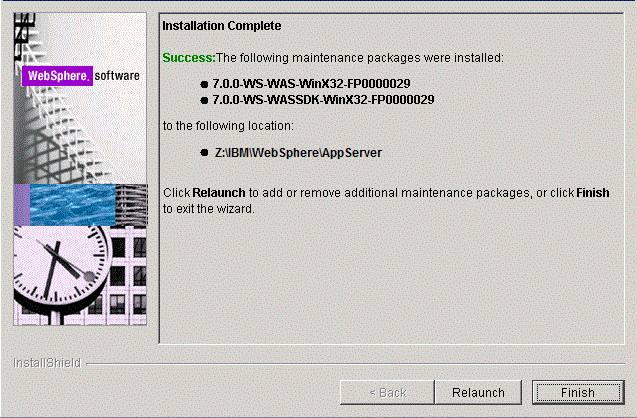
-
On Installation Complete, Success, click the Relaunch button to relaunch the wizard and install the HTTP server components.
4.7 Installing the IBM HTTP Server Fix Pack
Note:
If you are planning to use Microsoft Internet Information Services (IIS), you can skip this section and continue to Installing the WebSphere 7.0 Plug-ins Fix Pack.To install the IBM HTTP Server Fix Pack:
-
Ensure that all WebSphere and HTTP Services are stopped prior to updating the software.
-
Download and uncompress the fix pack file for the IBM HTTP Server to the
\UpdateInstaller\maintenancedirectory.For example:
7.0.0-WS-IHS-WinX32-FP00000029.pak -
Once the wizard has restarted, select the HTTP server components.
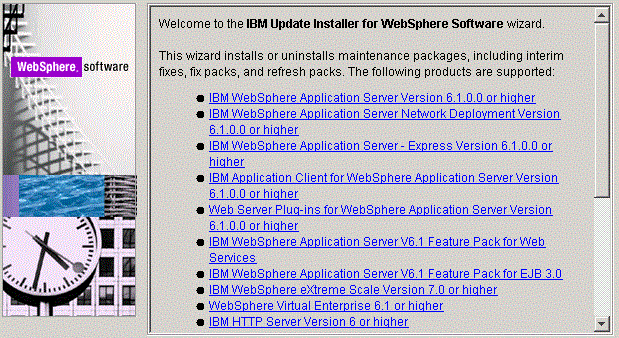
-
On the Welcome screen, click the Next button to begin the Update Installer wizard.
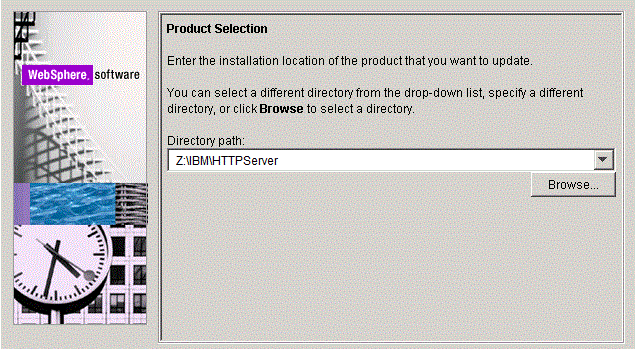
-
On Product Selection, use the drop down to select the installation location of the IBM HTTP Server. For example:
Z:\IBM\HTTPServer -
Click the Next button to continue.
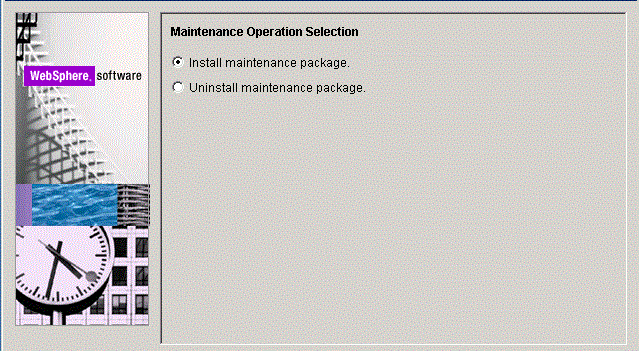
-
On Maintenance Operation Selection, select this radio button:
Install maintenance package
-
Click the Next button to continue.
-
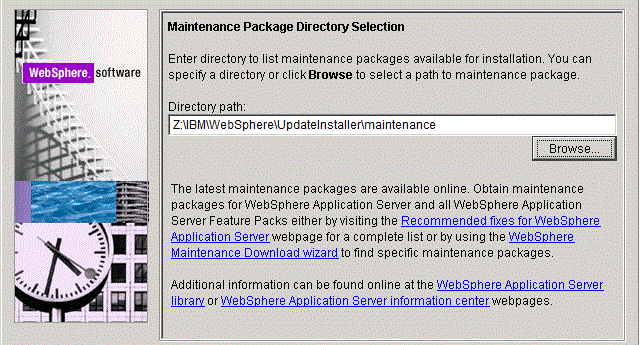
On Maintenance Package Directory Selection, validate the directory path that was located by the Installer wizard.
-
Click the Next button to continue.
-
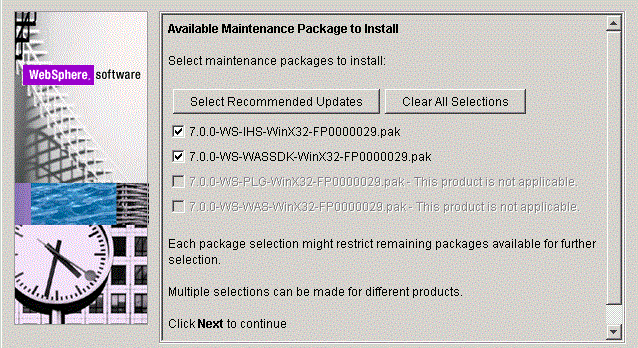
On Available Maintenance Package to Install, ensure that the available IHS and WASSDK fix pack files are checked since the IBM HTTP Server components are being updated.
-
Click the Next button to continue.
-
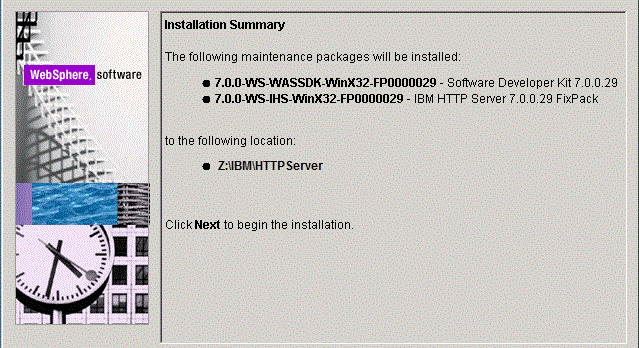
On Installation Summary, click the Next button to begin the installation.
-
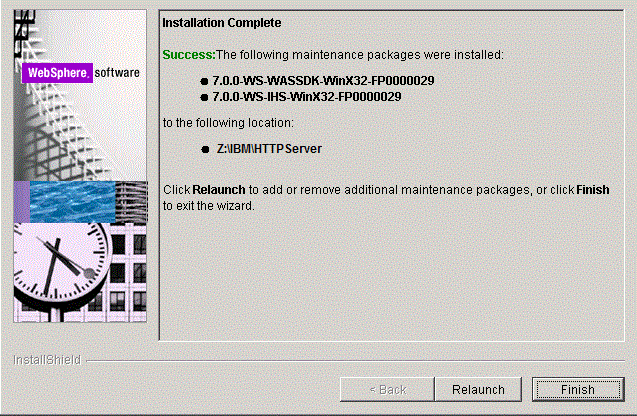
On Installation Complete, verify that the proper maintenance packages for the IBM HTTP Server were successfully installed.
-
Click the Relaunch button and continue to the next section to install WebSphere Plug-ins Fix Pack.
4.8 Installing the WebSphere 7.0 Plug-ins Fix Pack
Note:
It is very important to following the exact sequence of steps in this procedure.To install the WebSphere 7.0 Plug-ins Fix Pack:
-
Ensure that all WebSphere and IBM HTTP or Microsoft IIS Services are stopped prior to updating the software.
-
Download and copy the fix pack file for the WebSphere Plug-ins to the
\UpdateInstaller\maintenancedirectory.For example:
7.0.0-WS-PLG-WinX32-FP00000029.pak -
Run the
updateexecutable from the copiedUpdateInstallerdirectory using these commands:cd Z:\IBM\WebSphere\UpdateInstallerZ:\IBM\WebSphere\UpdateInstaller > update.exe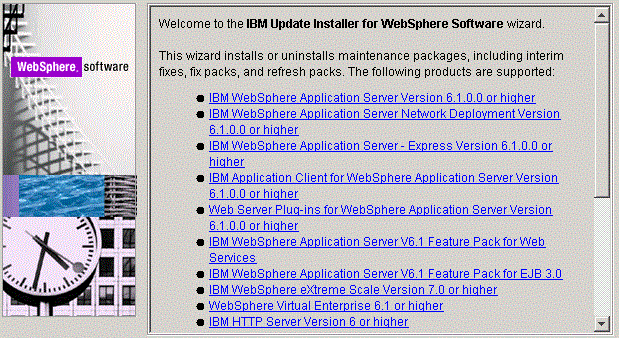
-
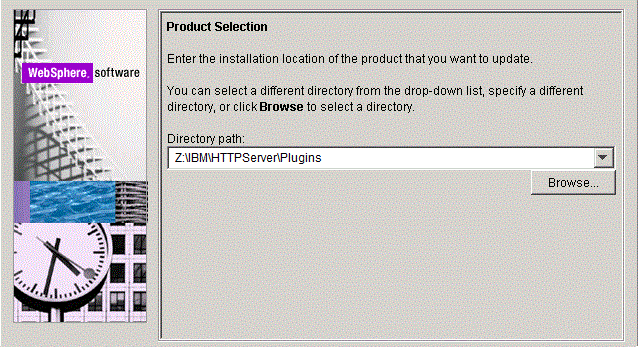
Once is wizard is restarted, select the Plugins component.
-
On Product Selection, use the drop down to select the installation location of the Web server plugin. For example:
Z:\IBM\HTTPServer\Plugins -
Click the Next button to continue.
-
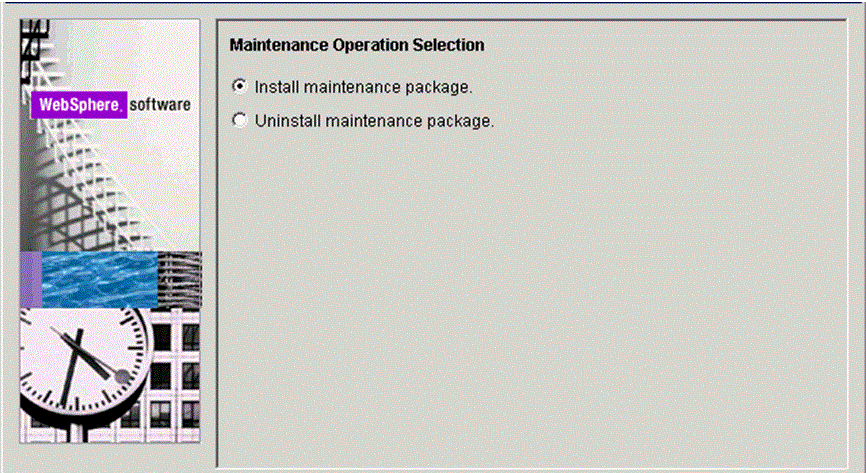
On Maintenance Operation Selection, select the following radio button:
Install maintenance package
-
Click the Next button to continue.
-
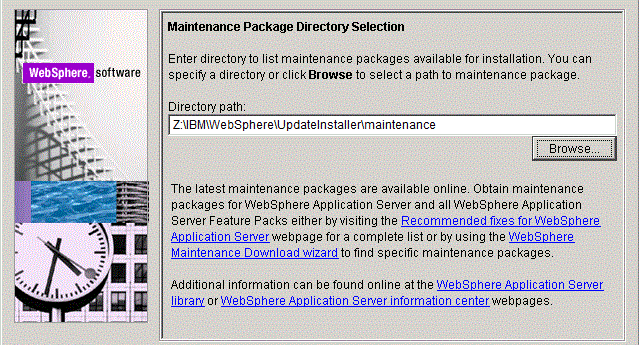
On Maintenance Package Directory Selection, validate the directory path that was located by the Installer wizard.
Note:
The installer inspects the\UpdateInstaller\maintenancedirectory for maintenance packages (.pakfiles). -
Click the Next button to continue.
-
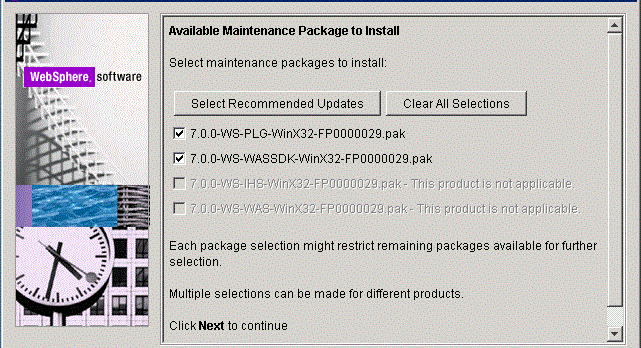
On Available Maintenance Package to Install, ensure that the PLG and WASSDK fix pack files are checked since the WebSphere Plugin components are being updated.
-
Click the Next button to continue the update for the WebSphere Plug-ins.
-
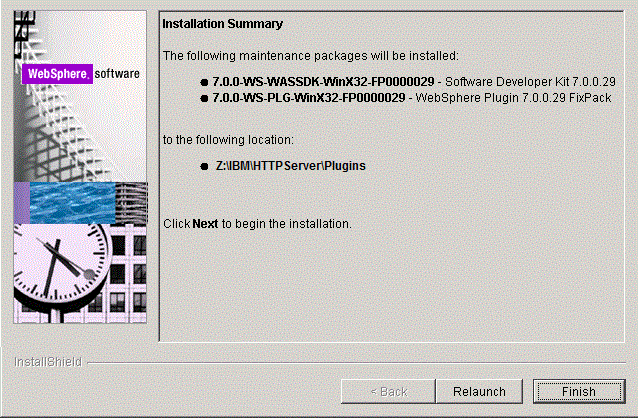
On the Installation Summary screen, review the information and click the Next button to begin the installation.
-
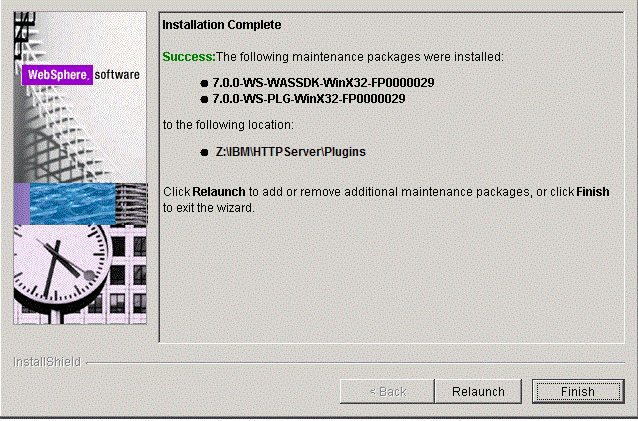
After the Plug-ins update is complete, the Success screen indicates the status of the maintenance package installation.
-
Click the Finish button to exit the Update Installer wizard.
4.9 Verifying the Versions of Installed WebSphere Products
This section describes how to verify the versions of these installed WebSphere products:
4.9.1 WebSphere Application Server
Use this procedure to verify the version of the IBM WebSphere Application Server.
-
Open a Windows Command window
-
Navigate to this folder:
Z:\IBM\WebSphere\AppServer\bin -
From the above folder, execute this batch file:
versionInfo.batVerify the installed version of the IBM WebSphere Application Server is 7.0.0.29 as shown in the example below:

4.9.2 IBM HTTP Server
Use this procedure to verify the version of the IBM HTTP Server.
-
Open a Windows Command window
-
Navigate to this folder:
Z:\IBM\WebSphere\AppServer\bin -
From the above folder, execute this batch file:
versionInfo.batVerify the installed version of the IBM HTTP Server is 7.0.0.29 as shown in the example below:

4.9.3 WebSphere Plugins for IBM WebSphere Application Server
Use this procedure to verify the version of the IBM HTTP Server.
-
Open a Windows Command window
-
To verify the Web server plugins for IBM WebSphere Application Server, navigate to this folder:
Z:\IBM\HTTPServer\Plugins\bin -
From the above folder, execute this batch file:
versionInfo.batVerify the installed version of the Web server plugins for IBM WebSphere Application Server is 7.0.0.29 as shown in the example below:

4.10 Starting the WebSphere Application Server
Note:
By default, WebSphere Application Server 7.0 creates and configures a default server namedserver1 during installation. If you named your server something other than the default value, then substitute that name for server1 in the following steps.To start the WebSphere Application Server:
-
Start a command prompt.
-
Navigate to the
<websphere_install_dir>\AppServer\profiles\profile_name\bindirectory. For example:cd Z:\IBM\WebSphere\AppServer\profiles\AppSrv01\bin -
Issue the command
startServerfollowed by the Application Server name. For example:Z:\IBM\WebSphere\AppServer\profiles\AppSrv01\bin > startServer server1
This command is case sensitive.
Tip:
The Application Server can also be started through the Windows Services Applet. Each profile that you configured will have a corresponding service that is automatically created when you created the profile.Note:
Starting with Tools Release 8.97, you can use the Server Manager to start the WebSphere process.4.11 Stopping the WebSphere Application Server
Note:
By default, WebSphere Application Server 7.0 creates and configures a default server namedserver1 during installation. If you named your server something other than the default value, then substitute that name for server1 in the following steps.To stop the WebSphere Application Server:
-
Start a command prompt.
-
Navigate to the
<websphere_install_dir>\AppServer\profiles\profile_name\bindirectory. For example:cd Z:\IBM\WebSphere\AppServer\profiles\AppSrv01\bin -
Issue the command
stopServerfollowed by the Application Server name. For example:stopServer server1
This command is case sensitive.
Note:
If administrative security has been enabled for the WebSphere Application Server profile then use the following command to stop the servers:Z:\IBM\WebSphere\AppServer\profiles\AppSrv01\bin > stopServer server1 user <admin_user_name> -password <admin_user_password>
Tip:
The Application Server can also be stopped through the Windows Services Applet. Each profile that you configured will have a corresponding service that is automatically created when you created the profile.Note:
Starting with Tools Release 8.97, you can use the Server Manager to stop the WebSphere process.4.12 Determining the Name and Status of the WebSphere Application Server
To determine the name and status of any or all WebSphere Application servers:
-
Start a command prompt.
-
Navigate to the
<websphere_install_dir>\AppServer\profiles\profile_name\bindirectory. For example:cd Z:\IBM\WebSphere\AppServer\profiles\AppSrv01\bin -
Issue the command serverStatus followed by the Application Server name (or with the all option to view the status of all the servers in the profile). For example, to view the status of all Application Servers:
Z:\IBM\WebSphere\AppServer\profiles\AppSrv01\bin > serverStatus -allNote:
If administrative security has been enabled for the WebSphere Application Server profile, you must use the following command to check the status of the servers:Z:\IBM\WebSphere\AppServer\profiles\AppSrv01\bin > serverStatus all user <admin_user_name> -password <admin_user_password>
4.13 Starting the IBM HTTP Server
To start the IBM HTTP Server:
-
Start a command prompt.
-
Navigate to the
<ibm_http_server_location>\bindirectory and issue the start command with the -k option. For example:cd Z:\IBM\HTTPServer\binapache.exe -k start
This command is case sensitive.
Tip:
The IBM HTTP Server can also be started through the Windows Services Applet.Note:
Starting with Tools Release 8.97, you can use the Server Manager to start the IBM HTTP Server process.4.14 Stopping the IBM HTTP Server
To stop the IBM HTTP Server:
-
Start a command prompt.
-
Navigate to the
<ibm_http_server_location>\bindirectory and issue the stop command with the -k option. For example:cd Z:\IBM\HTTPServer\binapache -k stop
This command is case sensitive.
Tip:
The IBM HTTP Server can also be stopped through the Windows Services Applet.Note:
Starting with Tools Release 8.97, you can use the Server Manager to stop the IBM HTTP Server process.Note:
Below is an example of the console indicating that the IBM HTTP Server is successfully stopped:4.15 Accessing the WebSphere Administration Console
The WebSphere Administration Console is completely web-based and can be accessed from any supported web browser. The default URL is:
http://<machinename>:<profile_port>/admin
where machine_name is the name of the machine on which WebSphere Application Server has been installed, and
where profile_port was defined during the profile creation in the profile creation wizard. For the first profile created, the default value is usually 9060.
To access the WebSphere Administration Console on the installed machine:
-
Ensure that the WebSphere Application Server (default name is
server1) is started. -
Start a web browser.
-
Enter this URL to access the WebSphere Administration Console:
http://localhost:9060/adminTip:
If the port number is unknown and the default port is not working, theAboutThisProfile.txtfile contains the keyAdministrative console port, which typically lists the assigned admin port number. Typically this file is located in this directory:<websphere_installation_root>\AppServer\profiles\<profile_name>\logs\ AboutThisProfile.txt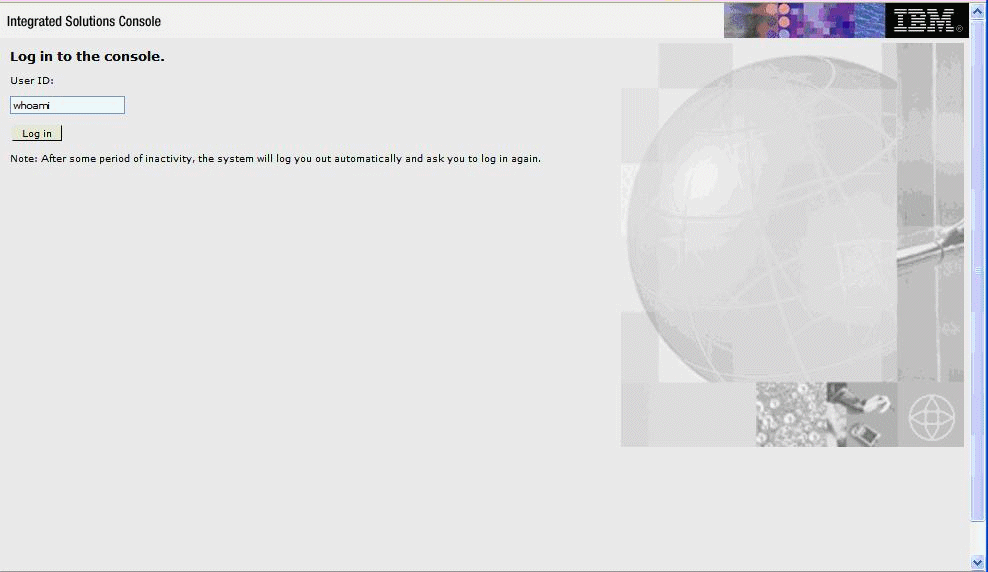
-
On the Log in to the console screen, enter a valid or new user.
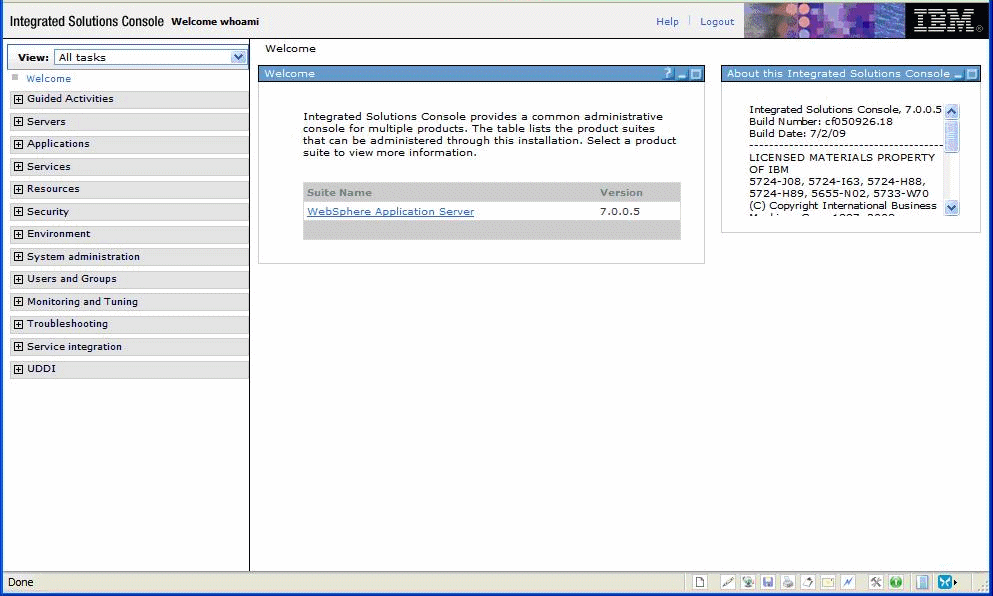
Upon successful logon, the WebSphere Application Server welcome screen is displayed. You can use this application to manage your WebSphere servers and related machines.
4.16 Testing the WebSphere and IBM HTTP Server Installation
To test the WebSphere Administration Console:
-
Ensure that the WebSphere Application Server (default name is
server1) is started. -
Ensure that the IBM HTTP Server is started.
-
Start a web browser.
-
Enter this URL to test the WebSphere Administration Console:
http://<machine_name>:<http_port>/snoopwhere
machine_nameis your server, andwhere
http_portis the port of your IBM HTTP Server. The default value is 80.For example:
http://localhost:80/snoop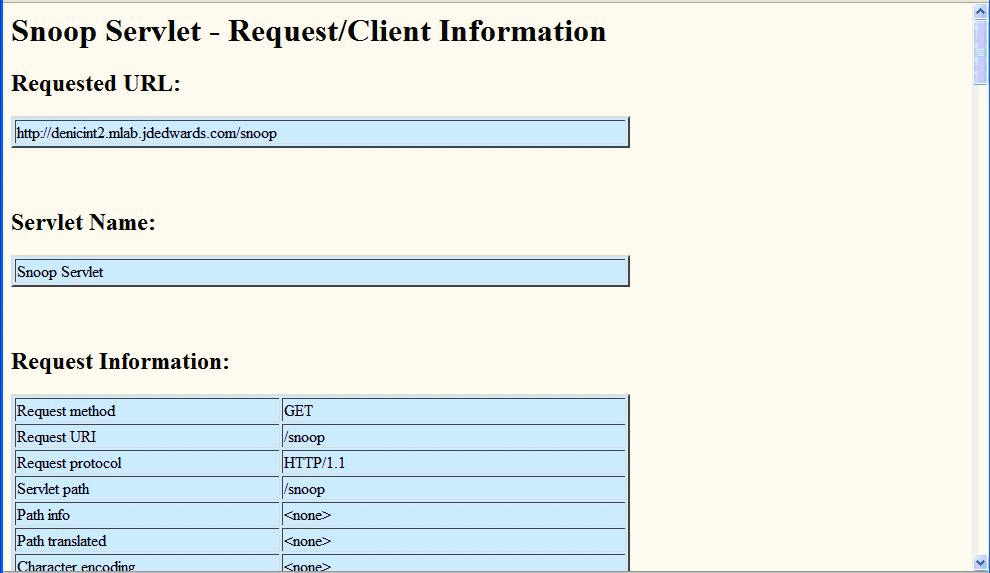
Upon successful execution, the resulting page should display information similar to the above. This indicates that your WebSphere Application Server is successfully installed and functioning.
4.17 Generating and Propagating WebSphere Plug-ins (optional)
Note:
This section is informational only and is not required before you install the Oracle JD Edwards EnterpriseOne HTML Web server.Whenever you install new enterprise applications, or create new virtual hosts, you must regenerate Web Server plug-ins. If your WebSphere installation is on a single machine, you can generate plug-ins from the WebSphere Administrative console. However, your configuration is across multiple machines, you might need to manually generate plug-ins.
This section describes these topics:
4.17.1 Generating WebSphere Plug-ins
To generate WebSphere plug-ins:
-
Log on to the WebSphere Administrative console as described in Accessing the WebSphere Administration Console.
-
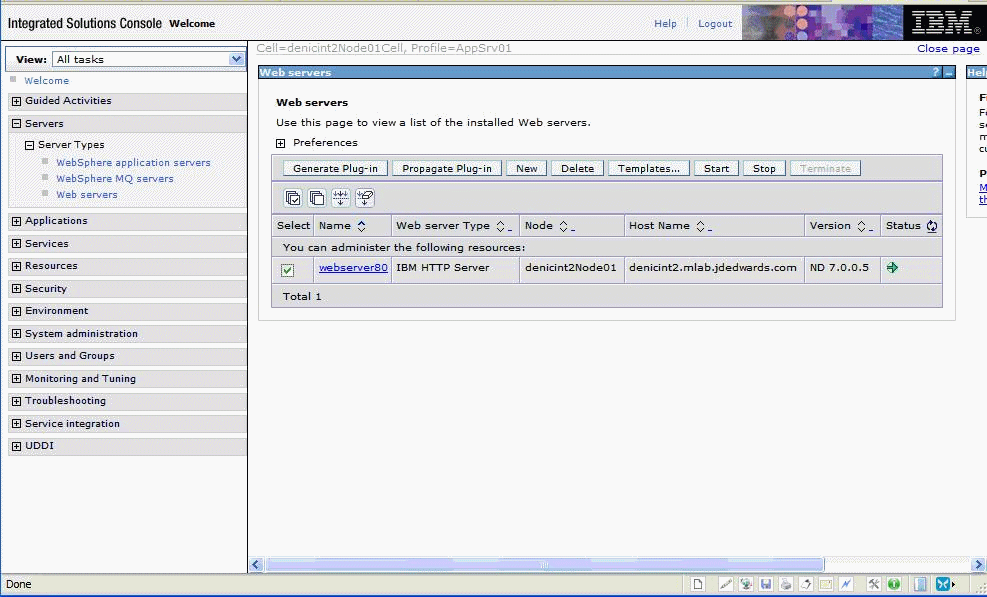
On the left hand navigation pane, select Servers > Server Types > Web servers
-
Click the check box next to the webserver definition for which you want to regenerate plug-ins.
-
To generate plug-ins, click the Generate Plug-in button, which is located above the webserver definition.
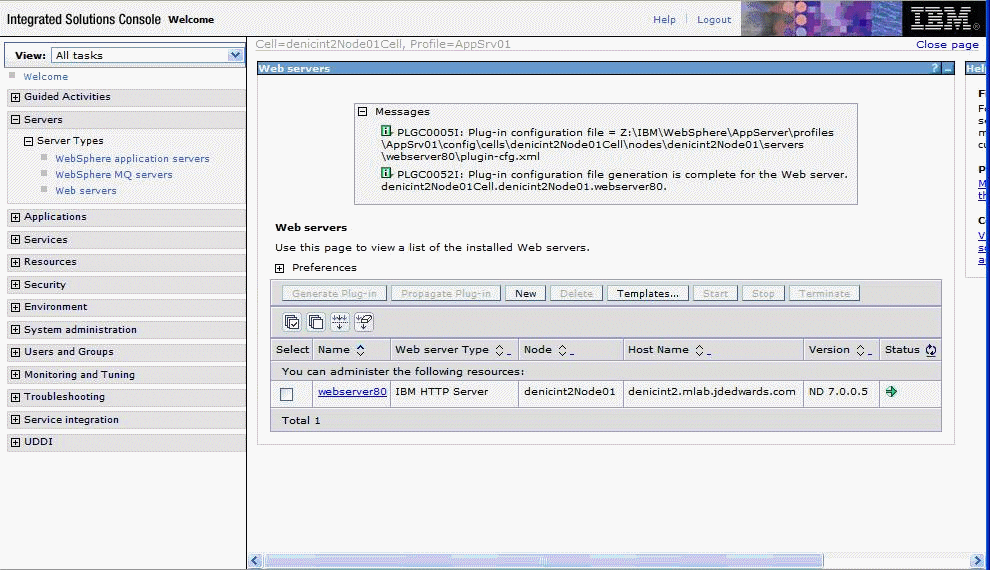
The Plug-in file
plugin-cfg.xmlis regenerated in place, typically at this location:Z:\IBM\WebSphere\AppServer\profiles\AppSrv01\config\cells\denicint2Node01Cell\nodes\ denicint2Node01\servers\webserver80A status message will display under the Web servers section.
-
You must restart the IBM HTTP or Microsoft IIS Server for any plug-in changes to take effect.
4.17.2 Propagating WebSphere Plug-ins
To propagate the generated WebSphere plug-ins:
-
Log on to the WebSphere Administrative console as described in Accessing the WebSphere Administration Console.
-
On the left hand navigation pane, select Servers > Server Types > WebServers.
-
Click the check box next to the webserver definition for which you want to propagate plug-ins.
-
To generate plug-ins, click the Propagate Plug-in button, which is located above the webserver definition.
The Plug-in file plugin-cfg.xml is propagated in place, typically at this location:
x:\IBM\HTTPServer\Plugins\config\webserver80\plugin-cfg.xmlwhere
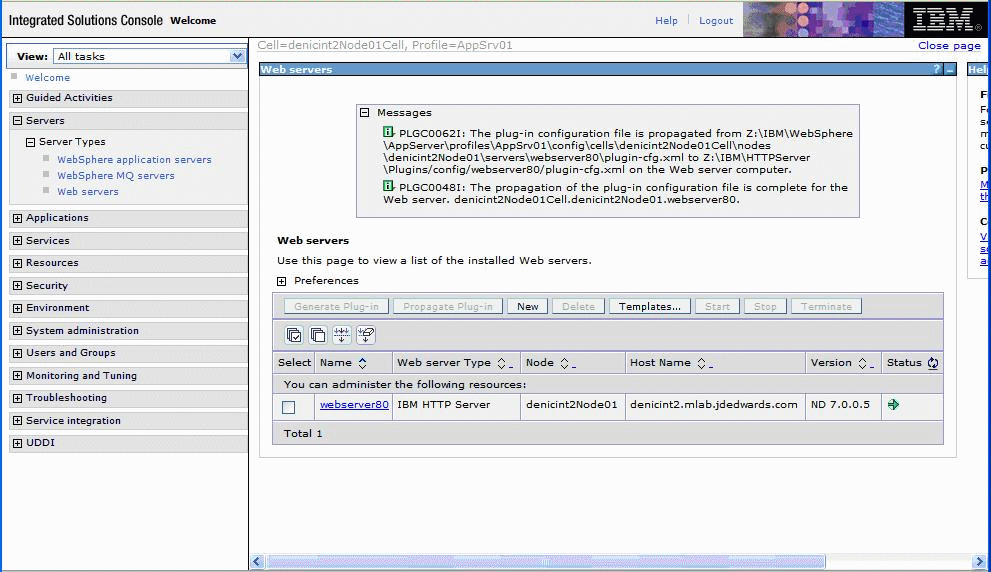
x:is the drive on which the IBM HTTP Server is installed.A status message displays under the Web servers section as indicated in this screenshot sample:
Note:
Federated (Clustered) Web Servers. If you are using WebSphere Application Server and running JD Edwards EnterpriseOne as part of a federated (or clustered) web server, you may need to regenerate the WebSphere global plugin configuration after deploying the newest tools release. This is required when new servlets have been added to the tools release you are deploying.To update (regenerate) plugins, refer to the following procedure.
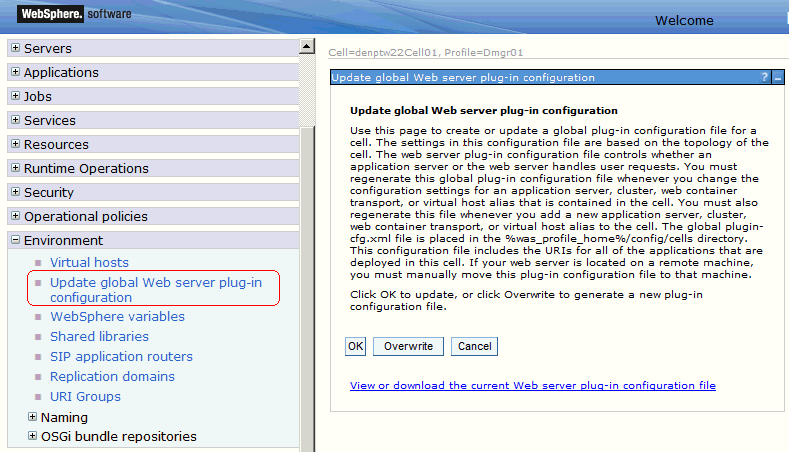
To update (regenerate) and propagate the global web server plugin configuration:
-
Log on to the Deployment Manager Administration Console using the Dmgr01 profile.
-
Expand the Environment node and select Update global Web server plug-in configuration.
-
Review the content in the right-hand pane and note the location of the plug-in file in the description. For example, the description might say:
The global plugin-cfg.xml file is placed in the %was_profile_home%/config/cells directory.
-
Click the OK button.
4.18 Creating a New Application Server Profile (optional)
Note:
This section is informational only and is not required before you install Oracle JD Edwards EnterpriseOne HTML Web server.To create a new application server profile:
-
Launch the profile creation wizard. For example:
cd Z:\IBM\WebSphere\AppServer\bin\ProfileManagementZ:\IBM\WebSphere\AppServer\bin\ProfileManagement > pmt.bat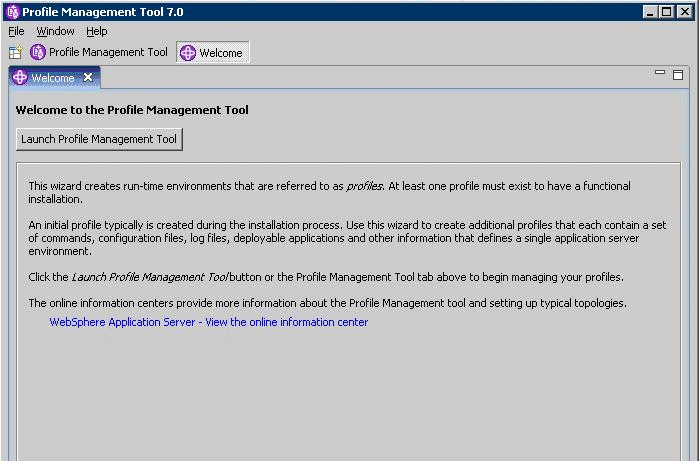
-
On the Welcome screen, click the Launch Profile Management Tool button.
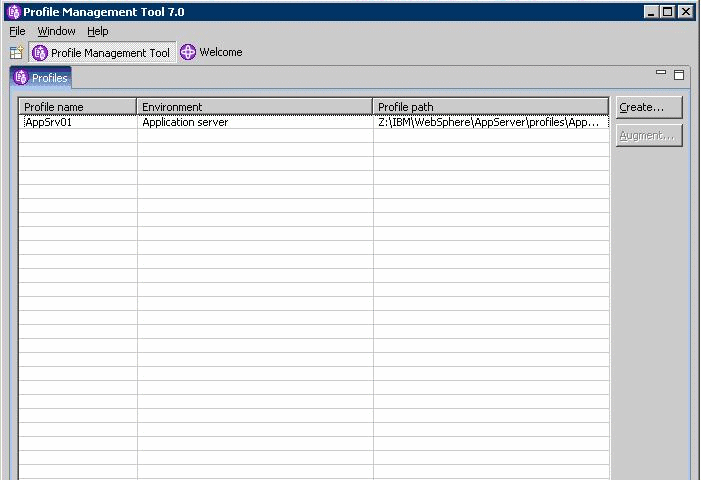
-
On Profile Management Tool, click the Create button to begin the profile configuration.
-
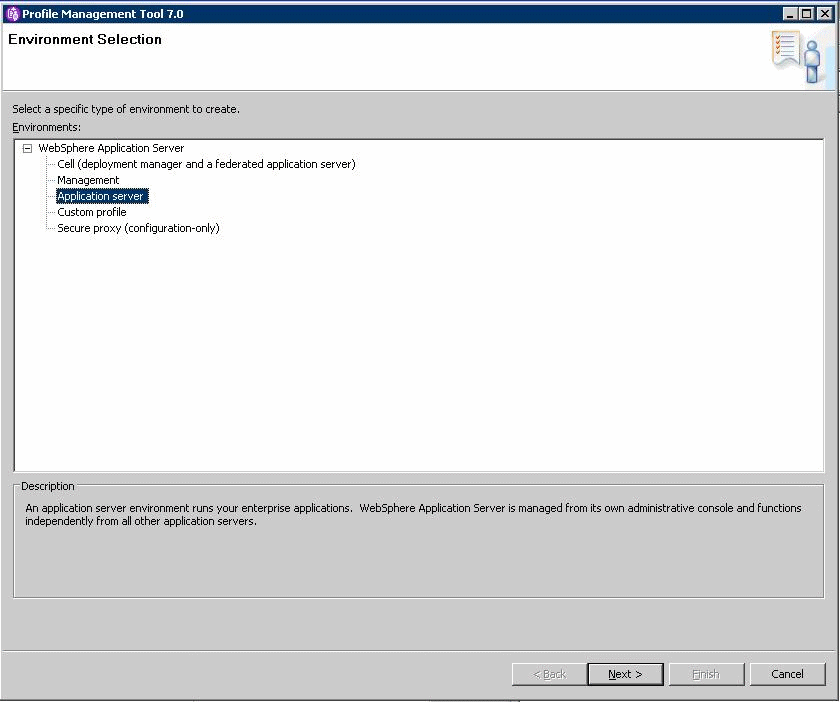
On Environment Selection, select Application Server as the type of environment to create.
-
Click the Next button to continue.
-
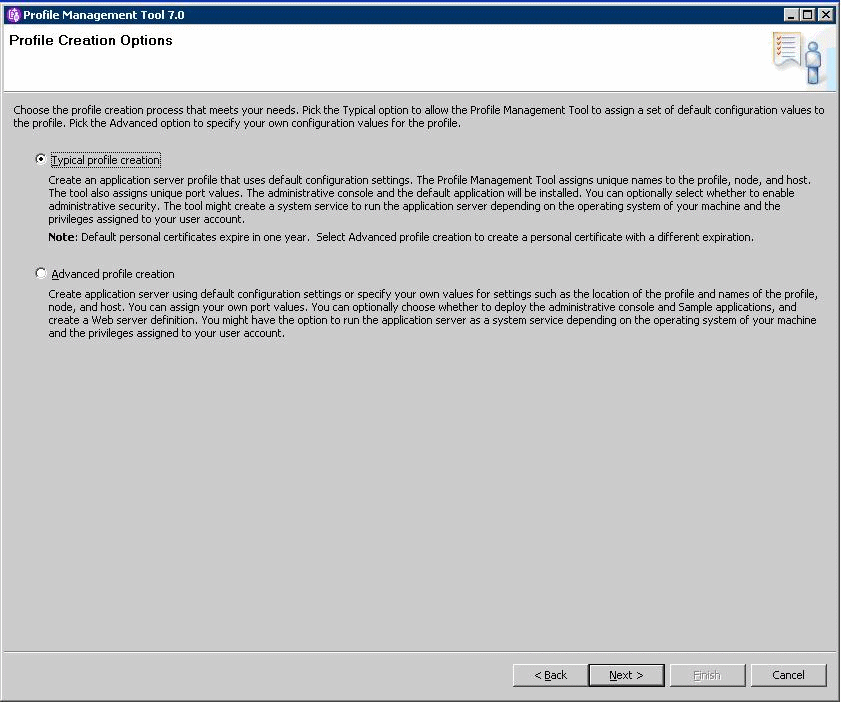
On Profile Creation Options, select the Typical profile creation radio button.
-
Click the Next button to continue.
-
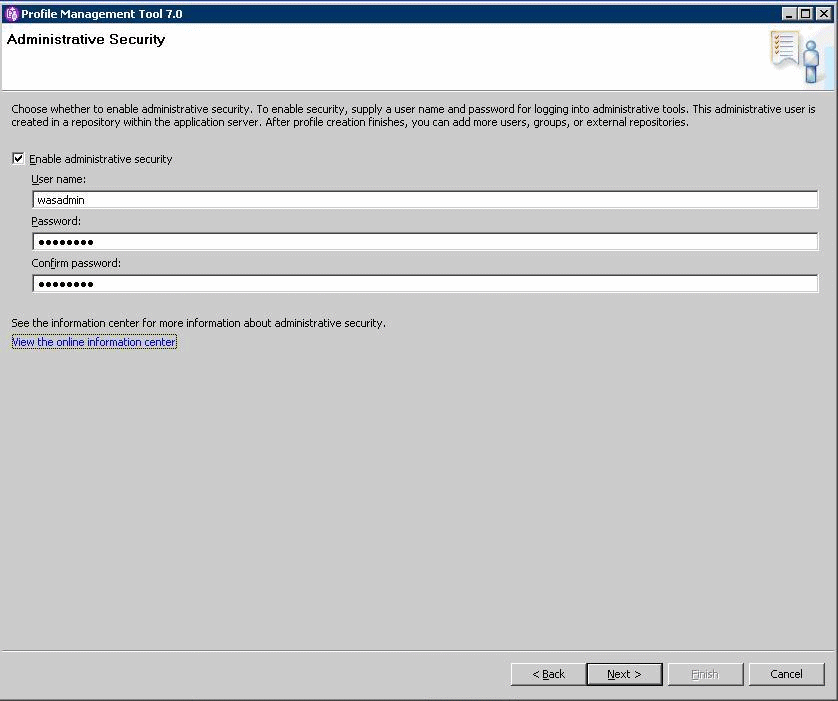
Administrative security is enabled for the profile by default. Clear the check box to disable administrative security or enter the user name and password.
On Enable Administrative Security, the check box for the application server profile is checked by default. You can choose either to:
-
Clear the check box for Enable administrative security to disable server administrative security, or
-
If the check box is enabled for Enable administrative security, server administration security will be enabled and you must enter the User ID and Password
-
-
Click the Next button to continue.
-
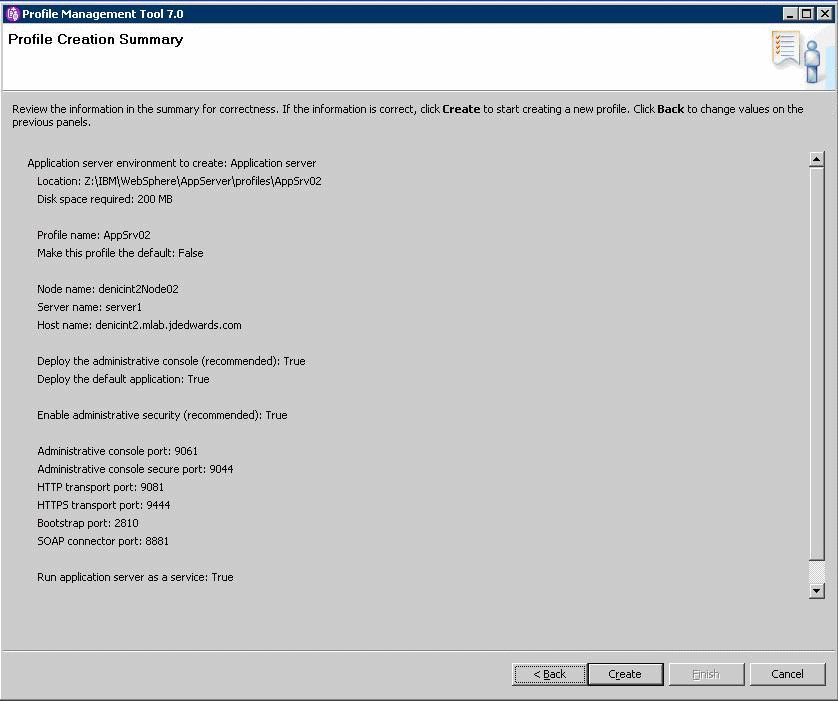
On Profile summary, review your selections.
-
Click the Create button to start the profile creation.
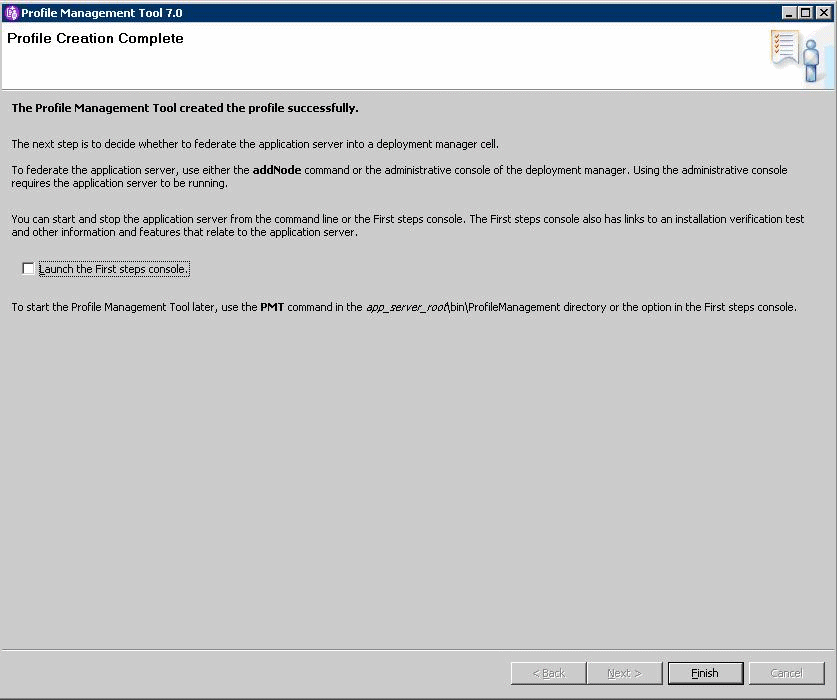
When complete, the installer displays the message: The Profile Management Tool created the profile successfully. It is not necessary to Launch the First Steps console at this time; you can clear the check box, which is checked by default.
-
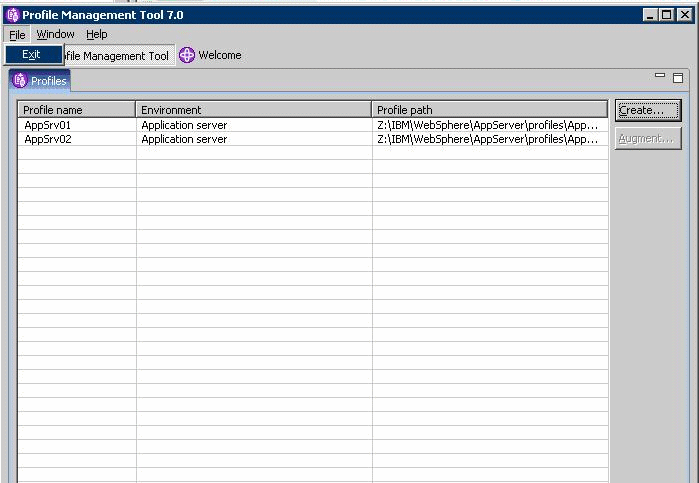
Click the Finish button to complete the wizard and the profile configuration and proceed to the final Profiles screen.
-
Exit the Profile Management Tool by choosing File > Exit.
4.19 Deleting a Profile (optional)
This section is provided as reference in case you need to delete a WebSphere base or Network Deployment profile.
-
From a command prompt, change to this directory:
cd Z:\IBM\WebSphere\AppServer\bin -
To delete a profile, issue this command:
manageprofiles delete profileName <profile_name>where
profile_nameis the name of the profile to be deleted.If the
profile_nameis valid, and the command successfully executed, the system returns this message:INSTCONFSUCCESS: Success: The profile no longer exists.
When you delete a profile, the profile and its directory are deleted, except for the logs directory. You must manually delete the logs directory and then delete the profile directory.
4.20 Adding a New Web Server for a New Profile (optional)
Each profile should be associated with a Web Server. The EnterpriseOne HTML Web Server install fails if it does not find a webserver associated with the profile specified during the install. If the newly created profile is an ND profile, you can create the Web Server by using the button Create a New Web Server from the Web Servers page on the WebSphere Administrator Console. However, if the newly created profile is not an ND profile, the option to Create a New Web Server is not available. Instead, you must create a new web server must be created from the command line.
To add a new web server for a new profile from the command line:
-
Locate a copy of this Web Server configuration file which is typically located in this directory with this name:
x:\IBM\HTTPServer\Plugins\bin\configurewebserver<webserver_port>.batwhere
x:is the drive on which you installed the IBM HTTP Server, andwhere
<webserver_port>is the port on which the IBM HTTP Server is installed. -
Make a copy of the
configurewebserver<webserver_port>.batfile assigning a new port value to the copy. For example, assuming you have changed directory tox:\IBM\HTTPServer\Plugins\bin:copy configurewebserver80.bat configurewebserver81.batDo not manually copy the
configurewebserver1.batfile to the specific profile directory. -
Edit the new configuration file (
configurewebserver81.bat) file that resides in thex:\IBM\HTTPServer\Plugins\bindirectory to change the settings to be unique to and specific to your newly created profile.Change the settings to be unique to and specific to your newly created profile.
A sample file is provided below where:
the newly created profile is called AppSrv02, and
the new webserver will be called webserver81, and
the name of the node that we specified for our new profile is SERVERNode02, and
the name of the server itself is SERVER.domain.com.
The above is illustrated by the bolded settings in this sample file:
"Z:/IBM/WebSphere/AppServer/profiles/AppSrv02/bin/wsadmin.bat"
%PROFILE_NAME_PARAMETER% %WSADMIN_USERID_PARAMETER%
%WSADMIN_PASSWORD_PARAMETER% -conntype NONE -f
"Z:\IBM\WebSphere\AppServer\bin\configureWebserverDefinition.jacl"
webserver81 IHS "Z:\\IBM\\HTTPServer"
"Z:\\IBM\\HTTPServer\\conf\\httpd.conf" 81 MAP_ALL
"Z:\\IBM\\HTTPServer\\Plugins" managed denicint2Node02
denicint2.mlab.jdedwards.com windows
Note:
Where the original settings for these bolded entries were probably something similar to these:-
AppSrv01
-
webserver80
-
80
-
SERVERNode01
-
-
Save the file.
-
From the directory where the batch file exists, execute it using this command:
configurewebserver81.batwhere
x:is the drive on which your plugins are installed.The console displays these messages when the batch file is running and finishes:
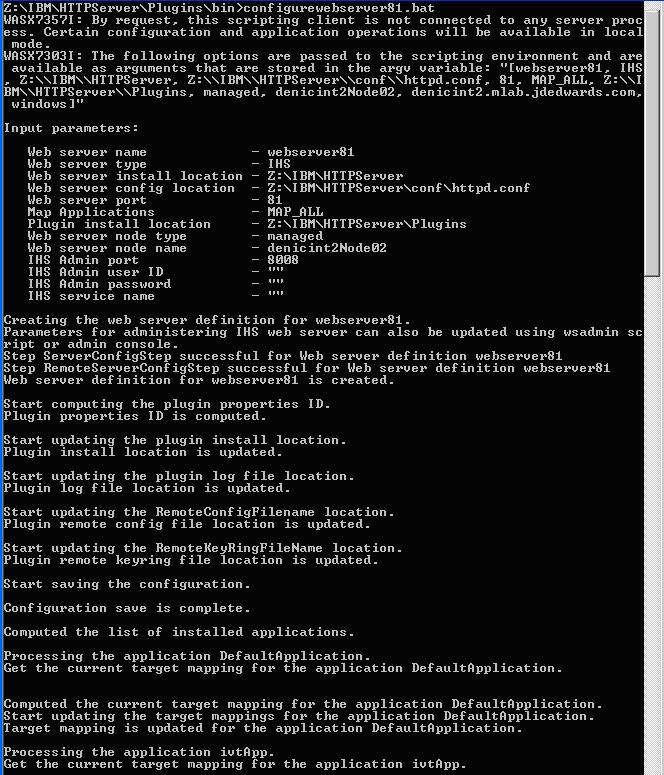

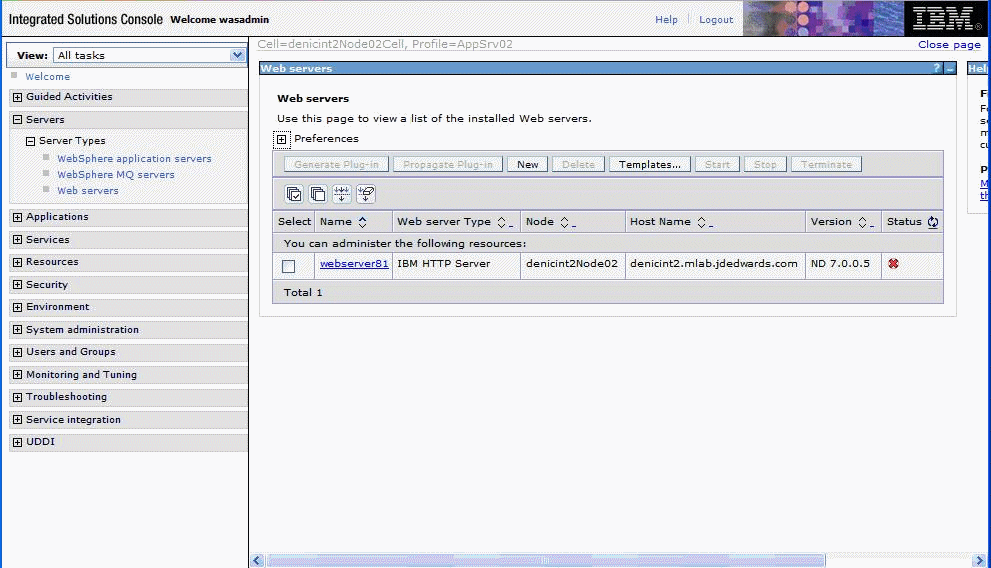
-
Verify your newly created Web Server is created by logging into the WebSphere Admin Console and clicking on Web Servers. For example:
