3 Installing WebSphere Express 7.0 or WebSphere for Developers 7.0
This chapter describes how to install WebSphere Express 7.0 or WebSphere for Developers 7.0. These procedures must be followed only if you are using one of the above WebSphere products for the H4A7 web client.
Note:
You can skip this chapter if you are using the Oracle Application Server for the OH4A web client.This chapter contains the following tasks:
-
Section 3.1, "Running the Installation Wizard for the WebSphere Express or Developers"
-
Section 3.2, "Updating WebSphere Express or Developers 7.0 to the Latest Fix Pack Level"
3.1 Running the Installation Wizard for the WebSphere Express or Developers
Caution:
The installers for WebSphere Express and WebSphere for Developers place data into the registry specifically for the Windows user that is signed into Windows at the time of installation. You must sign into Windows using this same user when you install and then run the JD Edwards EnterpriseOne Development and Web Clients.-
The WebSphere Express 7.0 installer may be downloaded from the Oracle Software Delivery Cloud (
https://edelivery.oracle.com) or the IBM support site. If you choose to use WebSphere for Developers 7.0, you must download it from the IBM support site. -
To start the installation, run
launchpad.exefrom the download location.Note:
On Development Clients running Microsoft Windows 7 with User Access Control (UAC) turned on, you must right click on launchpad.exe and select "Run as administrator."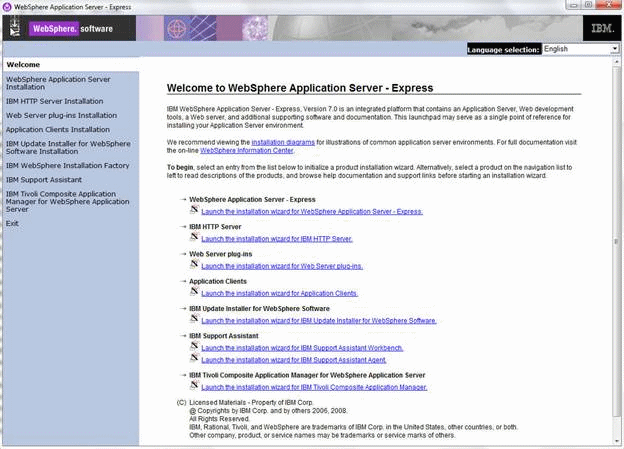
-
On Welcome to WebSphere Application Server - Express, click the link to launch the installation wizard:
WebSphere Application Server - Express
Launch the installation wizard for WebSphere Application Server - Express
WebSphere Application Server - Developers
Launch the installation wizard for WebSphere Application Server - Developers
Note:
The WebSphere Express and WebSphere for Developers screens are branded identically. Both refer to "WebSphere Express" in the title section of the screens.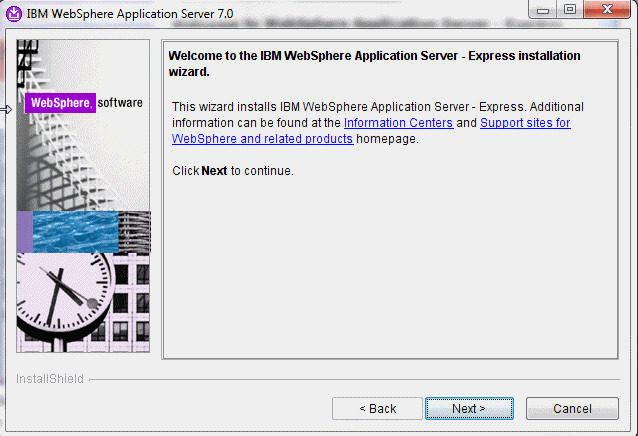
-
On Welcome to the IBM WebSphere Application Server - Express installation wizard, click the Next button.

-
On Software License Agreement, click the radio button to accept the license agreement.
Optionally you can click the Print button to print the license agreement.
If you do not accept the license agreement the installation process is terminated.
-
Click the Next button.

-
On System Prerequisites Check, the below Warning may be displayed:
-
A supported operating system was not detected.
You can ignore this Warning provided the operating system conforms to the current Oracle JD Edwards Minimum Technical Requirements as well as the current IBM System Requirements.
Review all the information on this screen, using the scroll bar if necessary.
-
-
Click the Next button.
-
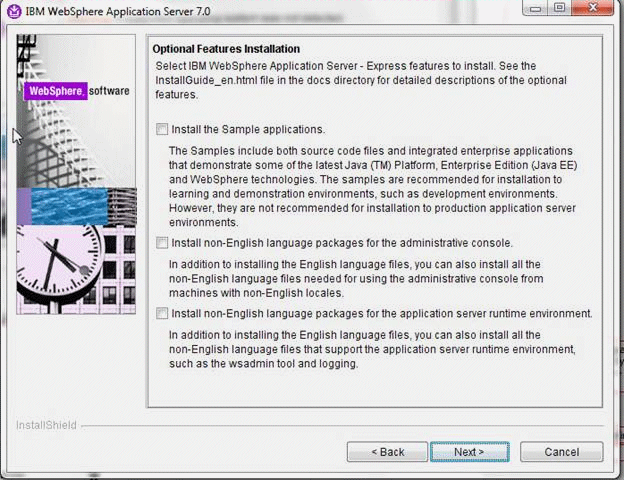
On Optional Features Installation, you can accept the default which will not install any optional features; none of these are required by JD Edwards EnterpriseOne.
-
Click the Next button.
-
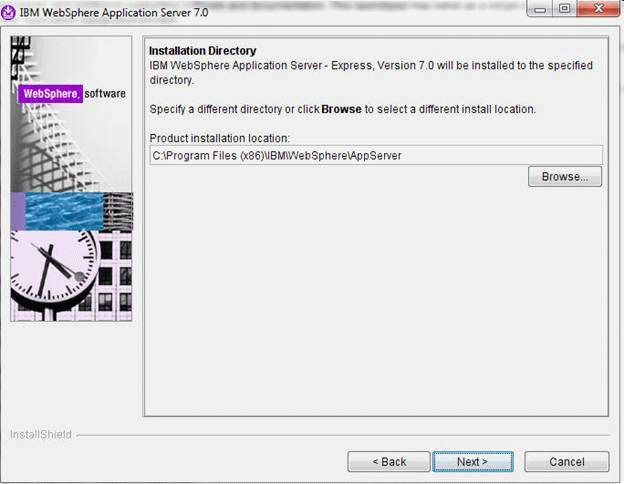
On Installation Directory, you can accept the default value or enter or browse to a different installation location. For example, the default value might be:
c:\Program Files (x86)\IBM\WebSphere\AppServer -
Click the Next button.
-
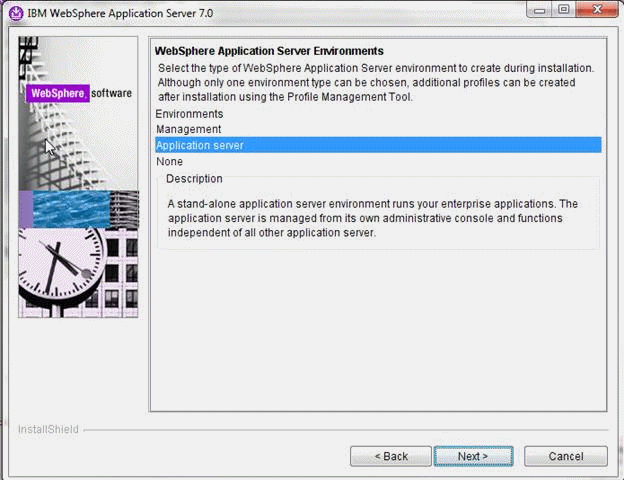
On WebSphere Application Server Environments, you must select this environment:
-
Application server
Note:
No other WebSphere Application Server environment type is supported. This value must be "Application server." -
-
Click the Next button.

-
On Enable Administrative Security, clear this check box:
Enable administrative security
Note:
The JD Edwards Development Client does not support secured profiles.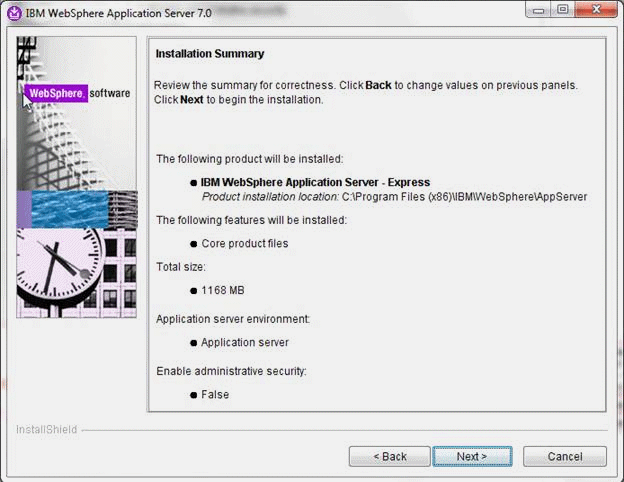
-
On Installation Summary, review the summary for correctness.
-
Click the Next button.
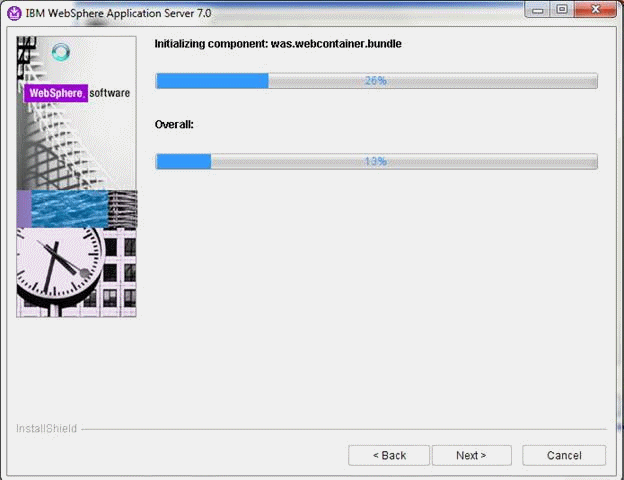
The installation wizard displays a progress screen. If required, the wizard may prompt for the location of a second disk or installation directory.
-
On Installation Successful screen, click the Finish button.
Note:
If the Installation Successful screen indicates only partial success refer to this IBM support document, option 2: -
You must update your WebSphere installation to the required fix pack level as described in the next section of this guide entitled: Updating WebSphere Express or Developers 7.0 to the Latest Fix Pack Level.
3.2 Updating WebSphere Express or Developers 7.0 to the Latest Fix Pack Level
Unlike previous releases of WebSphere Express, you might need to manually update your WebSphere 7.0 Express or WebSphere Developers 7.0 in order to meet the JD Edwards Minimum Technical Requirements. If required, you can use the update installer and fix pack instructions in the JD Edwards document entitled: JD Edwards EnterpriseOne HTML Web Server Reference Guide for WebSphere 7.0 (use the version of the guide that matches your release and platform). Within that guide, use the steps in this chapter and sections:
-
Chapter 3. Installing and Configuring WebSphere 7.0
-
Installing the WebSphere Update Installer
-
Installing the WebSphere 7.0 Fix Pack
-
Note:
WebSphere Express 7.0, WebSphere for Developers 7.0, and WebSphere Application Server 7.0 use the same files for the update install and fix pack. No separate versions exist for the different products.