4 Working with Express Installation for IBM i for JD Edwards EnterpriseOne
This chapter contains the following topics:
-
Section 4.2, "Adding an Entry to the Remote Database Directory"
-
Section 4.3, "IBM i Express Installation Image System Changes"
-
Section 4.4, "Update the IBM i TCP/IP Host Table with Deployment Server Information"
-
Section 4.6, "Rebuilding Cross Reference Tables on the IBM i"
-
Section 4.9, "Obtaining and Preparing the IBM i Express Installation Image"
-
Section 4.10, "Copying IBM i Java Utilities into the Express Installation Image"
-
Section 4.13, "Understanding the IBM i HTTP, HTML, and Server Manager Agent Components Installation"
-
Section 4.15, "Troubleshooting Express Installation for IBM i"
4.1 Completing the Pre-Install Worksheet
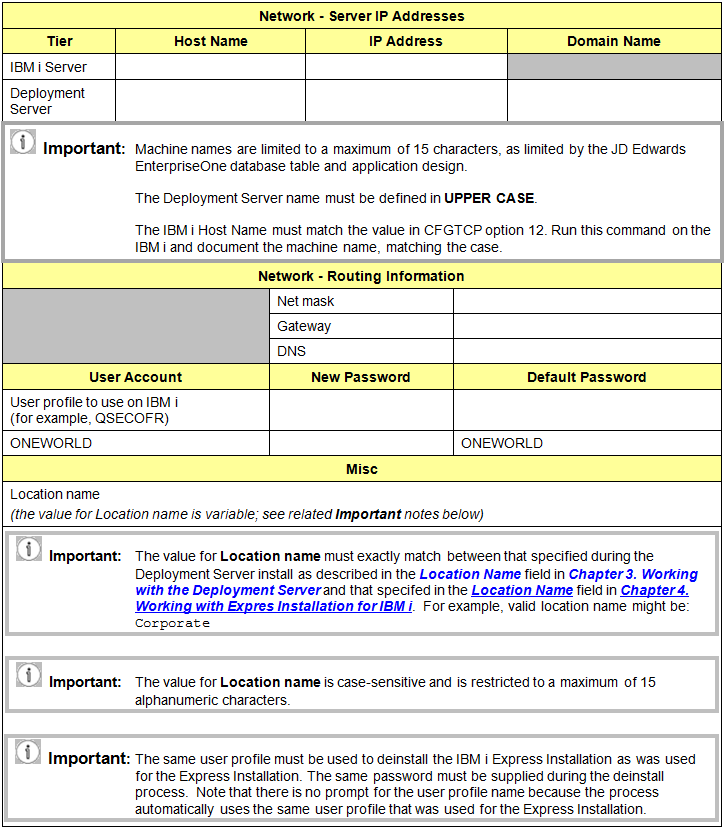
Use the Pre-Install Worksheet to gather information required to answer the questions prompted by the Platform Pack installer as it executes. Prior to running the Platform Pack installer, complete the Pre-Install Worksheet with the requisite information. Doing so will reduce the potential for errors due to incorrect data entry information.
Note:
Since the scripts are designed to execute only once, incorrect data entry may result in a corrupted install and the need to deinstall and start the install again.The following image is a depiction of the Pre-Install Worksheet
4.2 Adding an Entry to the Remote Database Directory
Add or verify the entry to the remote database directory by completing these steps:
-
Log on to the IBM i as QSECOFR.
-
On the command line, enter WRKRDBDIRE.
-
Look for an entry on the IBM i for Remote Location *LOCAL. This entry must be identical to the IBM i hostname (CFGTCP Option 12). This includes the hostname's case, which can be upper, or lower, or mixed.
-
If there is no *LOCAL entry, enter 1 in the Option column and type the machine name in the Relational Database column, and press enter. In the Remote Location Name or Address field, enter *LOCAL and press Enter. If there is already a *LOCAL entry and the Relational database name is not the same as the host name (CFGTCP Option 12), remove the entry and add a new entry as previously described.
Note:
In previous JD Edwards EnterpriseOne releases, installation of Vertex required adding an entry to the Remote Database Directory, but no special naming was required. It is possible that in some cases an entry was added with some other naming convention for this purpose. Vertex will work with a Remote Database Directory entry that is correct for Release 9.0. -
In a case where the relational database directory entry was not changed skip this step. If the entry is corrected, recycle the database host server prestart jobs by issuing these commands:
ENDPJ SBS(QSERVER) PGM(QSYS/QZDAINIT) OPTION(*IMMED)ENDPJ SBS(QUSRWRK) PGM(QSYS/QZDASOINIT) OPTION(*IMMED)ENDPJ SBS(QUSRWRK) PGM(QSYS/QZDASSINIT) OPTION(*IMMED)STRPJ SBS(QSERVER) PGM(QSYS/QZDAINIT)STRPJ SBS(QUSRWRK) PGM(QSYS/QZDASOINIT)STRPJ SBS(QUSRWRK) PGM(QSYS/QZDASSINIT)Note:
Users will not be able to use JD Edwards EnterpriseOne while these commands are running.
4.3 IBM i Express Installation Image System Changes
The IBM i Express Installation Image installer may make changes to the IBM i system.
-
JD Edwards EnterpriseOne services require that the TCP service *EDRSQL is running. Consequently the IBM i Express Installation Image installer will do the following:
-
Change the TCP service for *EDRSQL to autostart *YES so that it starts when TCP services are started.
-
Start the *EDRSQL Service.
-
-
Two IBM i system values might be changed. The IBM i Express Installation Image installer verifies these values and makes changes if they are not optimally set.
System Value Change Value QJOBMSGQMX 64 QJOBMSGQFL *PRTWRAP -
Four job queues will be created with a maximum active job setting of '1' in library QGPL. The job queues are named QBATCH1, QBATCH2, QBATCH3, and QBATCH4. These job queues will be attached to the QBATCH subsystem. If the QBATCH subsystem cannot be found, the job queues will not get created.
The JD Edwards EnterpriseOne table F986130 (application P986130) will contain definitions for the job queues.
-
An output queue named QGPL/ONEWORLD will be created. The JD Edwards EnterpriseOne printer definition (F986163) and default printer configuration (F986167) tables will contain a definition targeting this output queue.
-
The PATH system environment variable will be updated to prepend the following to the existing path definition:
'/usr/bin:.:'
4.4 Update the IBM i TCP/IP Host Table with Deployment Server Information
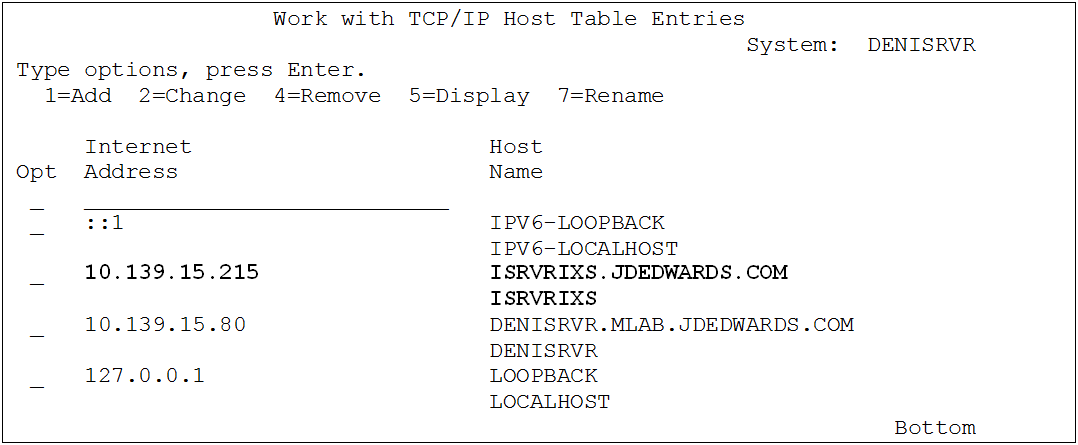
Add a TCP/IP Host Table Entry on the IBM i for the Deployment Server. The entry must include both host and host.domain information.
To update the IBM i TCP/IP Host Table use the following commands:
-
Log on to the IBM i as QSECOFR.
-
On the command line, enter the text below with the amended substitutions.
cmd: ADDTCPHTE INTNETADR('10.139.15.215')HOSTNAME((ISRVRIXS) (ISRVRIXS.JDEDWARDS.COM))where
ISRVRIXSis the Deployment Server host name, and whereISRVRIXS.JDEDWARDS.COMis the fully qualified (host.domain) name, and where 10.139.15.215 is the Deployment Server IP address. -
On the command line, type CFGTCP and press ENTER. Select option 10 to "Work with TCP/IP host table entries." Make certain the newly created entry appears in the table (depicted in bold font below).
4.5 Testing Long File Names on the IBM i
Before running the IBM i Express Installation Image installer, it might be necessary to rebuild the cross-reference table. This table enables tables of long file names (more than 10 characters) to be created on the IBM i. Rebuilding the table causes the system to be in a restrictive state. Coordinate this activity with the system administrator.
To test long file name support on the IBM i:
-
Log on to the IBM i as QSECOFR.
-
On the command line, enter STRSQL.
This command will start a SQL session on the IBM i.
-
To test a long file name, enter this SQL statement:
CREATE TABLE QGPL/LONGFILENAME (FIELD CHAR(10))where
LONGFILENAMEis the name of your file.Your system is ready if the file is created in the QGPL library. You can ignore the journal setting.
-
To remove the file that you just created in the QGPL library, enter the following SQL statement:
DROP TABLE QGPL/LONGFILENAME
Note:
If the table with a long name cannot be created, it is likely the system cross reference tables are corrupt. The system cross reference tables must be rebuilt before proceeding. Refer to Section 4.6, "Rebuilding Cross Reference Tables on the IBM i".4.6 Rebuilding Cross Reference Tables on the IBM i
The cross reference tables must be rebuilt only if database tables with long names cannot be created. To rebuild cross reference tables on the IBM i:
-
Stop all subsystems using this command:
ENDSBS *ALL *IMMED -
After the jobs have successfully stopped, run the following command:
RCLSTG SELECT(*DBXREF)Note that this command may run for as much as several hours.
-
Restart all subsystems using this command:
STRSBS QCTLThe cross reference tables are now rebuilt and ready for use.
4.7 Adding a New Entry to the QAQQINI File
Once the latest PTFs have been applied on the IBM i, the new LOB locator functionality must be enabled. If this is not done, the Specifications Merge and Package Build will fail.
-
Open the QAQQINI file on the Enterprise Server using this command:
WRKOBJ QUSRSYS/QAQQINI *FILE -
If the QAQQINI file does not exist, add it using this command:
CRTDUPOBJ QAQQINI QSYS *FILE QUSRSYS DATA(*YES) -
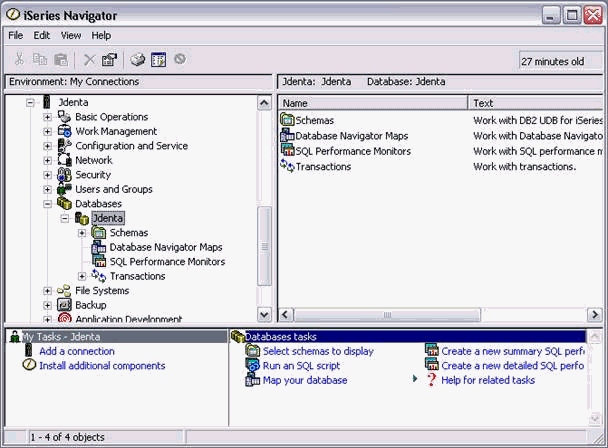
Start iSeries Navigator.
-
Navigate the Databases node and then expand to show the IBM i name.
-
Right click on the machine name and select Run SQL Scripts.
Run these SQL commands:
SELECT * FROM QUSRSYS.QAQQINIIn the results, search for this entry:
LOB_LOCATOR_THRESHOLDIf the
LOB_LOCATOR_THRESHOLDentry does not exist, insert it by running this command:INSERT INTO QUSRSYS.QAQQINI VALUES('LOB_LOCATOR_THRESHOLD','10000', default)If the
LOB_LOCATOR_THRESHOLDdoes exist, update it by running this command:UPDATE QUSRSYS.QAQQINI SET QQVAL='10000' WHERE QQPARM='LOB_LOCATOR_THRESHOLD'Tip:
If STRSQL is available on the IBM i, the commands can be executed from that program. -
Sign out of the iSeries Navigator and make sure the
QZDASOINITjob is terminated. This is required because a new database connection must be started with the new values forQZDASOINIT.
4.8 Setting Up a Network Share for iSeries Root
Use this procedure to set up a network share on the IBM i root directory.
-
Start iSeries Navigator
-
Expand the IBM i name in the tree.
-
Drill down into the Network node.
-
Drill down into the Servers node.
-
Highlight TCP/IP.
-
In the right hand panel find iSeries NetServer.
If it has a status of Stopped, right click and start it.
-
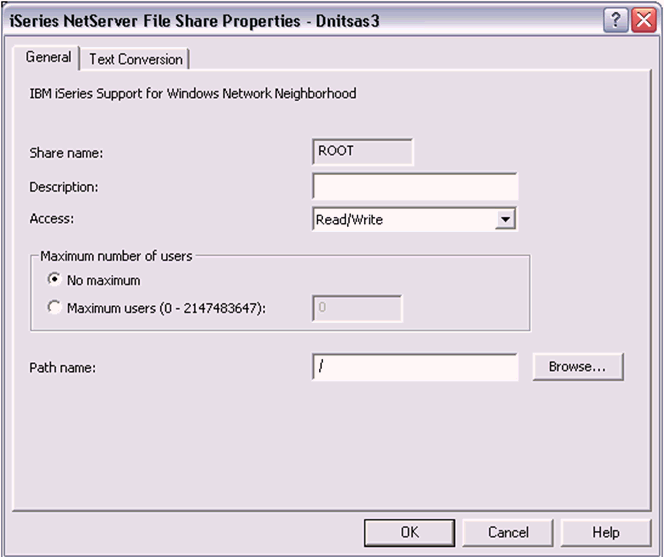
Double click on the started iSeries NetServer.
-
Navigate from File | New | File and complete these fields:
-
Share Name
Enter this value: ROOT
-
Description
Enter the Root directory in IFS.
-
Access
Use the pulldown to choose Read/Write.
-
-
On iSeries NetServer - File Share Properties <machine_name>, click OK.
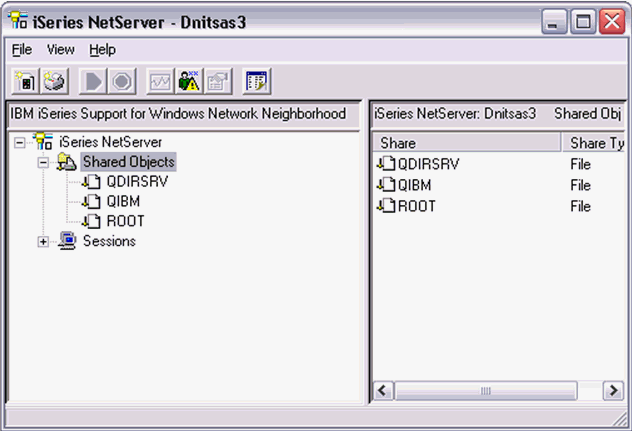
-
On iSeries NetServer File Share Properties, right click on Root and go to properties and make sure that Access is set to Read/Write.
Note:
Note: The default value is Read only. -
Click OK to save the Read/Write setting.
4.9 Obtaining and Preparing the IBM i Express Installation Image
Important:
The IBM i Express Installer will be running in Microsoft Windows. Before running the installation program, shut down all programs running on the Windows machine (usually the Deployment Server) that could cause DLL conflicts (such as Microsoft SQL Services, Internet Explorer, Microsoft Word, or Adobe Acrobat). Also make sure there are no jobs running on the IBM i host that could cause locking problems. These programs can be restarted after running the Express Installation.The IBM i Express Installation images can be obtained from the Oracle Software Delivery Cloud site:
To install from images downloaded from Oracle Software Delivery Cloud:
-
Create a parent download directory on a disk with at least seven (7) GB disk space. For example:
c:\ExpressI -
Download the source disk images for the JD Edwards EnterpriseOne Express Installation for IBM i into the directory you created in Step 1.
-
Using Extract Here option, unzip each of the disk images into the directory you created in Step 1.
After unzipping all disk images, the structure should be:
c:\ExpressI\Disk1\ JDEINI oui SAVF Stage VS2008Sp1_redist c:\ExpressI\Disk2\SAVF c:\ExpressI\Disk3\SAVF -
You must manually move the contents of the
Disk2\SAVFandDisk3\SAVFdirectories into this directory:c:\ExpressI\Disk1\SAVFImportant:
The only directory onDisk2andDisk3is theSAVFdirectory. Before running the Express Installation, allSAVFfiles must be in theDisk1\SAVFdirectory.
4.10 Copying IBM i Java Utilities into the Express Installation Image
Note:
This step must be done before starting the installer. The installer attempts to load all jar files needed for the process right at the start.-
On the Windows machine where the install image was downloaded, map a network drive to the root directory on the IBM i machine which is the target of this install.
-
Navigate to this directory:
QIBM\ProdData\HTTP\Public\jt400\lib -
Copy the jt400.jar and util400.jar to this directory:
Disk1\stage\ext\jlibNote:
IBM i Access for Windows must be loaded on the machine running the install. However, the versions of these jar files on the IBM i machine will likely be more current than the files on the Windows computer. These files must be in the location described above before starting the Express installation.Note:
On IBM i release V7R1, there is another version ofjt400.jarandutil400.jarin this directory:QIBM\ProdData\HTTP\Public\jt400\lib\java6Do NOT use the java6 version; doing so will cause the install to fail.
4.11 Installing Microsoft Windows Visual Studio
Before running the IBM i Express Installation, install the Visual Studio 2008 SP1 RunTime. Refer to Section 1.3, "Accessing Minimum Technical Requirements" in this guide. The Visual Studio 2008 Runtime is available from the Microsoft Download Center. Download and install one of the following:
Microsoft Visual C++ 2008 SP1 Redistributable Package (x86) - 32-bit vcredist_x86.exe
Microsoft Visual C++ 2008 SP1 Redistributable Package (x64) - 64-bit vcredist_x64.exe
Note:
Choose the 32-bit or the 64-bit installer that is appropriate for the Microsoft Windows platform on which the Express Installation for IBM i will be run.4.12 Running the Express Installation for IBM i
Note:
The Express Installation for IBM i delivers JD Edwards EnterpriseOne logic, database and HTML servers on the same IBM i machine. This model must be followed to complete a successful install.To run the Express Installation for IBM i:
-
Navigate to this directory:
Disk1\oui\bin -
Run this executable by doubling clicking on the file:
setup.exeNote:
Windows 2008. If running the installer on a Windows/2008 machine, you must right-click on setup.exe and choose the Run As Administrator option.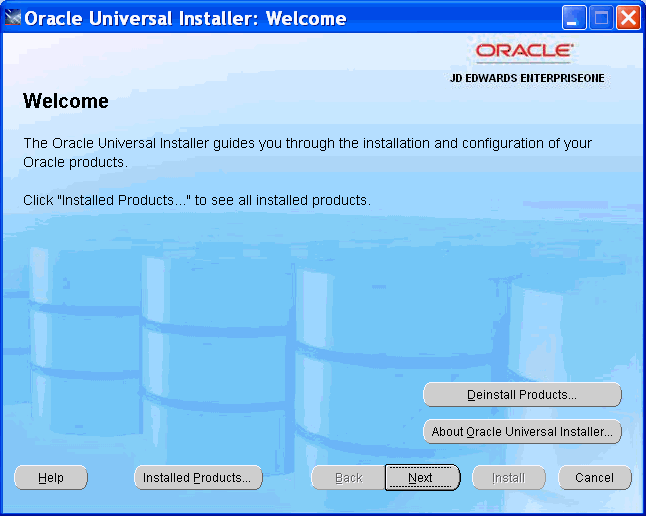
-
On Welcome, click the Next button.
-
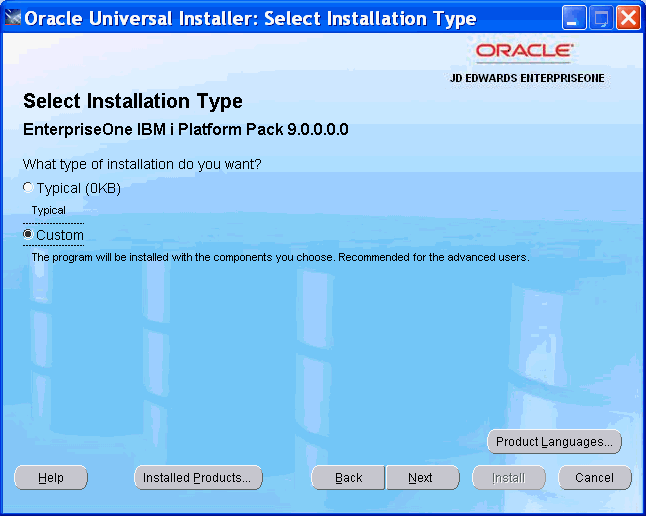
On Select Installation Type, the default value is Typical, which only installs the PS900 and PY900 environments for JD Edwards EnterpriseOne. For IBM i installations, you must change default installation type to Custom.
Note:
The Express Installation for IBM i delivers JD Edwards EnterpriseOne logic, database and HTML servers on the same IBM i machine. This model must be followed to complete a successful install.The Express Installation for IBM i requires the installation of all four standard JD Edwards EnterpriseOne Environments. This model must be followed to complete a successful install.
-
Click the Next button.
-
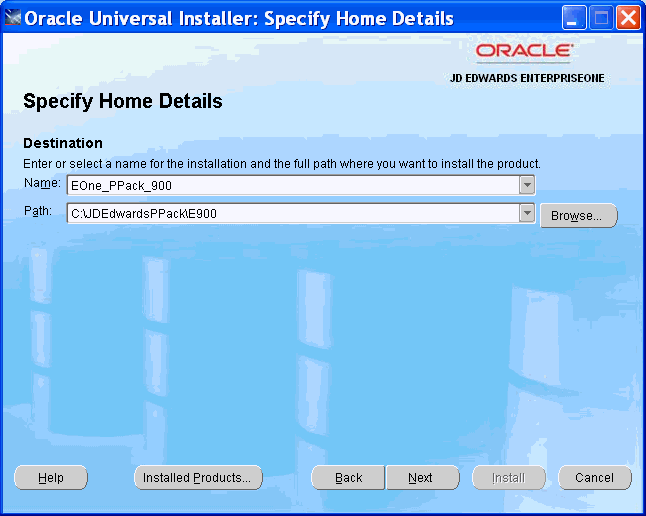
On Specify Home Details, enter these values:
Field Value Name EOne_PPack_900 Path c:\JDEdwardsPPack\E900 By default, the installer populates the values on this screen with _1 suffix. The _1 suffix can be removed, if desired. The actual value between Name and Path need not be consistent. It is only used by the Oracle Universal Installer.
If desired, change the install location from the c: drive. During the installation process itself, only a small amount of disk space is required on the Microsoft Windows machine for the Oracle Inventory for this install and a few temporary text files like jde.ini.
-
Click the Next button.
-
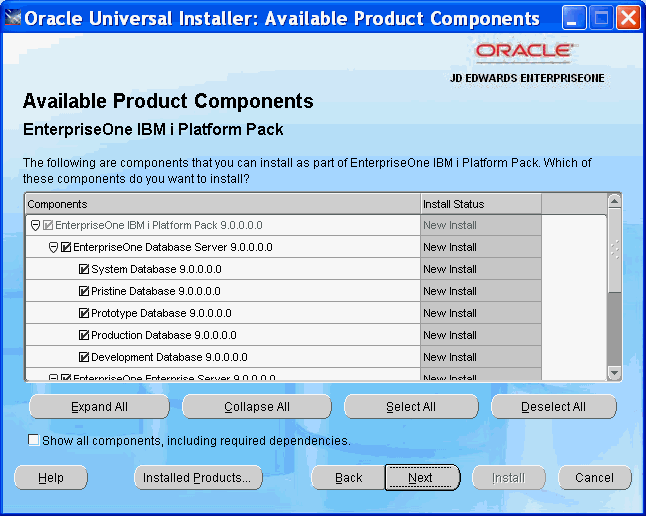
On Available Product Components, assuming Custom was chosen on the Select Installation Type screen, accept the default values.
Do not uncheck any of the components on this screen. The configuration data delivered with the Express Installation for IBM i has references to all four standard JD Edwards EnterpriseOne environments (DV900 PD900 PS900 PY900). Use the scroll bar to roll down and see what will be installed.
-
Click the Next button.
-
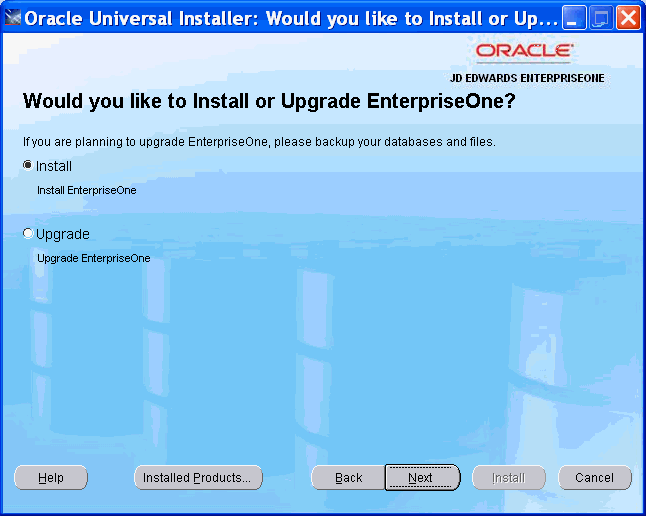
On Would you like to Install or Upgrade EnterpriseOne?, select the Install radio button.
This selection installs Central Objects and Business Data / Control Tables for the selected environments.
Note that the installer checks for the existence of the Business Data and Control Tables libraries and will not proceed if any of these libraries already exist:
Environment Business Data Control Table DV900 TESTDATA TESTCTL PD900 PRODDTA PRODCTL PY900 CRPDTA CRPCTL -
Click the Next button.
-
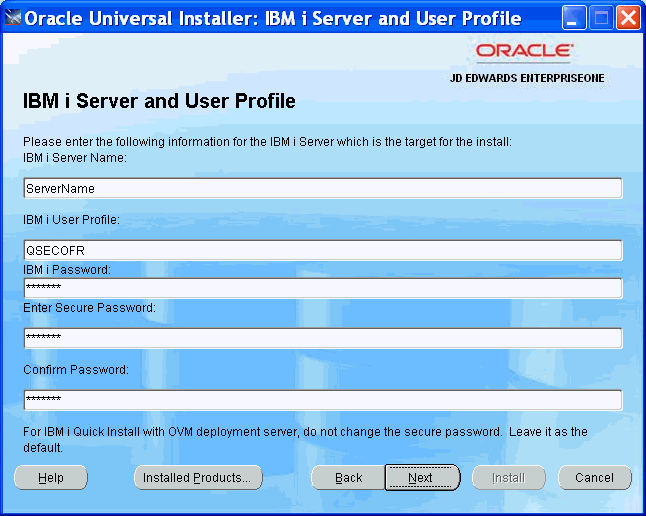
On IBM i Server and User Profile, complete these fields:
Field Description IBM i Server Name Enter the name of the IBM i machine. IBM i User Profile Enter QSECOFR or another user on the host that has *ALLOBJ *SECADM *SAVSYS *IOSYSCFG *JOBCTL rights. Note this user profile name as the deinstall process requests the password for this user profile. The deinstall process automatically uses the user profile specified when the Express Installation was run.
IBM i Password Enter the password for the User Profile above. Enter Secure Password This password allows you to change the password for users created on the IBM i. The default creates user profiles with password = user (for example, JDE JDE). If this violates the password rules on your IBM i machine, supply a secure password that will pass your password rules, then change the INI files and change the JD Edwards EnterpriseOne security definitions using JD Edwards EnterpriseOne applications P980001 and P98OWSEC before starting services. Leaving this as the default password, will allow the JD Edwards EnterpriseOne services to be started immediately after the installation.
Confirm Password Leave this as the default unless the Secure Password has been entered. -
Click the Next button.
Note:
If you enter an invalid user or password, you will see the following screen pop up multiple times. At this point you should start the Windows Task Manager, find the OUI process (javaw.exe) and end it. Then start the installer again.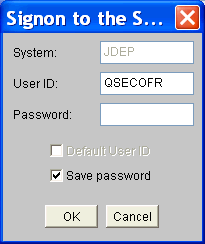
-
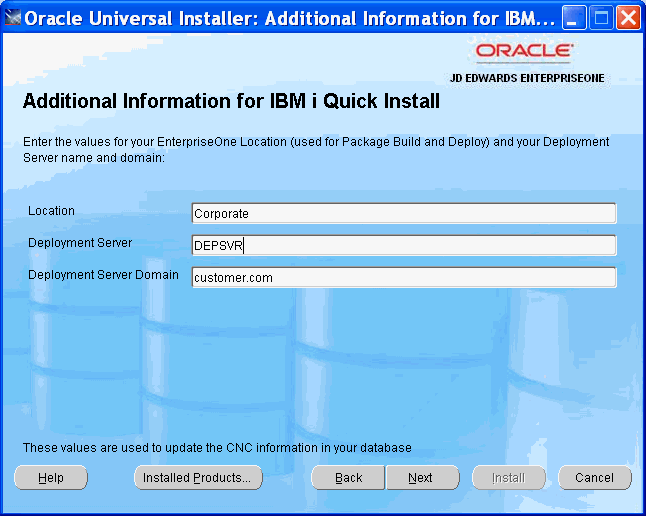
On Additional Information for IBM i Express Install, complete these fields:
Note:
The Deployment Server name must be defined in UPPER CASE. -
Field Value Location (Name) Enter any valid up to 15 characters long. The value entered here is used by Package Build and Deploy to group machines. This must match the Location name chosen during the Deployment Server install.
Deployment Server The installer provides a default value for this field with the name of the machine on which the installer is run. If the installer is not run on the Deployment Server, enter the Deployment Server name. -
The information on this screen is used to change the preconfigured CNC data that was delivered with the install disk images.
-
Click the Next button.
-
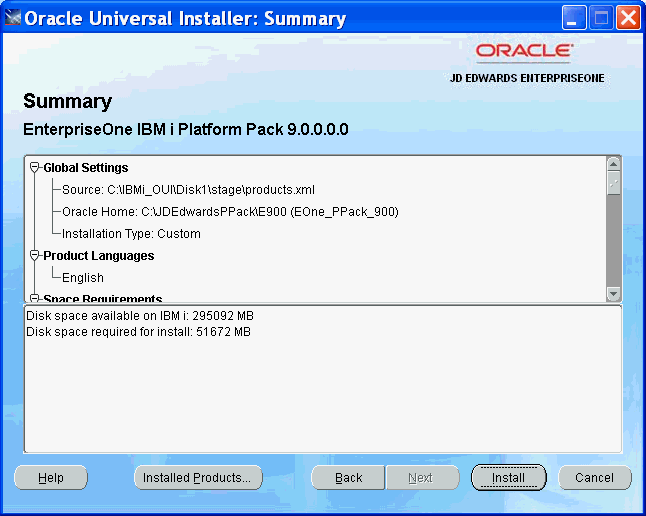
The Summary screen display the available and required disk space on the target IBM i machine on which the JD Edwards EnterpriseOne Express Installation for IBM i will be installed.
-
Click the Install button to start the installation.
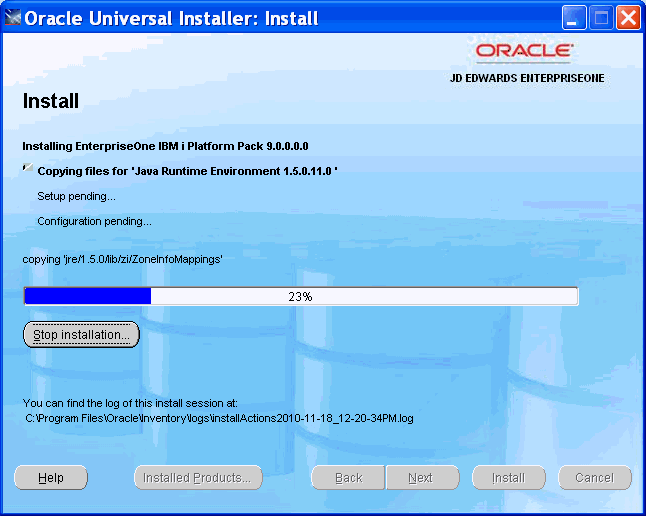
The installation process begins by copying OUI installer components.
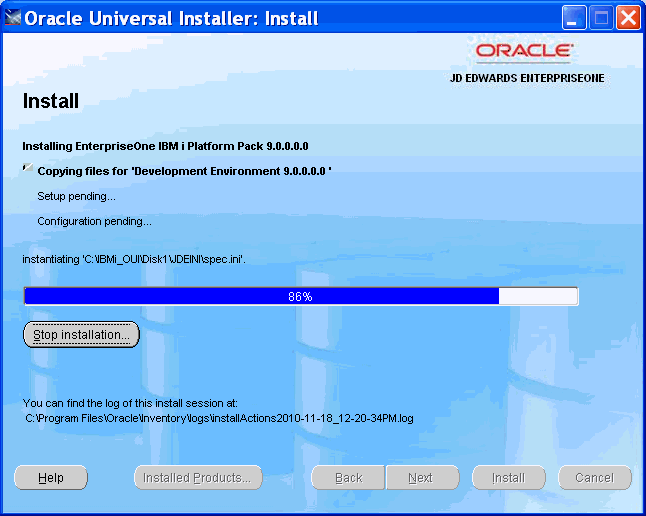
The installation process continues with the installation of JD Edwards EnterpriseOne components.
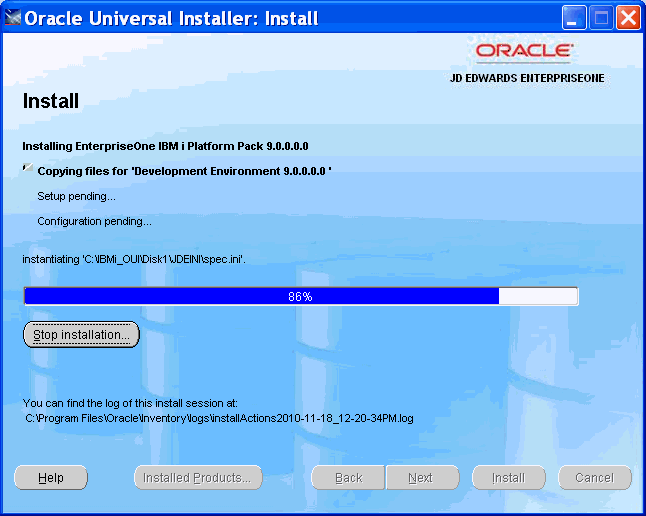
During the install, the progress of the install can be monitored by displaying the OWINSTALL/OWINSTALL message queue on the IBM i machine using this command:
DSPMSG OWINSTALL/OWINSTALL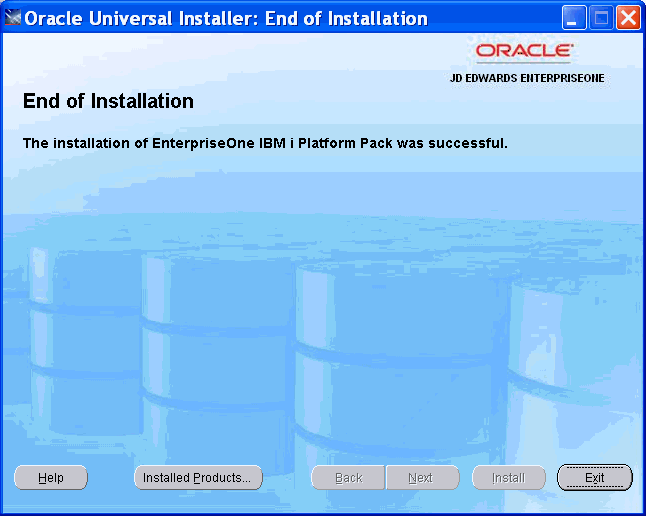
At this point the EnterpriseOne IBM i install is complete.
-
Click the Exit button to exit the Oracle Universal Installer.
4.13 Understanding the IBM i HTTP, HTML, and Server Manager Agent Components Installation
The Oracle Universal Installer will invoke a process which installs the following:
| Feature | Profile | Port / Container / Function | Description |
|---|---|---|---|
| HTTP Server Profile | E1JAS | Port 79 | http://<ibm_i_hostname>:79 |
| WebSphere Application Server | E1JAS | server1
Port: 9061 |
http://<ibm_i_hostname>:9061/ibm/console |
| AS_JS_80
Port: 80 - PD |
http://<ibm_i_hostname>/jde/E1Menu.maf | ||
| AS_JS_81
Port: 81 - PY |
http://<ibm_i_hostname>:81/jde/E1Menu.maf | ||
| AS_JS_80
Port: 82 - DV |
http://<ibm_i_hostname>:82/jde/E1Menu.maf | ||
| AS_JS_80
Port: 83 - PS |
http://<ibm_i_hostname>:83/jde/E1Menu.maf | ||
| JD Edwards EnterpriseOne Server Manager Agent | iTemplate | IBM i IFS Install Location:
|
In the course of installing the HTTP, WebSphere HTML, and Server Management Agent components the WebSphere wsadmin and other functions generate spool files which are placed in an output queue JDEOW/JDEDWARDS.
The process which installs the above listed components requires that the underlying product minimum technical requirements (MTR) are met on the system IBM i. This includes but is not limited to the IBM HTTP and WebSphere Application Server products and their associated fix packs and/or iFixes. Failure to meet the MTRs will result in failure.
Note:
Failure to successfully install the above listed components will not interfere with the Platform Pack process. The process to install these components can be invoked independently of the Oracle Universal Installer.If the process failed to successfully install the components, use the uninstall process to completely remove the unsuccessfully applied components. Refer to Section 10.5, "Uninstalling the IBM i Delivered HTTP, HTML, and Server Manager Agent Components" in this guide for instructions.
4.14 Reinvoking the IBM i HTTP, HTML, and Server Manager Agent Components Installation Process
Isolate the cause for the initial failed installation, such as an unmet MTR. Correct these items and make certain to uninstall these components as directed above.
Note:
It is possible to uninstall and reinstall the IBM i Express Installation image components for HTTP, WebSphere HTML, and Server Manager Agent independently of the other IBM i Express Installation platform pack.To reinvoke the installation of the IBM i Express Installation image components (HTTP, WebSphere, Server Manager Agent):
-
Log on to the IBM i as QSECOFR.
-
On the command line, enter the following:
cmd: CALL QCMD -
On the command line, enter the following:
cmd: SBMJOB CMD(JDEOW/ITEMPLATE DEPSVR(ISRVRIXS) DEPSVRDMN(JDEDWARDS.COM)) JOB(ITEMPLATE) CURLIB(JDEOW) LOG(4 00 *SECLVL) LOGCLPGM(*YES)
where ISRVRIXS represents the Deployment Server host name and JDEDWARDS.COM represents the concatenated domain name.
As before the installation and configuration of HTTP, WebSphere HTML, and Server Management Agent components will generate spool files which are placed in this output queue:
JDEOW/JDEDWARDS
4.15 Troubleshooting Express Installation for IBM i
During the install, the progress of the install can be monitored by looking in the logs as described below. Otherwise, display the messages on the IBM i machine using this command:
DSPMSG OWINSTALL/OWINSTALL
The IBM i Express Installer copies SAVFs to the OWINSTALL library for all the logic components (for example, PD900 library), then restores them for each environment. It then runs the Web Components install, which produces spool files in this output queue:
OWINSTALL/JDEDWARDS
The installer next copies the SAVFs for all database components, and restores them for each environment. Following this, it runs SQL scripts to copy the package repositories and update the CNC information. The SQL scripts produce spool files in QPRINT with names like CPYPKG, RAPIDICNC and RAPIDIDV.
If the OUI installer for IBM i fails after installing the Web Components (ITEMPLATE command), the Web Component must be uninstalled before running the Express Installation again. (The Deinstall through OUI, will perform the uninstall of the Web Components). See Section 10.5, "Uninstalling the IBM i Delivered HTTP, HTML, and Server Manager Agent Components" in this guide for details on running the UNINSTWAS command.
To troubleshoot any issues with the Express Install, start by looking at the install logs in this directory:
c:\Program Files\Oracle\Inventory\logs
The OUI logs every action taken by the install in a log with a name such as:
installActions2011-12-14_02-41-52PM.log
The filename of the log file contains the date and time that the install was run. The Express Installation for IBM i also produces an additional log in the same location with the same name, but with .out for the file extension. This contains a list of all IBM i commands run during the install, and any messages issued by the IBM i when the command was run.
If the install fails and you are unable to run the OUI Deinstaller, delete any inventory entries in the Home you chose when starting the install. For example, your Home might be:
C:\JDEdwardsPPack\E900_1
In this example, delete the E900_1 directory before trying to re-run the install. The preferred method is to run the OUI Deinstaller because it will delete the inventory.
4.16 Post Installation Step
After completing the IBM i Express Installation, you must install the Server Manager Console and run the Tools Accelerator TLIBMI001 that will update the Package inf and ini files. The Change Assistant tool should be configured as described in Chapter 3, "Working with the Deployment Server"Chapter 3. Working with the Deployment Server, Configuring the Planner Databases.
Note:
TheTLI5001_20_99.par Tools Accelerator, which is referenced below, can be found on disk1 of the Express Installation Enterprise Server image within the TLIBMI0001 directory. Copy this par file into the \Downloads folder of Change Assistant. For example, the folder might be:
c:\JDEdwards\E900\Change Assistant\Downloads\
-
Start Change Assistant and deploy
TLI5001_20_99.parwhich is in the location specified in the above Note. While the Tools Accelerator is running, from the Questions tab expand the Load node to monitor its progress. This Tools Accelerator will run for 30 minutes or more and perform the following:-
Shares the install folder on the Deployment Server for Client Install and Package Build
-
Updates ESU entries in the registry for the shipped ESUs
-
Updates CNC information in the Planner database with IBM i specific information (machine types, platform names, data source types)
-
Configures the shipped install and package inf files and ini files
-
Configures the Package Feature records
-
Configures the manifest records for these shipped packages:
- PS900FA
- PY900FA
- PD900FA
- DV900FA
Note:
If all four standard environments are not installed as recommended, the Tools Accelerator will fail for each environment not installed. However, this does not prevent it from running correctly for each standard environment that is installed.
-
-
Install the Server Manager Console onto the Deployment Server if not already done.
Note:
Download Server Manager fromhttp://edelivery.oracle.com/(available as part of the Express Installation media pack) and follow the installation instructions in the JD Edwards EnterpriseOne Server Manager Guide. This installation process assumes that Server Manager has been installed on the Deployment Server. The control files for the IBM i Server Manager Agents are updated to reference the Deployment Server.Once the Tools Accelerator has been run, the JD Edwards EnterpriseOne and HTML services can be started.
Tip:
The Enterprise Server has not been started yet at this point. To start the Enterprise Server, refer to the section in this guide entitled: Section 5.1, "Starting and Shutting Down Network Services on the Enterprise Server." -
Logon to the Enterprise Server (IBM i) as ONEWORLD to initialize the user profile and create the ONEWORLD message queue.
-
Logon to the Enterprise Server (IBM i) as JDE, again to initialize the user profile and create the JDE message queue.
4.17 Starting the Server Manager Agent
After completing the IBM i Express Install, make certain the Server Manager Console located on the Deployment Server is running. Start the Server Manager Agent as instructed directly below. The user profile used to start the Server Manager Agent must have the following special authorities: *ALLOBJ, *JOBCTL, *SAVSYS, and *SECADM.
-
From a System i telnet session, login using a user profile with the above listed special authorities.
-
To start the Server Manager Agent services invoke the following from command line:
cmd: SBMJOB CMD(STRQSH CMD('cd /JDEdwards/iTemplate/bin;startAgent &')) JOB(STARTAGENT) JOBQ(QTXTSRCH) -
To stop the Server Manager Agent services invoke the following from command line:
cmd: SBMJOB CMD(STRQSH CMD('cd /JDEdwards/iTemplate/bin;stopAgent &')) JOB(STOPAGENT) JOBQ(QTXTSRCH) -
To restart the Server Manager Agent services invoke the following from command line:
cmd: SBMJOB CMD(STRQSH
CMD('cd /JDEdwards/iTemplate/bin;restartAgent &'))
JOB(STOPAGENT) JOBQ(QTXTSRCH)
4.18 Optional Steps - Enterprise Server
At this point the Enterprise Server is ready to start (see Chapter 5, "Working With the Enterprise Server"). However, consider these optional steps.
Log in as QSECOFR and perform these optional steps:
-
The Express Installation creates and pre-delivers tables and files which reference user profile accounts and passwords using the standard simple password. You may consider changing the passwords for the JDE and ONEWORLD users. Make sure to remember the new passwords. If you modify the passwords you must change the JD Edwards EnterpriseOne security definitions using JD Edwards EnterpriseOne applications P980001 and P98OWSEC. You will also need to change the
JDE.INIfile on the Enterprise Server to match this JDE password. -
Tune the
JDE.INIfile to match the site-specific hardware and user load based upon any sizing recommendations from your hardware vendor.
Note:
The HTML Web Server has not been started yet at this point. To start the HTML Web Server, refer to the chapter in this guide entitled: Chapter 6, "Starting the HTML Server".