F Creating a Subscriber JMS Queue in WebLogic Server other than Transaction Server
Although it is supported it is not recommended that you create the subscriber queue in the Transaction Server container. This section describes the recommendation, which is to create the a subscriber JMS queue on a WebLogic Server other than the Transaction Server.
This appendix describes these tasks:
F.1 Creating the JMS Server
To create the JMS Server:
-
From the WebLogic Administration Console, select the domain in which you want to create the JMS Server.
-
Click on YourDomain > Services > Messaging > JMS Servers
-
In the right panel click the New button.
-
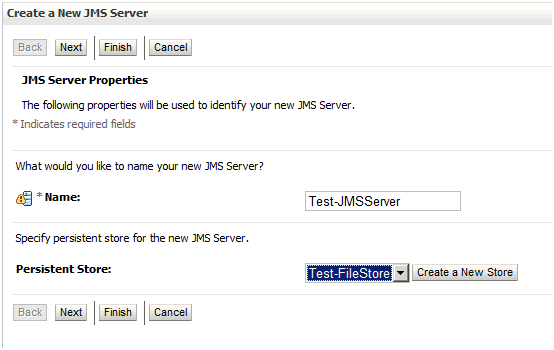
On Create a New JMS Server, enter a value for the name of the JMS server to be created. In this guide, the name is Test-JMSServer.
-
Use the pulldown to select the Persistence Store.
Note:
If Persistence Store does not exist you must create a new Persistence Store by clicking the Create a New Store button. -
Click the Next button.
-
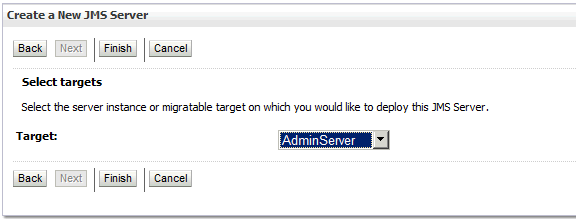
On Create a New JMS Server, select the Weblogic server node and click the Finish button.
As shown below, at this point using the example in this guide a JMS server called Test-JMSServer is created. This Test-JMSServer is targeted to AdminServer. However this can be targeted to any other container available, which may not necessarily be AdminServer

F.2 Creating the JMS Module
To create a subscriber queue on WebLogic Server:
-
In the WebLogic Administration Console, select the domain into which you want to create the JMS Module.
-
Click on YourDomain > Services > Messaging > JMS Modules
-
In the right panel click the New button.
-
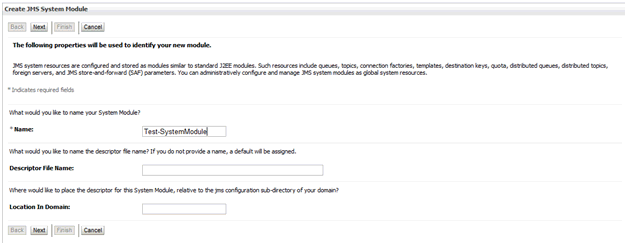
On Create JMS System Module, enter a value for the name of the JMS module to be created. In this guide, the name is Test-SystemModule.
-
Click the Next button.
-
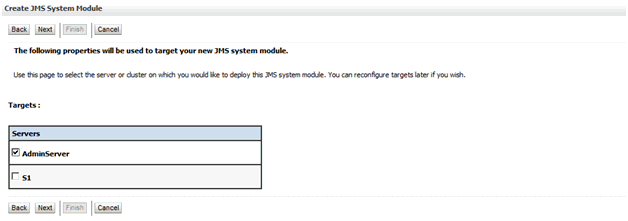
On Create JMS System Module, select the target of Weblogic server node.
-
Click the Finish button.
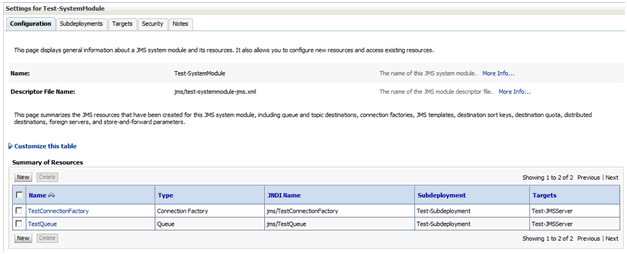
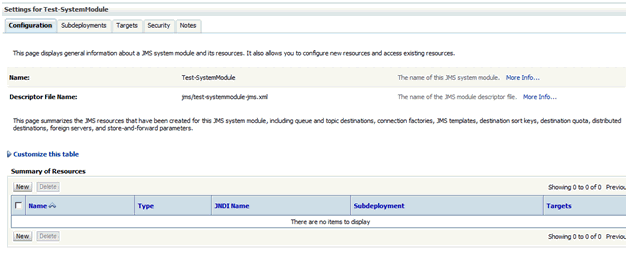
As shown below at this point, using the example in this guide, the Test-SystemModule is created. This Test- SystemModule is targeted to AdminServer. However this can be targeted to any other container .

F.3 Creating the JMS Resource
Use this procedure to create a JMS resource such as connection factory, queue, or topic in the JMS Module you created in the previous section.
To create a JMS Resource:
-
Click the JMS Module where you want to create a resource (in this guide Test-SystemModule).
-
On Settings for <Module_Name> , click the New Button.
-
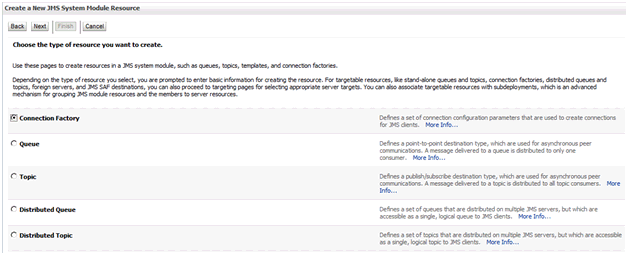
On Create a New JMS System Module Resource, select the radio button for the resource type to be created. In this example, Connection Factory is selected.
-
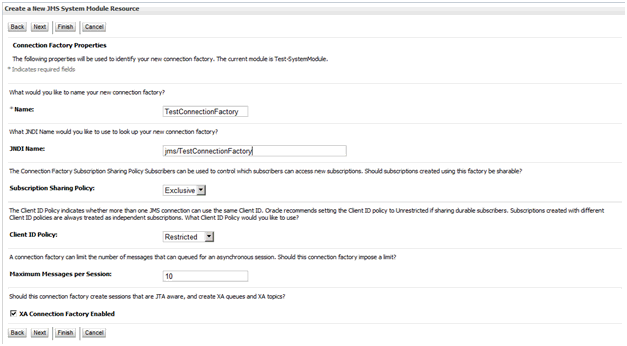
On Create a New JMS System Module Resource, enter Connection Factory name and JNDI name for this Connection Factory.
-
Click the Next button.

-
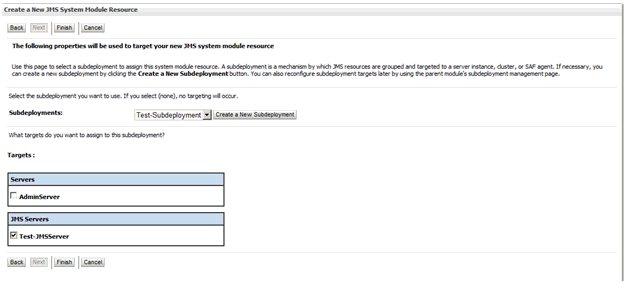
On Create a New JMS System Module Resource, use the pulldown to select the Subdeployment. If no existing Subdeployment can be used click on Create a New Subdeployment button.

-
On Create a New Subdeployment, enter a name for a new Subdeployment.
-
Click the OK button.
-
On Create a New JMS System Module Resource, click the checkbox next to the JMS Server for which you just created a resource.
-
Click the Next button.
-
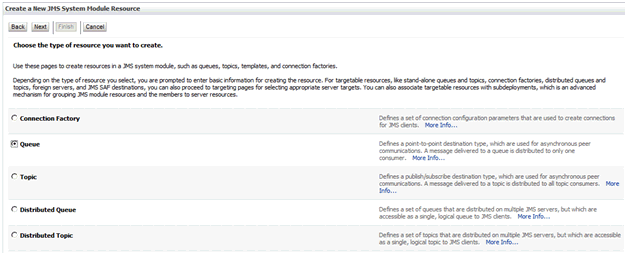
On Create a New JMS System Module Resource, click the radio button for Queue.
-
Click the Next button.

-
On Create a New JMS System Module Resource, enter a I and JNDI Name for this Queue.
-
Click the Next button.
-
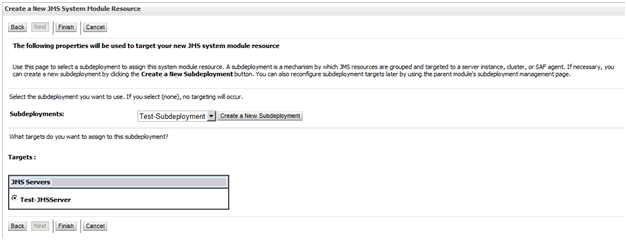
On Create a New JMS System Module Resource, select the Subdeployment.
-
Click the Finish button.
-
As shown below, verify that both the xxxx
