| Oracle® Fusion Applications Installation Guide 11g Release 1 (11.1.3) Part Number E16600-08 |
|
|
PDF · Mobi · ePub |
| Oracle® Fusion Applications Installation Guide 11g Release 1 (11.1.3) Part Number E16600-08 |
|
|
PDF · Mobi · ePub |
This appendix presents the Provisioning Wizard screens in the Database Installation interview and describes the purpose of each of the following screens:

No action is required on this read-only screen.
Click Next to continue.
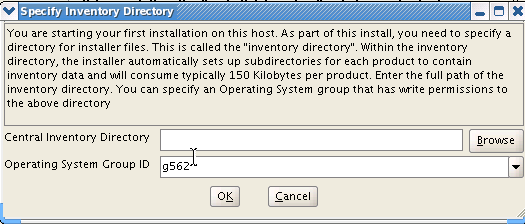
This screen displays only if one or more of the following conditions are not met:
The -invPtrLoc option is used to specify the central inventory location on non-Windows platforms, so the default value for your platform is not used. The default values for platforms follows:
Linux and AIX: /etc/oraInst.loc
Solaris and HP: /var/opt/oracle/oraInst.loc
The Central Inventory Pointer File is readable.
The Central Inventory Pointer File contains a value for inventory_loc.
The inventory_loc directory is writable.
The inventory_loc directory has at least 150K of space.
inventory_loc is not an existing file.
Specify the location of the Central Inventory Directory that meets the previous criteria. The inventory_loc directory can be created by the createCentralInventory.sh script and does not have to exist at the time you specify its location.
For non-Windows platforms, in the Operating System Group ID field, select or enter the group whose members will be granted access to the inventory directory. All members of this group can install products on this host. Click OK to continue.
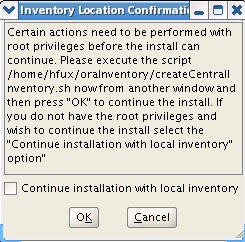
The Inventory Location Confirmation dialog prompts you to run the inventory_directory/createCentralInventory.sh script as root, to confirm that all conditions are met and to create the default inventory location file, such as /etc/oraInst.loc. After this script runs successfully, return to the interview and click OK to proceed with the installation.
If you do not have root access on this host but want to continue with the installation, select Continue installation with local inventory and click OK to proceed with the installation.
For Windows platforms, this screen displays if the inventory directory does not meet requirements.
For more information about inventory location files, see "Oracle Universal Installer Inventory" in the Oracle Universal Installer and OPatch User's Guide.
Click Next to continue.
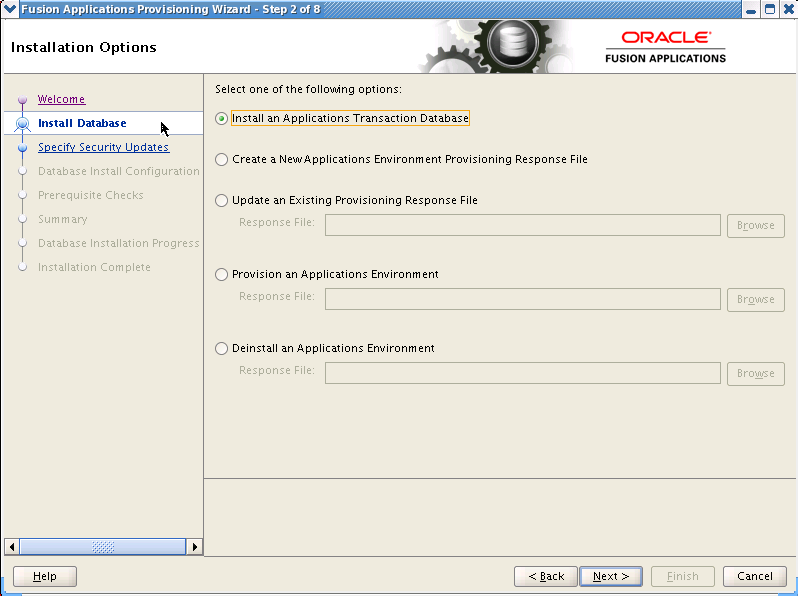
Select the task that you want to perform from the list of options. When prompted, enter a directory path in the Response File field to access completed response file to use as the base for one of the actions. Or, click Browse to navigate to the response file location.
Install an Applications Transaction Database: Install an empty, single-instance Oracle Database Enterprise Edition using the nonseeded database template shipped with this release.
Create a New Applications Environment Provisioning Response File: Create a response file for a new Oracle Fusion Applications environment.
Update an Existing Provisioning Response File: Add or change details in a completed response file that has not yet been implemented or in a partially completed response file.
Provision an Applications Environment: Initiate and track the processes that install, configure, and deploy product offerings in a new Oracle Fusion Applications environment.
Deinstall an Applications Environment: Remove applications and middleware components from an existing applications environment.
Click Next to continue.

Set up a notification preference for security-related updates and installation-related information from My Oracle Support.
Email: Specify your email address to have updates sent by this method.
I wish to receive security updates via My Oracle Support: Select this option to have updates sent directly to your My Oracle Support account. You must enter your My Oracle Support Password if you select this option.
Click Next to continue.
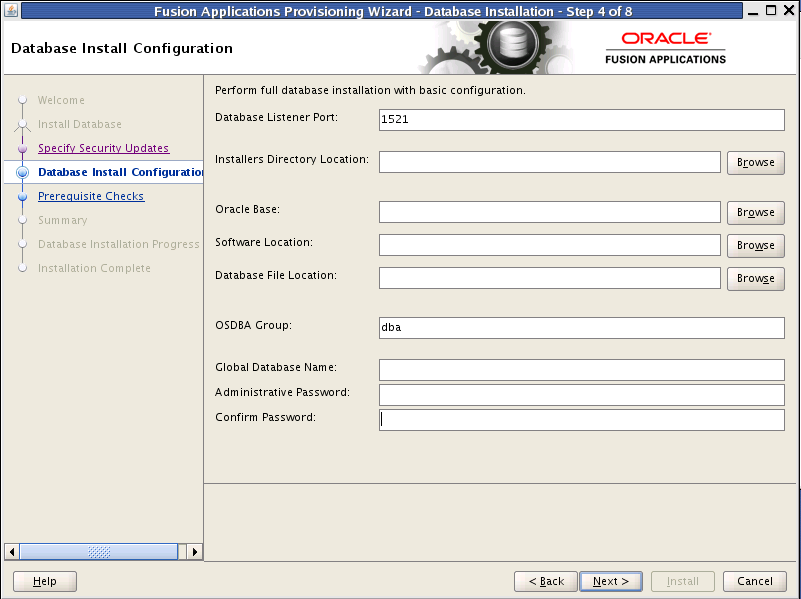
Specify information about the database that you want to install:
Database Listener Port: Port number designated for the database server. The default port for Oracle Database is 1521.
Installers Directory Location: Enter the path to the repository_location directory you created when you downloaded the provisioning repository. For Windows, the location must be a symbolically linked directory. Symbolic links are described in Oracle Fusion Applications Installation Guide. Note that a symbolic link is not necessary if the repository and the database are on the same node.
Oracle Base: Enter the top-level directory for Oracle software installations. You can change the path based on your requirements.
Software Location: Accept the default value or enter the Oracle home directory path that points to where you want the data files to reside. The directory path must not contain spaces.
Database File Location: Accept the default value or enter the path to the .dbf, .dtl, and .log files.
OSDBA Group: The UNIX operating system group that the database administrator is a member of. Displayed only if the platform detected by the installer is UNIX.
Global Database Name: Enter a name to distinguish this database instance from other Oracle Database instances running on the same host. The name can be written as database name or database name.domain name. This is the database service name.
Administrative Password: Specify a valid password. Retype it to Confirm.
Click Next to continue.
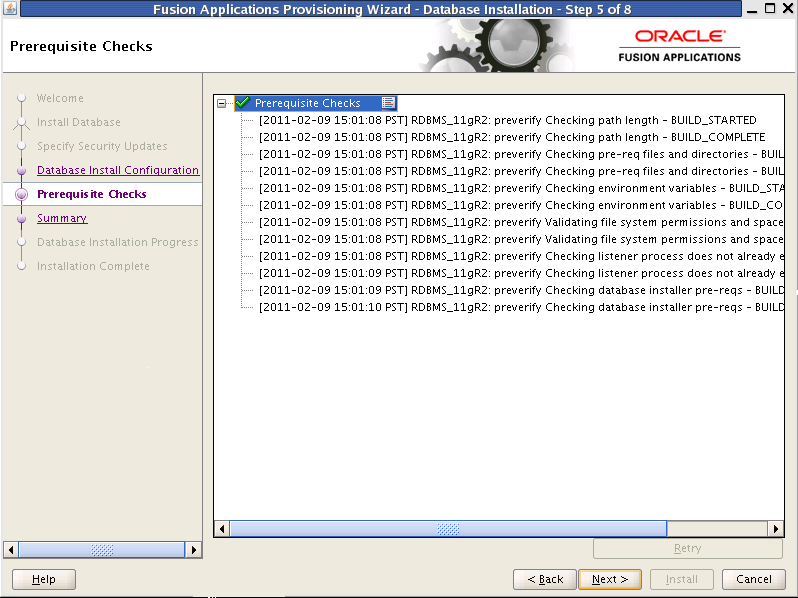
The Prerequisite Checks list shows each prerequisite check performed, and its status:
Block: Processing has not yet started on this host for the named phase.
Clock: Performing the build for a phase.
Check mark: The build was completed successfully.
x mark: The build has failed for this phase. You must correct the errors before you can continue.
Restricted symbol: The validation process has stopped due to a failure within another process.
Click an x or a Restricted symbol to display information about failures. Click the Log file for details about the validation.
Fix any issues reported, and click Retry to run the prerequisite checks again. See "Troubleshooting for Database Installation" in the Oracle Fusion Applications Installation Guide for information about recovery after failure.
When prerequisite checking is complete with no errors, click Next to continue.
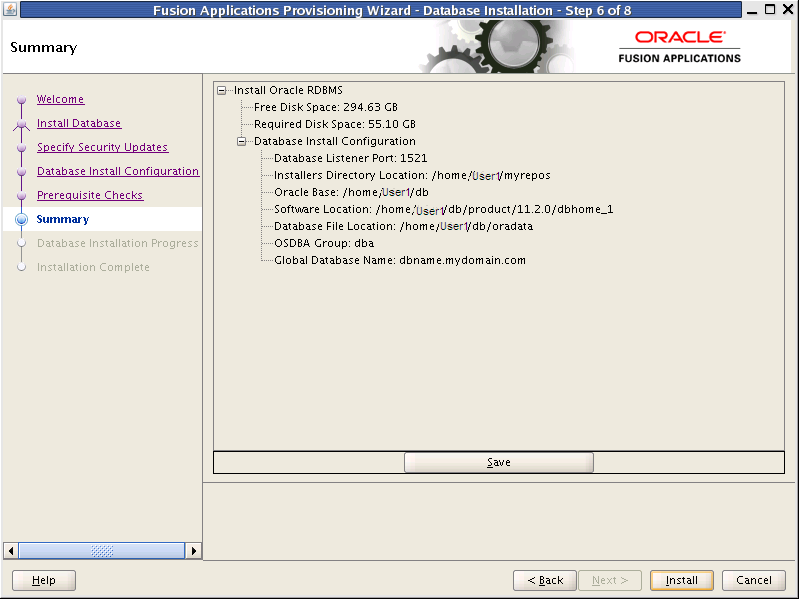
Click Save to create and save a text file to use as a record of this configuration.
Note: Record the file name and its location. You must supply these details when you create a response file.
Click Install to begin the installation.
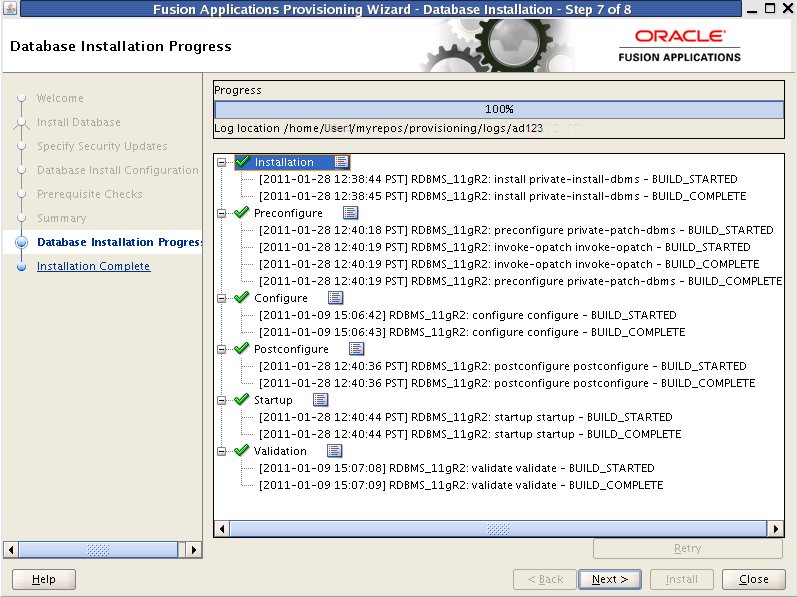
The installation Progress is reported by phase:
Installation: Runs the database installer to install the software.
Preconfigure: Applies patches to the installed database. The patches are located in the repository_location/installers/database/patch directory.
Configure: Creates services used to connect to the database and applies the database template to set system parameters.
Postconfigure: Performs any necessary postconfigure steps.
Startup: Starts any installed components that are not already started.
Validation: Connects to the database to verify the integrity of the installation.
The progress of the installation phases is listed. A message appears after the installation phase is complete directing you to run root.sh. Follow this instruction and click OK when you are finished to continue the installation.
The central log file location is displayed below the Progress bar. Click a Log icon to view phase log files. Click Retry if a failure occurs. If a recovery action is necessary, see "Troubleshooting for Database Installations" in Oracle Fusion Applications Installation Guide.
Click Next to continue.
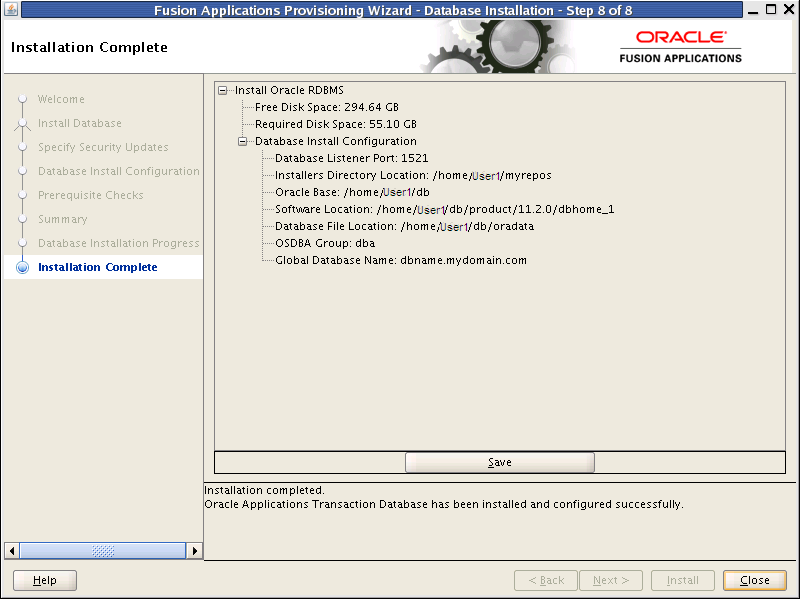
Summarizes the actions and validations that were performed for this installation. Click Save to record the database summary information in a text file.
Record the name and location of this file. You must supply these details when you create a response file. Your system administrator may also need this information as they perform maintenance tasks.
Click Close to dismiss the screen and exit the wizard.