52 Restore Purged Data to the Account Ledger (F0911)
This chapter contains this topic:
52.1 Restoring Purged Data
There might be times when it is necessary for you to restore journal entries that you previously purged from the Account Ledger.
Before restoring data to the Account Ledger (F0911), do the following:
-
Back up all files
-
Using World Writer with the fields GLPRGE and GLSUMM:
-
Remove 'Y' from the Purged field
-
Remove 'S' from the Summarized field
-
-
Delete records with a document type of 'BF' from the Account Ledger (F0911) in the production library for the fiscal year being restored.
-
Restore your purged information (F0911xx) to a temporary library on your AS/400.
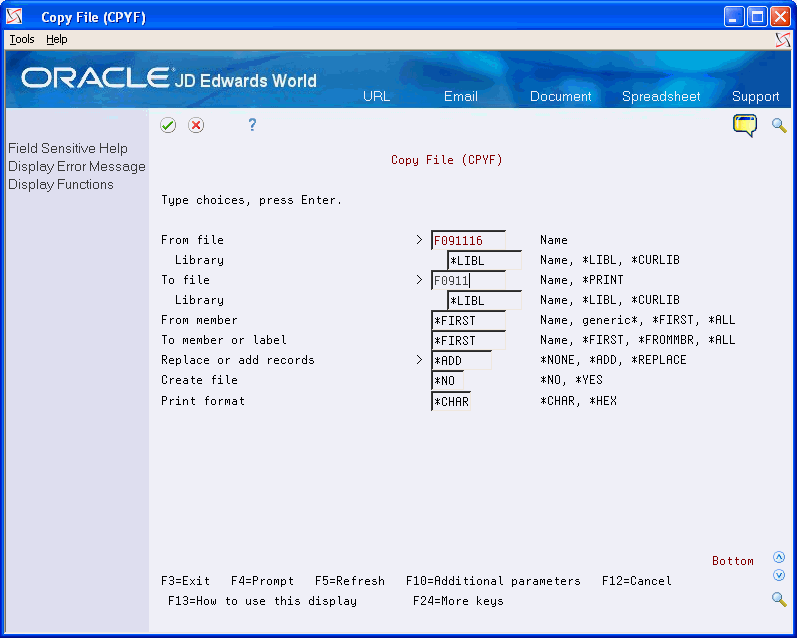
On General Accounting (G09), Enter ?CPYF and press F6
On Copy File (CPYF)
-
Complete the following fields:
-
From File
-
Library
-
To File
-
Library
-
Replace or Add Records
Field Data From File Enter F0911xx - where xx is the Fiscal year that was purged, for example F091116 contains purged 2016 records. Library Name of Temporary Library containing Purged File. To File F0911 Library Name of the Library to which you are restoring the records Replace or Add Records *ADD -
-
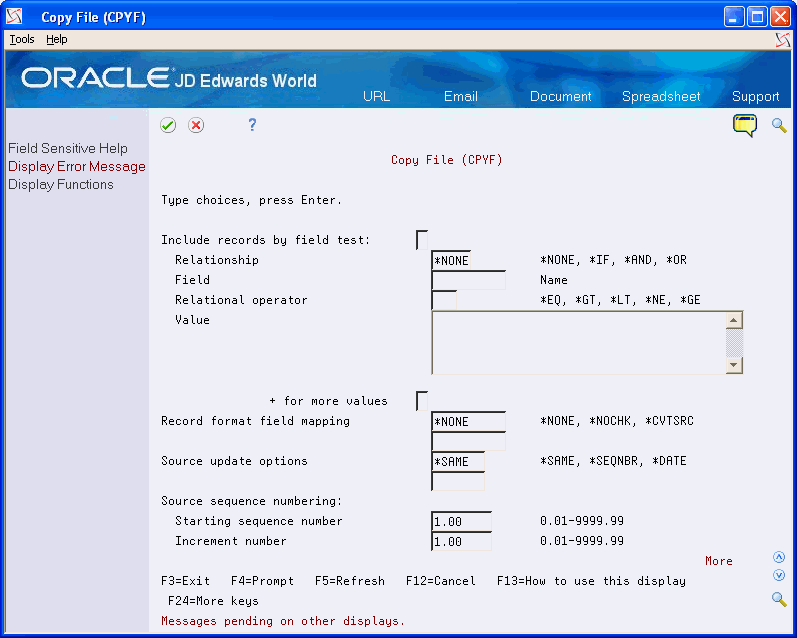
Press F10 to access the Additional Parameters.
-
Press Page Down four times to display the 'Include Records by Field Test' screen.
Figure 52-2 Copy File screen (Include Records by Field area)
Description of "Figure 52-2 Copy File screen (Include Records by Field area)"
-
Complete the following fields:
-
Record Format Field Mapping (1)
-
Record Format Field Mapping (2)
Field Data Record Format Field Mapping *MAP Record Format Field Mapping (2) - The unlabeled field under Record Format Field Mapping (1) *DROP
-
-
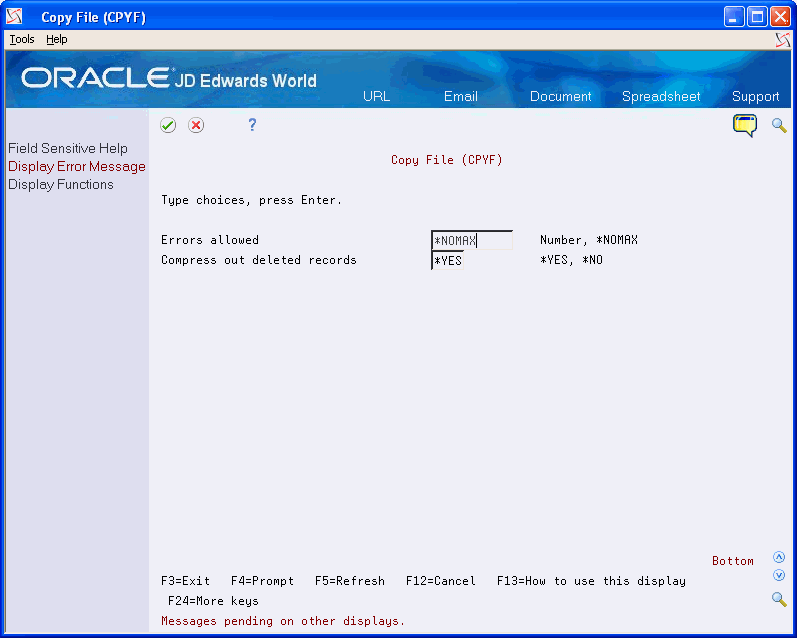
Press Page Down one time.
Figure 52-3 Copy File screen (Errors Allowed area)
Description of "Figure 52-3 Copy File screen (Errors Allowed area)"
-
Enter *NOMAX in to the Errors allowed field.
-
Press Enter to submit Copy file.