7 Work with Commitments
This chapter contains these topics:
Section 7.1, "Defining Commitment Rules"
Section 7.2, "Defining Commitments at a Work Center Location"
Section 7.3, "Managing Commitments for Grade and Potency Controlled Items"
Section 7.4, "Creating Commitments for Potent Units"
Section 7.5, "Reposting Work Order Commitments"
When an ingredients list is attached to a work order header, either manually or using the batch program, the system automatically creates commitments for each ingredient.
7.1 Defining Commitment Rules
When you define commitments, you set up the parameters that determine how the commitment is made. If you are using lot control, you also manage commitments by grade and potency. Repost commitments when you need to clear commitments and reassign quantities to other work orders.
When you create a commitment manually or using the batch program, you must define the following commitment rules for the work order:
-
Defining the commitment method for the item
-
Defining the commitment control and type of commitment
To define the commitment method for the item
From Inventory Management (G41), choose Inventory Master/Transactions
From Inventory Master/Transactions (G4111), choose Item Branch/Plant Information
You can define the method that the system uses when creating a commitment. These methods are by location, lot number, or lot expiration date.
On Item Branch/Plant Information
Figure 7-1 Item Branch/Plant Information screen
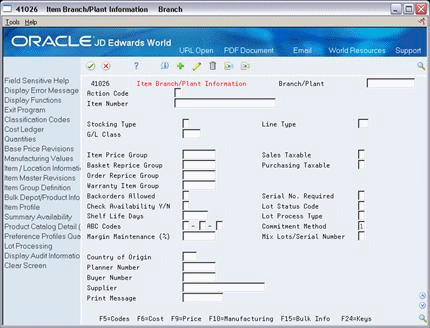
Description of "Figure 7-1 Item Branch/Plant Information screen"
Complete the following field:
-
Commitment Method
| Field | Explanation |
|---|---|
| Commitment Method | A code that indicates the method that the system uses to commit lot items from inventory. Valid codes are:
|
To define the commitment control and type of commitment
From Shop Floor Management (G31), choose Shop Floor Control Setup
From Shop Floor Control Setup (G3141), choose Manufacturing Constants
You can define the commitment control method and type for the work order. The control determines how the system commits inventory to a work order, and limits the inventory location to which commitments are made. The type specifies whether the commitment is soft, hard, or starts out soft and later becomes hard.
On Manufacturing Constants
Complete the following fields:
-
Commitment Control
-
Hard/Soft Commit
| Field | Explanation |
|---|---|
| Commitment Control | Determines how the system commits inventory to a work order, and limits the inventory location to which commitments are made. The system activates this field only when you create hard commitments. Valid codes are:
When you set the Commitment Method field in the Item Branch/Plant table to 2 or 3 (lot number or expiration date control), you must set this field to 3. |
| Hard/Soft Commit | Determines how the Shop Floor Control system commits inventory. Valid codes are:
For World: When the hard/soft commit option is set to 2 or 3, any line item in the parts list may be hard committed prior to printing or relieving the inventory. Note: When you set the Commitment Method field in the Branch/Plant Constants screen to 2 or 3, you must use 1 or 2 for this field because a hard commitment must be performed. |
7.2 Defining Commitments at a Work Center Location
Defining commitments at a work center consists of:
-
Defining the location at the work center
-
Defining the work center in the item's routing
-
Defining the ingredients for a process
-
Defining how the system commits inventory during backflush
To define the location at the work center
From Product Data Management (G30), choose Daily PDM Discrete
From Daily PDM Discrete (G3011), choose Enter/Change Work Center
On Enter/Change Work Center
Figure 7-3 Enter/Change Work Center screen
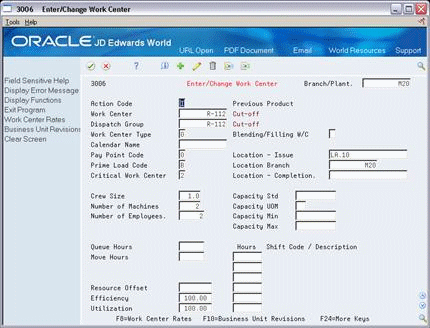
Description of "Figure 7-3 Enter/Change Work Center screen"
Complete the following fields:
-
Work Center
-
Location - Issue
To define the work center and location in the items routing
From Product Data Management (G30), choose Daily PDM Process
From Daily PDM Process (G3012), choose Enter/Change Process
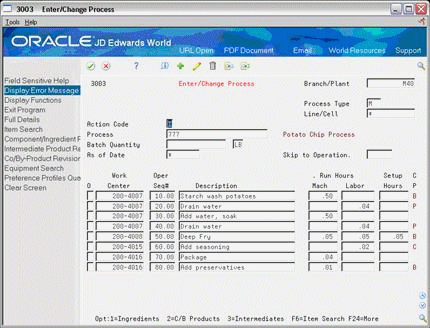
Review the following field:
-
Work Center
-
Replenishment Location
| Field | Explanation |
|---|---|
| Location | A code that identifies inventory locations in a branch/plant. You define the format of the location identifier by branch/plant.
Form-specific information This field overrides the location defined in the work center master, which allows for multiple work center locations. |
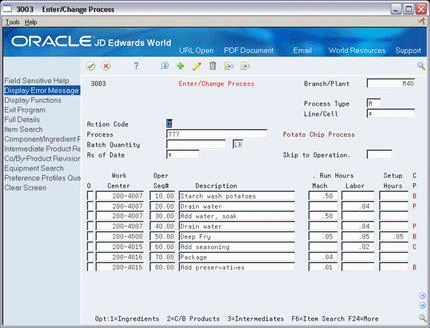
To define the ingredients for a process
From Product Data Management (G30), choose Daily PDM Process
From Daily PDM Process (G3012), choose Enter/Change Process
-
Complete the following fields:
-
Branch/Plant
-
Parent Item
-
-
Access the detail area.
Figure 7-6 Enter/Change Process screen, Detail area
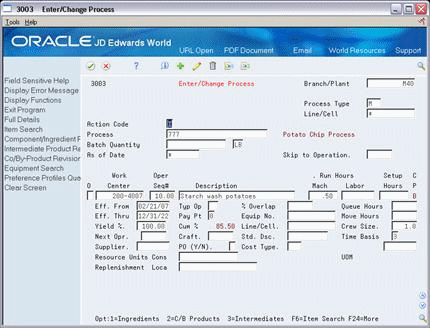
Description of "Figure 7-6 Enter/Change Process screen, Detail area"
-
-
Operation Sequence
-
-
Figure 7-7 Routing Operation Master Text window
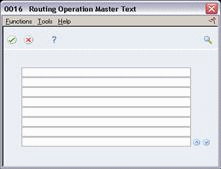
Description of "Figure 7-7 Routing Operation Master Text window"
-
Create a separate generic text entry for a component item of the parent item.
This window enables you to provide more information and specific instructions per component. You can also use the User Information and Text Model Selection windows to view user and date updates, as well as model selections.
7.2.1 What You Should Know About
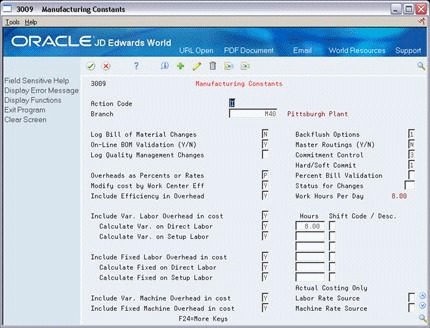
To define how the system commits inventory during backflush
From Shop Floor Management (G31), enter G3141 in the selection or command line
From Shop Floor Control Setup(G3141), choose Manufacturing Constants
On Manufacturing Constants
Figure 7-8 Manufacturing Constants screen
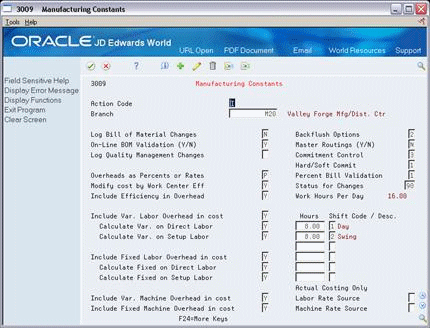
Description of "Figure 7-8 Manufacturing Constants screen"
-
Backflush Options
| Field | Explanation |
|---|---|
| Backflush Options | Determines how the system performs commitment and release of inventory during the backflush process. Valid codes are:
Note: You must create the work order routing before the parts list. If you are running work order generation, the work order routing and the parts list must be created at the same time. |
7.3 Managing Commitments for Grade and Potency Controlled Items
From Shop Floor Control (G31), choose Process Daily Order Preparation
From Daily Order Preparation - Process (G3113), choose Enter/Change Order
On Enter/Change Order, choose Ingredients List.
Grade and potency controlled items must be lot controlled. When the system creates commitments for grade and potency controlled items, it moves the grade and potency range to the ingredients list. Only those lots within the range are eligible for commitments.
For example:
| Unit | Location | Exp. Date | Grade | On Hand | Commit |
|---|---|---|---|---|---|
| P | 50 | ||||
| S | 9406220000 | 08/31 | A01 | 50 | 50 |
| S | 9406230000 | 08/15 | A02 | 300 | 300 |
| S | 9406240000 | 12/12 | A03 | 400 | 400 |
| S | 9406250000 | 09/01 | A04 | 5 | |
| S | 9406260000 | 09/01 | A05 | 5000 |
In the above example, the work order quantity required is 800, and the grade range is A01-A03. The system makes the commitments in date sequence.
The system commits the quantities using the primary unit of measure. If all of the commitments cannot be made against specified lots in the range, the system commits the remainder to the primary location at standard grade or potency.
7.4 Creating Commitments for Potent Units
When you define a unit of measure as a potent unit of measure, and the system creates commitments, the system converts the quantity to the primary unit of measure. For example, if the primary unit of measure is GA (gallons), the component unit of measure is GP (potent gallons), and the standard potency is 70%, the ingredients list requires 500 GP.
| Unit | Location | Potency | On Hand | Potent Units | Commit at Standard & 70% |
|---|---|---|---|---|---|
| P | 43 | ||||
| S | 9406220000 | 80% | 50 | 40 | 50 |
| S | 9406230000 | 90% | 300 | 270 | 300 |
| S | 9406240000 | 40% | 400 | 160 | 400 |
In the above ingredients list example, only the equivalent of 470 GPs are available. The remaining 30 GPs are committed back to primary (30 GP/.7 = 43 GA).
Using the above example, if the primary unit of measure was GP, the potency associated with it in the Lot Master table (F4108) is only for conversion purposes. Potent units of measure are assumed to be 100% potent.
Also, a lot that consists of 100 potent units with a potency of 75% means that it is the equivalent of 133.3333... physical gallons (100/75). It is important for those companies that store in potent units to know the physical size of the inventory.
Caution:
The system issues a warning message when it changes the standard value for grade or potency on the branch/plant record. Commitments can be brought out of balance if the primary unit of measure for an item is non-potent and commitments exist from a sales order or work order in a potent unit of measure. The reverse is true as well. You can correct this by running a repost for the sales order and work order. JD Edwards World recommends that you run sales order reports, and repost the purchase order, after you repost the work order.Creating commitments for potent units consists of:
-
Defining potent units
-
Setting up a unit of measure conversion
From General Systems (G00), choose General User Defined Codes
Figure 7-9 General User Defined Codes screen
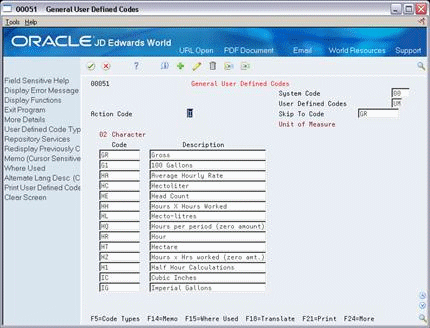
Description of "Figure 7-9 General User Defined Codes screen"
-
Access the detail area.
Figure 7-10 General User Defined Codes screen, Detail area
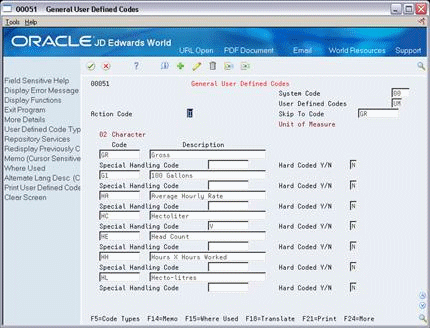
Description of "Figure 7-10 General User Defined Codes screen, Detail area"
-
-
Special Handling Code
-
| Field | Explanation |
|---|---|
| Special Handling Code - User Def Codes | A code that indicates special processing requirements for certain user defined code values. The particular value you enter in this field is unique for each user defined code record type.
The system uses the special handling code in many ways. For example, special handling codes defined for Language Preference specify if the language is double-byte or if the language does not have uppercase characters. Programming is required to activate this field. Form-specific information If a "P" is in the second position, the system identifies that unit of measure as a potent unit of measure. |
To set up a unit of measure conversion
From Inventory Management (G41), enter G4141 in the selection or command line
From Inventory System Setup (G4141), choose Standard Units of Measure
You set up a unit of measure conversion for potent units so that the system can:
-
Convert potent units of measure to physical units of measure
-
Convert physical units of measure to potent units of measure
On Standard Units of Measure
Figure 7-11 Standard Units of Measure screen
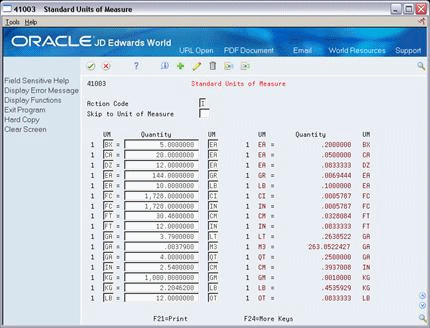
Description of "Figure 7-11 Standard Units of Measure screen"
Complete the following fields:
-
Unit of Measure
-
Quantity
-
Unit of Measure
7.5 Reposting Work Order Commitments
From Shop Floor Control, enter 27
From Advanced Shop Floor Control (G3131), choose Repost Open Quantities
After you set up commitments, run the Repost Open Quantities batch program to:
-
Clear outdated or invalid commitments
-
Repost the commitments and on-order quantities specified in your work order to current requirements
Processing options allow you to limit the repost process to those work orders below a certain status.
7.5.1 Before You Begin
-
Verify that the Item Branch table (F4102) is not is use.
-
Indicate whether you want inventory hard or soft committed at each branch. See Section 7.1, "Defining Commitment Rules".