22 Program Overview
This chapter contains these topics:
22.1 About the Program Overview
The program overview provides a basic overview of the standards used in a program. It includes the following:
22.2 Subroutines
The Program Generator uses two categories of subroutines:
-
Standard Subroutines
-
Common Subroutines
22.2.1 Standard Subroutines
The Program Generator includes the required standard routines in the Calculation Specifications at the time it generates a program. It arranges them in alphanumeric order.
If you must enter your own standard subroutine, name it in such a way that it will be executed in the necessary order. For example, if you need your subroutine to be executed after the scrub and edit subroutine (S005) but before the update files subroutine (S010), begin the name with an S and then use a three to four character suffix that fits in logically, such as S005A or S006.
Standard subroutine code lines are identified in positions 7 and 8 with SR. Their names always begin with an S. Subroutines are separated by a single line of asterisks. Major blocks of code within a subroutine are separated by a single line of dashes.
Figure 22-1 Standard Subroutine Code Lines

Description of "Figure 22-1 Standard Subroutine Code Lines"
Place an END tag on the ENDSR statement. The TAG name should start with END. The subroutine name is added as a suffix. For example, END001 would be used for subroutine S001. Do not use the end tag for anything else. Use a T tag if the code needs to be executed prior to the ENDSR statement. For example, T001 would be used for subroutine S001 if the tag is used in the middle of the subroutine.
22.2.2 Common Subroutines
Common subroutines are maintained outside the program and are included at the appropriate times using the COPY statement. Common subroutines are also referred to as copy modules for that reason. JD Edwards World stores all common subroutines in the file JDECPY.
At compile time, the compiler copies in source code for all instances of the COPY statement. The included code displays only once and can be called from anywhere within the program.
The statement that instructs the compiler to copy in the source code is shown below. Single lines of asterisks separate common subroutines.
Figure 22-3 Compiler Instruction Statement to Copy Source Code

Description of "Figure 22-3 Compiler Instruction Statement to Copy Source Code"
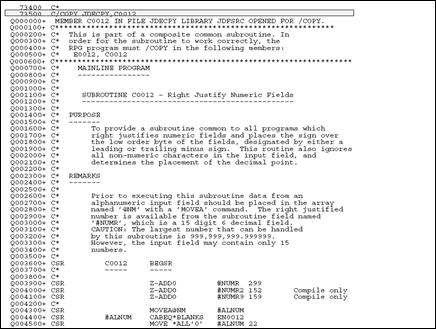
This example shows how the COPY statement in the source (above) brings in additional code to the compiled source.
Figure 22-4 Results from Copy Statement Above

Description of "Figure 22-4 Results from Copy Statement Above"
The following user defined code contains an online listing and specifications:
-
Install System Code: 93
-
User Defined Code: /C
22.3 Error Handling
JD Edwards World has devised an efficient means of handling errors by way of arrays.
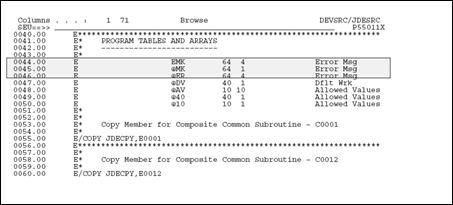
The EMK array holds the four byte data dictionary name of every error that could occur in this program. The array is loaded in Housekeeping (S999).
-
The @MK array maintains a flag setting for each error identified in EMK. If one of the errors occurs, the flag is set on.
-
The @ER array loads the related error messages when the user presses F7 to view the errors that actually occurred.
-
A program may have up to 64 errors.
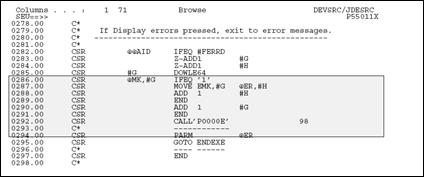
The call to the error message handling program is shown below.
Figure 22-6 Call to the Error Message Handling Program

Description of "Figure 22-6 Call to the Error Message Handling Program"
If any error flag is set to one, then the program moves the corresponding data item from the array of all possible errors (EMK) into the array of the errors that have actually occurred (@ER). P0000E is called to display the errors when the function key is pressed.
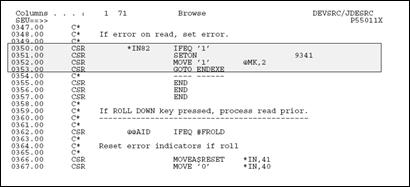
The next example of code shows how a flag is set in the @MK array.
22.4 Indicator Usage
There are 99 indicators available for use. They are grouped by purpose. The chart on the next page lists the available indicators and their description.
| Indicator | Explanation |
|---|---|
| 01 | Causes the Invalid Function Key Pressed message to appear |
| 02 | Dictates the color palette to be used |
| 15 | Indicates a function key was pressed |
| 20 | Handles the clear screen action code |
| 21 | Handles the add action code |
| 22 | Handles the change action code |
| 23 | Handles the delete action code |
| 24 | Handles the inquire action code |
| 25 | Handles the inquire action code 'P' for print (payroll) |
| 31 | Used in conjunction with subfile processing to initiate the INVITE or SFLCLR keyword. Using INVITE will slow processing |
| 32 | Used in conjunction with subfile processing initiating the keyword SFLNXTCHG |
| 37 | Used in conjunction with subfile processing to avoid display of an empty subfile (used only with inquiry subfiles) |
| 38 | Used in conjunction with subfile processing to highlight the last record in the display (keyword SFLDSP) and avoid display of an empty subfile |
| 40-79 | Used for error processing to indicate which fields are in error and need to be highlighted |
| 40 | Reserved for errors in the Action Code field |
| 41 | Reserved for errors in the key fields |
| 80-89 | General reusable one-time indicators. Use them as needed |
| 93 | Global error indicator that highlights line 24 |
| 98 | Indicates a chain or read failure |
| 99 | Indicates a record is in use or file error |
| OF | Indicates overflow for report processing |
| LR | Indicates that the last record has been read and the program should end normally |
| RT | Indicates that a temporary or final halt in the program should take place. Returns to calling program leaving files open |
22.5 Documentation
In the F specifications the program contains several comment lines that are to serve as the program revisions log. The log should list all programmers who have revised the program, the date the revisions were made, and the SAR outlining the change that was made.
When entering comment lines, use the following conventions:
-
An asterisk in column seven specifies that the line is a comment line only.
-
The asterisk should be followed by four blank spaces before the comment begins.
-
Precede and follow the comment lines with a blank line.
The example below shows how these conventions are observed.
22.5.1 Guidelines
Common sense should be your guide when documenting your programs. Be thorough and descriptive. Put yourself in the place of the next programmer who will inherit your work. Use English and not "programmerese" to specify the action occurring. For example, for the code shown below:
Figure 22-10 Example of Code to be Documented

Description of "Figure 22-10 Example of Code to be Documented"
DON'T WRITE: If $998 is blank, execute S998.
INSTEAD WRITE: Load data field dictionary parameters (one cycle only).
Include a line of dashes beneath any line of code that branches to another line of code (CASxx, CABxx, GOTO, EXSR, CALL, BEGSR). The receiving tag statement should also be followed by a line of dashes as shown in the example below.
22.6 Miscellaneous Items
The following represent miscellaneous items that you should keep in mind when writing your own code.
Use the following first character to distinguish different item names:
-
@ Array names
-
$ Program created field names (flags and work fields)
-
# Fields defined in common subroutines
Key lists should all be defined in the housekeeping subroutine.
Begin the key list name with the data file prefix. For example, the Address Book Master file prefix is AB, so the key list would be ABKY01.
The Program Generator creates key lists using the following naming conventions:
-
XXKY01 for physical files where XX = the file prefix. For example, ABKY01.
-
When a physical file needs to have more than one key list in a program, the successive files are noted in the last character space. For example, for three key lists for the physical file F0101, the key lists would be: ABKY01, ABKY02, and ABKY03.
-
XXKY0x for logical files where XX is equal to the file prefix and x is equal to the last letter of the logical file name. For example: ABKY0A for F0101LA, ABKY0B for F0101LB.
-
When a logical file needs to have more than one key list in a program, the successive files are noted in the second to last character space. For example for three key lists for the logical file F0101LA, the key lists would be: ABKY0A, ABKY1A, and ABKY2A.
22.6.1 Work Fields
Define work fields only once within a program. The use of the *LIKE DEFN command is highly recommended for defining work fields when their attributes are directly tied to those of database fields.
If the work field needs to have the same attributes as a field that exists in a file, for example:
MOVE ABANS $$ANS
Then define $$ANS:
*LIKE DEFN ABANS $$ANS
The advantage of this method is that the work field and database field will retain the same attributes even if the database field changes.
When using work fields as a flag, you should assign them the prefix $ and have the remainder of the name be descriptive. In the example below, the work field name is $GLOBL. This name is more descriptive than a field name such as $G.
Figure 22-12 Example of a Work Field Name

Description of "Figure 22-12 Example of a Work Field Name"
If a program uses files which are dependent upon your particular setup, you should designate those files as user control open (UC) in the file specifications and then write the program such that they are opened, if needed, in the Housekeeping subroutine. This eliminates the need to open files unnecessarily and conserves resources.
The lines that perform the open are shown below.
If your program performs a user-controlled open for a file that is part of another system, you will also need to provide pre-compiler commands in the event the user has not purchased that system. The example below illustrates the necessary pre-compiler commands designed to address this situation.
In the example, if a Payroll client has not purchased Human Resources, the code specifies a file override and then substitutes an empty file (identified with the suffix E) which all Payroll clients receive.
Figure 22-14 Pre-compiler Commands that Perform a User-controlled Open If a File Is Part of Another System Not Purchased by the User

Description of "Figure 22-14 Pre-compiler Commands that Perform a User-controlled Open If a File Is Part of Another System Not Purchased by the User"
The user-controlled opens in the program allow the program to run in the absence of certain files, whereas the precompiler commands allow the program to be compiled in the absence of those files.


