Updating the Technology Stack
This chapter describes how to use the specialized Rapid Install option to update the technology stack.
This chapter covers the following topics:
- Updating the Technology Stack
- Replacing the Oracle E-Business Suite Database Technology Stack
- Replacing the OracleAS 10.1.2 (Tools) Technology Stack
- Replacing the Oracle Fusion Middleware Technology Stack
Updating the Technology Stack
Rapid Install offers a specialized option that allows you to replace selected technology stack executables in an existing instance, for example where executable files have been lost or become corrupted. The option can be used to replace executables belonging to the Oracle E-Business Suite Database, OracleAS 10.1.2, or Oracle Fusion Middleware.
Important: Before undertaking any of the procedures in this chapter, you should ensure you have a list of any patches that have been applied to the Oracle home in question. After running the procedure, you should apply any missing patches to the newly created replacement Oracle home.
Replacing the Oracle E-Business Suite Database Technology Stack
Steps
-
Remove the RapidWiz install stage area under the database Oracle home:
$ rm -rf $ORACLE_HOME/temp/*
For example:
$ rm -rf /d01/oracle/RW/PROD/12.1.0/temp/*
-
Source the environment on the database tier:
$ . $ORACLE_HOME/<CONTEXT_NAME>.env
-
Detach the Oracle Database 12cR1 Oracle home from the inventory:
UNIX:
$ $ORACLE_HOME/oui/bin/detachHome.sh
Windows:
C:\>%ORACLE_HOME%\oui\bin\detachHome.bat
-
Take a copy of the context file.
-
On Windows only, perform the following steps:
-
Shut down the database and database listener.
-
Delete the database service using the following command:
C:\>%ORACLE_HOME%\bin\oradim -DELETE -SID [SID]
-
-
Remove the database Oracle home
$ rm -rf $ORACLE_HOME
-
As the operating system user that owns the technology stack you are replacing, run the Rapid Install wizard with the
-techstackoption:$ rapidwiz -techstack
-
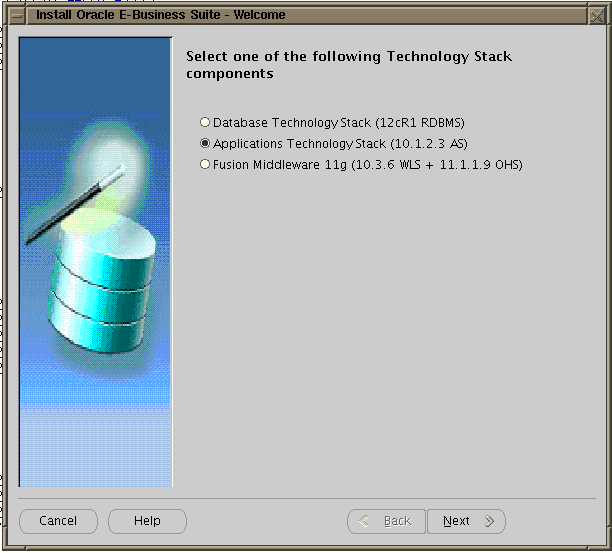
Select "Database Technology Stack (12cR1 RDBMS)" and then click Next.
Welcome screen with "Database Technology Stack (12cR1 RDBMS)" option selected

-
Fill in the required information in the Database Node screen and then click Next.
Database Node screen
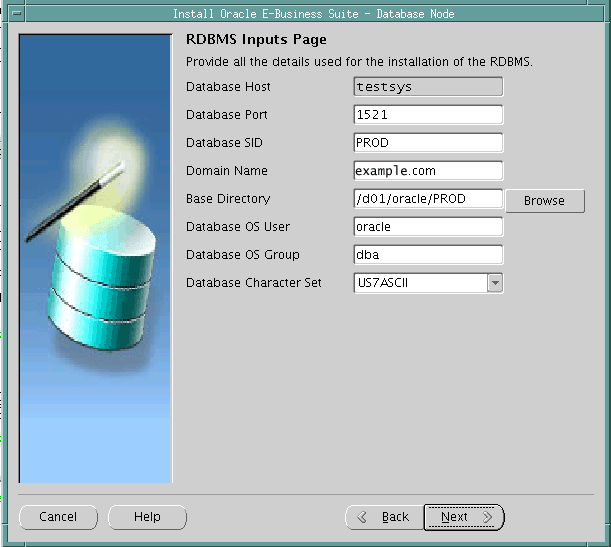
Important: The host name for the database tier node must be no longer than 30 characters. While entering the host name, ensure that you specify the host name in lower case. Using upper case or mixed case for the host name is not supported.
The Rapid Install wizard displays a warning message if the fully qualified domain name (FQDN) exceeds 30 characters. If the host name for the database tier node is no longer than 30 characters, then you can ignore the warning and proceed with the installation. Otherwise you must update the host name before you proceed.
Additionally, the host name must begin with an alphabetic character. The host name cannot include an underscore (
_) character.In the Database SID field, enter the database name, or service name, for the local instance. The database name must be alphanumeric, must not exceed eight characters in length, must not start with a number, and must not include any spaces.
Important: The database name specified in this field is used to determine the database SID. The database SID may vary depending on your environment.
-
In an environment that does not use Oracle RAC, the database SID is the same as the database name.
-
In an Oracle RAC environment, the instance number is appended to the database name to form the database SID for each Oracle RAC node.
-
-
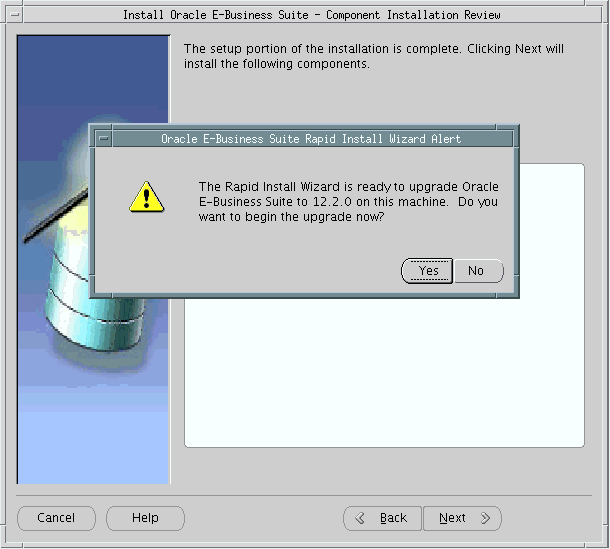
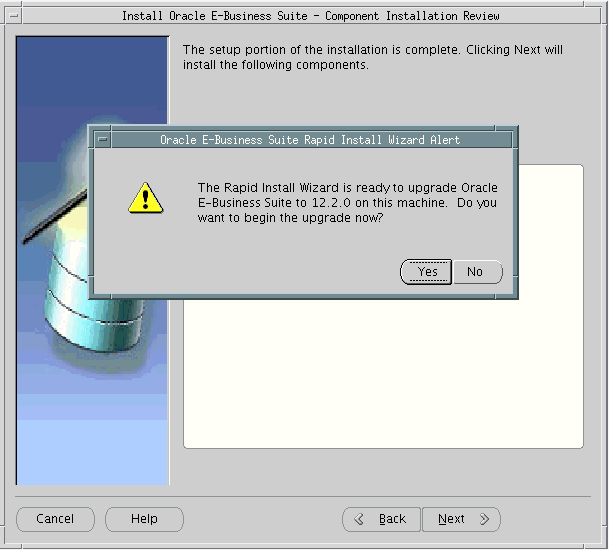
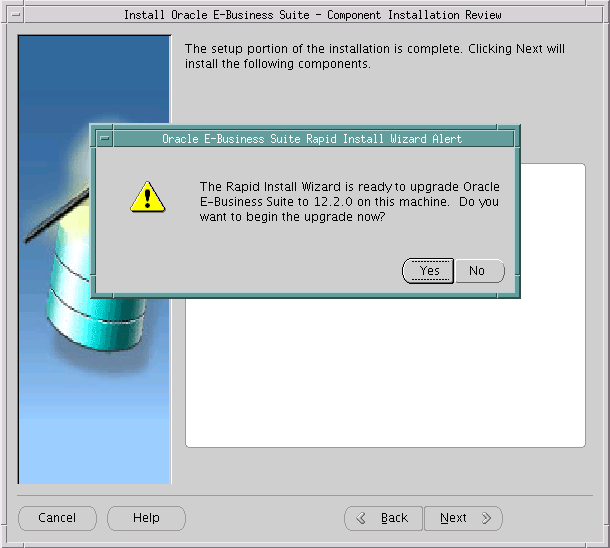
Click Yes in the Oracle E-Business Suite Rapid Install Wizard Alert dialog box to start the installation.
Oracle E-Business Suite Rapid Install Wizard Alert dialog box
-
After the installation has completed successfully, copy your context file to the $ORACLE_HOME/appsutil directory.
-
Run AutoConfig with this context file. Although this first run will fail (because it needs a database up and running to succeed), it will generate the basic metadata that the database needs to start up.
-
Set the environment, and start up the database.
-
Run AutoConfig a second time. This time it should succeed.
Replacing the OracleAS 10.1.2 (Tools) Technology Stack
Steps
-
Remove the RapidWiz install stage area on both application tier file systems, fs1 and fs2:
$ rm -rf <s_base>/fs1/inst/apps/<context>/temp/*
$ rm -rf <s_base>/fs2/inst/apps/<context>/temp/*
-
Detach the OracleAS 10.1.2 AS (Tools) Oracle home from the inventory:
UNIX:
$ runInstaller -removeHome ORACLE_HOME=$ORACLE_HOME ORACLE_HOME_NAME=<OraInventory name>
Windows:
C:\>setup.exe -noconsole -waitforcompletion -removeHome ORACLE_HOME=%ORACLE_HOME%
Do this for both fs1 and fs2.
-
Remove the OracleAS 10.1.2 Oracle home on both file systems:
$ rm -rf <s_base>/fs1/EBSapps/10.1.2
$ rm -rf <s_base>/fs2/EBSapps/10.1.2
-
As the operating system user that owns the technology stack you are replacing, run the Rapid Install wizard with the
-techstackoption:$ rapidwiz -techstack
-
Select "Applications Technology Stack (10.1.2.3 AS)" and click Next:
Welcome screen with "Applications Technology Stack (10.1.2.3 AS)" option selected
-
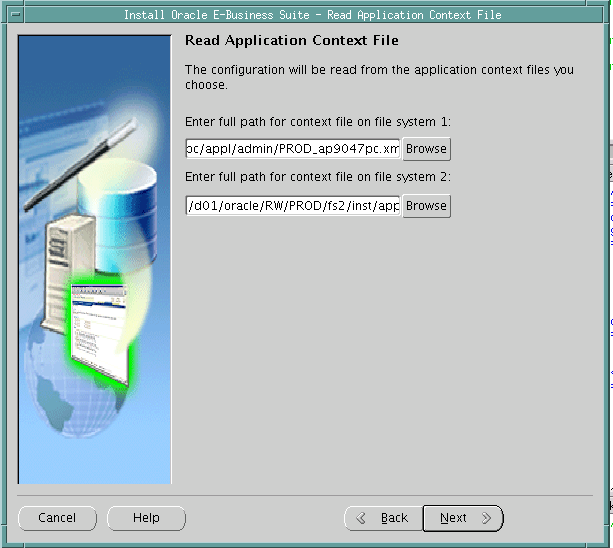
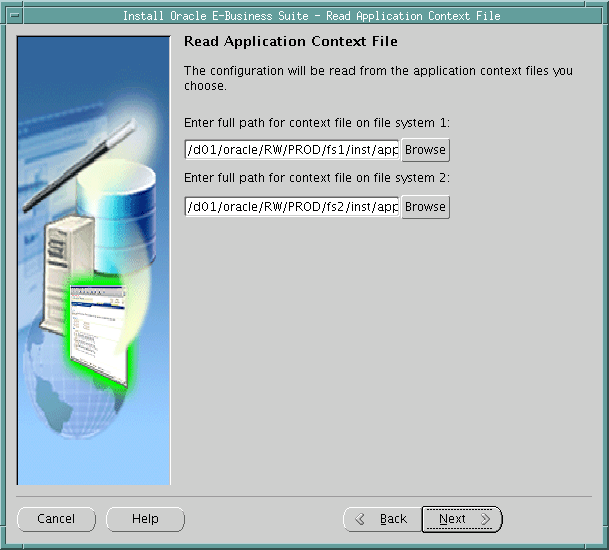
In the "Read Application Context File" field, enter the context file (generated with adclonectx if required) that matches the parameters of your OracleAS 10.1.2 installation, then click Next.
Note: You only have to enter the context file for fs1. The context file for fs2 is automatically filled in as you enter the fs1 path and file.
Read Application Context File screen
-
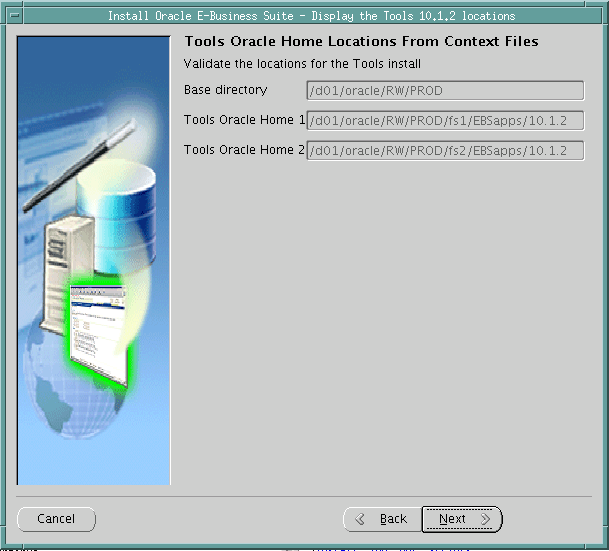
The next screen is to confirm that this is the correct location of the OracleAS 10.1.2 Oracle home. Click Next.
Display the Tools 10.1.2 Locations screen
-
Click Yes in the Oracle E-Business Suite Rapid Install Wizard Alert dialog box to start the install.
Oracle E-Business Suite Rapid Install Wizard Alert dialog box
-
After a installation has completed successfully, run AutoConfig and then start the application tier services.
Replacing the Oracle Fusion Middleware Technology Stack
Steps
-
Uninstall Oracle Fusion Middleware:
UNIX:
$ <s_base>/fs1/FMW_Home/utils/uninstall/uninstall.sh
$ <s_base>/fs2/FMW_Home/utils/uninstall/uninstall.sh
Windows:
C:\><s_base>\fs1\FMW_Home\utils\uninstall\uninstall.cmd
C:\><s_base>\fs2\FMW_Home\utils\uninstall\uninstall.cmd
-
Remove the RapidWiz install stage area on both application tier file systems, fs1 and fs2:
$ rm -rf <s_base>/fs1/inst/apps/<context>/temp/*
$ rm -rf <s_base>/fs2/inst/apps/<context>/temp/*
-
Detach the Web tier Oracle home from the inventory:
-
UNIX:
$ $ORACLE_HOME/oui/bin/detachHome.sh [-invPtrLoc <s_invPtrLoc>]
Specify the
-invPtrLocargument only if you are using the EBS Installation Central Inventory. When specifying this argument, replace<s_invPtrLoc>with the context variable that stores the inventory pointer location.Additional Information: For more information about the EBS Installation Central Inventory, see: Before You Start, Oracle E-Business Suite Maintenance Guide.
-
Windows:
C:\>%ORACLE_HOME%\oui\bin\detachHome.bat
Do this for both fs1 and fs2.
-
-
Detach Oracle Common from the inventory:
-
UNIX:
$ $ORACLE_HOME/oui/bin/detachHome.sh [-invPtrLoc <s_invPtrLoc>]
Specify the
-invPtrLocargument only if you are using the EBS Installation Central Inventory. When specifying this argument, replace<s_invPtrLoc>with the context variable that stores the inventory pointer location.Additional Information: For more information about the EBS Installation Central Inventory, see: Before You Start, Oracle E-Business Suite Maintenance Guide.
-
Windows:
C:\>%ORACLE_HOME%\oui\bin\detachHome.bat
Do this for both fs1 and fs2.
-
-
Detach Oracle_EBS-app1 from the inventory:
-
UNIX:
$ $ORACLE_HOME/oui/bin/detachHome.sh [-invPtrLoc <s_invPtrLoc>]
Specify the
-invPtrLocargument only if you are using the EBS Installation Central Inventory. When specifying this argument, replace<s_invPtrLoc>with the context variable that stores the inventory pointer location.Additional Information: For more information about the EBS Installation Central Inventory, see: Before You Start, Oracle E-Business Suite Maintenance Guide.
-
Windows:
C:\>%ORACLE_HOME%\oui\bin\detachHome.bat
Do this for both fs1 and fs2.
-
-
This step is platform-dependent. On UNIX, remove Oracle_EBS-app1/jdk. Do this for both fs1 and fs2.
-
Remove the <FMW_HOME>/oracle_common directory. Do this for both fs1 and fs2.
-
Remove the contents of the <FMW_HOME>/webtier directory, except the 'instances' directory. Do this for both fs1 and fs2.
-
This step is platform-dependent.
-
UNIX: Remove s_fmw_jdktop. Do this for both fs1 and fs2.
-
Windows: Remove s_jdktop and s_fmw_jdktop. Do this for both fs1 and fs2.
-
-
As the operating system user that owns the technology stack you are replacing, run the Rapid Install wizard with the
-techstackoption:$ rapidwiz -techstack
-
Select "Fusion Middleware 11g (10.3.6 WLS + 11.1.1.9 OHS)" and click Next.
Welcome screen with "Fusion Middleware 11g (10.3.6 WLS + 11.1.1.9 OHS)" option selected

-
In the "Read Application Context File" field, enter the context file (generated with adclonectx if required) that matches the parameters of your Oracle Fusion Middleware installation, then click Next.
Read Application Context File screen
-
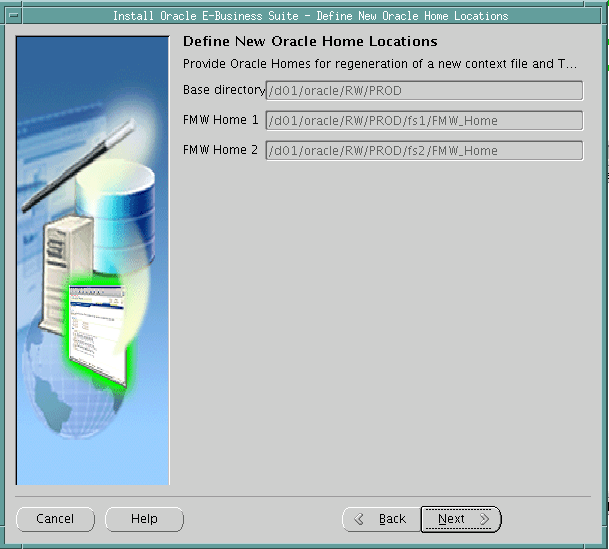
The next screen is to confirm that these are the correct locations for the Oracle Fusion Middleware Oracle homes. Click Next.
Define New Oracle Home Locations screen
-
Click Yes in the Oracle E-Business Suite Rapid Install Wizard Alert dialog box to start the install.
Oracle E-Business Suite Rapid Install Wizard Alert dialog box
-
(Conditional) If you are running the Oracle HTTP Server on a privileged port, refer to Step 3.3: Running Oracle HTTP Server on a Privileged Port of My Oracle Support Knowledge Document 1905593.1, Managing Configuration of Oracle HTTP Server and Web Application Services in Oracle E-Business Suite Release 12.2.
-
After the installation has completed successfully, run AutoConfig and then start the application tier services on the run edition file system.