4 Creating and Configuring the CC
This chapter contains information on the requirements for creating and configuring the Oracle Communications Offline Mediation Controller Nortel CS 2000 AMADNS collection cartridge (CC).
An optional instance of the CS 2000 AMADNS CC can be created to reprocess CS 2000 AMADNS record files when there is no match with the Service Provider Lookup file. The process to create this CC is the same as outlined below except that in the Rule File drop-down list, select Reprocess - NortelCS 2000 SN09 AMADNS.
Creating and Configuring the Nortel CS 2000 AMADNS CC
To create and configure the Nortel CS 2000 AMADNS CC:
-
Log on to Offline Mediation Controller Administration Client.
The Node Hosts & Nodes (logical view) screen appears.
-
In the Mediation Hosts table, select a host.
-
In the Nodes on Mediation Host section, click New.
The Create a Node dialog box appears.
-
Select Voice over IP (VoIP) and click Next.
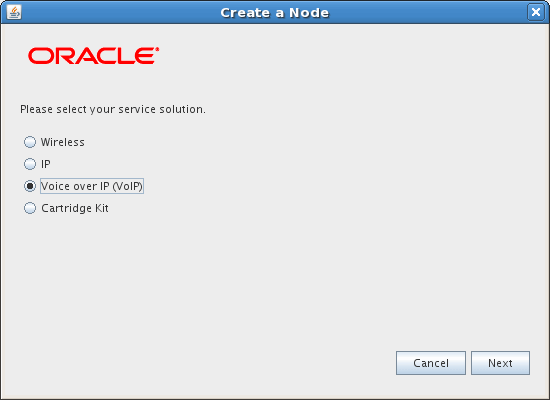
Description of the illustration nortel_cs2k_wiz001.gif
-
Select Collection Cartridge (CC) and click Next.
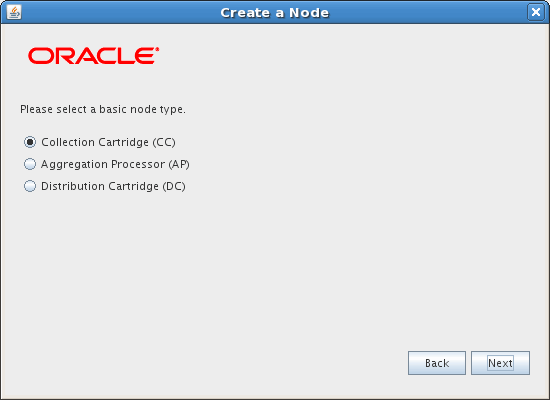
Description of the illustration nortel_cs2k_wiz002.gif
-
Select Nortel CS 2000 AMA DNS and click Finish.
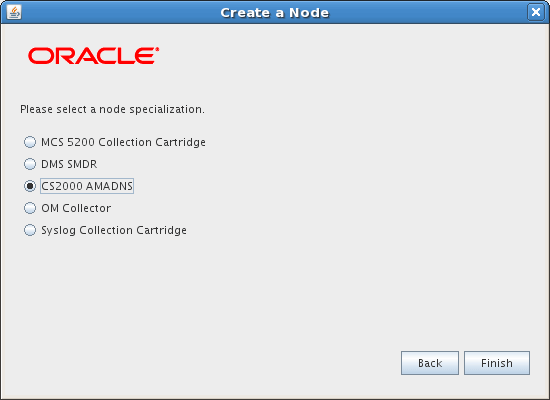
Description of the illustration nortel_cs2k_wiz003.gif
-
In the node configuration window, type a name for the cartridge in the Name field.
-
In the Rule File drop-down list, accept the default rule file, NortelCS 2000 SN09 AMADNS.
-
On the General tab, refer to the online help for field definitions. The default field settings are shown in the sample below:
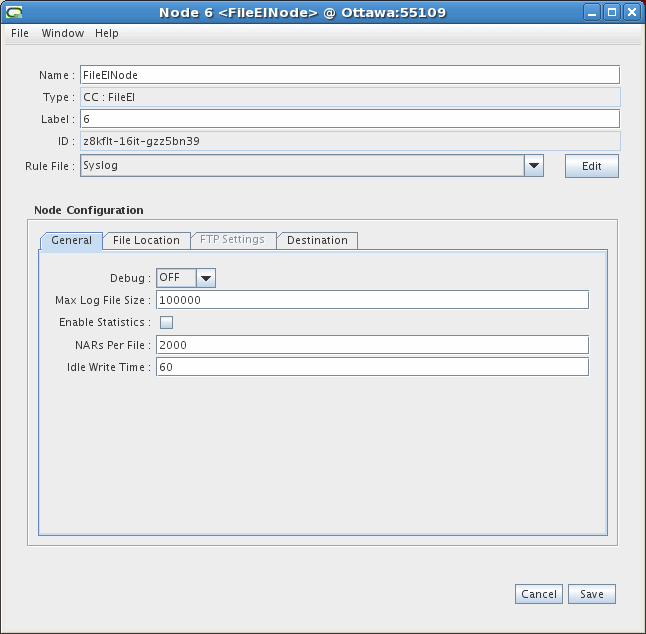
Description of the illustration nortel_cs2k_1001.gif
-
On the File Location tab, configure the settings to match the desired mode of file transfer. Here are the field definitions:
-
If the files are to be retrieved by the CC from an intermediate FTP server, select Files are pulled (via FTP). If the files will be pushed to the CC, select Files are pushed to this node.
-
The Check for new files period defines the period the cartridge waits before checking the input directory for a new AMADNS file. You can configure this value if you selected the Files are pushed to this node option.
-
The Local Directory is the location where the retrieved AMADNS files will be placed upon successful file transfer.
-
Select the desired File Pattern to identify the input file. When a simple prefix and suffix is not enough to identify an input file, you can refer to JavaDoc for class java.util.regex.Pattern to understand how to use regular expression as file filter, or you can contact Oracle Customer Support for assistance in configuring regular expression.
-
In the Prefix of Files after Collection field, enter a prefix the CC appends to all files after processing.
-
In the Suffix of Files after Collection field, accept the default or enter a suffix the CC appends to all files after processing.
-
Select the Delete Files After Processing if you want the CC to delete files after it processes them.
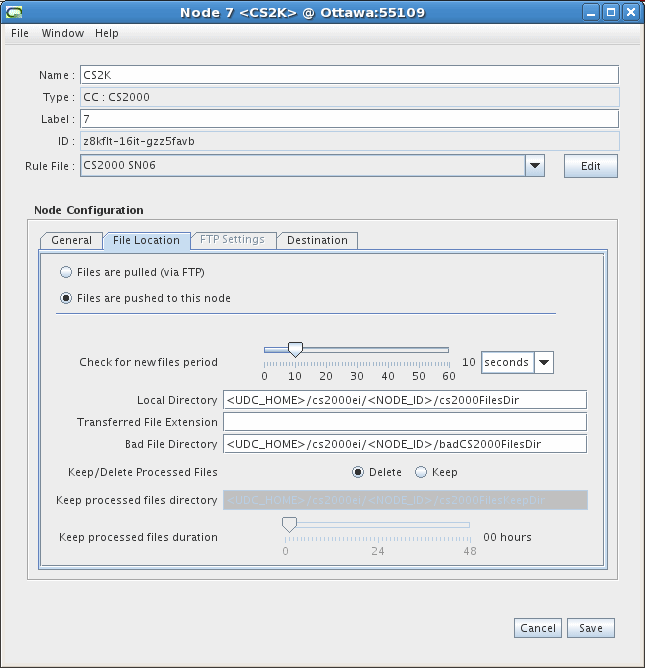
Description of the illustration nortel_cs2k_2001.gif
-
-
The FTP Settings tab is active if you select the Files are pulled (via FTP) option on the File Location tab.
-
The FTP Interval allows you to select how often the remote files will be retrieved. This setting applies to all remote FTP servers.
-
The Interrupt Timer Delay allows you to select how long before the files stop being retrieved from the FTP server. Various intervals between 1 and 60 minutes can be chosen from the drop-down list.
-
The Delete remote files option allows you to choose whether to delete the file on the remote server after the file has been processed by the CC.
-
The Rename remote files option allows you to choose whether to rename the file on the remote server after the file has been processed by the CC.
-
You must choose either the Delete remote files option or the Rename remote files option.
-
Click the Add button to add an FTP server configuration.
-
The FTP Configuration window appears.
-
Configure the fields in the FTP Configuration window as follows:
-
FTP Type - select the FTP method you wish to use: regular, secure FTP (SFTP) or passive
-
IP Address - enter the IP address of the FTP server
-
Username - enter the user name for the FTP server
-
Password - enter the password for the FTP server
-
Verify Password - enter the password again to verify its accuracy
-
Directory - enter the directory path on the FTP server where the log files reside that you want to transfer. Enter an asterisk (*) after the directory path to pull all files from that directory, or if you know the file type, enter the directory path and file type with an asterisk. For example, /var/admin/*.complete
-
File Pattern - select the desired file pattern to identify the input file. When a simple prefix and suffix is not enough to identify an input file, you can refer to JavaDoc for class java.util.regex.Pattern to understand how to use regular expression as file filter, or you can contact Oracle Customer Support for assistance in configuring regular expression.
You can Delete or Edit existing FTP configurations by using the corresponding buttons on the FTP Settings tab.
-
-
Click OK when you have finished entering values in this window.
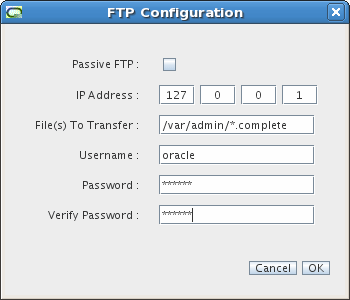
Description of the illustration nortel_cs2k_ftp.gif
-
You return to the FTP Settings tab. The FTP configuration now appears on the tab.
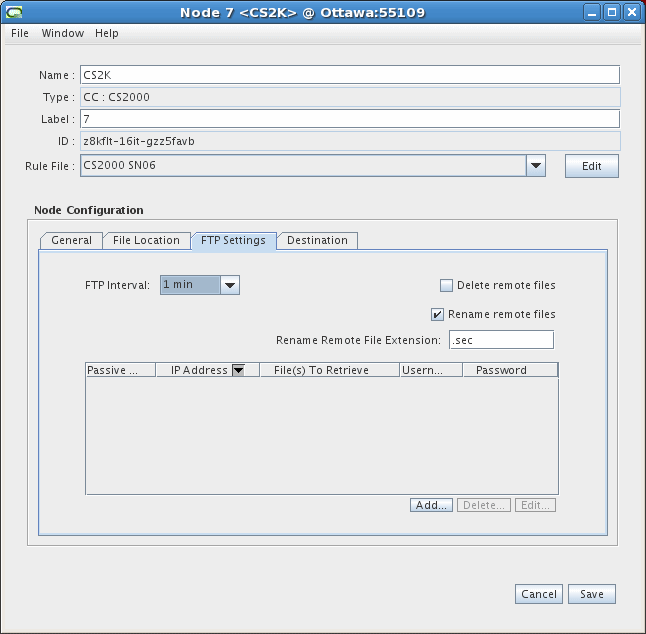
Description of the illustration nortel_cs2k_3001.gif
-
-
The Destinations tab displays the other cartridges in the system and shows which cartridge the current cartridge is connected to, and the type of routing used. You do not need to configure any settings on this tab. An example is shown below. See the Offline Mediation Controller Online Help for more information on this tab.
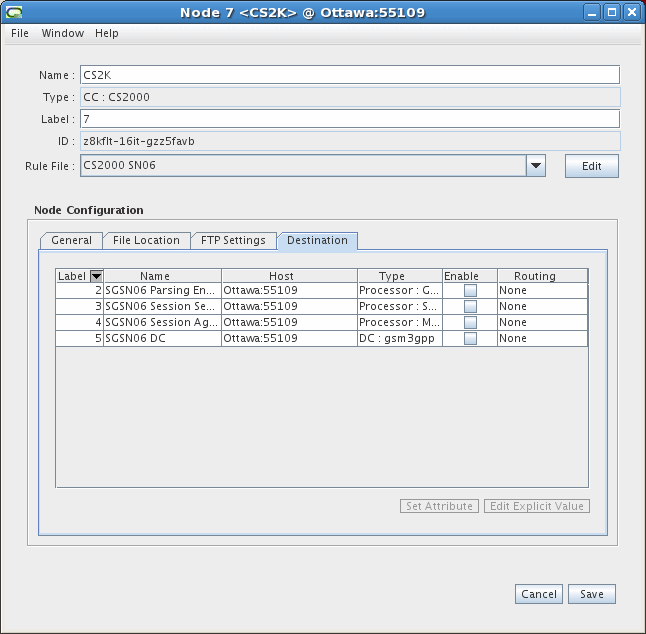
Description of the illustration nortel_cs2k_4001.gif
-
Click Save.