This first phase covers purely the registration part, meaning how you discover the container of the storage elements you intend to use in your environment.
To register a storage array:
Make sure that your storage server exposes raw disks (Fibre Channel SAN volumes, iSCSI targets and LUNs) to the storage network of your server pool.
In Oracle VM Manager open the Hardware view and open the Storage tab in the navigation pane.
In the navigation pane, select and right-click Storage Arrays, then select Register Storage Array. The Storage Array Discovery dialog box is displayed, where you enter the information necessary for Oracle VM Manager to discover the external storage elements.
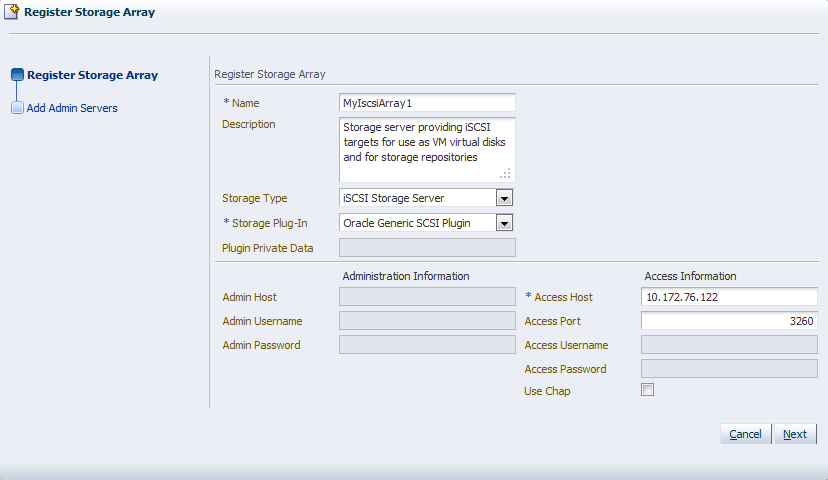
Enter the following information:
Name: the name you wish to use to identify the storage array
Description: optional information you would like to add about this storage array
Storage Type: the array is either a SAN or an iSCSI storage server
Storage Plug-in: the storage plug-in corresponding to the type of storage array, which is either generic iSCSI, or a vendor-specific iSCSI or fibre channel plug-in
Access Host: the host name or IP address of the server or SAN hardware offering the storage elements
NoteThis is not applicable to fibre channel storage arrays.
When adding iSCSI storage, add the access port as well. The default access port for iSCSI is 3260.
Depending on the selected storage type and plug-in, you may be required to enter additional information when registering your storage array:
Table 4.1. Required Information for Registering Different Storage Types
Information Field Required
generic iSCSI
vendor-specific iSCSI
generic Fibre Channel
vendor-specific Fibre Channel
Access host and port
yes
yes
no
no
Access credentials/Chap
no
optional
no
no
Administration information
no
yes
no
yes
Plug-in private data
no
optional
no
optional
NoteWhen registering a vendor-specific storage array, be sure to double-check the information you entered in the plug-in private data field. Once the storage array is registered, this field can no longer be modified. If you need to update the plug-in private data, you must unregister and re-register the storage array.
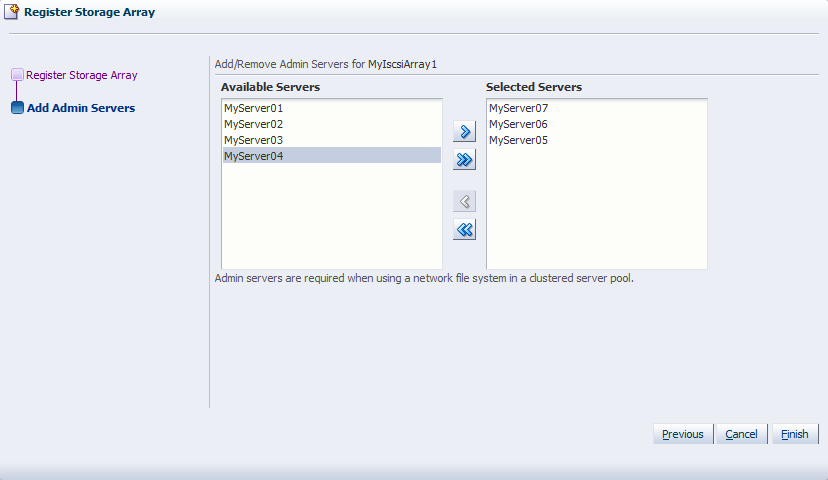
Click Next to proceed to the admin server selection screen. If you are working with a non-clustered server pool, you may skip this screen.
Use the arrow buttons to move the required Oracle VM Servers to the Selected Servers box. Click Finish to complete the storage array registration.
The new storage array appears in the navigation pane, under Storage Arrays. At this point, the Storage Connect plug-in has established a link to the storage location. No new storage elements have been detected yet.
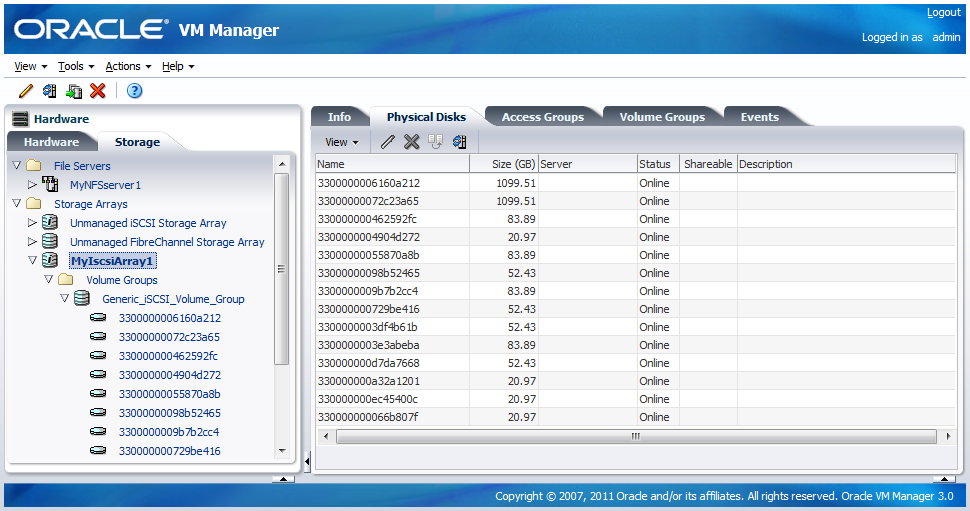
To discover the physical disks on the storage array, select it and click Refresh Storage Array. You can select the storage array either in the navigation pane or in the Storage Arrays management pane.
When the operation is complete, the available physical disks appear in the navigation pane, under the storage array and volume group to which they belong. The physical disks also show up to the right of the Storage Arrays overview table when you select that particular array.
At this point the discovery phase of your storage array is complete: physical disks show up in the Storage tab of the Hardware view. However, the Oracle VM Servers have no access to this storage yet. You must first configure access to physical disks through access groups. The exception to this rule is again the unmanaged fibre channel storage array, which offers its LUNs to all Oracle VM Servers connected to the fibre channel storage network.