Oracle® Enterprise Manager Ops Center
Creating vServers
12c Release 1 (12.1.4.0.0)
E27357-02
June 2013
This guide provides an end-to-end example for how to use Oracle Enterprise Manager Ops Center.
Introduction
In Oracle Enterprise Manager Ops Center, the resources allocated to a Virtual Datacenter (vDC) are entitled to accounts. Accounts are containers for virtual resources and provides the required capabilities to manage the allocated resources.
An account entitles designated cloud users the right to use computing, network, and storage resources of a vDC to create virtual servers, known as vServers, and host or access applications.
Oracle Enterprise Manager Ops Center provides a wizard that walks you through a series of steps to collect information and resources to create vServers.
This guide describes the options available to cloud users when creating vServers in an account using Oracle VM Server for x86 as the virtualization technology. This guide also includes a series of steps to prepare for vServers creation in the account.
In this guide, the following aspects are covered:
See Related Articles and Resources for links to related information and articles.
What You Will Need
You will need the following to create vServers:
-
An account in a vDC using Oracle VM Server for x86 as the virtualization technology.
-
A cloud user with access to the account.
-
Enough resources available in the account: vcpu, networks, memory, and storage.
-
A server template file in a location accessible to the Enterprise Controller server.
Upload a Server Template
A server template provides pre-built images for creating vServers. Server templates are specific to processor architecture of the server pool and virtualization type and contain the configuration of a vServer.
You can upload two different types of server template to your account: template and assembly.
In this example, you upload your server template using a template based on a file for a single virtual machine template that is ready to be deployed into virtualized platforms. For this example, the template file is accessible through a URL.
The server template uploaded in this example is used later in this guide to to create the vServer.
-
Expand vDC Management in the Navigation pane.
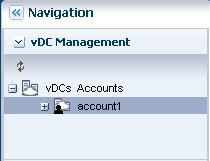
Description of the illustration accountnavigationpane.png
-
Select the account listed under vDC Accounts.
The account must have enough free storage to store the new server template. You can verify the storage utilization in the Dashboard or Storage tab of the account.
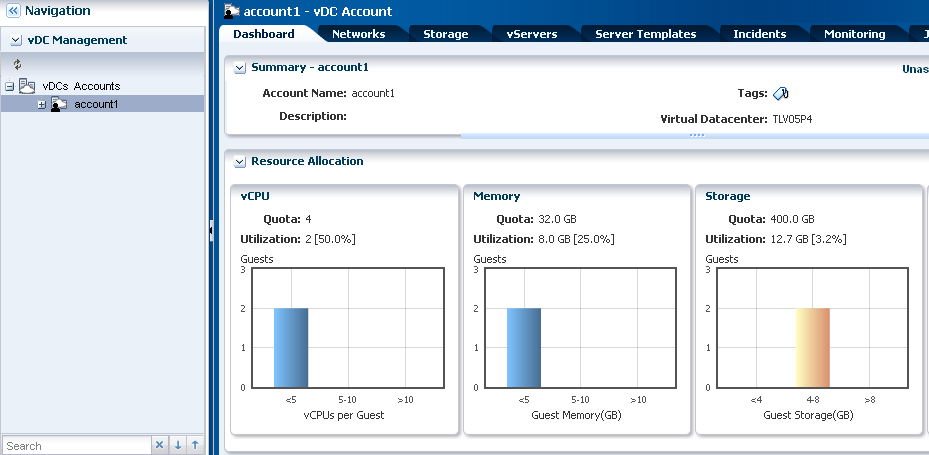
Description of the illustration accountdashboard.png
-
Click Upload Server Template in the Actions pane.
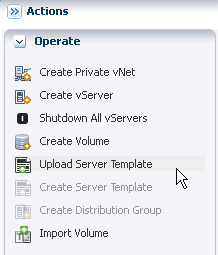
Description of the illustration uploadtemplate.png
-
Select the Template type and enter a name and description for the server template, then click Next.
In this step, you can also add a Tag to the server template.
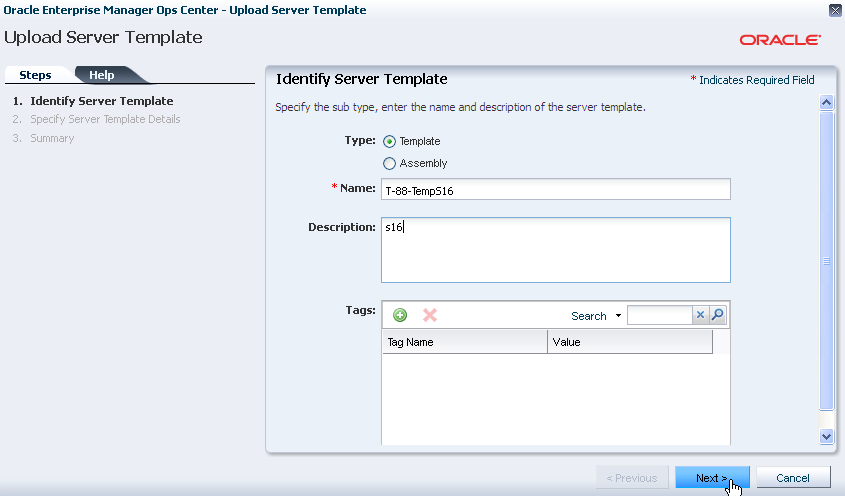
Description of the illustration uploadtemplatedetails2.png
-
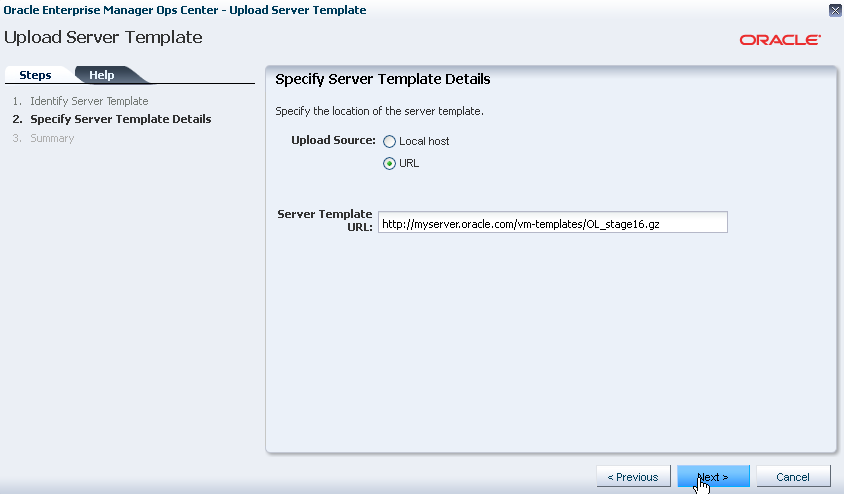
Select URL as the upload source. Enter the URL of the template file and click Next.
Use only HTTP, HTTPS, or FTP protocols to upload the server templates from other locations.
Description of the illustration uploadtemplatedetails4.png
-
Review the server template information and click Upload.
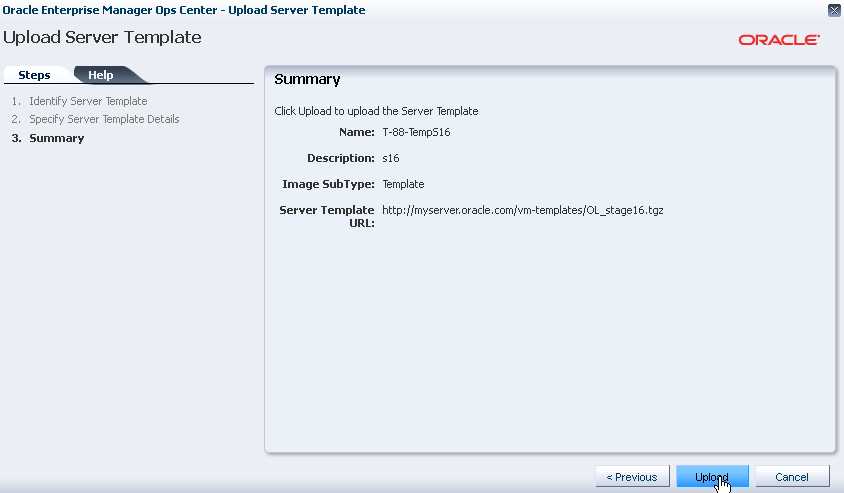
Description of the illustration uploadtemplatesum.png
After the job completes, the server template is listed in the Server Template tab of of the account. The server template is created as private, you can register the server template if you want it to be visible to other accounts in the vDC.
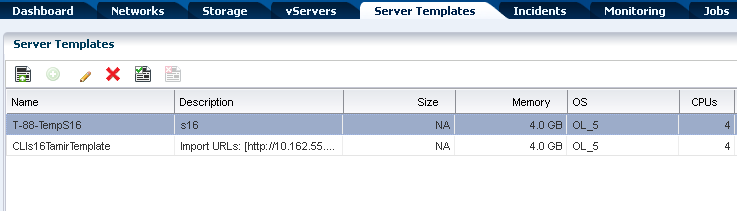
Description of the illustration uploadtemplatepost1.png
Create a Private vNet
An account can have public networks or private vNets. vServers are bound to one or more networks to connect and restrict network access. As cloud user, you can only create private vNets. Public networks are created by the cloud administrator when a vDC is created.
In this example, you create a private vNet for 14 elements. Only 14 vIPs can be assigned to vServers within this private vNet. The private vNet created in this example is used later in this guide to create the vServer.
-
Select the account listed under vDC Accounts.
The account must have enough vNet quota available for the new vNet. You can verify the vNet quota in the Dashboard or Network tab of the account.
Description of the illustration accountdashboard.png
-
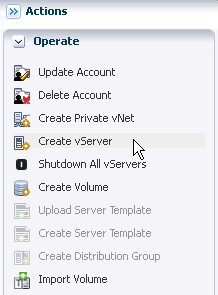
Click Create Private vNet in the Actions pane.
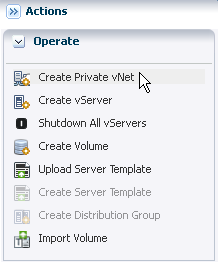
Description of the illustration createprivatevnet.png
-
Enter a name and description for the private vNet, then click Next.
In this step, you can also add a Tag to the private vNet.
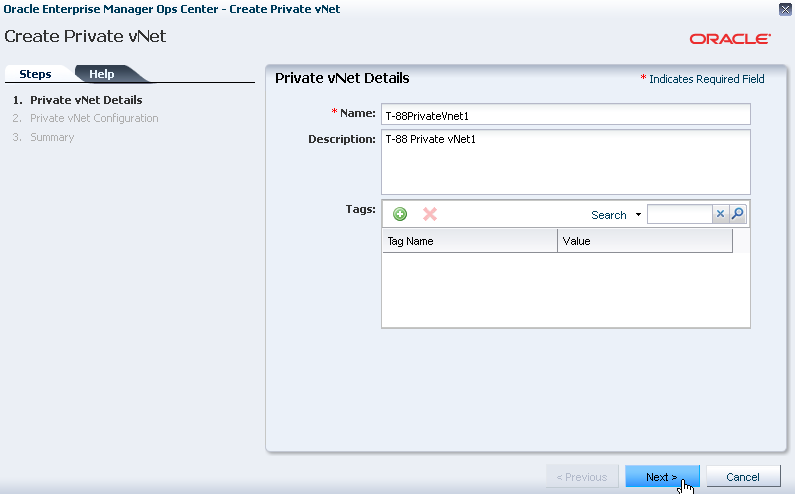
Description of the illustration createprivvnetdetails.png
-
Enter the number of elements, or slide the bar to select the number, then click Next.
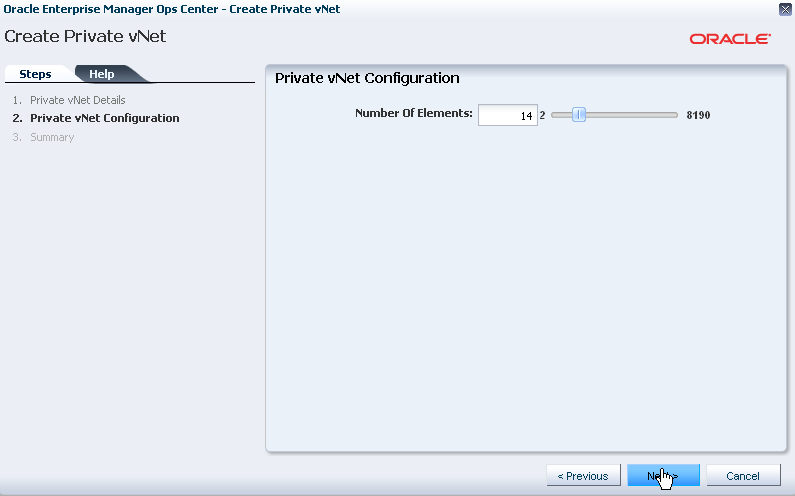
Description of the illustration createprivvnetconfig.png
-
Review the private vNet information and click Finish to create.
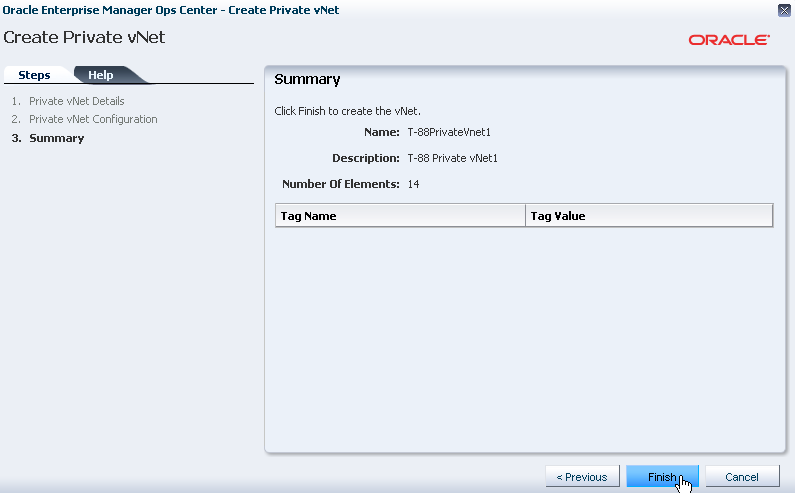
Description of the illustration createprivvnetsum.png
After the job completes, the private vNet is listed in the Networks tab of the account.
Create a vServer
A vServer is an entity that provides the outward interface of a stand-alone operating system that consumes CPU, storage, and memory resources. A vServer has its own identity, local storage, interfaces, and configuration that exist for the full lifetime of the vServer.
In this example, you create a vServer using the server template uploaded previously to create a virtual machine guest with Oracle Linux as operating system. You also assign a vIP automatically using the vNet created previously. A vIP from a public network is not assigned to this vServer.
-
Select the account listed under vDC Accounts.
Description of the illustration accountdashboard.png
-
Click Create vServer in the Actions pane.
Description of the illustration createvserver.png
-
Enter a name and description for the vServer, then click Next.
In this step, you can also add a Tag to the vServer.
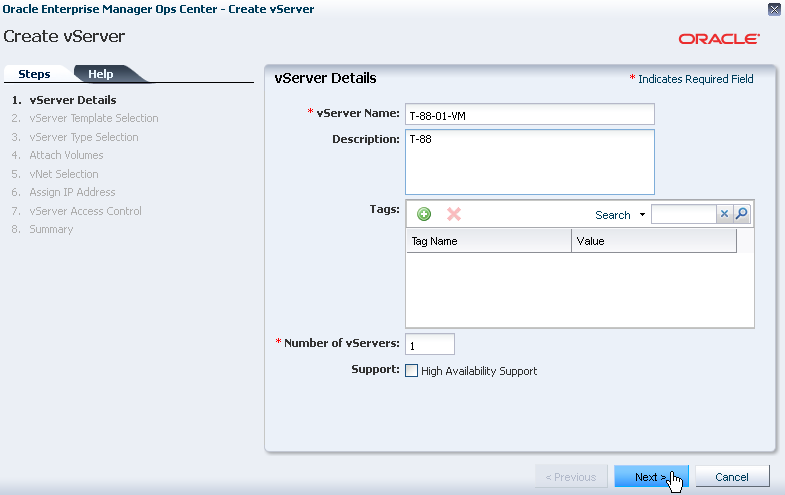
Description of the illustration vmcreatevserverdetails.png
-
Select the server template required for creating the vServer, then click Next.
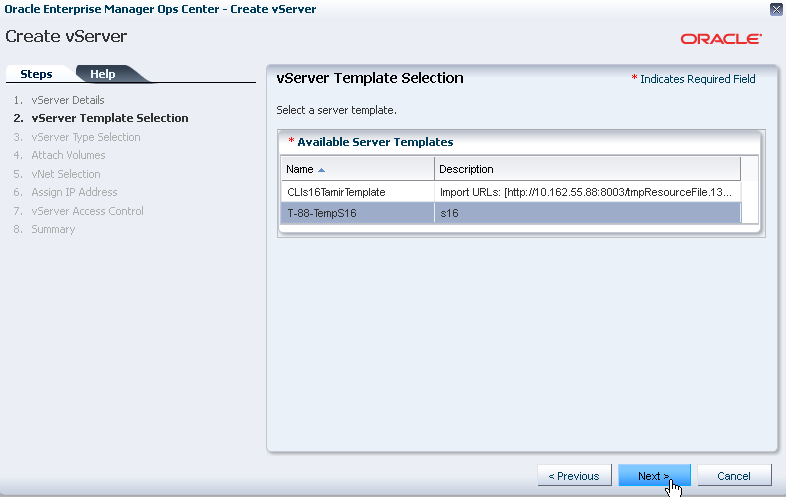
Description of the illustration vmcreatevservertemplate.png
-
Select the SMALL vServer type from the list, then click Next.
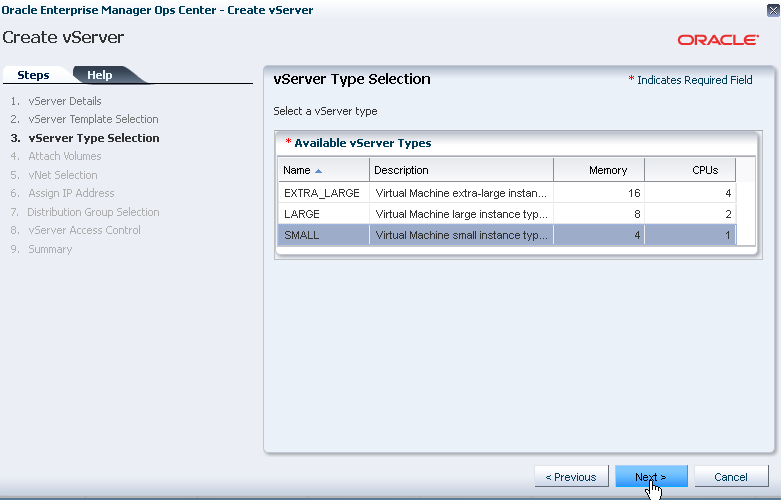
Description of the illustration vmcreatevservertype.png
-
Click Next. There are no volumes available to attach in this example.
You can attach a volume at this step if you have any available or you can attach the volume after the vServer is created.
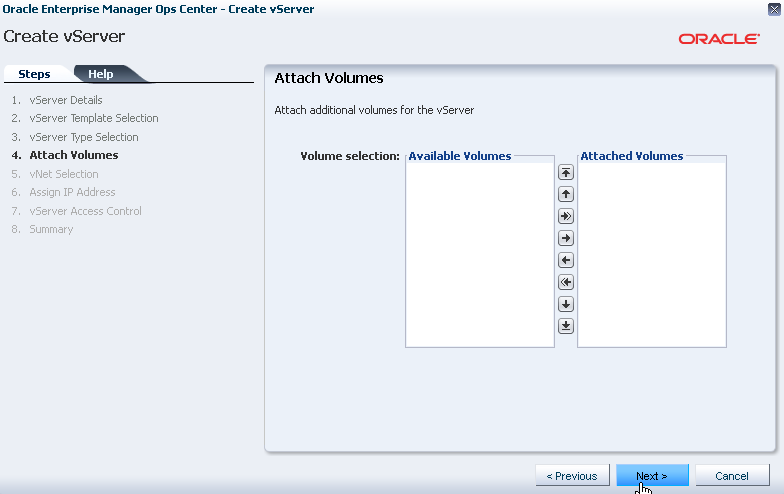
Description of the illustration createvservervolume.png
-
Select a vNet from the list, then click Next.
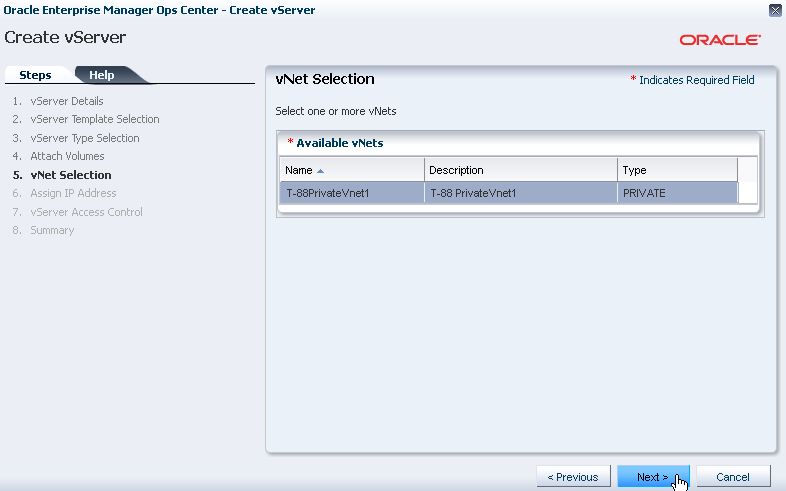
Description of the illustration vmcreatevservervnet.png
-
Select automatic as the network address allocation method, then click Next.
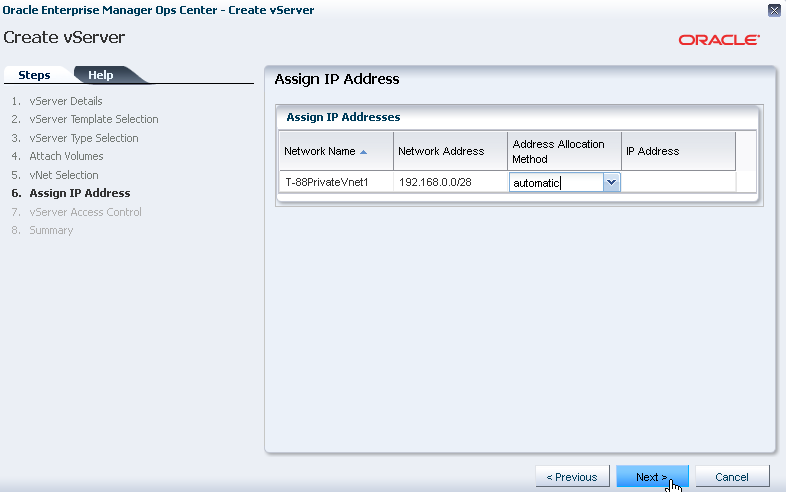
Description of the illustration vmcreatevservervip.png
-
Select Login Credentials to supply passworkd for remote SSH root access, then click Next.
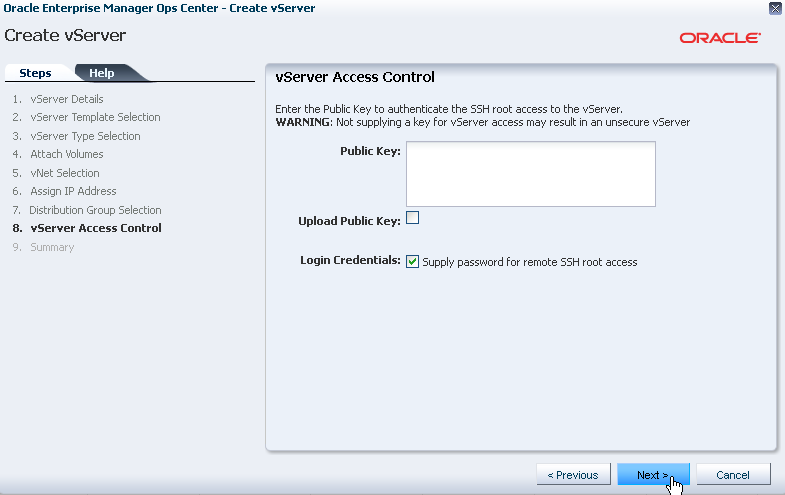
Description of the illustration vmcreatevservervaccess.png
-
Enter the root password for the new vServer, then click Next.
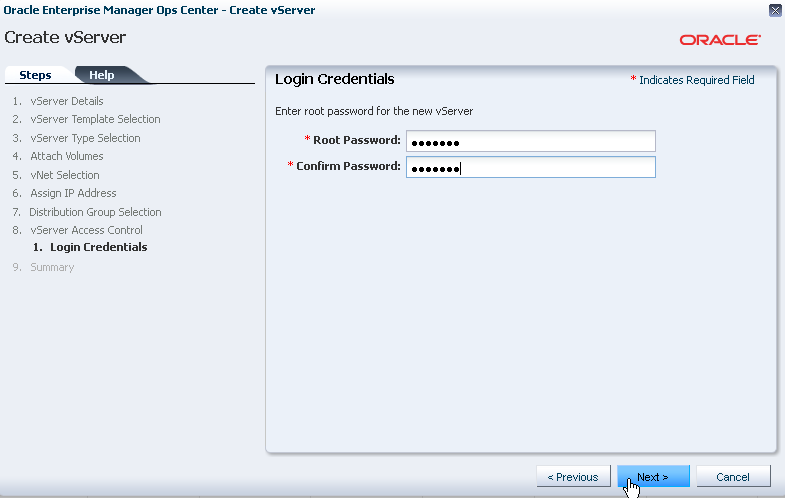
-
Review the vServer information and click Finish to create.
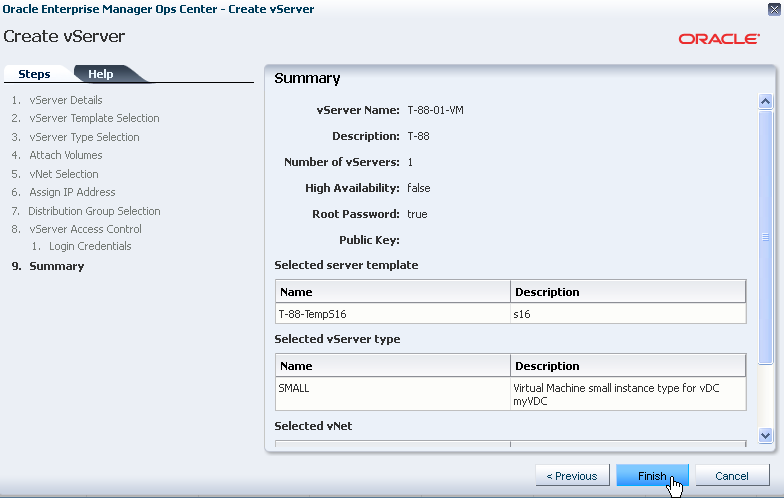
Description of the illustration vmcreatevservervsummary.png
After the job completes, the vServer is created and visible in the vServers tab of the account.
What's Next?
-
You can manage the life cycle of the vServer. Refer to Managing and Using Your vServers for some options to manage and use the vServer.
-
Learn more about the Cloud API and CLI that is available for a cloud user to manage the resources efficiently in an account. Refer to Oracle Enterprise Manager Ops Center Cloud Infrastructure API and CLI Reference Guide for more information.
Related Articles and Resources
Refer to the following documentation resources for more information:
-
Virtual Datacenters chapter of the Oracle Enterprise Manager Ops Center Features Guide
-
Oracle Enterprise Manager Ops Center Cloud Infrastructure API and CLI Reference Guide
Documentation Accessibility
For information about Oracle's commitment to accessibility, visit the Oracle Accessibility Program website at http://www.oracle.com/pls/topic/lookup?ctx=acc&id=docacc.
Oracle customers have access to electronic support through My Oracle Support. For information, visit http://www.oracle.com/pls/topic/lookup?ctx=acc&id=info or visit http://www.oracle.com/pls/topic/lookup?ctx=acc&id=trs if you are hearing impaired.
Oracle Enterprise Manager Ops Center Creating vServers, 12c Release 1 (12.1.4.0.0)
E27357-02
Copyright © 2007, 2013, Oracle and/or its affiliates. All rights reserved.
This software and related documentation are provided under a license agreement containing restrictions on use and disclosure and are protected by intellectual property laws. Except as expressly permitted in your license agreement or allowed by law, you may not use, copy, reproduce, translate, broadcast, modify, license, transmit, distribute, exhibit, perform, publish, or display any part, in any form, or by any means. Reverse engineering, disassembly, or decompilation of this software, unless required by law for interoperability, is prohibited.
The information contained herein is subject to change without notice and is not warranted to be error-free. If you find any errors, please report them to us in writing.
If this is software or related documentation that is delivered to the U.S. Government or anyone licensing it on behalf of the U.S. Government, the following notice is applicable:
U.S. GOVERNMENT END USERS: Oracle programs, including any operating system, integrated software, any programs installed on the hardware, and/or documentation, delivered to U.S. Government end users are "commercial computer software" pursuant to the applicable Federal Acquisition Regulation and agency-specific supplemental regulations. As such, use, duplication, disclosure, modification, and adaptation of the programs, including any operating system, integrated software, any programs installed on the hardware, and/or documentation, shall be subject to license terms and license restrictions applicable to the programs. No other rights are granted to the U.S. Government.
This software or hardware is developed for general use in a variety of information management applications. It is not developed or intended for use in any inherently dangerous applications, including applications that may create a risk of personal injury. If you use this software or hardware in dangerous applications, then you shall be responsible to take all appropriate fail-safe, backup, redundancy, and other measures to ensure its safe use. Oracle Corporation and its affiliates disclaim any liability for any damages caused by use of this software or hardware in dangerous applications.
Oracle and Java are registered trademarks of Oracle and/or its affiliates. Other names may be trademarks of their respective owners.
Intel and Intel Xeon are trademarks or registered trademarks of Intel Corporation. All SPARC trademarks are used under license and are trademarks or registered trademarks of SPARC International, Inc. AMD, Opteron, the AMD logo, and the AMD Opteron logo are trademarks or registered trademarks of Advanced Micro Devices. UNIX is a registered trademark of The Open Group.
This software or hardware and documentation may provide access to or information on content, products, and services from third parties. Oracle Corporation and its affiliates are not responsible for and expressly disclaim all warranties of any kind with respect to third-party content, products, and services. Oracle Corporation and its affiliates will not be responsible for any loss, costs, or damages incurred due to your access to or use of third-party content, products, or services.