9 Configuring Oracle Management Agent for High Availability
Configure Oracle Enterprise Manager 11g Grid Control to monitor databases configured for high availability by using the following procedure:
Note:
Oracle Fail Safe is only compatible with Oracle Enterprise Manager Grid Control 11g release or earlier.-
Create an Oracle Management Agent that listens on a virtual address.
-
Add the Oracle Management Agent installed in Step 2 to the same group as the Oracle Database (or databases) configured for high availability.
-
Configure the Oracle Management Agent to monitor the database or databases.
See Also:
Documentation available on the Oracle Technology Network website at:
http://www.oracle.com/technetwork/indexes/documentation/index.html#em-
Oracle Enterprise Manager Grid Control Basic Installation Guide for information about Enterprise Manager Grid Control
-
Oracle Enterprise Manager Grid Control Advanced Installation and Configuration Guide for information about installing Oracle Management Agent
-
"Configuring the Management Agent" in Oracle Enterprise Manager Administrator's Guide
-
The following topics are discussed in this chapter:
9.1 Prerequisites for High Availability
The following software must be installed on the cluster system before you can configure an Oracle Management Agent for high availability:
-
Oracle Database – any release supported by Oracle Enterprise Manager Grid Control
-
Oracle Management Agent
Install the Management Agent on each cluster node using the same Oracle home on each node.
-
Oracle Fail Safe
In addition, the following components must be configured:
-
An Oracle Database instance must be configured for high availability.
-
An Oracle Enterprise Manager Management Server must be configured and available for setup. The Management Server need not reside on the cluster system.
9.2 Procedure for Configuring Oracle Management Agent for High Availability
Perform the following steps to configure Oracle Management Agent for high availability:
-
Step 2, "Add the Highly Available Database as a Target in Oracle Enterprise Manager"
-
Step 4, "Remove Extraneous Targets from the Oracle Enterprise Manager Environment"
- Step 1 Make the Management Agent Highly Available
-
Use Oracle Fail Safe Manager to add the new Oracle Management Agent to the Fail Safe group that contains the databases it will monitor. Then follow these steps:
-
Go to Oracle Resources page, select the Oracle Management Agent resource type from the Available Oracle Resources list,
-
Select Add this Resource to a Group from the Actions menu list in the right panel of the window. Add Resource to Group wizard opens.
Figure 9-1 Add Resource to Group Wizard - Group Page
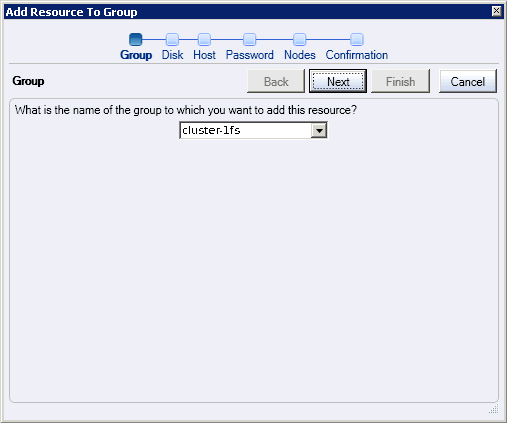
Description of "Figure 9-1 Add Resource to Group Wizard - Group Page"
-
In the Group guided process window, select a group to which you want to add Oracle Management Agent. This must be the group that contains the database you want to monitor with Oracle Management Agent.
-
Click Next. The Management Agent Disk page opens.
Figure 9-2 Add Resource to Group Wizard - Management Agent Disk Page
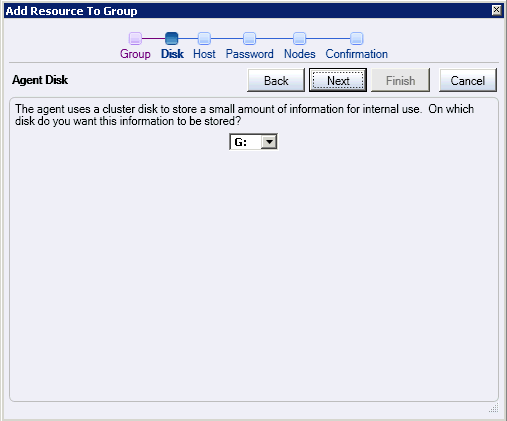
Description of "Figure 9-2 Add Resource to Group Wizard - Management Agent Disk Page"
-
In the Agent Disk guided process window, select a cluster disk that will be used to store Management Agent context information.
-
Click Next. The Management Agent Host page opens.
Figure 9-3 Add Resource to Group Wizard - Management Agent Host Page
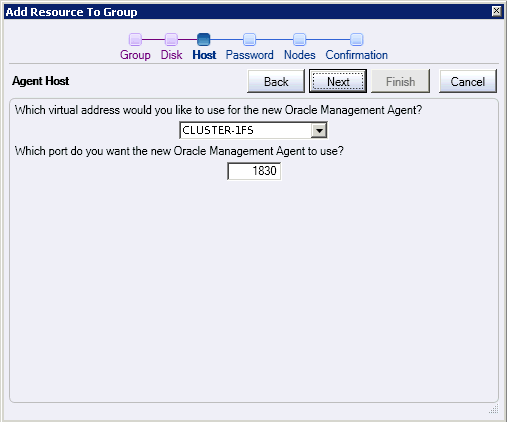
Description of "Figure 9-3 Add Resource to Group Wizard - Management Agent Host Page"
-
In the Agent Host guided process window, select a Virtual Address for the new Oracle Management Agent.
-
In the other box, enter an open port number.
-
Click Next. The Management Agent password page opens.
Figure 9-4 Add Resource to Group Wizard - Management Agent Password Page
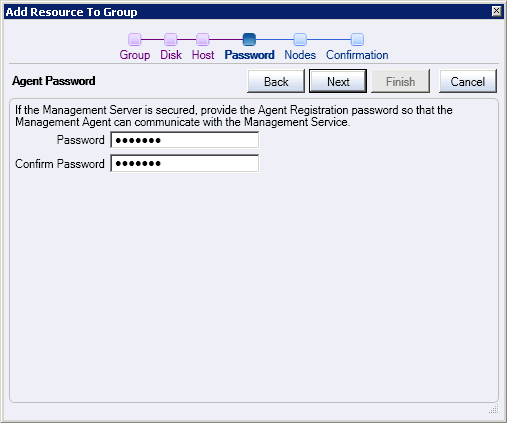
Description of "Figure 9-4 Add Resource to Group Wizard - Management Agent Password Page"
-
Provide the password used for the Oracle Management Server.
-
Click Next. The Management Agent Confirmation page opens.
Figure 9-5 Add Resource to Group Wizard - Management Agent Confirmation Page
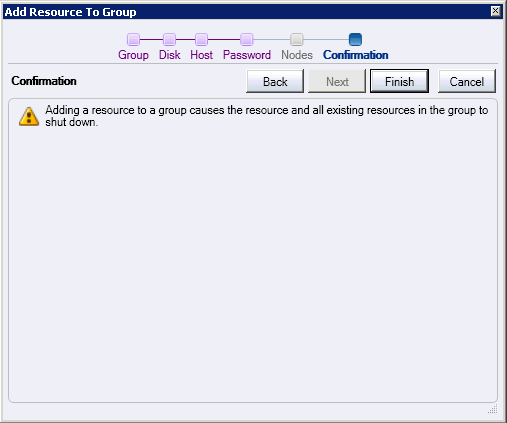
Description of "Figure 9-5 Add Resource to Group Wizard - Management Agent Confirmation Page"
-
Click Finish. The Adding resource to group progress window opens. This window displays the tasks being completed for the operation. You may choose to either select to save the contents of the output window to a file or choose to print the output.
-
Once the task completes successfully, the Clusterwide Operation Status dialog box opens. Click OK. Then click Close in the Adding resource to group progress window to close the operation.
-
- Step 2 Add the Highly Available Database as a Target in Oracle Enterprise Manager
-
To configure the highly available database for monitoring through the highly available Management Agent, follow these steps:
-
Log in to the Oracle Enterprise Manager Grid Control Console.
-
Click the Targets tab. The Hosts page opens.
-
Click the Databases secondary tab. The Databases page opens.
-
Click Add (in the upper right-hand section of the page). The Add Database Target: Specify Host page opens.
-
Click the flashlight icon. The Search and Select Host window opens.
-
Select the virtual host, and then click Select. The Search and Select Host window closes and the Host field in the Add Database to Target: Specify Host page contains the selected virtual host.
-
Click Continue. The Targets Discovered on Host page opens.
-
Select the highly available database or databases that you want to monitor, then click OK. The Database Configuration Results page opens.
-
Click OK.
-
- Step 3 Test the Highly Available Management Agent
-
To test that the Management Agent is highly available, run a job against the highly available database it is monitoring, and follow these steps:
-
Log in to the Oracle Enterprise Manager Grid Control Console.
-
Create a SQL job and submit it against the highly available database, as follows:
-
Click the Jobs tab. The Job Activity page opens.
-
In the Create Job box, select SQL Script, and then click Go. The Create 'SQL Script' Job page opens.
-
In the Job Name box, enter
TEST JOB,and in the SQL Script field, enterSELECT * FROM ts$. -
In the Databases region of the page, click Add. The Add Targets page opens.
-
Select the highly available database host name (which matches the virtual host name), and then click Add. The Create 'SQL Script' Job page opens.
-
In the Host and Database Credentials portion of the page, specify the database credentials, and then click Submit.
-
-
Ensure that the submitted job completes successfully.
-
Create another job against the same database (by following Step 1 and Step 2 in this list), but schedule it for 10 minutes from the current time.
-
Using Oracle Fail Safe Manager, fail over the group.
-
After 10 minutes pass, check that the second job scheduled ran successfully.
-
- Step 4 Remove Extraneous Targets from the Oracle Enterprise Manager Environment
-
When you reach this step, the Oracle Enterprise Manager Grid Control Console shows three targets for the same database. During the Management Agent installation, the installer automatically discovers Oracle components, including highly available databases, and adds the discovered components as targets.
Because the highly available database instance exists on each cluster node, there are two targets for the database – each monitored by a different Management Agent. In addition, you create a third target when you add the database as a target for the highly available Management Agent listening on the virtual server.
Perform the following steps to safely remove the database targets that were discovered when the Management Agent was installed:
-
Log in to the Oracle Enterprise Manager Grid Control Console.
-
Click the physical (as opposed to virtual) host name for one of the cluster nodes. The Host page for that physical host opens.
-
Click the Targets locator link.
-
9.3 Removing Oracle Management Agent from a Group
If you decide you no longer want to have an Oracle Management Agent configured for high availability, then remove it from the group that contains it. When you do so, the Oracle Management Agent is deleted from the cluster.
To remove an Oracle Management Agent from a group, perform the following steps:
-
Open the Oracle Resources page.
-
Select the Oracle Management Agent that you want to remove and then, from the Actions menu list on the right pane of the screen, select Remove.
-
The Confirm Remove Resources from Group dialog box opens. Click Yes to remove the resource.