A Installer Screens
This appendix contains sample screenshots and descriptions for the Installer screens used to apply the patch. The screen functionality will be the same for most installers.
A.1 Welcome
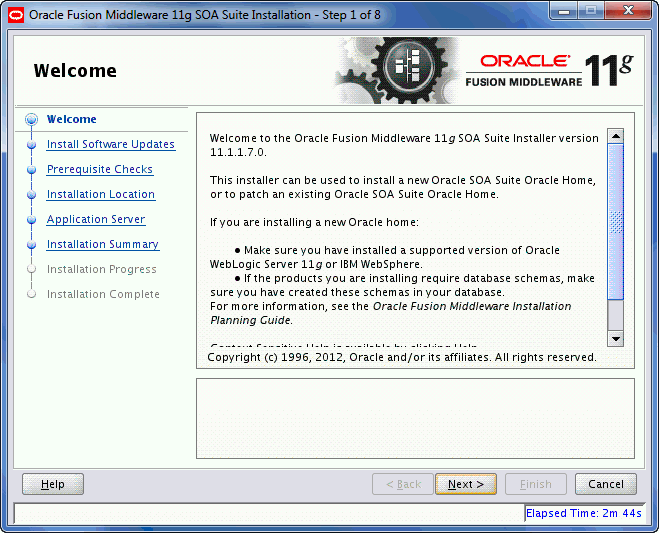
Description of the illustration ''install_welcome.gif''
This page introduces you to the Oracle Fusion Middleware installer and provides two important pieces of information:
-
A navigation pane on the left that summarizes the tasks the installer will help you complete. Each item in the navigation pane represents a specific installer screen that will prompt you for information required to install the software.
-
Information about any prerequisites you might need to perform before continuing with the installation.
Review the information on this screen carefully to be sure you have performed all the necessary prerequisites.
If you are not sure about any of the prerequisite tasks, refer to the Oracle Fusion Middleware Installation Planning Guide, as well as the installation guide for the specific Oracle Fusion Middleware software you are about to install.
A.2 Install Software Updates
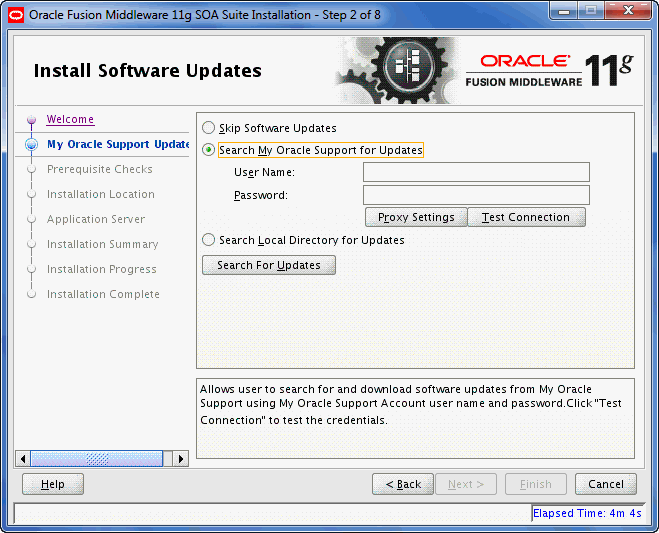
Description of the illustration ''install_software_updates.gif''
Use this screen to quickly and easily search for the latest software updates, including important security updates, via your My Oracle Support account.
The following table describes the fields on this screen.
| Element | Description |
|---|---|
| Skip Software Updates | Select this option to skip this screen. The installer will not check for updates that might be applicable to the current product installation. |
| Search My Oracle Support for Updates | If you have a My Oracle Support account, then select this option to have the installer automatically search My Oracle Support for software updates that apply to the software products are about to install.
Enter your My Oracle Support account name and password, and then click Search for Updates. The installer automatically downloads applicable software updates from My Oracle Support. Before you search for update, you can test your login credentials and the connection to My Oracle Support by clicking Test Connection. Click Proxy Settings to configure a proxy server if one is required. |
| Search Local Directory for Updates | Select this option if you already downloaded the latest software updates and you want the installer to search a local directory for updates applicable to the products you are about to install.
When you select this option, the installer displays an additional field and Browse button that you can use to identify the local directory where your updates are located. |
A.3 Prerequisite Checks
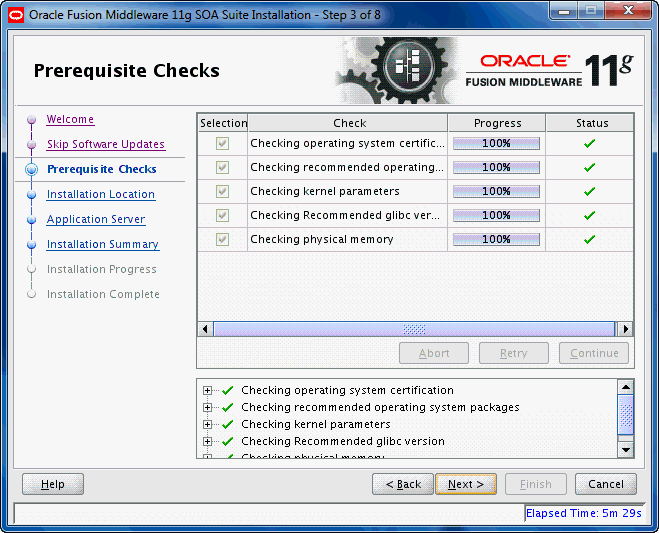
Description of the illustration ''install_prereq_check.gif''
This screen analyzes the host computer to ensure that specific operating system prerequisites have been met.
If any of the prerequisite checks fail, then a short error message appears in the bottom portion of the screen. Fix the error and click Retry to try again. If you want to ignore the error or warning messages and continue with the installation, click Continue.
Click Abort to stop prerequisite checking for all components.
A.4 Specify Installation Location
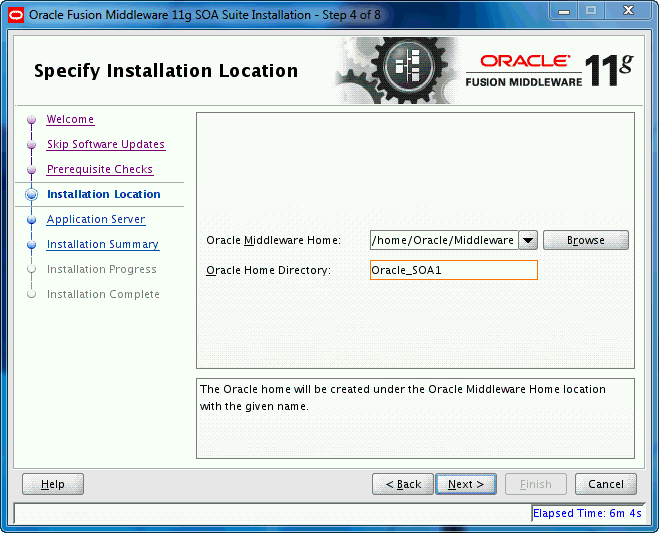
Description of the illustration ''install_location.gif''
Use this screen to identify where you want to install your Oracle Fusion Middleware software.
The following table describes the fields that appear on this page.
| Field | Description |
|---|---|
| Oracle Middleware Home | Use this field to specify the location of your Oracle Middleware home directory:
|
| Oracle Home Directory | Use this field to specify the directory inside the Middleware home where you want to install your products.
If you specify a directory that already exists, it must be either:
If you specify a new directory, it will be created inside the Middleware home. |
Note:
For the remainder of this document, the directory specified in the Oracle Home Directory field will be referred to as your SOA Oracle home to avoid any confusion with the Oracle home directories of other Oracle Fusion Middleware products.For more information about the Oracle home and Middleware home directories, refer to "Oracle Fusion Middleware Directory Structure" in Oracle Fusion Middleware Installation Planning Guide.
If you are performing an installation on a Windows operating system, be sure that your directory paths are valid and do not contain double backslashes (\\).
A.5 Application Server
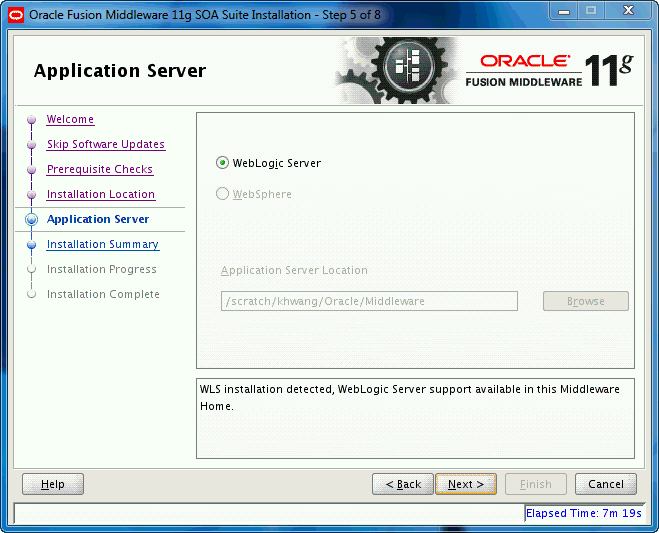
Description of the illustration ''install_app_server.gif''
Use this screen to select the application server you want to use for this installation.
-
If the installer detects a Middleware home with Oracle WebLogic Server installed, then this is the application server that will be used. All other fields in this screen will be inactive.
-
If the installer detects a Middleware home without an Oracle WebLogic Server installed, you must select one of the application server options and then provide its location in the Application Server Location field.
-
If the installer does not detect a Middleware home directory, the "WebLogic Server" option will be inactive. You must select "WebSphere" and then provide the location of your IBM WebSphere in the Application Server Location field.
A.6 Installation Summary
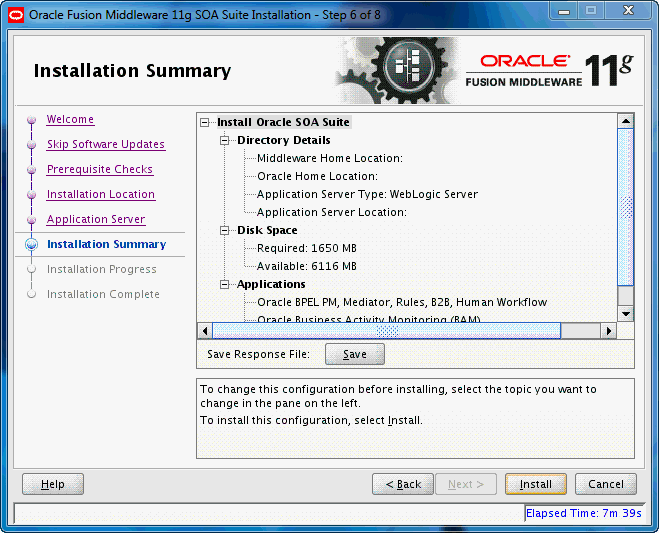
Description of the illustration ''install_summary.gif''
This screen summarizes the selections you have made during this installation session. It includes the following information:
-
The location of your installation
-
How much disk space will be used for the installation
-
The applications you have selected for installation
Review information on this screen carefully, and take one of the following actions:
-
If you want to make any changes to the configuration before starting the installation, use the navigation pane to select the Installer screen you want to return to and edit.
-
If you are satisfied with the information, click Install to begin the installation procedure.
-
If you want to save this configuration to a text file (called a response file), click Save. The resulting response file can be used later if you choose to perform the same installation from the command line.
A.7 Installation Progress
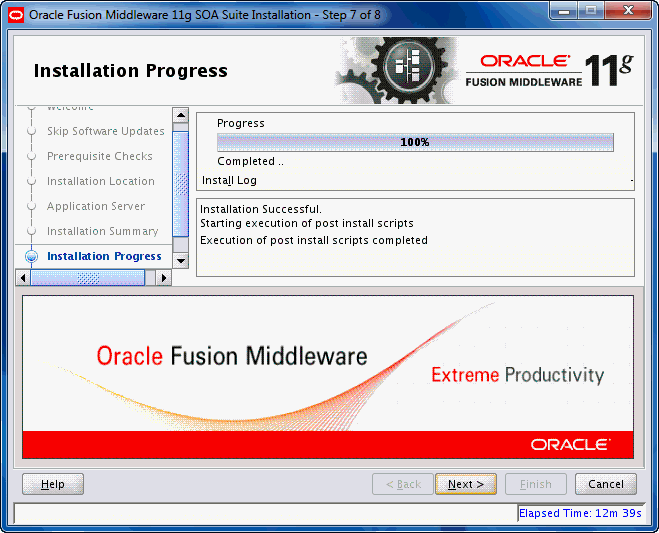
Description of the illustration ''install_progress.gif''
This screen shows you the progress of the installation.
If you want to quit before the installation is completed, click Cancel. Doing so will result in a partial installation; the portion of the software that was installed on your system before you click Cancel will remain on your system, and you will have to remove it manually.
A.8 Installation Complete
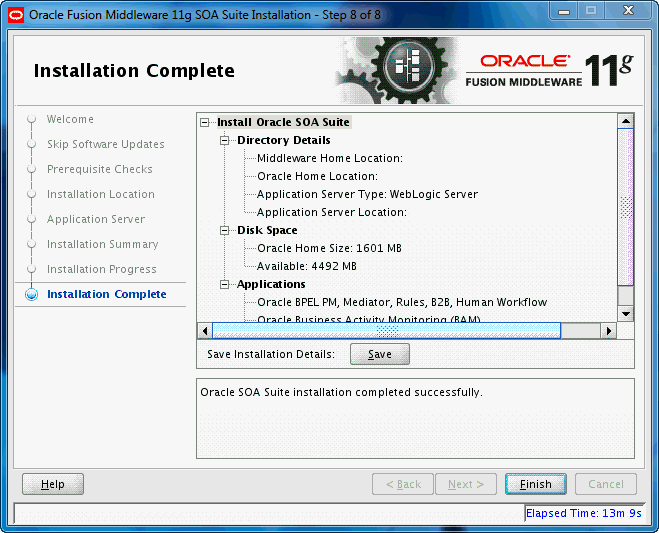
Description of the illustration ''install_complete.gif''
This screen summarizes the installation that was just completed.
If you want to save this summary information to a text file for future reference, click Save.
Click Finish to dismiss the screen.