C Oracle Web Tier Deinstallation Screens
This appendix contains screenshots and descriptions for all of the Oracle Web Tier deinstallation screens:
C.1 Welcome Screen
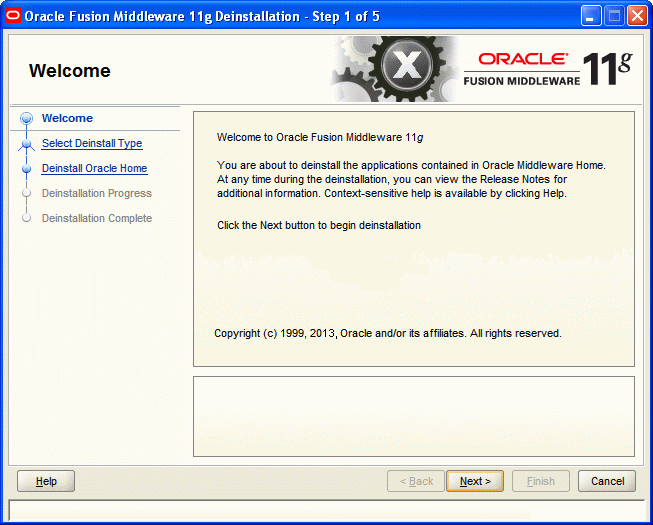
Description of the illustration de_welcome.gif
The Welcome screen is the first screen that appears when you start the deinstaller.
Click Next to continue.
C.2 Select Deinstallation Type Screen
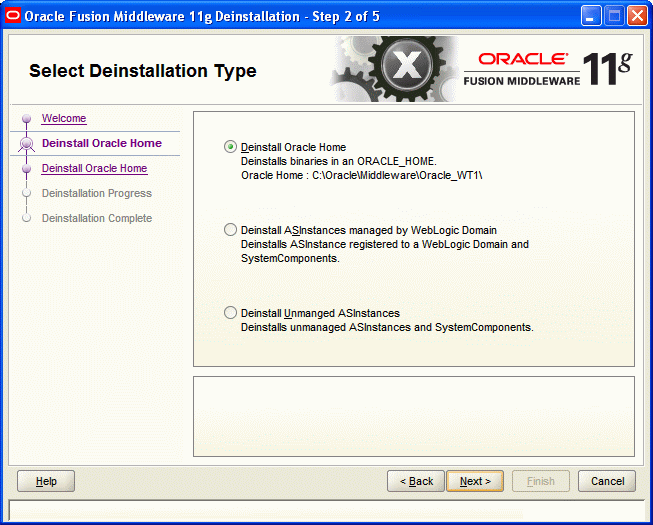
Description of the illustration de_select_deins_type.gif
Select the type of deinstallation you want to perform:
-
Deinstall Oracle Home
Select this option to deinstall all binaries in the specified Oracle Home directory (the directory from which you started the deinstaller).
-
Deinstall ASInstances managed by WebLogic Domain
Select this option to deinstall a specific Oracle Instance, and its system components that are registered to a WebLogic Domain.
-
Deinstall Unmanaged ASInstances
Select this option to deinstall all unmanaged Oracle Instances, and their system components.
Click Next to continue.
C.3 Deinstall Oracle Home Screen
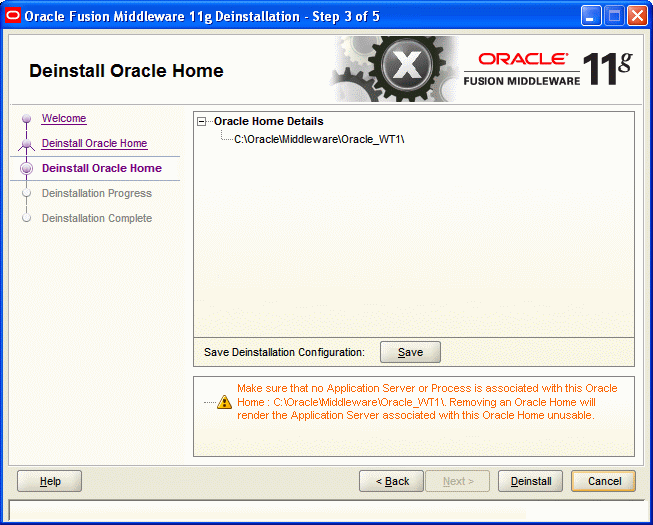
Description of the illustration de_deinstall_oracle_home.gif
This screen only appears if you selected Deinstall Oracle Home on the Select Deinstallation Type Screen.
This screen shows the Oracle home directory that is about to be deinstalled. This is the Oracle home directory from which the deinstaller was started.
Verify that this is the correct directory, then click Deinstall to continue.
The following warning screen appears:

Description of the illustration de_warning1.gif
Click Yes to remove the software and the Oracle home directory from which the deinstaller was started.
Click No to remove the software but do not remove the Oracle home directory.
Click Cancel to return to the previous screen.
C.4 Specify WebLogic Domain Detail Screen
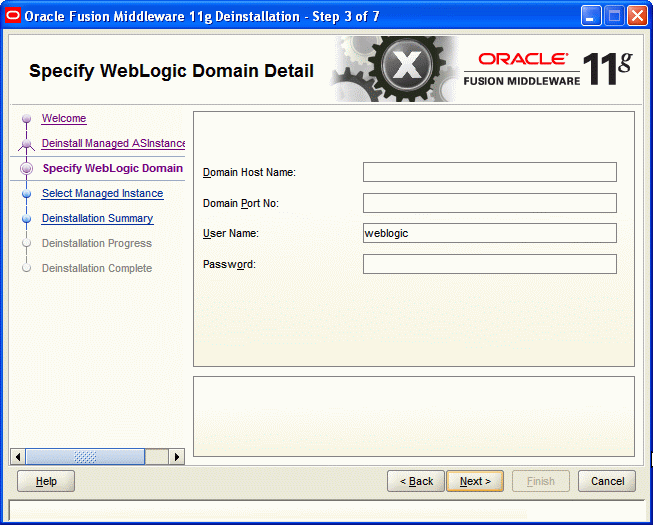
Description of the illustration de_spec_weblogic_dmn_detl.gif
This screen only appears if you selected Deinstall ASInstances managed by WebLogic Domain on the Select Deinstallation Type Screen.
Specify the WebLogic Domain credentials:
-
Domain Host Name
The name of the system on which the WebLogic Domain is running.
-
Domain Port No
Listen port number of the domain. The default port number is
7001. -
User Name
The WebLogic Domain user name.
-
Password
The password of the WebLogic Domain user.
Click Next to continue.
C.5 Select Managed Instance Screen
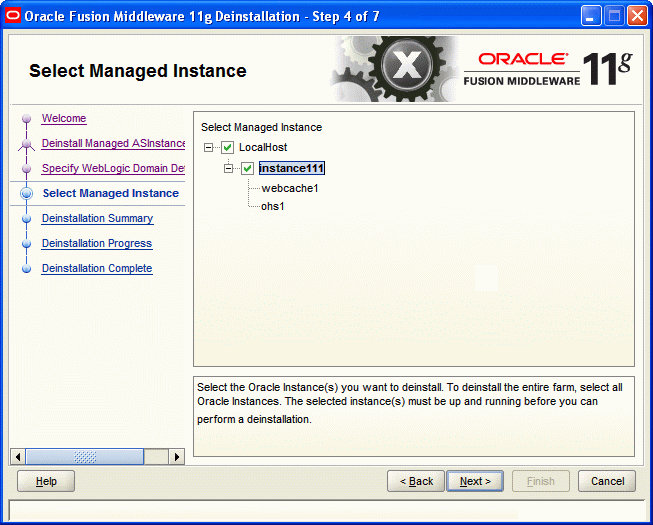
Description of the illustration de_select_managed_instance.gif
This screen only appears if you selected Deinstall ASInstances managed by WebLogic Domain on the Select Deinstallation Type Screen.
Select the managed instance you want to deinstall.
Note:
The instance or instances selected for deinstallation must be up and running.
Click Next to continue.
C.6 Specify Instance Location Screen
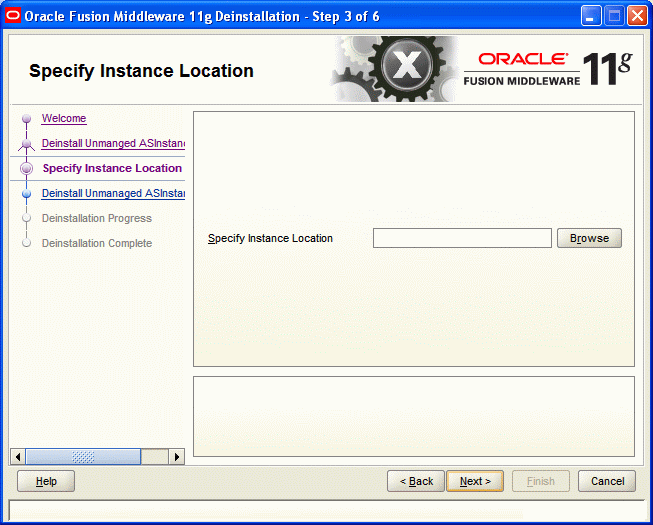
Description of the illustration de_spec_instance_location.gif
This screen only appears if you selected Deinstall Unmanaged ASInstances on the Select Deinstallation Type Screen.
Specify the full path to your Oracle Instance directory. If you are unsure, click Browse to find this directory on your system.
Click Next to continue.
C.7 Deinstallation Summary Screen (Unmanaged Instance)
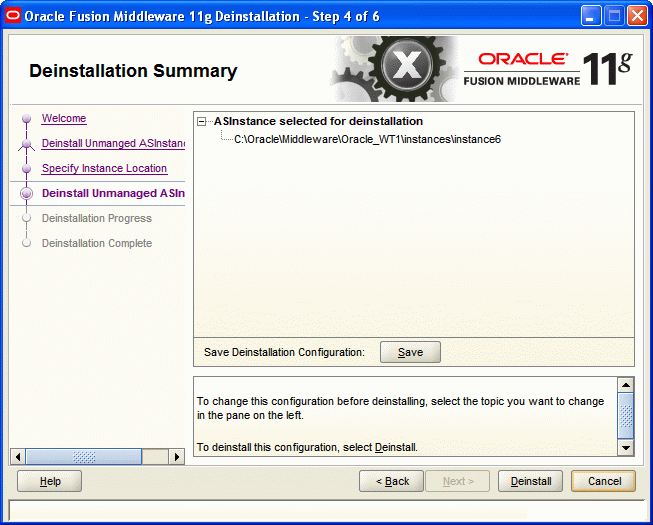
Description of the illustration de_deins_sumy_unmang_ins.gif
This screen only appears if you selected Deinstall Unmanaged ASInstances on the Select Deinstallation Type Screen.
Verify that the specified instance is the one you want to deinstall.
Click Deinstall to begin the deinstallation.
C.8 Deinstallation Summary Screen (Managed Instance)
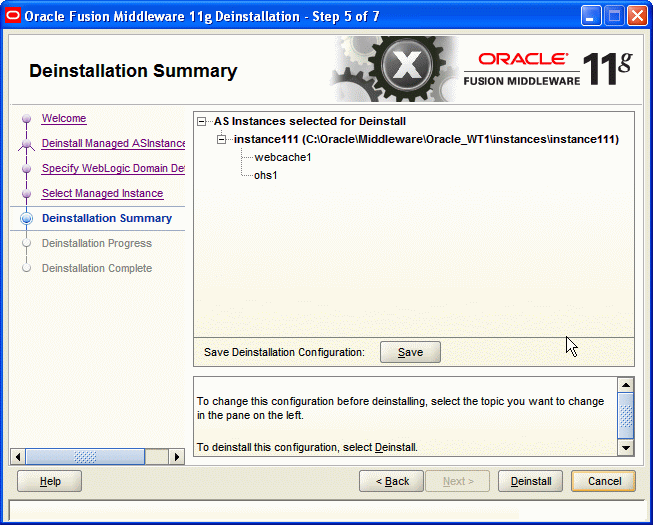
Description of the illustration de_deins_sumry_mang_ins.gif
This screen only appears if you selected Deinstall ASInstances managed by WebLogic Domain on the Select Deinstallation Type Screen.
Verify that the specified instance is the one you want to deinstall.
Click Deinstall to begin the deinstallation.
C.9 Deinstallation Progress Screen
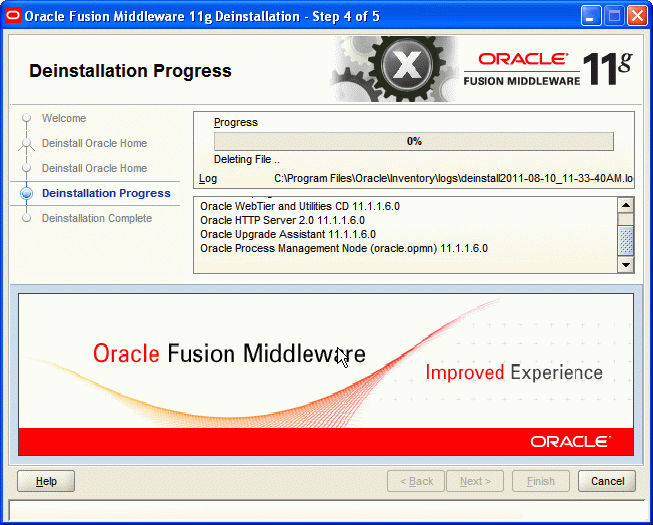
Description of the illustration de_deinstallation_progress.gif
This screen shows you the progress of the deinstallation.
If you want to quit before the deinstallation is completed, click Cancel.
C.10 Deinstallation Complete Screen
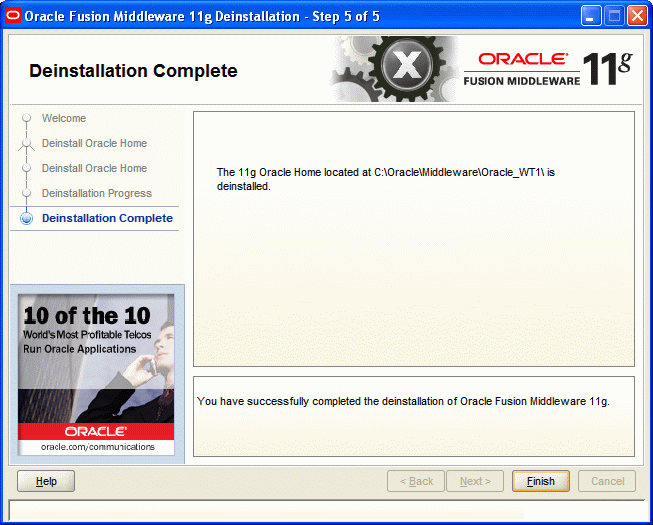
Description of the illustration de_deinstallation_complete.gif
This screen summarizes the deinstallation that was just completed.
Click Finish to dismiss the screen.