6 Creating Pages
El Piju offers construction services, as well as a design and construction of green dwellings. Let's create two pages in the Services subspace that describe these offerings. Before doing so, we have to upload the content you'll use to populate the new pages.
This step will show three methods for populating a page with content: first, a very simple example using the Rich Text Editor to work with a .txt document; then a simple Content Presenter example to display a single HTML file; then using Content Presenter to build a three-tabbed page.
6.1 Step 1: Create the Construction Page
Let's create a page, add the pre-supplied text about El Piju's construction services, and experiment with changing the text style using the Rich Text Editor.
To create the Construction page:
-
Expand Admin Links, click Services Admin, then select the Pages tab.
-
Click Create Page.
This displays the Create Page dialog.
-
In the Page Name field, type
Construction. -
Ensure that Page Style is Blank, and click Create. Click the Actions icon, and select Edit Page from the resulting context menu.
The page displays in edit mode, as shown in Figure 6-1:
-
Click Add Content.
This displays the Resource Catalog.
-
Next to Web Development, click Open.
-
Next to Text, click Add, and then Close.
Your page should look like Figure 6-2:
Figure 6-2 Text Element in the Construction Page

Description of "Figure 6-2 Text Element in the Construction Page"
-
Open the
construction.txtfile from wherever your WebCenter Portal administrator placed the pre-supplied content. -
Copy the text, and go back to Spaces.
-
Click Edit Text on the right side.
-
Under the Text box, select "Enter your text here" and paste the text you copied from the
construction.txtfile. -
Make the text larger, change its color, and change its font using the editing tools offered by the Rich Text Editor. When you're finished, click Done Editing.
-
Click Save, then Close.
-
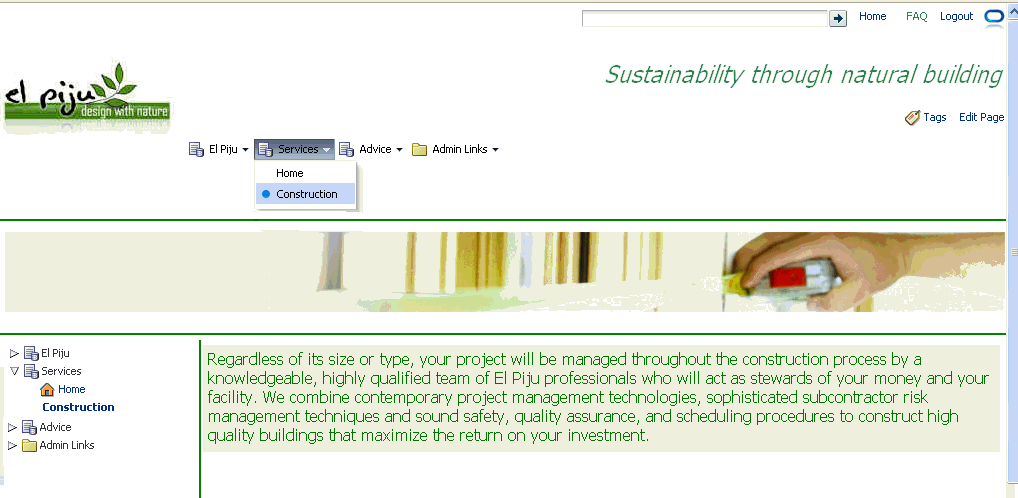
Verify that your new page was added to the Services node in the navigation models, both along the top and in the tree, as shown in Figure 6-3:
Figure 6-3 Construction Page Accessible From Menu and Tree
Description of "Figure 6-3 Construction Page Accessible From Menu and Tree "
You just created a simple page and added plain text that you edited for its style and color using the Rich Text Editor. Now you'll upload content and graphics to the Services subspace and use them to create a new page.
6.2 Step 2: Upload Content to the Services Subspace
You'll now upload the content for a new page, Green Building, which you'll create in just a moment.
-
Expand Admin Links, click Services Admin, then select the Content tab.
-
Click Documents.
This displays the root directory of the Services subspace.
-
Click Upload.
-
Click Select files and browse to your documents:
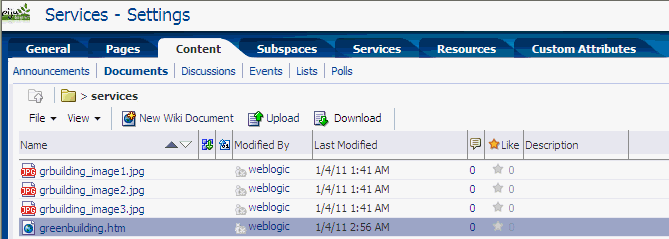
grbuilding_image1.jpg,grbuilding_image2.jpg,grbuilding_image3.jpg, andgreenbuilding.htm. Click Upload. -
The names of the uploaded files appear on the Documents page, as shown in Figure 6-4:
Figure 6-4 Green Building Images Uploaded
Description of "Figure 6-4 Green Building Images Uploaded"
Now let's build the Green Building page with the content you just uploaded.
6.3 Step 3: Create the Green Building Page
You'll now design the Green Building page using the Content Presenter feature. With Content Presenter, you can select an Oracle WebCenter Content's Site Studio file, a single item of content, multiple content items, query for content, or select content based on the results of a WebCenter Portal's Personalization Conductor scenario, and then select a template to render the content on a page in a Spaces application. Don't worry if you're not familiar with all of these terms.
You should still be on the Content tab.
-
Click the Pages tab.
-
Click Create Page.
-
In the Page Name field, type
Green Building. -
In the Page Style section, select the Right Narrow option, then click Create.
-
Click the Actions icon, and select Edit Page from the resulting context menu. This displays the Green Building page in edit mode.
-
In the left region, click Add Content.
This displays the Resource Catalog.
-
Next to Content Management, click Open.
-
Next to Space Documents, click Open.
Tip:
You can skip steps 6 and 7 and directly search for Space Documents.
Space Documents provides access to all the documents that have been uploaded for the current space.
-
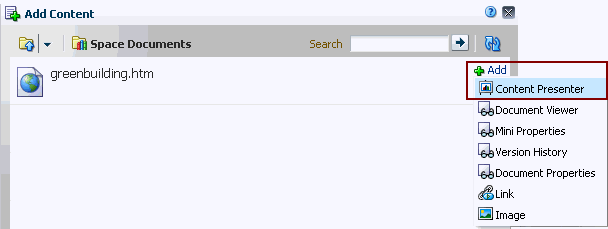
Next to greenbuilding.htm, click Add. From the pop-up menu, select Content Presenter, then click Close.
Figure 6-5 Resource Catalog - Add - Content Presenter
Description of "Figure 6-5 Resource Catalog - Add - Content Presenter"
The text from the
greenbuilding.htmfile displays in the left region, as you can see in Figure 6-6:Figure 6-6 Green Building - Left Region Populated with Text

Description of "Figure 6-6 Green Building - Left Region Populated with Text"
-
In the right region, click Add Content.
This displays the Resource Catalog.
-
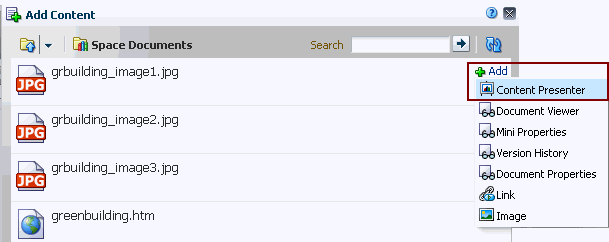
Next to grbuilding_image1.jpg, click Add, then select Content Presenter from the pop-up menu:
Figure 6-7 Resource Catalog - Add - Content Presenter
Description of "Figure 6-7 Resource Catalog - Add - Content Presenter"
-
Repeat step 10 to add grbuilding_image2.jpg and grbuilding_image3.jpg, then click Close.
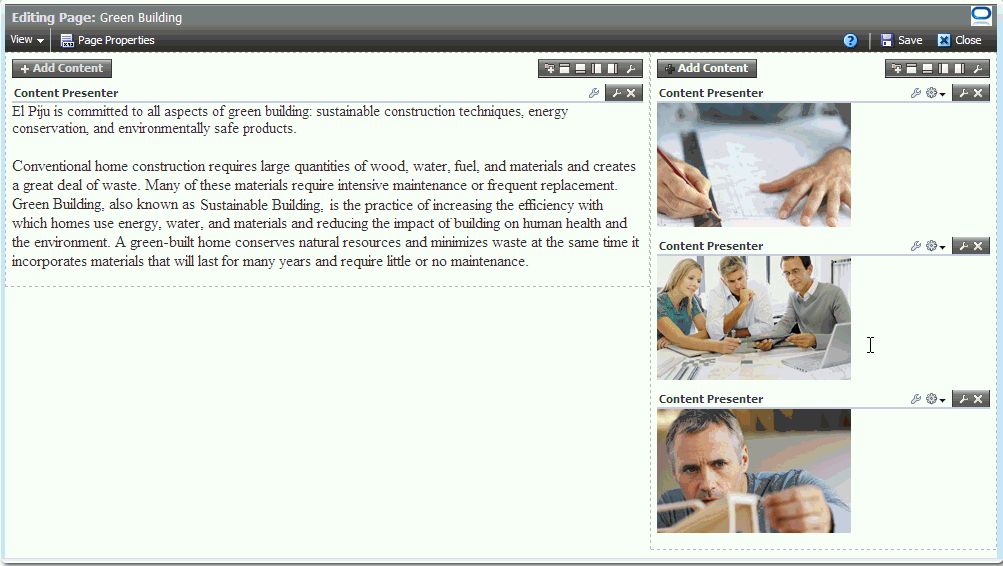
The three images are added along the region to the right, while the content appears on the left. The Green Building page should now look like Figure 6-8:
Figure 6-8 Green Building - Right Region Populated with Images
Description of "Figure 6-8 Green Building - Right Region Populated with Images"
Let's see what this content looks like when surrounded by the page template.
-
Click Save, then Close.
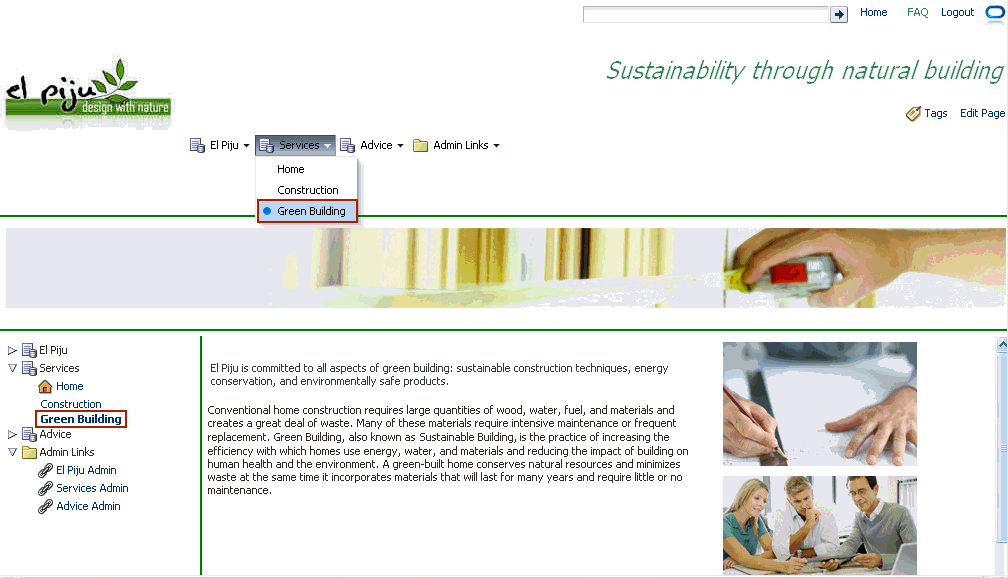
Notice that the Green Building page is now accessible from both navigations: the Services menu and the Services tree, as shown in Figure 6-9:
Your page is now ready. Since you created this page using Content Presenter task flows, it is editable at runtime. We'll see in a bit what this means to end users.
6.4 Step 4: Edit the Green Building Page at Runtime
Now let's see how your users can edit this page inline, assuming they have the appropriate privileges to do so. For end users, editing at runtime is made easy with Content Presenter.
-
While looking at the Green Building page, press Ctrl-Shift-C.
Each region containing content becomes outlined in blue; in a hashed border.
-
Click the View and manage this document icon in the region that contains text.
This displays the Edit dialog.
-
Click Edit.
-
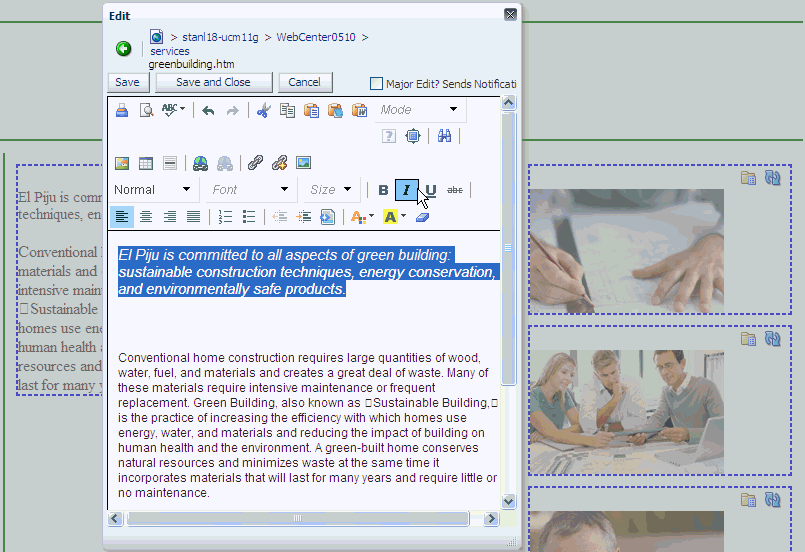
Make some text changes; for example, italicize the first sentence, as shown in Figure 6-10.
You're editing content directly in Spaces at runtime, this is also called in-context editing, a Content Presenter capability to empower users to manage online content.
At runtime, users will have access to the features that you explored while making the Documents page available in Step 3: Make the Documents Page Available. They will be able to upload a new version of a document, check out the current version for editing, copy its download link using the View menu, and so on.
-
Click Save and Close.
-
Press Ctl-Shift-C to make the hashed border disappear.
6.5 Step 5: Upload Content to the Advice Subspace
You'll now upload the content for a new page, Key Decisions, which you'll create in just a moment.
-
Expand Admin Links, click Advice Admin, then select the Content tab.
-
Click Documents.
This displays the root directory.
-
Click Upload.
-
Click Select files, and browse to select your documents:
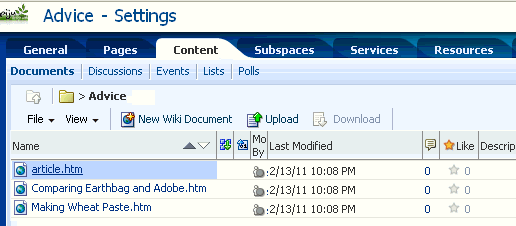
Comparing Earthbag and Adobe.htm,Making Wheat Paste.htm, andarticle.htm. -
Click Upload.
Figure 6-11 Files Uploaded Appear As Links
Description of "Figure 6-11 Files Uploaded Appear As Links"
6.6 Step 6: Create the Key Decisions Page
Now let's create a three-tabbed page in the Advice subspace. Once again you'll use the Content Presenter task flow, but this time with an extended functionality that lets you add content in a preconfigured Content Presenter format and template that you can choose from the available options.
You should be on the Advice - Settings page.
-
Select the Pages tab.
-
Click Create Page.
-
In the Page Name field, type
Key Decisions. -
Ensure that Page Style is Blank, and click Create. The page appears in the list of available pages.
-
Click the Actions icon, and select Edit Page from the resulting context menu. This displays the Key Decisions page in edit mode.
-
Click Add Content.
This displays the Resource Catalog.
-
Next to Content Management, click Open.
-
Next to Content Presenter, click Add, then click Close.
The Content Presenter task flow is added. Because we have three pieces of content we want to display together in a particular format, we select Content Presenter first, rather than the content. When we were creating the Green Building page, we had three unrelated files to display, so we added them one at a time.
-
On the right side, click the first wrench icon, as shown in Figure 6-12.
Figure 6-12 Wrench Icon in Content Presenter Task Flow

Description of "Figure 6-12 Wrench Icon in Content Presenter Task Flow"
This displays the Content Presenter Configuration wizard, as shown in Figure 6-13:
Figure 6-13 Content Presenter Configuration Wizard
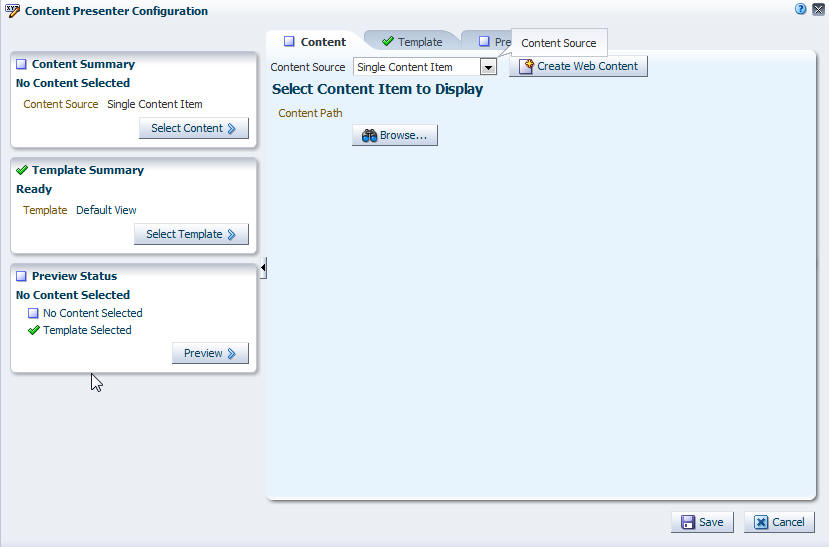
Description of "Figure 6-13 Content Presenter Configuration Wizard"
-
On the Content tab, from the Content Source dropdown list, select List of Items.
-
Under Select Items to Display, click Add.
This displays the Select One or More Content Items dialog.
-
Highlight the three files you uploaded in Step 5: Upload Content to the Advice Subspace, then click Select.
-
On the Template tab, from the Template dropdown list, select Tabbed View, then click Save.
-
Now save and close the page. Your screen should look like Figure 6-14:
Figure 6-14 The Three-Tabbed Page in the Advice Subspace

Description of "Figure 6-14 The Three-Tabbed Page in the Advice Subspace"
-
Click each tab to view each article.
6.7 Summary
You created three pages in the subspaces to experience different page designing methods. First you created Construction using a simple layout with the Rich Text Editor. For Green Building, you chose the Right Narrow layout and displayed some content using Content Presenter. You also edited the Green Building page at runtime to experience Content Presenter's runtime editing capabilities. Finally, you designed a three-tabbed page, Key Decisions, by adding three articles and applying a preconfigured Content Presenter template. Content Presenter is a powerful tool that you can use to accomplish almost all possible content scenarios. Oracle Fusion Middleware User's Guide for Oracle WebCenter Portal: Spaces provides detailed information about what you can do with Content Presenter.

